
Choosing a Template Category
Google Docs offers a wide range of free templates to help you streamline your work and create professional-looking documents. Before diving into the world of templates, it’s important to choose the right category that best suits your needs. This will ensure that you find a template that aligns with the purpose of your document. Let’s explore some popular template categories to get you started:
- Business: If you need to create invoices, business plans, or project proposals, this category has you covered. You’ll find templates for resumes, meeting agendas, and more.
- Education: Whether you’re a teacher looking for lesson plans or a student needing a study timetable, the education category has templates for reports, class notes, and even quizzes.
- Personal: From invitations and event planning to meal planners and budget trackers, the personal category is perfect for organizing your personal life.
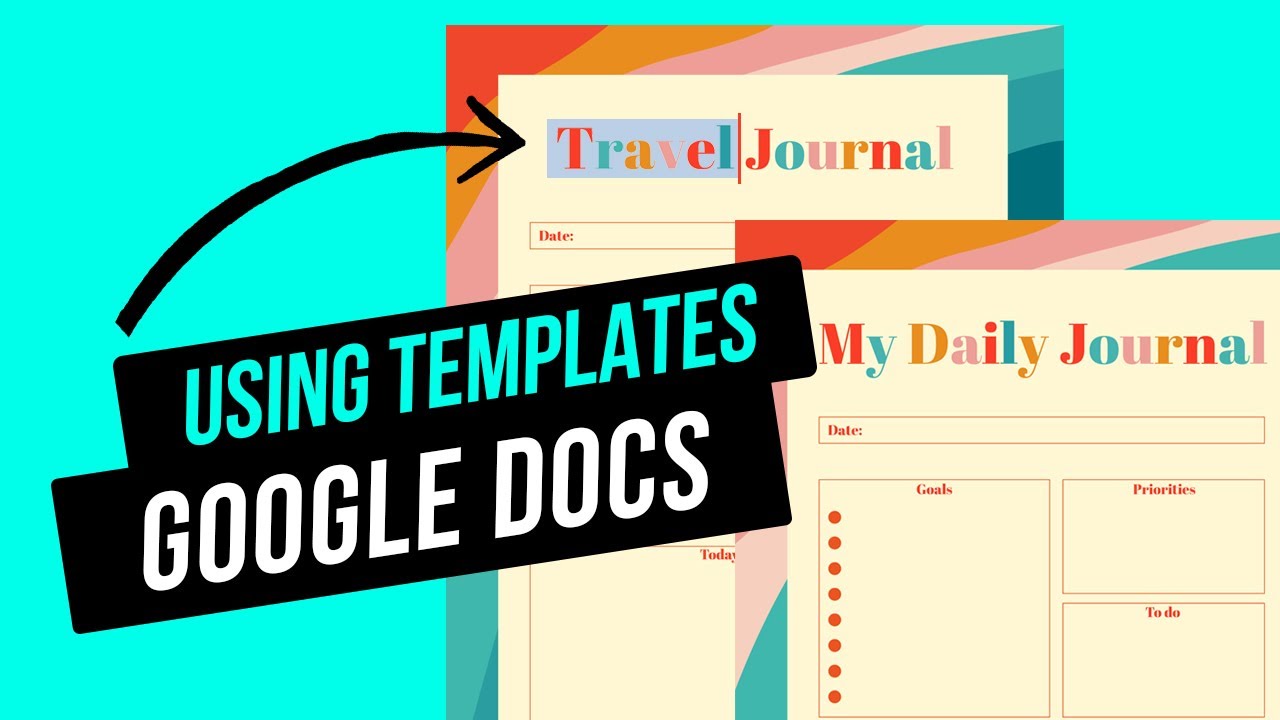
- Creative: This category offers templates for newsletters, brochures, and posters, allowing you to unleash your creativity and design eye-catching materials.
- Project Management: If you’re working on a project and need a Gantt chart, project timeline, or a task tracker, this category will assist you in managing your project effectively.
- Resumes & CVs: Looking for a professional-looking resume or CV? This category provides a variety of templates to highlight your skills and experience.
When choosing a template category, consider the purpose of your document and the specific elements you need. Keep in mind that Google Docs constantly updates its template gallery, so even if you don’t find the perfect template right away, you can check back later or explore other categories.
Once you’ve selected a category, you’re ready to explore the vast collection of templates available to you. Let’s move on to the next section to learn how to find templates in the Google Docs Template Gallery.
Finding Templates in the Google Docs Template Gallery
The Google Docs Template Gallery offers a vast selection of professionally designed templates to choose from. To find a template that suits your needs:
- Open Google Docs and click on the “Template Gallery” option in the top-right corner of the page. This will take you to the template gallery.
- Use the search bar at the top of the template gallery to search for specific keywords related to the type of document you need. For example, if you’re looking for a resume template, type “resume” in the search bar.
- Browse through the different categories on the left side of the page to find templates that match your desired document type.
- Click on a template thumbnail to preview it. You can see a larger image, read a description, and even view sample content to get a better idea of how the template will look.
- If you find a template you like, click on the “Use Template” button. This will create a copy of the template and open it in a new Google Docs document.
- Once the template is open, you can start customizing it to fit your specific needs. Add or delete sections, edit text, and personalize the design to make it your own.
Remember, the template gallery is regularly updated with new templates, so check back often to discover fresh options. If you can’t find exactly what you’re looking for, don’t worry. You can always modify an existing template or create your own from scratch, which we will cover in the following sections.
Now that you know how to find templates in the Google Docs Template Gallery, let’s move on to the next section to learn how to customize an existing template.
Customizing an Existing Template
Once you have selected a template from the Google Docs Template Gallery, you can customize it to fit your specific needs. Here are the steps to customize an existing template:
- Open the template in Google Docs by clicking on the “Use Template” button. This will create a copy of the template and open it in a new document.
- Review the template’s content and structure. You may want to make changes to better align the document with your requirements.
- Edit the text by simply clicking on it and typing your desired content. Customize headings, paragraphs, and any other text elements to suit your preferences.
- If you need to add or delete sections, use the “Insert” menu to add new text boxes or delete existing ones. This allows you to tailor the template to your specific needs.
- To adjust the formatting of text, such as font style, size, and color, use the “Format” menu at the top of the page. It provides various options for customizing the appearance of your document.
- If the existing template contains placeholder images, you can replace them with your own. Simply click on the image, go to the “Insert” menu, and choose “Image” to upload your desired image from your computer or the web.
- Take advantage of the “Explore” feature in Google Docs to find relevant content, images, or citations related to your document. Access the “Explore” feature by clicking on the small star icon in the bottom right corner of the screen.
- Remember to save your progress regularly by clicking on the “File” menu and selecting “Save” or using the keyboard shortcut Ctrl + S (Windows) or Command + S (Mac).
By customizing an existing template, you can save time and effort while still creating a unique and personalized document. Once you have made all the necessary modifications, you can move on to the next sections to learn more about adding tables, formatting fonts, and sharing and collaborating on your template.
Creating a Blank Template from Scratch
If you can’t find a suitable template in the Google Docs Template Gallery, or if you prefer to start with a completely blank canvas, you can create your own template from scratch. Here’s how to create a blank template:
- Open Google Docs and click on “Blank” when prompted to choose a template. This will open a new document with no pre-existing content.
- Think about the structure and design of your template. Consider the sections and elements you want to include, such as headings, paragraphs, bullet points, or images.
- Add text to your template by simply clicking on the document and typing your desired content. Customize the font style, size, and alignment using the options available in the toolbar.
- To insert images or other media, click on the “Insert” menu at the top of the page and select the appropriate option. You can choose to insert images from your computer, the web, or even use Google Drive to access your files.
- Format your template using the formatting options available in the toolbar. Adjust the font styles, colors, and sizes to create a visually appealing and consistent template.
- Consider using tables, charts, or other visual elements to organize your information and enhance its presentation. You can insert these elements from the “Insert” menu.
- Once you’re satisfied with your blank template, you can save it as your own reusable template for future use. Go to the “File” menu and select “Save as Template”. Give it a distinctive name and choose a location to save it in Google Drive.
- When you need to use your blank template in the future, go to the Google Docs Template Gallery and click on the “My Templates” tab. You will find your saved template there for easy access.
Creating a blank template from scratch offers ultimate flexibility and creativity. You can design a template that perfectly suits your specific requirements and preferences. Whether it’s for personal use, work, or education, a blank template allows you to unleash your creativity and tailor the document to your exact needs.
Now that you know how to create a blank template, let’s move on to the next sections to learn how to add and customize text, insert and format images, and further enhance your template.
Adding and Customizing Text
When creating or customizing a template in Google Docs, adding and customizing text is a fundamental step. Here’s how you can make the most of this feature:
- To add text to your template, simply click on the document and start typing. The text will appear exactly where you clicked.
- You can customize the appearance of the text by selecting it and accessing the formatting options in the toolbar. Adjust the font style, size, and color to suit your preferences.
- For headings or subheadings, use the “Heading” styles available in the toolbar. This creates a consistent and visually pleasing hierarchy within your template.
- To create bullet or numbered lists, click on the “Bulleted list” or “Numbered list” icon in the toolbar. This helps in organizing and structuring your content.
- If you want to highlight specific text, use the “Bold”, “Italic”, or “Underline” options in the toolbar. These formatting options draw attention to important information.
- To align your text, use the alignment options in the toolbar. You can choose to align it to the left, center, or right of the document.
- If you need to add symbols or special characters, go to the “Insert” menu and select “Special characters”. This allows you to insert a wide range of symbols and characters into your template.
- Resize or reposition text boxes by clicking and dragging the corners or edges. This allows you to create custom text layouts within your template.
- For longer documents, consider utilizing headers and footers. Go to the “Insert” menu, select “Header & Page Number”, and choose from a variety of header and footer options.
- Remember to proofread your text and ensure that it is free from spelling and grammar errors. Make use of the spell-check feature in Google Docs to help you with this.
Adding and customizing text in your template allows you to organize information, emphasize important details, and create a visually appealing document. By utilizing the formatting options and features available in Google Docs, you can tailor the text to match your desired style.
Now that you know how to add and customize text in your template, let’s move on to the next sections to learn about inserting and formatting images, adding tables and charts, and applying page layout and styles.
Inserting and Formatting Images
Images play a crucial role in enhancing the visual appeal and conveying information in your template. Here’s how you can insert and format images in Google Docs:
- To insert an image, place the cursor where you want the image to appear in your template and go to the “Insert” menu at the top of the page.
- Choose the “Image” option, and a window will pop up allowing you to choose the image source. You can upload an image from your computer, select from your Google Drive, or even search for images on the web.
- Once you’ve selected an image, it will appear in your template. You can click and drag the image to reposition it or adjust its size by clicking and dragging the corners or edges.
- To format the image, click on it and use the options available in the toolbar. You can choose to align the image to the left, right, or center of the page. You can also wrap text around the image, add borders, or adjust the image’s brightness and contrast.
- If you want to replace an existing image, click on it and click the “Replace image” icon in the toolbar. This allows you to select a new image without changing the layout of your template.
- To ensure that your images are properly placed and appear consistently across different devices and screens, it is recommended to adjust the size and position of images using the “Wrap Text” functionality. This ensures a seamless visual experience for your readers.
- If you need to delete an image, simply click on it and press the “Delete” key on your keyboard or use the “Backspace” key.
- To maintain a professional and polished look, it is important to use high-quality images that are relevant to your template’s content. Avoid using pixelated or low-resolution images that may diminish the overall visual impact.
- When incorporating images into your template, ensure that you have the necessary rights and permissions to use them. Using copyrighted images without permission may lead to legal consequences.
By effectively inserting and formatting images in your template, you can enhance its visual appeal, communicate ideas more effectively, and create a visually engaging document.
Now that you know how to insert and format images, let’s explore the next sections to learn about formatting fonts and paragraphs, adding tables and charts, and using headers and footers in your template.
Formatting Fonts and Paragraphs
The font style and formatting of your text can significantly impact the overall look and readability of your template. Here’s how you can format fonts and paragraphs in Google Docs:
- Select the text you want to format by clicking and dragging your cursor over it.
- To change the font family, size, or color, use the options available in the toolbar. You can choose from a variety of font styles and sizes, and you can also customize the color of the text.
- To make the text bold, italicized, or underlined, use the appropriate icons in the toolbar. These formatting options help emphasize important information or add emphasis to specific sections of your template.
- If you want to apply consistent formatting throughout your template, consider using styles. Styles enable you to create a consistent look across different sections by applying predefined formatting options.
- To modify the paragraph spacing, alignment, or indentation, use the options available in the toolbar. You can set the alignment to left, center, right, or justified, and adjust the indentation to create a desired layout.
- To create numbered or bulleted lists, use the toolbar options. These options help in organizing information and improving the readability of your document.
- If you’re using a column layout in your template, adjust the column width and spacing using the column formatting options. This helps create a visually appealing and well-organized template.
- Remember to maintain consistency in font styles, sizes, and formatting throughout your template for a professional and polished look. Cohesive formatting contributes to a visually appealing and cohesive document.
- Proofread your text after formatting to ensure that there are no formatting errors or inconsistencies. Format any remaining text accordingly to maintain a consistent and visually appealing template.
By effectively formatting fonts and paragraphs, you can create a visually appealing and organized template while enhancing the readability of your content. Consistency in font styles, sizes, and formatting adds a professional touch to your template and improves the overall user experience.
Now that you know how to format fonts and paragraphs, let’s move on to the next sections to learn about adding tables and charts, using headers and footers, and applying page layout and styles to your template.
Adding Tables and Charts
Tables and charts are powerful tools for presenting data and information in an organized and visually appealing manner. In Google Docs, you can easily add and customize tables and charts to enhance your template. Here’s how:
- To add a table, place your cursor where you want the table to appear in your template and go to the “Table” option in the toolbar. Select the desired number of rows and columns.
- Once the table is inserted, you can click and drag to resize it according to your needs. To add or remove rows and columns, right-click on the table and select the appropriate option.
- To format the table, use the formatting options available in the toolbar. You can change the border color and style, adjust cell padding, and customize the text formatting within the table.
- To add content to the table, simply click within a cell and start typing. You can format the text within each cell using the toolbar options.
- If you need to create a more dynamic visual representation of data, you can add charts to your template. Go to the “Insert” menu, select “Chart,” and choose the specific chart type you want to use.
- A new sheet will open, displaying the chart editor. Enter or import your data into the editor, and customize the chart’s design, such as labels, colors, and formatting.
- Once you’re satisfied with the chart, click “Insert” to add it to your template. You can then resize and reposition the chart as needed.
- To edit the data or formatting of a chart, simply right-click on the chart and select “Edit chart.” This will open the chart editor, allowing you to make changes.
- Tables and charts can be useful for a wide range of purposes, including displaying statistics, tracking progress, or organizing data. Use them strategically to help convey your message effectively.
- Remember to keep tables and charts concise and visually appealing. Avoid cluttering them with excessive data or overwhelming designs that may distract the reader.
- Proofread and verify the accuracy of the data and information in your tables and charts before finalizing your template. This ensures that the presented data is reliable and error-free.
By adding tables and charts to your template, you can present complex information in a visually digestible format. Use them to organize data, track progress, and illustrate key points effectively.
Now that you know how to add tables and charts, let’s move on to the next sections to explore using headers and footers, applying page layout and styles, and sharing and collaborating on your template.
Using Headers and Footers
Headers and footers are useful for adding consistent information, such as page numbers, titles, or logos, to your template. Google Docs provides easy ways to incorporate headers and footers. Here’s how you can use them:
- To add a header or footer, go to the “Insert” menu and select “Header & Page Number.” From the drop-down menu, choose either “Header” or “Footer.”
- You can select from predefined header and footer options, or choose “Edit header” or “Edit footer” to create a custom header or footer.
- Once in the header or footer area, you can type or insert content just like you would in the main body of your template.
- Use the formatting options available in the toolbar to customize the appearance of your header or footer, including font styles, sizes, and alignment.
- To add page numbers, click the “Page Number” option in the toolbar of the header or footer area. You can choose the position and formatting of the page numbers.
- Headers and footers can be different for odd and even pages. To enable this, go to the “Insert” menu, select “Header & Page Number,” and choose “Different odd and even” or “Different first page.” This is particularly useful for reports or documents containing alternating layouts.
- Headers and footers contribute to the professional look of your template and provide consistent information throughout the document. They help maintain a cohesive and polished appearance.
- Remember to proofread and double-check the content in your headers and footers. Ensure that the information is accurate and relevant to your template.
- If you want to remove headers or footers from your template, go to the “Insert” menu, select “Header & Page Number,” and choose “Remove Header” or “Remove Footer.”
By utilizing headers and footers in your template, you can include important information, such as titles, page numbers, dates, or logos, that appears consistently across all pages. This enhances the professionalism and organization of your document.
Now that you know how to use headers and footers, let’s move on to the next sections to learn about applying page layout and styles, sharing and collaborating on your template, and downloading and using templates in different formats.
Applying Page Layout and Styles
Applying page layout and styles to your template can enhance its visual appeal and improve the overall readability. Google Docs offers several options for adjusting the page layout and applying styles. Here’s how you can do it:
- To change the page orientation, margins, or size of your template, go to the “File” menu and select “Page setup.” In the dialogue box, you can customize these settings according to your preferences.
- To apply a specific style or theme to your template, go to the “Format” menu, select “Document styles,” and choose from the available options. This changes the font styles, colors, and formatting throughout the entire document.
- Use the “Paragraph styles” dropdown menu in the toolbar to apply predefined styles to your text, such as headings, titles, or body text. This ensures consistency and improves the visual hierarchy of your template.
- To create custom styles, select the desired text and use the “Format” menu to define the font size, style, and other formatting attributes. Then, go to the “Styles” dropdown menu and choose “Update [name of style]” to save the custom style for future use.
- Consider using page breaks to control the flow of content in your template. Go to the “Insert” menu and choose “Break,” then select “Page break” to insert a new page at the desired location.
- To apply different layouts to specific pages or sections of your template, use the “Insert” menu to add section breaks. This allows you to have various column layouts, headers, or footers within different sections.
- Experiment with different fonts, styles, and layouts to find the most visually appealing and effective combination for your template. However, it’s important to maintain consistency throughout the document.
- When using styles or applying page layout changes, make sure to review the entire template for consistency and ensure that the changes align with the overall purpose and design of your document.
By applying page layout and styles to your template, you can create a visually appealing and well-structured document. Whether it’s adjusting the page orientation, customizing styles, or using page breaks, these options enhance the overall aesthetics and readability of your template.
Now that you know how to apply page layout and styles, let’s move on to the next sections to explore sharing and collaborating on your template, downloading and using templates in different formats, and making template updates for future use.
Sharing and Collaborating on Templates
One of the key advantages of using Google Docs is the ability to easily share and collaborate on templates with others. Here’s how you can maximize the collaborative features of Google Docs:
- To share your template, click on the “Share” button in the top-right corner of the page. In the sharing settings, enter the email addresses of the individuals you wish to collaborate with or choose to generate a shareable link.
- Decide whether the people you share the template with will have view-only access or the ability to edit and make changes. You can customize their permissions by selecting the appropriate options.
- Collaborators can view and make changes to the template in real-time. Any updates or revisions made by one person will be instantly visible to all other collaborators.
- Use the “Comments” feature to have discussions, ask for feedback, or provide suggestions within the template. Comments can be added by selecting a portion of the text and clicking the “Comment” button or using the shortcut Ctrl + Alt + M (Windows) or Command + Option + M (Mac).
- To assign tasks or track progress, utilize the “Action Items” feature. By highlighting a portion of the text and selecting the “Action items” button or using the shortcut Ctrl + Shift + A (Windows) or Command + Shift + A (Mac), you can assign specific tasks to collaborators and monitor their completion.
- Enable the “Suggesting” mode to allow collaborators to suggest edits without making direct changes to the template. This mode is useful when you want to review suggested changes before accepting or rejecting them.
- Collaborators can access the template from any device with an internet connection. They can view and edit the template in Google Docs using a web browser or by downloading the Google Docs mobile app.
- Regularly save your progress by clicking on the “Save” button or using the shortcut Ctrl + S (Windows) or Command + S (Mac). This ensures that all changes are saved and visible to collaborators.
- Keep track of edits and revisions by accessing the document’s version history. Go to the “File” menu, select “Version history,” and choose “See version history” to view past revisions and restore previous versions if needed.
- Communication and collaboration are essential when working on shared templates. Ensure that all collaborators have clear instructions, a common understanding of the project, and are aware of their roles and responsibilities.
By sharing and collaborating on templates in Google Docs, you can harness the collective expertise and contributions of your team members or collaborators. The real-time collaboration features make it easy to work together, provide feedback, and create a cohesive and high-quality template.
Now that you know how to share and collaborate on templates, let’s move on to the next sections to explore downloading and using templates in different formats, making template updates, and reusing templates for future projects.
Downloading and Using Templates in Microsoft Word or PDF Format
If you need to work with your Google Docs template in Microsoft Word or share it with others who prefer different file formats, you can download and use your template in either Word or PDF format. Here’s how:
- Click on the “File” menu in Google Docs and select “Download”. Choose the desired format, either “Microsoft Word (.docx)” or “PDF Document (.pdf)”.
- The template will be downloaded to your computer in the selected format. Open the downloaded file in the appropriate software.
- If you downloaded the template in Word format, it will open in Microsoft Word. You can edit and customize the template further, just like any other Word document.
- If you downloaded the template in PDF format, it will open in a compatible PDF viewer. You can view and print the template, but editing options may be limited unless you have access to PDF editing software.
- When working with templates in Microsoft Word or PDF format, be aware that certain features or formatting options available in Google Docs may not be fully supported. Some elements may require adjustments to ensure the document looks as intended.
- In Microsoft Word, you can make further edits to the template, such as adjusting the formatting, adding or removing content, or applying different styles. However, it is advised to make a copy of the template in case you need to revert to the original Google Docs version.
- PDF versions of the templates are particularly useful when you want to share documents with others who may not have the specific software installed or to ensure that the formatting remains consistent across different devices and operating systems.
- Keep in mind that when using templates in different formats, it’s important to maintain the integrity and branding of your document. Verify that all text, images, and formatting elements appear as intended.
- Consider saving a copy of the template in both Word and PDF formats for flexibility and future use. This allows you to easily access and share the template in the most suitable format for your needs.
- Regularly back up your template files to avoid data loss. Keeping multiple copies in different storage locations ensures that your templates are always accessible and protected.
By downloading and using templates in Microsoft Word or PDF format, you can work with your templates in different software and collaborate with individuals who may prefer different file formats. This flexibility allows for seamless sharing and compatibility across various platforms.
Now that you know how to download and use templates in different formats, let’s move on to the next sections to explore making updates to templates and reusing templates for future projects.
Making Template Updates and Reusing Templates
Templates are meant to be versatile and reusable. Once you have created or customized a template in Google Docs, you can make updates as needed and reuse it for future projects. Here’s how:
- To make updates to a template, open the template in Google Docs, make the desired changes, and save the modified version. This ensures that your template reflects any new content, formatting, or structure you want to incorporate.
- If you plan to reuse the template for similar projects, consider creating a copy of the updated template. Go to the “File” menu and select “Make a copy.” This creates a new document that you can use as a starting point for future projects without affecting the original template.
- Regularly review and update your templates to ensure their relevance and accuracy. As your needs change or new information becomes available, incorporate those changes into your templates to maintain their usefulness.
- When reusing a template, customize it according to specific project requirements. Edit the content, update any outdated information, and adjust the formatting as needed. This ensures that the template suits the unique needs of each new project.
- Consider organizing your templates in a dedicated folder within your Google Drive. This makes it easier to locate and access them for future use. You can also create subfolders to categorize templates based on projects, departments, or themes.
- Share your updated templates with others who may benefit from them. By sharing your templates, you can collaborate, gather feedback, and help streamline processes across teams or departments.
- Regularly back up your template files to avoid any potential loss of data. This can be done by periodically exporting your templates to a different storage location or creating backup copies within your Google Drive.
- Seek inspiration from other sources, such as Google Docs Template Gallery or online templates, to discover new design ideas or structural elements that you can incorporate into your own templates.
- Be mindful of any personal or sensitive information that may be included in your templates. Remove or anonymize sensitive data before sharing or reusing templates to protect privacy and confidentiality.
Making updates to templates and reusing them saves time, promotes consistency, and improves efficiency. By regularly maintaining and enhancing your templates, you can streamline your workflow and continually improve the quality and effectiveness of your documents.
Now that you know how to make template updates and reuse templates, you can continue to refine and expand your collection of useful and customized templates to suit your needs.