
Overview of Google Docs Flyer Template
When it comes to creating eye-catching and professional flyers, Google Docs offers a fantastic solution with its built-in flyer template. Whether you need to promote an event, advertise a business, or showcase a product, the Google Docs Flyer Template provides a user-friendly platform to design and customize your flyer.
With sleek and modern designs, the Google Docs Flyer Template allows you to create visually appealing flyers that capture the attention of your target audience. Whether you are a beginner or an experienced designer, this template is suitable for everyone, thanks to its intuitive interface and easy-to-use features.
One of the major advantages of using the Google Docs Flyer Template is its accessibility. As a web-based application, Google Docs allows you to access your flyer template from any device with an internet connection. This means you can work on your flyer from your desktop computer, laptop, tablet, or even your smartphone, making it convenient and flexible for users on the go.
Another advantage of the Google Docs Flyer Template is its collaboration feature. You can easily share your flyer template with others and collaborate in real-time. This is particularly useful when working on a team project or when seeking feedback from colleagues or clients. Multiple users can make edits and suggestions simultaneously, streamlining the creative process and ensuring a polished end result.
Furthermore, the Google Docs Flyer Template offers a wide range of customization options. From changing fonts and colors to adding images and graphics, you can personalize your flyer to match your branding or the theme of your event. The template also allows you to adjust the layout and design, giving you the freedom to create a unique and visually appealing flyer that stands out from the crowd.
Accessing the Google Docs Flyer Template
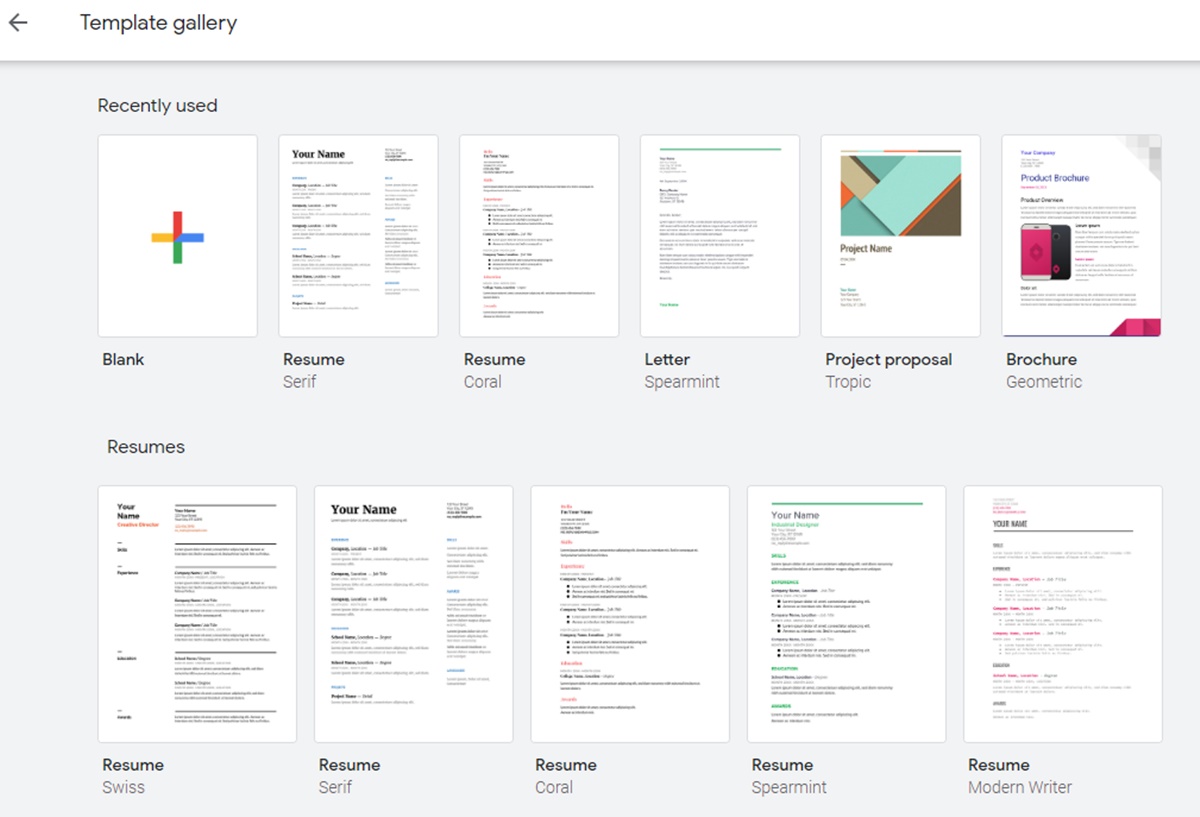
Getting started with the Google Docs Flyer Template is a breeze. To access the template, follow these simple steps:
- Open your web browser and navigate to docs.google.com.
- Sign in to your Google account. If you don’t have one, you can create a new account for free.
- Once you’re signed in, click on the “+ New” button on the left side of the screen.
- A drop-down menu will appear. Select “Google Docs” from the list.
- A new blank document will open. To access the flyer template, go to the search bar at the top of the page and type in “flyer” or “brochure”.
- Hit the “Enter” key or click the magnifying glass icon to initiate the search.
- A variety of flyer templates will appear. Scroll through the options and select the one that best suits your needs by clicking on it.
- The flyer template will open in a new tab, ready for you to start customizing!
It’s worth mentioning that the Google Docs Flyer Template is accessible to anyone with a Google account, making it an inclusive option for individuals and businesses alike. Whether you’re a student, a small business owner, or an event organizer, you can take advantage of this powerful tool to create professional and visually appealing flyers.
Remember to save your work regularly by clicking the “File” tab and selecting “Save” or by using the shortcut “Ctrl + S”. This ensures that your progress is saved and allows you to return to your flyer template at any time to make further edits or adjustments.
Now that you know how to access the Google Docs Flyer Template, it’s time to dive into the various customization options and unleash your creativity!
Understanding the Basic Elements of the Flyer Template
Before you start customizing your flyer template, it’s important to familiarize yourself with the basic elements that make up the template. Understanding these elements will help you navigate and modify the template more effectively. Here are the key components of the Google Docs Flyer Template:
1. Header: The header is located at the top of the flyer and typically contains the title or main heading of your flyer. It is the first element that catches the reader’s attention, so choose a font and style that aligns with the tone and purpose of your flyer.
2. Body: The body of the flyer is where you can provide more detailed information about your event, product, or service. It allows you to showcase key features, benefits, or details in a visually appealing manner. Use bullet points, numbered lists, or paragraphs to organize the information effectively.
3. Images and Graphics: Adding images and graphics to your flyer can enhance its visual appeal and help convey your message more effectively. The template provides space where you can insert relevant images or illustrative graphics to complement the text. You can resize, crop, or adjust the position of the images to achieve the desired layout.
4. Call to Action (CTA): A call to action is a vital element of any flyer. It encourages the reader to take a specific action, such as making a purchase, attending an event, or contacting you for more information. Place the CTA prominently within your flyer and make it visually distinct, using bold text and contrasting colors.
5. Footer: The footer section is located at the bottom of the flyer and is often reserved for additional contact information, website URLs, or social media handles. It provides readers with ways to get in touch with you or access more information about your business or event.
By understanding these basic elements, you can effectively structure and organize the content of your flyer template. Keep in mind that these elements can be customized according to your specific needs and branding requirements. Experiment with different fonts, colors, and layouts to create a visually appealing and impactful flyer that grabs the attention of your target audience.
Customizing the Flyer Template
Customizing the Google Docs Flyer Template allows you to make it unique and tailored to your specific needs. Here are some key customization options to consider:
1. Colors and Fonts: The template offers a range of default colors and fonts, but you can easily modify them to match your brand or event theme. To change the colors, select the text or element you want to modify, click the “Text color” or “Fill color” icon in the toolbar, and choose a new color. Similarly, to change the font, select the text and click the “Font” dropdown menu in the toolbar to choose a different font style.
2. Background: You can change the background color or add a background image to make your flyer more visually appealing. To change the background color, right-click on an empty area of the flyer, select “Background”, and choose a color from the palette. To add a background image, go to “Insert” in the menu bar, choose “Image”, and select the image you want to use.
3. Images and Graphics: The template provides designated spaces for images and graphics. To insert an image, click on an image placeholder and either upload an image from your device or choose from the options in the sidebar. You can also drag and drop an image directly onto the flyer. To adjust the size and position of the image, click on it and use the resizing handles. For graphic elements, you can use the “Shapes” tool in the toolbar to add lines, icons, or other design elements.
4. Text Boxes: The template includes pre-defined text boxes for headings, subheadings, and body text. You can easily modify the text by clicking on a text box and typing in your desired content. You can also change the font style, size, and color using the formatting options in the toolbar.
5. Layout: If you want to adjust the layout of the flyer, simply click and drag any element to reposition it. You can also resize or delete elements as needed. To maintain symmetry and alignment, you can use the gridlines and alignment guides that appear automatically as you move elements around.
Remember to save your changes regularly to ensure that your customized flyer template is preserved. Once you’re satisfied with the customization, you can use the template as a starting point for future flyers by making a copy of it and modifying the content accordingly.
By customizing the Google Docs Flyer Template, you can create a visually appealing and professionally designed flyer that effectively conveys your message and captures the attention of your target audience.
Inserting Images and Graphics into Your Flyer
Adding images and graphics to your Google Docs Flyer Template can significantly enhance its visual appeal and help convey your message effectively. Here’s how you can insert and customize images and graphics in your flyer:
1. Inserting Images:
To insert an image into your flyer, follow these steps:
- Click on the desired location in the flyer where you want to insert the image.
- Go to the top menu and click on “Insert”.
- Select “Image” from the drop-down menu.
- A new window will appear with different options to add images.
- You can choose to upload an image from your computer, select an image from your Google Drive, or search for images through the built-in Google Image search.
- Once you have chosen your image, click on it to insert it into your flyer.
2. Resizing and Adjusting Images:
After inserting an image, you may need to resize or adjust its position to fit your flyer design. Here’s how:
- Click on the image to select it.
- Resize the image by clicking and dragging the resize handles that appear on the corners or sides of the image.
- To maintain the proportions, hold down the Shift key while resizing.
- Drag the image to reposition it, ensuring it fits well with the surrounding elements of the flyer.
3. Adding Graphics:
In addition to images, you can also include graphics to enhance the visual appeal of your flyer. Here’s how:
- Click on the desired location in the flyer where you want to insert a graphic element.
- Go to the top menu and click on “Insert”.
- Select “Drawing” from the drop-down menu.
- A drawing tool will open, allowing you to create or choose from a variety of shapes, lines, icons, and more.
- Customize the graphic element by selecting its color, size, and style.
- Once you’re satisfied with the graphic, click “Save and Close” to insert it into your flyer.
Remember, choosing high-quality images and relevant graphics that align with your message and overall design is essential. Also, ensure that you have the necessary rights or permissions to use any images or graphics to avoid copyright issues.
By effectively integrating images and graphics into your Google Docs Flyer Template, you can create visually appealing and engaging flyers that capture the attention of your audience and effectively convey your message.
Adding and Formatting Text in the Flyer
Text plays a crucial role in conveying information and attracting attention in your Google Docs Flyer Template. Here are the steps to add and format text in your flyer:
1. Adding Text:
To add text to your flyer, follow these simple steps:
- Click on the desired location in the flyer where you want to insert text.
- Type or paste your text into the selected area.
- Repeat the process to add additional text elements.
2. Formatting Text:
Formatting your text can help emphasize important details and enhance readability. Here are some formatting options available in Google Docs:
- Bold: To make your text bold, select the desired text and click the “B” icon in the toolbar or use the shortcut Ctrl+B.
- Italic: To italicize your text, select the desired text and click the “I” icon in the toolbar or use the shortcut Ctrl+I.
- Underline: To underline your text, select the desired text and click the “U” icon in the toolbar or use the shortcut Ctrl+U.
- Text Size: To change the size of your text, select the desired text and click the dropdown menu in the toolbar to choose a new size.
- Text Color: To change the color of your text, select the desired text and click the “Text color” icon in the toolbar to choose a new color.
- Alignment: To align your text, select the desired text and click the alignment icons in the toolbar to choose left, center, right, or justified alignment.
- Line Spacing: To adjust the line spacing of your text, select the desired text and click the “Line spacing” icon in the toolbar to choose a spacing option.
3. Text Effects:
You can also apply additional text effects to make your flyer more visually appealing. Here are some options to consider:
- Drop Cap: To add a drop cap to the beginning of a paragraph, click on the desired paragraph, go to “Format” in the menu bar, select “Drop cap”, and choose the desired design.
- Highlight: To highlight your text, select the desired text and click the “Text background color” icon in the toolbar to choose a highlight color.
- Text Box: If you want to enhance the visibility of specific text elements, you can place the text inside a text box. To insert a text box, go to “Insert” in the menu bar, select “Text box”, and choose the desired style.
Experiment with different font styles, sizes, and formatting options to create a visually cohesive and engaging flyer. Ensure that your text is easily readable and aligns with the overall design and message of the flyer.
By adding and formatting text effectively in your Google Docs Flyer Template, you can create visually appealing and informative flyers that effectively communicate your message to your target audience.
Adjusting the Layout and Design of the Flyer
The layout and design of your Google Docs Flyer Template play a crucial role in capturing attention and communicating your message effectively. Here are some tips for adjusting the layout and design of your flyer:
1. Resizing and Rearranging Elements:
To adjust the layout of your flyer, you can easily resize, rearrange, or delete elements. Here’s how:
- Resizing: Click on an element, such as an image or text box, and use the resizing handles that appear to adjust its size.
- Rearranging: Click and drag an element to move it to a new location within the flyer. Use alignment guides and gridlines that appear to maintain symmetry and alignment.
- Deleting: To remove an element, such as an image or text box, simply select it and press the “Delete” or “Backspace” key on your keyboard.
2. Using Alignment Tools:
Alignment is crucial for creating a visually pleasing and organized flyer. Google Docs provides helpful alignment tools to assist you in achieving the desired layout. Here are some options to consider:
- Alignment Guides: When moving elements around the flyer, alignment guides will appear to help you align them horizontally or vertically with other elements.
- Gridlines: Enabling gridlines can give you a visual aid for aligning elements accurately. To turn on gridlines, go to “View” in the menu bar and click on “Show gridlines”.
3. Adding Page Breaks:
If your flyer extends beyond a single page, you may need to insert page breaks to ensure proper separation. Inserting a page break will start a new page in the document from that point onwards. To insert a page break, place your cursor where you want the new page to begin, go to “Insert” in the menu bar, and select “Break” followed by “Page break”.
4. Utilizing Templates and Themes:
Google Docs offers a variety of templates and themes that you can explore to find a layout and design that aligns with your flyer’s purpose. To access these options, go to the “Template Gallery” or “Themes” option in the menu bar. Simply select a template or theme that suits your needs, and it will automatically apply to your flyer.
Remember to regularly save your work to prevent any unintended changes or loss of progress. You can do this by clicking on “File” in the menu bar and selecting “Save” or by using the shortcut “Ctrl + S”.
By adjusting the layout and design of your Google Docs Flyer Template, you can create a visually appealing and well-organized flyer that effectively communicates your message and captures the attention of your target audience.
Sharing and Collaborating on the Flyer
Google Docs offers powerful collaboration features that allow you to easily share and work on your flyer with others. Here are the steps to share and collaborate on your Google Docs Flyer Template:
1. Sharing the Flyer:
To share your flyer with others, follow these simple steps:
- Click on the “Share” button in the top right corner of the Google Docs interface.
- A sharing settings window will appear, allowing you to set the access level for your collaborators:
- Specific People: Enter the email addresses of the individuals you want to share the flyer with. You can choose whether they have view-only access or can edit the flyer.
- Link Sharing: Select “Get Shareable Link” to generate a link that you can send to your collaborators. You can also set the access level for anyone with the link, whether it’s view-only or edit access.
- After setting the sharing options, click “Send” to notify your collaborators via email or copy the link and share it manually.
2. Collaboration:
Collaborators can work on the flyer simultaneously, making real-time changes and providing input. Here’s how collaboration works:
- Real-time Editing: When multiple users are editing the flyer at the same time, you will see their changes happening in real-time. Changes made by others will be highlighted and labeled with the collaborator’s name.
- Comments and Suggestions: Collaborators can leave comments and suggestions on specific parts of the flyer. To do this, they can highlight the text or click on an element, then add a comment or suggestion. You will receive notifications and can respond to the comments accordingly.
- Version History: Google Docs automatically saves a version history of your flyer, allowing you to revert to previous versions if necessary. To access the version history, go to “File” in the menu bar and select “Version history” followed by “See version history”.
3. Permission Management:
As the owner of the flyer, you have control over permissions and can manage who can view, comment, or edit the flyer. You can add or remove collaborators, change their access levels, and revoke access if needed. To manage permissions, go to the “Share” button in the top right corner and click on “Advanced” to access more settings.
By sharing and collaborating on your Google Docs Flyer Template, you can work seamlessly with team members, clients, or other stakeholders to create an impactful and polished flyer.
Printing and Distributing the Flyer
Once you have finalized your design and are ready to share your Google Docs Flyer Template with your audience, it’s time to print and distribute physical copies. Here are some essential steps to consider for printing and distributing your flyer:
1. Printing Options:
When it comes to printing your flyer, you have several options to choose from:
- Home/Office Printer: If you have a high-quality printer at home or in your office, you can print the flyers yourself. Make sure you have sufficient ink or toner, and use high-quality paper for the best results.
- Local Print Shop: Alternatively, you can take your flyer template file to a local print shop. They have specialized equipment and expertise to produce professional-looking flyers. Discuss your requirements with the print shop team to select the best paper type and finishing options.
- Online Printing Services: There are numerous online printing services that offer convenience and professional results. Simply upload your flyer template file, select your printing options, and place an order. They will deliver the printed flyers to your doorstep.
2. Paper Selection:
Choose the right type of paper for your flyer, as it can significantly affect the overall appearance and durability. Consider factors such as thickness, finish, and texture to align with your design and target audience. Glossy or matte finishes are popular choices for enhancing the visual appeal of the flyer.
3. Quantity:
Determine the number of flyers you need for distribution. Consider your target audience and the reach of your promotion or event to ensure you have an adequate supply. It’s better to print a few extra copies to accommodate unexpected distribution opportunities.
4. Distribution Channels:
Identify the most effective channels to distribute your flyers to reach your target audience. Here are some traditional and digital distribution methods to consider:
- Physical Locations: Display your flyers in high-traffic areas such as bulletin boards, community centers, local businesses, and supermarkets.
- Events: Hand out flyers during relevant events, conferences, trade shows, or community gatherings where your target audience is present.
- Direct Mail: If applicable, consider mailing flyers to your target audience via postal services to ensure wider reach and visibility.
- Digital Platforms: Leverage online platforms such as social media, your website, email newsletters, or digital advertising to share digital copies of your flyer or promote its availability for download or printing.
5. Follow-Up and Evaluation:
After distributing your flyers, monitor the response and engagement to assess their effectiveness. Track any inquiries, website visits, or sales generated as a result. Adjust your distribution strategy accordingly for future campaigns based on the insights and feedback you receive.
By carefully printing and strategically distributing your flyer, you can maximize its visibility and ensure it reaches your intended audience effectively.