
Choosing a Template
When creating a Google Docs form, the first step is to choose a template that suits your needs. The template will provide a pre-designed structure and layout for your form, saving you time and effort in designing it from scratch. To choose a template, follow these simple steps:
1. Open Google Forms: Log into your Google account and navigate to Google Forms.
2. Click on “Template Gallery”: Once you are on Google Forms, click on the “Template Gallery” option located at the top right corner of the page.
3. Browse through the templates: You will be presented with a wide range of templates to choose from. Take your time to browse through the different categories and options available. You can find templates for surveys, feedback forms, event registrations, quizzes, and more.
4. Select a template: Once you find a template that matches your requirements, click on it to select it. You will see a preview of the template and a brief description of its purpose.
5. Create a new form: Click on the “Use Template” button to create a new form based on the selected template. This will open a new form with the template layout and settings applied.
It’s important to choose a template that aligns with the purpose of your form. Consider the type of information you want to collect, the style you prefer, and the overall layout that will best suit your audience. Remember, you can always customize and modify the template further to personalize it according to your needs.
By starting with a template, you’ll save time and have a professional-looking form ready to go. Now that you have chosen a template, it’s time to move on to customizing the form title and description.
Customizing the Form Title and Description
After selecting a template for your Google Docs form, the next step is to customize the form’s title and description. This will help you provide clear instructions and convey the purpose of the form to your respondents. Here’s how you can easily customize the form title and description:
1. Edit the form title: By default, the form title will be the same as the template’s title. To change the form title, click on it and start typing the new title. Make sure to choose a title that accurately reflects the content and purpose of your form.
2. Add a description: To provide additional information or instructions to your respondents, you can add a description. Click on the “Description” field below the form title and enter the text you want to include. You can use this space to clarify any confusing questions, specify any prerequisites, or provide context for the form.
3. Formatting options: You can format the form title and description using the text formatting options available in the toolbar. These options allow you to make the text bold, italicize it, underline it, change the font, adjust the size, and more. Use these formatting options to make the text more visually appealing or emphasize important details.
4. Preview the changes: As you update the form title and description, you can see the changes in real-time. Take a moment to preview how the form looks with the customized title and description to ensure everything appears as you intended.
Customizing the form title and description is an essential step in providing clear instructions and setting the tone for your form. It helps ensure that respondents understand what is expected of them and what information they need to provide. Once you are satisfied with the customized title and description, you can move on to adding different question types to your form.
Adding Different Question Types
Google Docs provides a wide range of question types that you can include in your form to gather specific information from respondents. Adding different question types allows you to collect various types of data and make your form more interactive. Here’s how you can add different question types to your Google Docs form:
1. Open your form: Go to Google Forms and open the form you want to edit or create a new one.
2. Click on the “+” icon: In the form editor, click on the “+” icon located on the right-hand side of the page. This will open a menu with different question types to choose from.
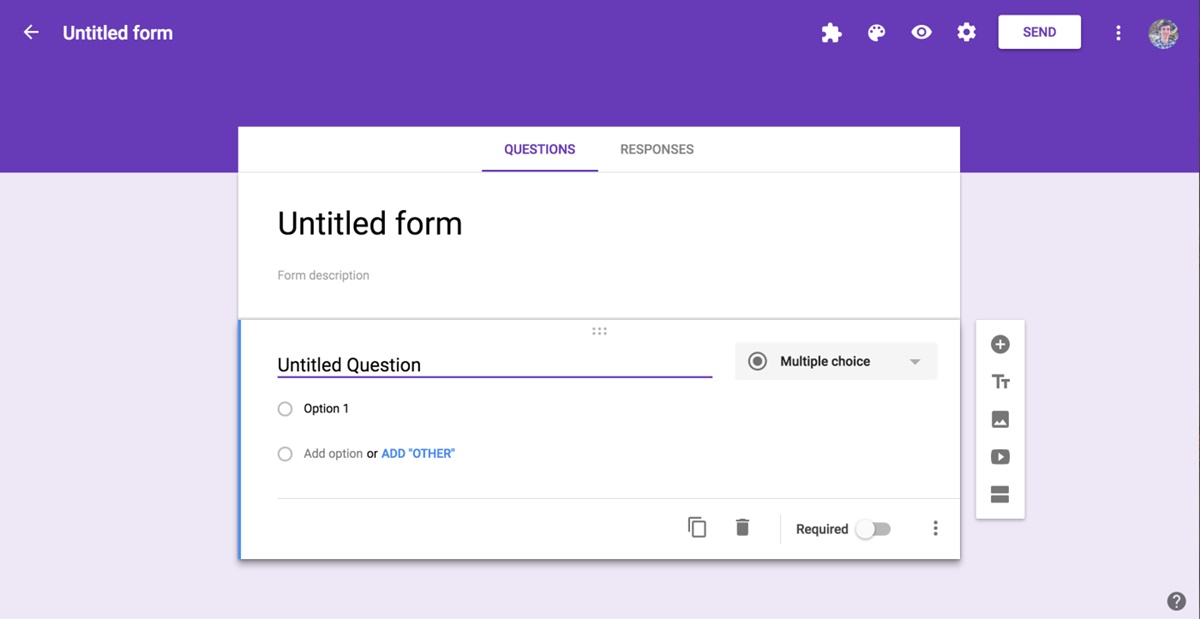
3. Select a question type: From the options available, choose the question type that best suits your needs. You can select from multiple choice, checkboxes, dropdown, short answer, paragraph, linear scale, multiple choice grid, and more. Click on the question type to add it to your form.
4. Customize the question: Once you’ve added a question, you can customize it further. Click on the question text to edit it and add any additional instructions or clarifications in the description box below the question. You can also use formatting options to make the question more visually appealing.
5. Add answer choices: For multiple choice, checkboxes, and dropdown questions, you need to provide answer choices. Click on the “Add option” button to add answer choices. You can also set whether respondents can select multiple answers or just one answer.
6. Duplicate or delete questions: If you want to add more questions of the same type, you can duplicate an existing question by clicking on the duplicate icon. To delete a question, click on the trash bin icon.
7. Rearrange the questions: To change the order of your questions, click and drag the question to the desired position. This allows you to organize your form in a logical flow.
Continue adding different question types to your form based on the information you want to collect. Experiment with the different question types available to make your form more engaging and interactive for respondents.
Organizing Questions with Sections
When creating a Google Docs form, organizing your questions into sections can help improve the overall structure and flow of your form. Sections allow you to group related questions together, making it easier for respondents to navigate and understand the form. Here’s how you can organize your questions with sections:
1. Add a section: In the form editor, click on the “+” icon to add a new question. From the menu, select the “Section” option. A new section will be added to your form.
2. Customize the section title: Click on the section title to edit it and provide a descriptive title that represents the content of the questions within that section.
3. Add questions to the section: Similar to adding questions outside of sections, you can now add different question types to the section. Click on the “+” icon within the section to add a new question and customize it accordingly.
4. Rearrange sections and questions: To change the order of the sections, click and drag the section to the desired position. You can also rearrange the questions within each section by dragging them up or down.
5. Customize section settings: Each section has its own settings that you can customize. By clicking on the three dots icon next to a section, you can choose to shuffle the questions within the section, show progress bar, or go to a specific section based on a respondent’s answer.
Organizing questions with sections provides a clear structure to your form, helping respondents navigate through the questions easily. It also allows you to group related questions together, making it more logical and organized for both you and your respondents. Experiment with different sections in your form to achieve the best organization and flow.
Requiring Answers and Setting Validation Rules
When creating a Google Docs form, you have the option to require answers and set validation rules for certain questions. This ensures that respondents provide the necessary information and helps maintain data integrity. Here’s how you can require answers and set validation rules in your form:
1. Requiring answers: To make a question mandatory, click on the question and then click on the three dots icon in the bottom right corner of the question box. Select the “Required” option from the dropdown menu. This will make it mandatory for respondents to provide an answer to that particular question.
2. Validating answers: In addition to requiring answers, you can set validation rules to ensure that respondents provide specific types of answers in a certain format. To set validation rules, click on the question and then click on the three dots icon in the bottom right corner. Select the “Validation” option from the dropdown menu.
3. Choose a validation type: After selecting the “Validation” option, you can choose from various validation types such as text, number, email, URL, and date. Select the type that corresponds to the answer you want to validate.
4. Define the validation criteria: Depending on the validation type, you’ll be able to define the criteria for the answer. For example, if the validation type is “Number,” you can set a range or specify whether the answer should be a whole number or decimal. If the validation type is “Email,” you can ensure that the answer follows a valid email format.
5. Show custom error messages: To provide clarification on the validation rules, you can enter a custom error message that will be displayed if a respondent enters an invalid answer. This helps guide respondents towards providing the correct information.
By requiring answers and setting validation rules, you can ensure that respondents provide the necessary information in the desired format. This helps maintain data integrity and improves the overall quality of the responses collected. It’s important to strike a balance between requiring answers for essential questions and allowing flexibility for optional questions.
Adding Images and Videos to Questions
Enhance the visual appeal and clarity of your Google Docs form by incorporating images and videos into your questions. Adding multimedia elements can provide additional context, demonstrate examples, or engage respondents in a more interactive way. Here’s how you can add images and videos to questions in your form:
1. Inserting images: To add an image to a question, click on the image icon in the toolbar of the question editor. You can then choose to upload an image from your computer, select an image from your Google Drive, or enter a URL to an online image. Once the image is selected, it will be inserted into the question.
2. Adjusting image size: After inserting an image, you can click and drag the edges of the image to resize it to the desired dimensions. This allows you to ensure that the image fits well within the question and doesn’t overwhelm the text.
3. Including videos: If you want to include a video in your question, click on the “Insert Video” icon in the toolbar. You can then choose to upload a video from your computer, select a video from your Google Drive, or enter the URL of a YouTube video. The video will be embedded into the question.
4. Positioning multimedia elements: By default, images and videos are inserted below the question text. However, you can adjust their position by clicking and dragging them to the desired location within the question. This allows you to place the multimedia element alongside or above the question text as needed.
5. Providing additional instructions: If you want to provide specific instructions related to the image or video, you can include them in the question description field below the question. This helps clarify the purpose or relevance of the multimedia element in relation to the question.
By incorporating images and videos into your questions, you can enhance the visual experience of your form and make it more engaging for respondents. However, it’s important to use multimedia elements judiciously and ensure that they complement the questions rather than distract from them. Keep in mind that including too many images and videos may increase the file size of your form, so consider the impact on accessibility and loading times.
Adding Additional Options to Questions
When creating a Google Docs form, you have the flexibility to add additional options to your questions, allowing for more customization and versatility. These additional options can enhance the clarity of the question, provide more response choices, and tailor the form to better suit your needs. Here’s how you can add additional options to questions in your form:
1. Adding description text: To provide additional instructions or context for a particular question, you can add description text. Simply click on the question and enter the desired text in the description box below the question. This text will appear underneath the question and can help clarify any ambiguous details or offer further guidance to respondents.
2. Including placeholders: Placeholders are placeholders are short hints or examples that provide guidance to respondents when answering a question. To add a placeholder, click on the question and enter the desired text in the “Placeholder” field. The placeholder text will be displayed in the answer field until respondents begin typing their response.
3. Enabling “Other” as an option: If you want to allow respondents to input an answer other than the provided choices, you can enable the “Other” option. To do this, select the question and check the “Add other” option in the question settings. This will add an additional field where respondents can provide their own answer if none of the pre-determined options are applicable to them.
4. Randomizing answer choices: To eliminate bias in answer selection, you can enable the “Shuffle option order” setting for multiple-choice questions. This will randomly rearrange the answer choices each time the form is loaded, ensuring that the order of choices does not influence respondents’ selections.
5. Limiting answer selections: If you want respondents to select a specific number of choices from a set of options, you can set a limit on the number of answer selections. Select the question, and in the question settings, specify the maximum number of choices that respondents can select. This helps to obtain focused and structured responses.
By utilizing these additional options, you can customize your questions to provide more clarity, offer more response choices, and accommodate unique circumstances. Remember to use these options selectively, as too many additional options may overwhelm respondents or make the form unnecessarily complex.
Adding a Progress Bar to the Form
When creating a Google Docs form with multiple sections or a long list of questions, adding a progress bar can be a helpful feature to guide respondents through the form and provide a sense of completion. The progress bar visually displays the progress made by respondents as they complete the form. Here’s how you can add a progress bar to your Google Docs form:
1. Open your form: Go to Google Forms and open the form you want to edit or create a new one.
2. Click on the settings gear icon: In the form editor, click on the settings gear icon located at the top right corner of the page.
3. Enable the progress bar option: In the settings menu, you’ll find the “Progress Bar” option. Toggle the switch to enable the progress bar feature on your form.
4. Customize the progress bar type: Google Forms offers three types of progress bars: “Percent,” “Fraction,” and “Progress Bar.” Choose the type that suits your preference and click “Save” to apply it to your form.
5. Preview the progress bar: As you enable and customize the progress bar, you can preview how it will look to respondents. This allows you to see the progress and adjust any settings if needed.
The progress bar will appear at the top of your form, just below the form title. Respondents will be able to see the overall progress they have made as they complete the form. The progress bar updates dynamically as they navigate through each question and section of the form, providing them a clear visual representation of how much more they need to complete.
In addition to helping respondents track their progress, the progress bar adds a sense of transparency and motivates them to continue until the form is finished. It’s especially useful for lengthier forms or forms with multiple sections, where the progress bar helps break down the completion process into manageable chunks.
Customizing the Theme and Background
Google Docs allows you to customize the theme and background of your form, giving it a personalized and visually appealing touch. By customizing the theme and background, you can align the form’s appearance with your brand, style, or the purpose of the form itself. Here’s how you can customize the theme and background of your Google Docs form:
1. Open your form: Go to Google Forms and open the form you want to edit or create a new one.
2. Click on the “Theme” button: In the form editor, click on the “Theme” button located at the top right corner of the page. This will open a theme panel on the right-hand side.
3. Choose a theme: Google Forms provides a range of pre-designed themes to choose from. Browse through the available themes and select the one that best suits your form. You can find themes for various purposes, including professional, playful, minimalist, and more.
4. Customize the color palette: After selecting a theme, you can further customize the color palette to match your preferences or branding. Click on the “Color palette” option in the theme panel, and choose the colors that best represent your style. You can select a color for the form’s header, background, text, buttons, and more.
5. Add a custom image background (optional): If you want to add a custom image as the background of your form, click on the “Image” icon in the theme panel. You can upload an image from your computer or select one from your Google Drive. The image will be applied as the background of your form.
6. Preview the customization: As you select a theme, customize the color palette, and add a background image, you can preview your changes in real-time. This allows you to see how the theme and background will appear to respondents before finalizing it.
Customizing the theme and background of your Google Docs form not only adds visual appeal but also helps create a cohesive and branded experience for respondents. It sets the tone and enhances the overall user experience, making the form more engaging and memorable. Experiment with different themes, color palettes, and background images to find the perfect customization for your form.
Previewing and Testing the Form
Before sharing your Google Docs form with others, it’s important to preview and test it to ensure everything is functioning as intended. Previewing and testing allows you to review the form’s layout, visibility of questions, and test the functionality of any special features or settings you’ve incorporated. Here’s how you can preview and test your Google Docs form:
1. Preview the form: In the form editor, click on the “Preview” button located at the top right corner of the page. This will open a preview of the form in a new tab or window. Take the time to carefully review each page, question, and the overall design of your form.
2. Test question responses: While previewing the form, answer each question as a respondent would. Check the logic and flow of the questions to ensure they make sense. Verify that any required questions are indeed prompted as mandatory, and that any optional questions are left open for users to decide. Ensure that any conditional formatting or validation rules are working as intended.
3. Check page navigation: If your form has multiple sections or pages, navigate through them as a respondent would. Verify that the page navigation buttons are functioning correctly and that respondents are able to move forward and backward through the form as expected.
4. Submit a test response: Once you are satisfied with the form and have tested all questions and features, submit a test response. This will help you assess the data captured, review the confirmation message (if any), or check if integration with other tools or services is working as anticipated.
5. Review the response summary: After submitting a test response, take a look at the response summary or confirmation page. Ensure that all responses have been logged correctly and that any calculated fields or formulas are producing the desired results.
By previewing and testing your Google Docs form, you can identify any issues or areas for improvement before sharing it with others. It helps ensure that your form is user-friendly, functional, and collects the necessary information effectively. Repeat the preview and testing process as needed, especially when making significant changes to the form or introducing new elements.
Sharing the Form with Others
After finalizing your Google Docs form, it’s time to share it with others to collect responses. Google Forms provides various options for sharing your form, enabling you to reach your desired audience and gather the information you need. Here’s how you can share your Google Docs form:
1. Get the form link: In the form editor, click on the “Send” button located at the top right corner of the page. This will open a window with sharing options. Simply copy the form link provided in the “Link” tab.
2. Share via email: If you want to share the form directly via email, you can use the “Email” tab in the sharing options. Enter the email addresses of the recipients, customize the subject and message, and click “Send.” Each recipient will receive an email with a direct link to the form.
3. Embed the form: If you have a website or blog where you want to embed the form, you can use the “Embed HTML” tab. Copy the provided HTML code and paste it into the desired location on your website or blog. The form will be displayed within that page, allowing visitors to fill it out without leaving your site.
4. Share on social media: To reach a wider audience, you can share the form through your social media platforms. Simply copy the form link and paste it into a social media post, along with any additional context or instructions you want to provide.
5. Generate a QR code: Google Forms also allows you to generate a QR code for your form. This is useful for in-person events or printed materials. Click on the QR code symbol in the sharing options and save or download the generated QR code. People can scan the code with their smartphones to access the form directly.
Consider the nature of your form, the intended audience, and the most effective channels for sharing when deciding which method is most appropriate. You can also combine various sharing methods to maximize your form’s reach and collect responses from different sources.
Remember to provide clear instructions and context when sharing your form to help respondents understand the purpose and importance of providing their responses. Regularly monitor the responses and consider setting reminders or follow-ups to ensure you gather the desired information within the desired timeframe.
Managing Responses to the Form
Once you start receiving responses to your Google Docs form, it’s important to manage and organize them effectively. Google Forms provides features that help you view, analyze, and export the responses for further analysis or action. Here’s how you can manage responses to your Google Docs form:
1. Access the response summary: In the form editor, click on the “Responses” tab located at the top of the page. This will open the response summary, where you can view a summary of all the responses received.
2. Review individual responses: In the response summary, you can review each individual response by clicking on the response entry. This will display the respondent’s answers to each question and allow you to review the details of their submission.
3. Analyze and visualize data: Google Forms provides built-in tools for analyzing and visualizing response data. Click on the “Individual” or “Summary” tab in the response summary to access various charts and graphs that represent the data collected.
4. Export response data: If you need to analyze the response data in more depth or share it with others, you can export it to different formats. Click on the spreadsheet icon at the top of the response summary to export the data to Google Sheets or download it as a CSV file.
5. Set up response notifications: To keep up with new responses in real-time, you can set up response notifications. In the response summary, click on the envelope icon and choose the settings for when and how often you want to be notified of new responses. This helps you stay informed and allows for timely follow-up actions, if needed.
6. Manage response settings: In the response summary, you can also manage various response settings. Click on the three dots icon to access options such as disabling new responses, creating a copy of the form, or checking the form’s response destination.
Managing responses effectively ensures that you stay organized and make the most of the data collected. Regularly review and analyze the responses, looking for trends, patterns, or insights that can inform decision-making or guide future actions. Consider setting up a system for categorizing or tagging responses to streamline your analysis process.
Remember to respect respondents’ privacy and adhere to any relevant privacy laws or regulations when managing and storing response data. Take steps to secure the data and only share it with authorized individuals or teams as necessary.
Analyzing Response Data
Once you have collected responses to your Google Docs form, analyzing the data can provide valuable insights and help you make informed decisions based on the information gathered. Google Forms offers several features and tools that allow you to analyze response data effectively. Here’s how you can analyze response data from your Google Docs form:
1. Use summary statistics: In the response summary, Google Forms automatically generates summary statistics for each question type, such as mean, median, mode, and count. These statistics provide an overview of the response distribution and can quickly reveal trends or patterns in the data.
2. Visualize data with charts: Google Forms provides various chart types, such as bar charts, pie charts, and line graphs, to visualize response data. In the response summary, click on the “Summary” tab to access the charting options. Choose the question you want to visualize, select the chart type, and customize the chart settings as needed.
3. Filter and segment data: To gain deeper insights, you can filter and segment the response data based on specific criteria. In Google Sheets, where the response data is typically stored, use filters to focus on specific subsets of data or create pivot tables to cross-analyze multiple variables. This allows you to explore relationships and patterns within the responses.
4. Conduct quantitative analysis: Depending on the nature of your form and the information collected, you may apply more advanced quantitative analysis techniques to derive meaningful insights. Tools like Google Sheets’ built-in formulas and functions can assist you in performing calculations, creating new variables, and conducting statistical analyses.
5. Seek qualitative insights: In addition to quantitative analysis, don’t overlook the qualitative insights that can be gleaned from open-ended questions. Review the responses carefully and identify recurring themes, common sentiments, or specific insights expressed by respondents. These qualitative insights can provide a deeper understanding of respondents’ perspectives.
6. Compare data over time: If you regularly distribute similar forms, you can compare response data over time to identify trends or changes in the data. By tracking changes in respondents’ opinions, behaviors, or preferences, you can assess the impact of initiatives or interventions and make informed adjustments.
By analyzing response data, you can uncover valuable insights that inform decision-making, guide improvements, or contribute to research endeavors. Remember to approach data analysis objectively, consider the limitations of the data collected, and interpret the findings in the context of your form’s objectives.