
Choosing the Right HDMI Switch
When it comes to connecting an HDMI switch to your laptop, choosing the right device is crucial. An HDMI switch allows you to connect multiple HDMI devices to your laptop and switch between them seamlessly. Here are some factors to consider when selecting the perfect HDMI switch for your needs.
1. Number of Ports: Determine the number of HDMI devices you plan to connect to your laptop. HDMI switches come in various sizes, ranging from 2 to 8 ports or even more. Make sure to choose a switch that has enough ports to accommodate all your devices.
2. HDMI Version: Check the HDMI version compatibility of the switch. The latest HDMI version is HDMI 2.1, which offers higher resolutions, refresh rates, and supports advanced features like HDR and variable refresh rate. If your laptop and devices support HDMI 2.1, it is recommended to choose a switch that complies with this version for optimal performance.
3. Resolution and Refresh Rate: Consider the maximum resolution and refresh rate supported by the HDMI switch. Ensure that the switch can handle the resolution and refresh rate required by your laptop and connected devices. This will ensure that you get the best picture quality and smooth video playback.
4. Audio Support: Check if the HDMI switch supports the audio formats you need, such as Dolby Atmos or DTS-HD. Some switches may only support stereo audio, while others offer advanced audio capabilities. Choose a switch that suits your audio requirements.
5. Remote Control and Auto-Switching: Look for an HDMI switch that comes with a remote control for convenient switching between devices. In addition, some switches offer auto-switching functionality, which automatically selects the active device without needing to press any buttons. This can be a handy feature if you frequently switch between multiple devices.
6. Price and Reviews: Consider your budget and read customer reviews before making a final decision. Compare the prices and features of different HDMI switches to find the one that offers the best value for money.
By considering these factors, you can choose the right HDMI switch that meets your requirements and enhances your laptop’s connectivity options. Now that you have selected the appropriate switch, let’s move on to the next step: checking the laptop ports.
Checking the Laptop Ports
Before connecting your HDMI switch to your laptop, it’s essential to check the available ports on your laptop. Most modern laptops come equipped with an HDMI port, but it’s still important to verify its presence and location.
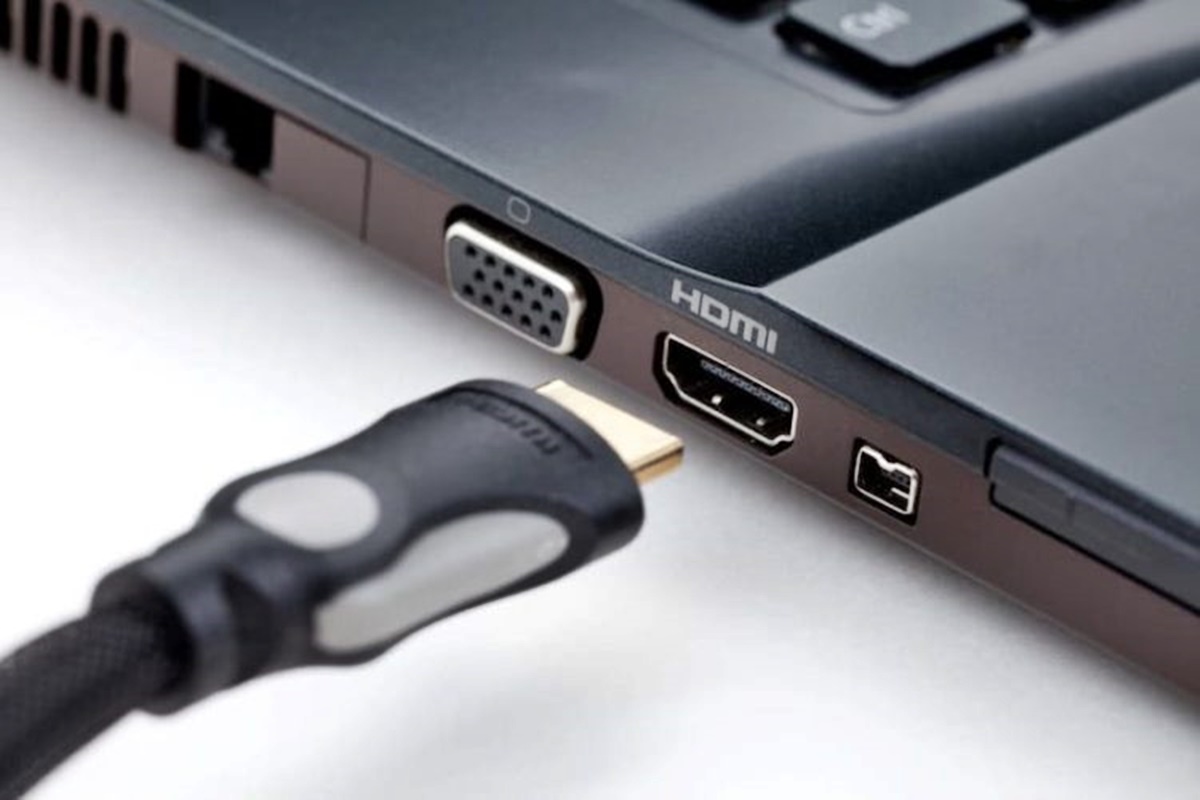
1. Look for the HDMI Port: Inspect the sides or back of your laptop for an HDMI port. It is typically a rectangular-shaped port with the HDMI symbol next to it. If your laptop has multiple HDMI ports, note which one you will be using for the connection.
2. Confirm HDMI Version: Determine the HDMI version supported by your laptop. You can usually find this information in the laptop’s specifications or user manual. Knowing the HDMI version will help ensure compatibility with your HDMI switch and connected devices.
3. Check for Other Video Ports: While HDMI is the most common video connection, laptops may also have other video ports like VGA or DisplayPort. If your laptop has additional video ports, make a mental note of them. You may need additional adapters or cables to connect them to the HDMI switch.
4. Assess Audio Ports: Besides video, consider the audio ports available on your laptop. HDMI transfers both audio and video signals, so if your laptop has an HDMI port, it likely supports audio output through that port. However, if you plan to connect external speakers or headphones, check for dedicated audio jacks on your laptop as well.
5. Additional Ports and Features: Take note of any other ports or features that may be relevant to your setup. For example, USB ports can be useful for connecting peripherals or powering external devices. Ethernet ports may provide internet connectivity options, while Thunderbolt ports offer high-speed data transfer capabilities.
By thoroughly checking the ports and features on your laptop, you can ensure a seamless and hassle-free connection with your HDMI switch. Once you have confirmed the availability of the necessary ports, it’s time to move on to the next step: connecting the HDMI switch to the laptop.
Connecting the HDMI Switch to the Laptop
Now that you have chosen the right HDMI switch and verified the ports on your laptop, it’s time to connect the two together. Follow these steps to establish a connection between your HDMI switch and laptop:
1. Power Off: Before making any connections, turn off both the laptop and the HDMI switch. This ensures that there are no electrical hazards and prevents any potential damage.
2. Connect HDMI Cable: Take one end of the HDMI cable and insert it into the HDMI output port on the HDMI switch. Ensure it is securely plugged in, to avoid any loose connections or interruptions in the signal transmission.
3. Laptop Connection: Take the other end of the HDMI cable and plug it into the HDMI input port on your laptop. Again, make sure it is properly inserted to establish a stable connection.
4. Power On: Once the HDMI cable is securely connected, power on the HDMI switch and the laptop. Allow them a few moments to boot up properly.
5. Select Input Source: Use the remote control that came with your HDMI switch and navigate to the appropriate input source. Most HDMI switches have numbered ports, so select the corresponding port where you connected your laptop.
6. Check Connection: After selecting the correct input source, check the display on your laptop to ensure that the connection was successful. If everything is connected properly, you should see the laptop’s screen displayed on your external monitor or TV.
By following these steps, you can establish a reliable connection between your HDMI switch and the laptop. However, if you encounter any issues or the connection is not working as expected, refer to the troubleshooting section for common solutions. In the next section, we will explore how to configure the HDMI switch settings for optimal performance.
Configuring the HDMI Switch Settings
After connecting your HDMI switch to the laptop, it’s important to configure the settings to ensure the best performance and compatibility. Follow these steps to configure the HDMI switch settings:
1. Access the Settings Menu: Depending on the model of your HDMI switch, there may be a dedicated settings button on the remote control or a menu accessible through the switch itself. Consult the user manual to determine how to access the settings menu.
2. Display Resolution: Navigate to the display settings within the HDMI switch settings menu. Here, you can select the desired resolution for your connected devices. Choose the resolution that matches your laptop’s display capabilities for optimal image quality.
3. Audio Output: If you have external speakers or a home theater system connected to the HDMI switch, you can configure the audio output settings. Select the appropriate audio format and settings that are compatible with your speakers to ensure optimal sound quality.
4. Picture Adjustments: Some HDMI switches offer picture adjustment options, allowing you to fine-tune the brightness, contrast, and other display settings. Explore these options to customize the picture quality according to your preference.
5. Auto-Switching and Fast Switching: If your HDMI switch supports auto-switching or fast switching, you can configure these settings to streamline the switching process between connected devices. Adjust the timing and sensitivity settings to suit your preferences.
6. Firmware Updates: Check if there are any firmware updates available for your HDMI switch. Visit the manufacturer’s website and follow their instructions to update the switch’s firmware. Keeping it up-to-date ensures optimal compatibility and performance with your laptop and connected devices.
7. Save and Apply Settings: Once you have configured the desired settings, make sure to save and apply the changes. This ensures that your HDMI switch operates according to your preferences and offers the best viewing and listening experience.
By properly configuring the HDMI switch settings, you can optimize the performance and functionality of your connected devices. In case you encounter any issues or the settings do not work as expected, refer to the troubleshooting section for possible solutions. Next, let’s explore some common issues that you may encounter while using an HDMI switch.
Troubleshooting Common Issues
While connecting an HDMI switch to your laptop can greatly enhance your multimedia experience, you may encounter some common issues along the way. Here are troubleshooting strategies for addressing these issues:
1. No Signal Detected: If your laptop’s display shows “No Signal” after connecting the HDMI switch, check the following:
– Ensure all cables are securely connected.
– Confirm that the HDMI switch is powered on.
– Try selecting a different input source on the HDMI switch.
– Check the display settings on your laptop to ensure it is set to extend or duplicate the display to the external monitor or TV.
2. Poor Display Quality: If you experience poor or blurry display quality, consider the following:
– Ensure that the HDMI cable you are using is of good quality and supports the necessary bandwidth for high-resolution displays.
– Adjust the display settings on the HDMI switch to match your laptop’s display capabilities.
– Check the refresh rate settings on your laptop and ensure it is compatible with the HDMI switch and external monitor or TV.
3. Audio Issues: If you encounter audio problems after connecting the HDMI switch, try the following:
– Check the audio settings on the HDMI switch and make sure the correct audio output is selected.
– Verify that the audio cable is properly connected from the HDMI switch to the speakers or audio system.
– Ensure that the volume levels on the HDMI switch and connected devices are appropriately set.
4. HDCP Errors: High-bandwidth Digital Content Protection (HDCP) is a technology that ensures content protection over HDMI connections. If you receive HDCP error messages, try the following steps:
– Switch off the HDMI switch and all connected devices, then power them on again.
– Check for any firmware updates for the HDMI switch and ensure it is up to date.
– If the issue persists, disconnect and reconnect all HDMI cables, ensuring they are securely plugged in.
5. Device Compatibility: If certain devices connected to the HDMI switch do not function properly, consider the following:
– Verify that the devices are compatible with the HDMI switch and its supported features.
– Check if there are any firmware updates available for the incompatible device(s) and update them accordingly.
– Consult the HDMI switch user manual or the device manufacturer’s website for any known compatibility issues or troubleshooting steps.
By troubleshooting these common issues, you can overcome challenges and ensure a smooth and uninterrupted experience when using an HDMI switch with your laptop and connected devices. In the next section, we will explore how to adjust the display settings on your laptop for optimal viewing.
Adjusting Display Settings on the Laptop
When using an HDMI switch with your laptop, it’s important to adjust the display settings to ensure optimal viewing on the external monitor or TV. Here are some methods for adjusting display settings:
1. Display Resolution: Open the display settings on your laptop and select the appropriate resolution for the external monitor or TV. Choose a resolution that matches the device’s native resolution for the best image quality. Avoid selecting a resolution that exceeds the device’s capabilities, as it may result in a blurry or distorted display.
2. Display Orientation: If your external monitor or TV is not displaying content in the correct orientation, you can adjust it in the display settings. Choose between landscape or portrait mode to match the desired orientation for your external display.
3. Display Mode: Depending on your preferences and requirements, you can choose from different display modes:
– Extend: This mode allows you to extend your laptop’s display to the external monitor or TV, effectively giving you more screen real estate.
– Duplicate: This mode mirrors your laptop’s display onto the external monitor or TV, showing the same content on both screens.
– Second Screen Only: This mode turns off the laptop’s display and only shows content on the external monitor or TV.
4. Display Scaling: Adjust the display scaling settings to ensure that the content on the external monitor or TV is properly sized and proportioned. You can increase or decrease the scaling to make text, icons, and other elements appear larger or smaller on the external display.
5. Orientation and Position: If the position or orientation of your external display needs adjustment, you can manually configure it in the display settings. Drag and position the external display icon to match the physical arrangement of your devices, ensuring a seamless transition when moving the cursor across screens.
6. Color Calibration: For accurate color reproduction, consider calibrating the colors on your external display. Most operating systems have built-in color calibration tools that allow you to adjust the color temperature, contrast, and brightness. Calibrate the display to achieve accurate and vibrant colors.
By adjusting the display settings on your laptop, you can optimize the viewing experience on the connected external monitor or TV. Experiment with different settings to find the configuration that best suits your needs and preferences.
In the next section, we will explore how to use an HDMI switch with multiple devices to expand your laptop’s capabilities.
Using the HDMI Switch with Multiple Devices
One of the main advantages of an HDMI switch is its ability to connect multiple devices to your laptop. This allows you to expand your laptop’s capabilities and easily switch between different devices without the hassle of constantly disconnecting and reconnecting cables. Here’s how you can effectively utilize the HDMI switch with multiple devices:
1. Connect the Devices: Begin by connecting all your desired devices to the available HDMI ports on the HDMI switch. This can include gaming consoles, Blu-ray players, streaming devices, or any other HDMI compatible devices. Simply plug one end of an HDMI cable into each device’s HDMI output port and the other end into an available HDMI input port on the switch.
2. Select the Active Device: Once all devices are connected, use the remote control or buttons on the HDMI switch to select the active device. The switch will route the audio and video output from the selected device to your laptop’s display via the HDMI connection.
3. Switching Between Devices: To switch between devices, simply use the remote control or press the corresponding button on the HDMI switch. The switch will seamlessly change the active device, immediately displaying the audio and video output from the selected device on your laptop’s screen.
4. Advanced Features: Some HDMI switches offer additional features like picture-in-picture (PiP) or split-screen modes. These features allow you to view content from multiple devices simultaneously on your laptop’s display. Explore the user manual or settings menu of your HDMI switch to understand and utilize these advanced features, improving multitasking capabilities.
5. Cable Management: With multiple devices connected, cable management becomes essential. Organize the HDMI cables and ensure they are properly routed and secured to prevent tangles or accidental disconnections. Consider using cable clips or organizers to keep the setup tidy and minimize clutter.
By using an HDMI switch with multiple devices, you can expand the functionality of your laptop by effortlessly switching between different devices and enjoying the content of your choice. Now that you are familiar with using the HDMI switch with multiple devices, let’s move on to some tips for optimizing its performance.
Tips for Optimal Performance
To ensure the best performance and experience when using an HDMI switch with your laptop, consider the following tips:
1. Use High-Quality HDMI Cables: Invest in good-quality HDMI cables that support the necessary bandwidth and features for your devices. High-quality cables help maintain a stable connection and minimize signal loss, resulting in better audio and video performance.
2. Keep Firmware Updated: Regularly check for firmware updates for your HDMI switch and connected devices. Firmware updates often provide bug fixes, performance improvements, and compatibility enhancements, ensuring optimal functionality and a seamless experience.
3. Avoid Excessive Cable Lengths: When connecting devices to an HDMI switch, try to keep the cable lengths as short as possible. Long cables can lead to signal degradation and potential quality issues. If longer cable lengths are necessary, ensure that you use high-quality cables designed for longer distances.
4. Power Off Unused Devices: When not in use, power off any devices connected to the HDMI switch that are not being actively used. This helps reduce power consumption and prevents unnecessary strain on the HDMI switch.
5. Properly Organize Cables: Neatly organize and secure the HDMI cables to minimize tangling and ensure a clean setup. Use cable management solutions, such as cable clips, ties, or sleeves, to keep the cables organized and prevent accidental disconnections.
6. Shielding and Interference: Some HDMI switches may be sensitive to interference from other electronic devices. To minimize interference, ensure that the HDMI switch is placed away from sources of electromagnetic interference, such as routers, speakers, or wireless gadgets.
7. Test Different HDMI Ports: If you encounter issues with a specific HDMI port on the switch, try connecting the problematic device to a different port. Sometimes a specific port may have compatibility issues or a faulty connection, and switching to a different port can resolve the problem.
8. Avoid Overloading the HDMI Switch: While HDMI switches are designed to handle multiple devices, make sure not to overload the switch by connecting more devices than it can handle. Refer to the manufacturer’s specifications for the maximum supported devices and adhere to the recommended limits.
By following these tips, you can optimize the performance of your HDMI switch, ensuring a smooth and seamless experience when using it with your laptop and connected devices. Now that you have learned how to maximize the performance of the HDMI switch, you’re ready to enjoy the convenience and versatility it offers.