
Required Equipment and Software
Before you can connect your Nintendo Switch to a laptop, there are a few essential pieces of equipment and software you’ll need to gather:
- A Nintendo Switch console
- A laptop or computer
- An HDMI cable
- An HDMI input on your laptop
- Internet access for online gameplay
- Optional: A USB-C to HDMI adapter (if your laptop doesn’t have an HDMI input)
It’s important to ensure that your laptop meets the system requirements for connecting and running the Nintendo Switch smoothly. Check the manufacturer’s specifications to verify the necessary software and hardware compatibility.
On the software side, you will need an operating system that supports video and audio input, such as Windows or macOS. Additionally, make sure your laptop’s graphics card and audio drivers are up to date to ensure optimal performance.
Gather all the required equipment and ensure everything is in good working condition before you proceed to the next steps. Once you have everything you need, you’re ready to connect your Nintendo Switch to your laptop.
Step 1: Check System Requirements
Before you begin connecting your Nintendo Switch to your laptop, it’s crucial to check that your laptop meets the necessary system requirements. This ensures that your device is compatible and capable of running the Switch smoothly. Here’s what you need to do:
- Refer to the laptop’s manufacturer specifications or user manual to identify the necessary hardware and software requirements.
- Verify that your laptop has an available HDMI input. Most modern laptops come equipped with an HDMI input, but if yours doesn’t have one, you may need a USB-C to HDMI adapter to connect the console.
- Ensure that your laptop’s operating system supports video and audio input. The majority of current operating systems, such as Windows and macOS, offer these capabilities. However, it’s always a good idea to check for any specific requirements or compatibility issues.
- Check that you have the latest graphics card and audio drivers installed on your laptop. These drivers play a vital role in the smooth transmission of video and audio signals between your Nintendo Switch and laptop. You can usually find the latest drivers on the manufacturer’s website.
By assessing your laptop’s system requirements beforehand, you can prevent any compatibility issues or potential performance glitches. This step ensures a seamless and enjoyable experience while connecting and using your Nintendo Switch with your laptop.
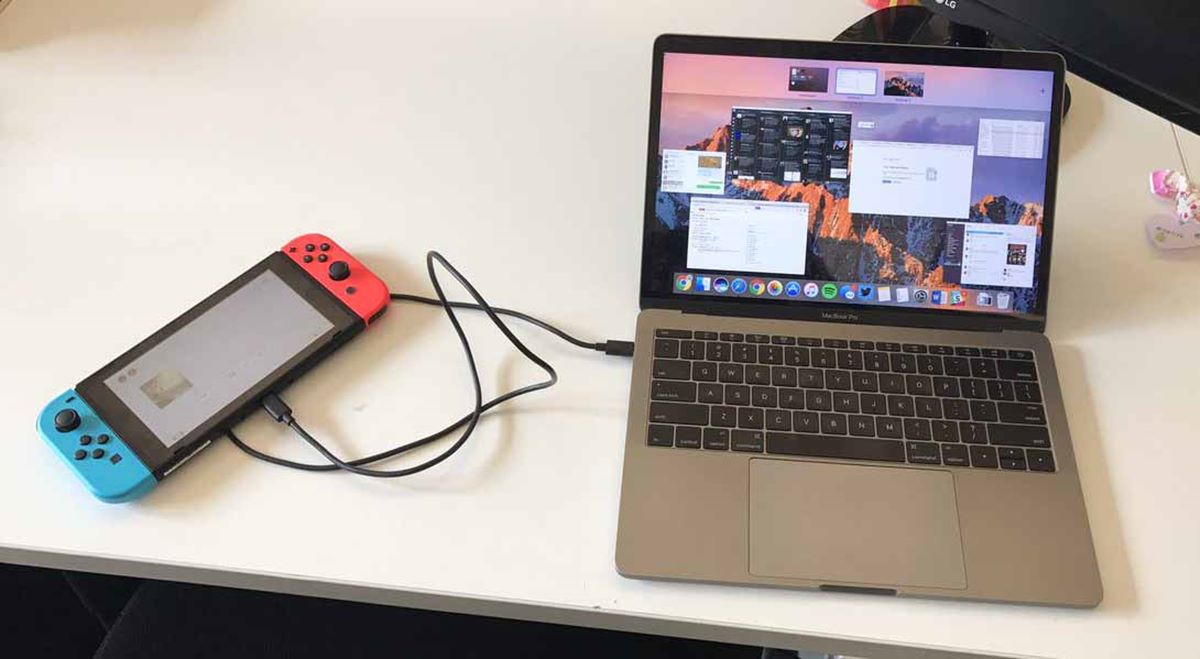
Step 2: Connect the Nintendo Switch to the Laptop
Now that you have verified your laptop’s compatibility, it’s time to connect your Nintendo Switch to your laptop. Follow these steps to establish a connection:
- Start by powering off both your Nintendo Switch console and your laptop.
- Locate the HDMI port on your laptop. It is usually located on the side or back of the device. If your laptop doesn’t have an HDMI port, make sure to connect the USB-C to HDMI adapter to the USB-C port on your laptop.
- Take the HDMI cable and connect one end into the HDMI port on your laptop or adapter, and the other end into the HDMI output port located on the Nintendo Switch dock.
- Power on your laptop and Nintendo Switch console.
- If your laptop has multiple input options (such as HDMI 1, HDMI 2, etc.), press the appropriate input switch button or select the correct input source in the display settings menu to ensure that the laptop recognizes the Nintendo Switch signal.
- On your Nintendo Switch, go to “System Settings” and navigate to “TV Settings.” Make sure the resolution is set to match your laptop’s display capabilities for optimal picture quality.
- You should now see your Nintendo Switch screen displayed on your laptop’s screen. Adjust the screen resolution and layout settings on your laptop if needed.
Once the connection is established, you can use your laptop as an external display for the Nintendo Switch. This allows you to enjoy games, watch videos, and perform other activities on a larger screen.
Step 3: Configure the Display Settings
After connecting your Nintendo Switch to your laptop, it’s important to configure the display settings to ensure optimal visuals. Follow these steps to adjust the display settings:
- On your laptop, access the display settings. This can usually be done by right-clicking on the desktop and selecting “Display Settings” or by navigating through the Control Panel or System Preferences.
- Look for the option to adjust the screen resolution. Set it to match the resolution supported by your laptop’s display for the best picture quality.
- Explore other display settings that may be available, such as brightness, contrast, and color settings. Adjust them according to your preferences to enhance your gaming or viewing experience.
- Some laptops have additional features, such as scaling options or display mirroring settings. Take the time to explore these options and customize them to your liking.
- Test the display settings by launching a game or playing a video on your Nintendo Switch. Ensure that the visuals appear crisp, vibrant, and properly aligned with no distortion or lag.
By configuring the display settings, you can optimize the visual output of your Nintendo Switch on your laptop’s screen. Making these adjustments will enhance your gaming experience and make the visuals more enjoyable.
Step 4: Adjust Audio Settings
Once you have successfully connected your Nintendo Switch to your laptop, it’s important to ensure that the audio settings are properly configured. Follow these steps to adjust the audio settings:
- Access the audio settings on your laptop. This can typically be done by right-clicking on the speaker icon in the taskbar and selecting “Playback Devices” or by navigating through the Control Panel or System Preferences.
- Locate the device that represents your connected Nintendo Switch. It may appear as “HDMI” or “Nintendo Switch” in the list of playback devices.
- Set the Nintendo Switch device as the default playback device. Right-click on the device and select “Set as Default” or “Set Default Device” to ensure that the audio output is directed to your laptop’s speakers or headphones.
- Adjust the volume levels as needed. Increase or decrease the volume of your laptop’s speakers or headphones to achieve the desired audio level.
- Test the audio settings by playing a game or video on your Nintendo Switch. Ensure that the sound is coming through your laptop’s speakers or headphones and that it is clear and audible.
By adjusting the audio settings, you can ensure that the sound from your Nintendo Switch is properly routed to your laptop’s audio output. This allows you to enjoy an immersive audio experience while gaming or watching videos on your Nintendo Switch connected to your laptop.
Step 5: Install any Required Drivers
In some cases, you may need to install additional drivers to ensure proper communication between your Nintendo Switch and laptop. Follow these steps to install any required drivers:
- Identify if there are any specific drivers needed for your laptop to recognize the Nintendo Switch. Check the manufacturer’s website or documentation for any available driver updates or downloads.
- Download the necessary drivers from the official website and save them to a location on your laptop.
- Once the drivers are downloaded, double-click on the installer file to begin the installation process.
- Follow the on-screen instructions provided by the driver installer. Typically, you will need to accept the license agreement, select the installation location, and click on the “Install” or “Next” button.
- Wait for the installation to complete. This may take a few moments, so be patient.
- After the installation is finished, restart your laptop to apply any changes made by the driver installation.
By installing any required drivers, you ensure that your laptop recognizes and communicates properly with the Nintendo Switch. This step is crucial for a seamless connection and optimal performance while using your Nintendo Switch with your laptop.
Step 6: Set Up the Network Connection
In order to access online multiplayer games and other online features on your Nintendo Switch while connected to your laptop, you’ll need to set up a network connection. Follow these steps to establish a network connection:
- Ensure that your laptop is connected to the internet. Connect to a Wi-Fi network or use an Ethernet cable to establish a stable internet connection.
- On your Nintendo Switch, navigate to the “System Settings” and select “Internet Settings.”
- Choose between Wi-Fi or Wired Connection, depending on your laptop’s setup. If you’re connected to a Wi-Fi network on your laptop, select the desired network from the list of available networks. If using an Ethernet cable, connect the cable from your laptop to your modem or router.
- Follow the on-screen instructions to complete the network setup process. For Wi-Fi connections, you may need to input the network password or select the appropriate security settings.
- Once the connection is established, confirm the successful network connection by performing a network test. This will verify that your Nintendo Switch is connected to the internet through your laptop.
By setting up a network connection, you can enjoy online multiplayer games, access the Nintendo eShop, and download software updates for your Nintendo Switch while connected to your laptop. This step ensures an uninterrupted and enjoyable online gaming experience.
Step 7: Test the Connection
After setting up the network connection, it’s important to test the connection between your Nintendo Switch and laptop to ensure everything is working properly. Follow these steps to perform a connection test:
- Make sure your Nintendo Switch and laptop are powered on and connected.
- Access the Nintendo Switch home menu and launch an online multiplayer game or any online application that requires an internet connection.
- Participate in an online match or perform any activity that requires network connectivity. Pay attention to the responsiveness, stability, and smoothness of the gameplay or online experience.
- If you encounter any issues, such as lag, disconnects, or poor performance, try restarting your Nintendo Switch and laptop. Additionally, check your network connection and ensure that your internet speed is sufficient for online gaming.
By testing the connection, you can verify the stability and performance of your network setup. It ensures that you can enjoy a seamless online gaming experience and access all the online features of your Nintendo Switch while connected to your laptop.
Step 8: Troubleshooting Tips
Even with careful setup, you may encounter some issues when connecting your Nintendo Switch to your laptop. Here are a few troubleshooting tips to help you resolve common problems:
- No Display on Laptop: Ensure that the HDMI cable is properly connected to both your Nintendo Switch and laptop. Try a different HDMI input on your laptop or use a USB-C to HDMI adapter if available.
- No Sound: Check the audio settings on your laptop and make sure that the Nintendo Switch is set as the default playback device. Adjust the volume levels and ensure your laptop’s speakers or headphones are functioning properly.
- Poor Performance: If you experience lag or poor performance, try closing any unnecessary applications running in the background on your laptop. Additionally, check your internet connection speed and consider connecting to a closer or more stable Wi-Fi network.
- Driver Issues: If your laptop does not recognize the Nintendo Switch, ensure that you have installed any required drivers. Visit the manufacturer’s website for driver updates specific to your laptop model.
- Incompatible Laptop: If your laptop does not meet the necessary system requirements or lacks the required hardware, it may not be compatible with connecting the Nintendo Switch. Consider using a different device or consult the manufacturer for support.
Remember, troubleshooting may vary depending on your specific laptop model and software configuration. If you continue to experience issues, consult the Nintendo Switch and laptop manufacturer’s support resources or reach out to their customer support for further assistance.