
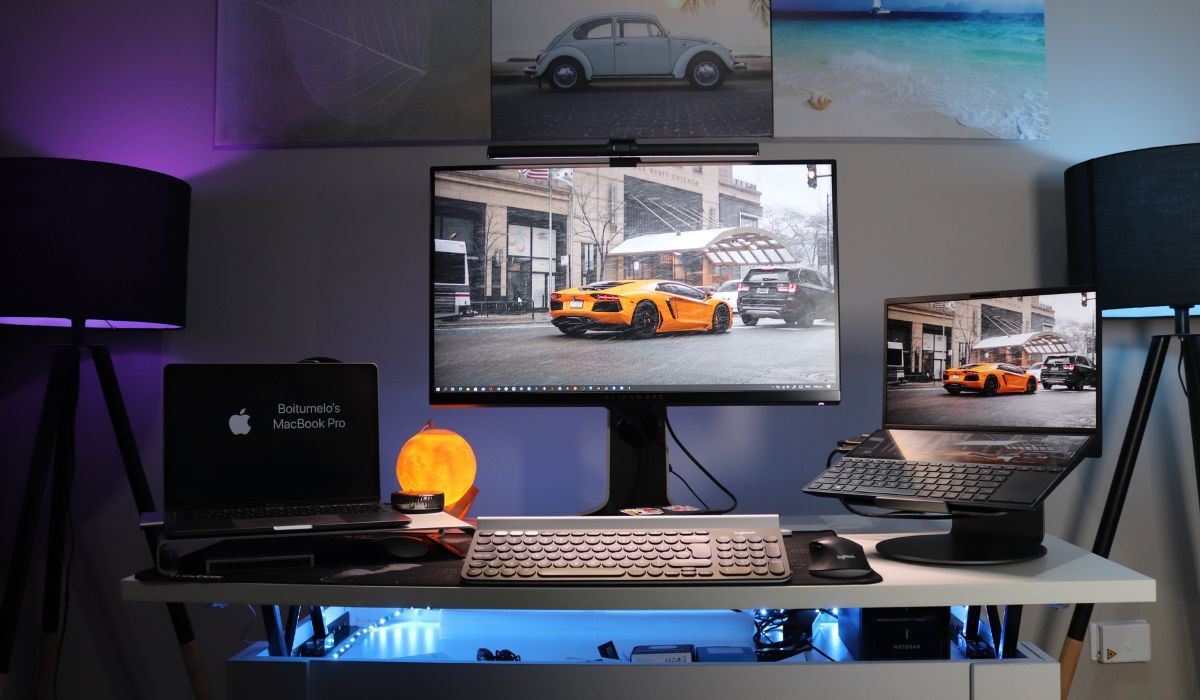
Benefits of connecting two computers to a single monitor
Connecting two computers to a single monitor might seem like an unusual setup, but it comes with several notable benefits. Whether you’re a multitasking professional, a gamer, or a home user, this configuration can streamline your workflow, save space, and enhance your productivity. Here are some of the key advantages of connecting two computers to a single monitor:
- Efficient multitasking: By using a single monitor for two computers, you can easily switch between them without the need for multiple displays. This allows you to work on one computer while monitoring processes or performing tasks on the other. It’s particularly useful for professionals working with multiple systems simultaneously.
- Space-saving: If you have limited desk space, connecting two computers to a single monitor can help declutter your workspace. Instead of dealing with two separate monitors, keyboards, and mice, you can consolidate them into a single setup, freeing up precious room for other essentials.
- Cost-effective: Purchasing a second monitor can be expensive. By utilizing a single monitor for both computers, you can save money and still reap the benefits of a multi-system setup. Additionally, you won’t need to invest in additional accessories like cables and mounting equipment.
- Enhanced gaming experience: Gamers can take advantage of connecting two computers to a single monitor, especially during multiplayer sessions. With this setup, you can have one computer dedicated to running the game while the other handles voice communication, game walkthroughs, or streaming. It eliminates the need for a second monitor and enables a seamless gaming experience.
- Improved collaboration: Connecting two computers to a single monitor can foster collaboration in various settings, including office environments and educational institutions. It allows individuals to share their screens or work together on projects more efficiently, enhancing communication and coordination among team members.
Overall, connecting two computers to a single monitor offers flexibility, convenience, and cost savings. It’s a practical solution for individuals who need to multitask, optimize their workspace, or enhance their gaming experience. Now that you’ve learned about the benefits, let’s explore the different methods of connecting two computers to a single monitor.
Common methods of connecting two computers to a single monitor
There are several methods you can use to connect two computers to a single monitor, each with its own advantages and considerations. Here are some common methods:
- Using a KVM switch: A KVM (Keyboard, Video, Mouse) switch allows you to connect multiple computers to a single monitor and switch between them using a switch button or hotkey. It provides seamless control over both computers without the need for additional cables and peripherals.
- Using a docking station: If you have a laptop and a desktop computer, using a docking station can simplify the process of connecting two computers to a single monitor. The docking station acts as a hub, allowing you to connect your laptop and desktop to it, and then connect the monitor to the docking station.
- Using a USB display adapter: USB display adapters allow you to connect an additional monitor to your computer via a USB port. By using two USB display adapters, you can connect two computers to a single monitor. However, keep in mind that the performance may vary depending on the graphics capabilities of your computers.
- Using a VGA or HDMI splitter: A VGA or HDMI splitter allows you to duplicate the screen output from one computer to multiple monitors, including a single monitor. By connecting both computers to the splitter, you can display the output of both systems on a single monitor simultaneously.
- Using remote desktop software: Remote desktop software allows you to access one computer from another over a network connection. By connecting the two computers using remote desktop software, you can control and view the screen of one computer on the monitor connected to the other.
When choosing the method that best suits your needs, consider factors such as the number of computers you want to connect, the required level of control and interaction between the systems, compatibility with your hardware, and your budget. It’s also important to check the specifications of your monitor and computers to ensure they support the selected method.
In the next section, we will explore each method in more detail, including the necessary equipment and setup instructions. So, let’s dive into the first method: using a KVM switch.
Method 1: Using a KVM switch
One of the most popular methods for connecting two computers to a single monitor is by using a KVM (Keyboard, Video, Mouse) switch. A KVM switch allows you to control multiple computers using a single set of peripherals connected to the switch.
Here’s how you can set up a KVM switch:
- Choose a KVM switch: There are different types of KVM switches available, including those with VGA or HDMI ports. Make sure to select a KVM switch that matches the ports and resolutions supported by your monitor and computers.
- Connect the cables: Start by connecting the VGA or HDMI cable from the monitor to the KVM switch’s output port. Then, connect the cables from each computer to the corresponding input ports on the KVM switch. These cables are typically VGA or HDMI, along with USB cables for the keyboard and mouse.
- Switch between computers: Once the connections are made, use the physical switch button on the KVM switch or a hotkey combination to switch between the connected computers. This will enable you to view and control the output of each computer on the single monitor.
Benefits of using a KVM switch include the ability to quickly toggle between computers without the need for multiple monitors or peripherals. It simplifies the setup and keeps your workspace organized. Some advanced KVM switches even offer features like USB port emulation and audio switching.
However, it’s important to ensure that the KVM switch supports the maximum resolution and refresh rate of your monitor and computers. Also, consider the number of ports available on the switch to accommodate future expansions or additional devices.
In the next section, we will explore another method: using a docking station. This method is particularly useful if you have a laptop and a desktop computer that you want to connect to a single monitor. So, let’s continue with the second method!
Method 2: Using a docking station
If you have a laptop and a desktop computer that you want to connect to a single monitor, using a docking station can simplify the process. A docking station acts as a hub, allowing you to easily connect and disconnect your laptop and desktop to various peripherals, including a monitor.
Here’s how you can set up a docking station:
- Choose a compatible docking station: Ensure that the docking station you choose is compatible with both your laptop and desktop. Look for a docking station that offers video output ports (such as HDMI or DisplayPort) that match the input ports of your monitor.
- Connect the docking station to the monitor: Connect the docking station to your monitor using the appropriate video cable (e.g., HDMI, DisplayPort). Make sure the cable is securely connected to both the docking station and the monitor.
- Connect the laptop and desktop to the docking station: Connect your laptop and desktop computers to the docking station. Each docking station will have specific connections for different devices, but commonly, you’ll need to connect the laptop using a USB cable and the desktop using a USB or Thunderbolt cable.
- Switch between the laptop and desktop: Most docking stations have a button or a software utility that allows you to switch between different computers connected to the docking station. Use the designated method to toggle between the laptop and desktop, and the monitor will display the output from the selected device.
Using a docking station offers a convenient way to connect both your laptop and desktop to a single monitor. It eliminates the need for constant cable swapping and allows you to quickly switch between the two devices. Additionally, docking stations often provide additional USB ports, Ethernet ports, and other useful connectivity options.
Keep in mind that when using a docking station, you may need to configure the display settings on your laptop and desktop to ensure the proper output resolution and display arrangement. Refer to the user manual of your docking station and computer for detailed instructions on configuring the display settings.
In the next section, we will explore another method: using a USB display adapter. So, let’s move on!
Method 3: Using a USB display adapter
If you want to connect two computers to a single monitor and you don’t have a docking station or KVM switch, using a USB display adapter can be a viable option. USB display adapters allow you to add an additional monitor to your computer through a USB port.
Here’s how you can set up a USB display adapter:
- Choose a compatible USB display adapter: Ensure that the USB display adapter you choose is compatible with the operating systems of both computers. Make sure it supports the necessary video output, such as VGA, DVI, or HDMI, to connect to your monitor.
- Install the required software: Most USB display adapters require specific drivers and software to be installed on your computers. Insert the provided driver disc or download the latest software from the manufacturer’s website and follow the installation instructions.
- Connect the USB display adapter: Connect the USB display adapter to the USB port of each computer. The adapter may have its own video output port, so make sure to use the appropriate cable to connect it to the monitor.
- Configure display settings: After connecting the USB display adapter, you may need to configure the display settings on each computer. Access the display settings through the operating system’s Control Panel or System Preferences and arrange the displays as needed.
Using a USB display adapter allows you to utilize an additional monitor, effectively connecting two computers to a single monitor setup. However, keep in mind that the performance of the USB display adapter may depend on factors such as the resolution and refresh rate of the monitor, the graphics capabilities of the computers, and the available USB bandwidth.
Ensure that your computers have adequate USB ports available and that they meet the minimum system requirements specified by the USB display adapter manufacturer. Some adapters may have limitations in terms of supported resolutions or video playback quality, so it’s important to check the product specifications before making a purchase decision.
In the next section, we will explore another method: using a VGA or HDMI splitter. This method allows you to duplicate the screen output from one computer to multiple monitors, including a single monitor. Let’s move on!
Method 4: Using a VGA or HDMI splitter
Another method for connecting two computers to a single monitor is by using a VGA or HDMI splitter. A splitter allows you to duplicate the screen output from one computer to multiple monitors, including a single monitor.
Here’s how you can set up a VGA or HDMI splitter:
- Choose a compatible splitter: Ensure that the VGA or HDMI splitter you choose matches the ports supported by your computers and monitor. VGA and HDMI splitters are commonly available and come in different configurations to support various monitor setups.
- Connect the splitter to the monitor: Connect one end of the VGA or HDMI cable to the output port of the splitter and the other end to the input port of your monitor. Make sure the cable is securely plugged in.
- Connect the computers to the splitter: Connect the VGA or HDMI cables from each computer to the input ports of the splitter. Each computer will now be sending its display signal to the splitter.
- Switch between computers: Some splitters may have a switch or button to toggle between the connected computers. Others may automatically display the output from both computers simultaneously. Refer to the splitter’s manual for instructions on switching between the computer outputs.
Using a VGA or HDMI splitter allows you to connect two computers to a single monitor and display their content simultaneously. This is useful for tasks that require visibility of both computers’ screens, such as monitoring multiple systems or comparing data side by side.
However, it’s important to note that using a splitter does not provide independent control over each computer’s display. Both computers will essentially be mirrored on the single monitor. Additionally, check the resolutions and refresh rates supported by the splitter to ensure compatibility with your monitor and computers.
In the next section, we will explore another method: using remote desktop software. This method allows you to access and control one computer from another, effectively utilizing a single monitor for both systems. Let’s continue!
Method 5: Using remote desktop software
If you want to connect two computers to a single monitor without any physical connections, using remote desktop software can be a convenient solution. Remote desktop software allows you to access and control one computer from another over a network connection.
Here’s how you can set up and use remote desktop software:
- Choose a remote desktop software: There are various remote desktop software options available, such as TeamViewer, Remote Desktop Connection (RDC) for Windows, Chrome Remote Desktop, or VNC (Virtual Network Computing). Select a software solution that is compatible with both computers’ operating systems.
- Install the remote desktop software: Install the chosen remote desktop software on both computers. Follow the installation instructions provided by the software vendor and ensure that both computers are connected to the same network.
- Configure the remote desktop software: Configure the remote desktop software by following the setup wizard or user interface instructions. Make sure to enable the necessary options for remote desktop access, such as display settings and access permissions.
- Connect to the remote computer: Launch the remote desktop software on the computer that you want to use as the primary system, which will be connected to the monitor. Enter the appropriate credentials or connection information to establish a remote connection to the secondary computer.
- Control the remote computer: Once the remote connection is established, you’ll be able to see and control the desktop of the secondary computer on the primary one. Use your primary computer’s keyboard and mouse to interact with the remote computer.
Using remote desktop software allows you to effectively utilize a single monitor for both computers without the need for physical connections. This method is particularly useful for accessing and controlling a computer located in a different room, office, or even in a different location altogether.
Keep in mind that for optimal performance, a stable network connection with sufficient bandwidth is necessary. Additionally, configure the remote desktop software settings to match your display preferences and ensure that both computers have the necessary permissions and security measures in place.
Now that you’ve explored various methods of connecting two computers to a single monitor, you can choose the method that best suits your needs. In the next section, we will discuss some factors to consider when selecting a method, as well as provide tips for setting up and troubleshooting the connection.
Factors to consider when choosing a method
When selecting a method to connect two computers to a single monitor, there are several factors you should consider:
- Number of computers: Determine how many computers you need to connect to a single monitor. Some methods, like using a KVM switch or VGA/HDMI splitter, can accommodate multiple computers, while others may be limited to connecting only two devices.
- Display requirements: Consider the display resolutions and refresh rates supported by your monitor and computers. Ensure that the chosen method can handle the desired display quality without compromising performance or compatibility.
- Peripheral sharing: If you want to share peripherals, such as a keyboard and mouse, between the connected computers, ensure that the method you choose supports peripheral sharing. Options like KVM switches and docking stations usually offer this functionality.
- Compatibility: Verify that the method is compatible with the operating systems and hardware of your computers. Not all methods may work seamlessly with every computer configuration, so make sure to check the system requirements and product compatibility before proceeding.
- Setup complexity: Consider your technical skills and comfort level when assessing the setup complexity of each method. Some methods may require more manual configuration, while others offer simple plug-and-play functionality.
- Budget: Determine your budget for connecting two computers to a single monitor. Different methods have varying costs, and pricing may depend on factors like the quality of the equipment, additional features, and brand reputation.
By considering these factors, you can make an informed decision and select the method that best suits your needs and constraints. Additionally, it’s important to refer to the user manuals and guides provided by the equipment manufacturers for detailed setup instructions specific to your chosen method.
In the next section, we will provide some useful tips for setting up and troubleshooting the connection between two computers and a single monitor. Let’s dive in!
Tips for setting up and troubleshooting the connection
When setting up and troubleshooting the connection between two computers and a single monitor, consider the following tips to ensure a smooth and reliable experience:
- Double-check the cables: Ensure that all cables are properly connected and securely plugged in. Loose or faulty connections can result in display issues or a lack of connectivity.
- Verify compatibility: Verify that your computers, monitor, and chosen method of connection are compatible with each other. Review the specifications and requirements of all components to ensure seamless compatibility.
- Update drivers and firmware: Keep your computer’s drivers and the firmware of the connected devices up to date. Check the manufacturer’s website for the latest driver and firmware updates to ensure optimal performance and compatibility.
- Adjust display settings: Configure the display settings on each computer to match the resolution, refresh rate, and orientation of your monitor. This can be done through the operating system’s display settings or the graphics control panel.
- Restart the devices: If encountering any issues with the connection, try restarting all devices involved in the setup. Sometimes, a simple reboot can resolve connectivity issues and refresh the system settings.
- Refer to user manuals: Consult the user manuals and guides provided by the manufacturers of your monitor and the chosen method of connection. These resources often contain troubleshooting steps and detailed setup instructions specific to your setup.
- Test individual components: If you are experiencing issues with the connection, try testing each component individually. Connect the monitor to each computer separately to ensure that the monitor and computers are functioning correctly.
- Check power sources: Ensure that all devices in the setup have a stable power source and are receiving adequate power. Power-related issues can cause connectivity problems or intermittent display failures.
By following these tips, you can eliminate common setup and connectivity issues and successfully connect two computers to a single monitor. Remember that troubleshooting connectivity problems may require patience and persistence, but with proper attention to detail, you can achieve a reliable and efficient setup.
Now that you have these tips at your disposal, you are ready to set up and troubleshoot the connection between your computers and the single monitor effectively.