
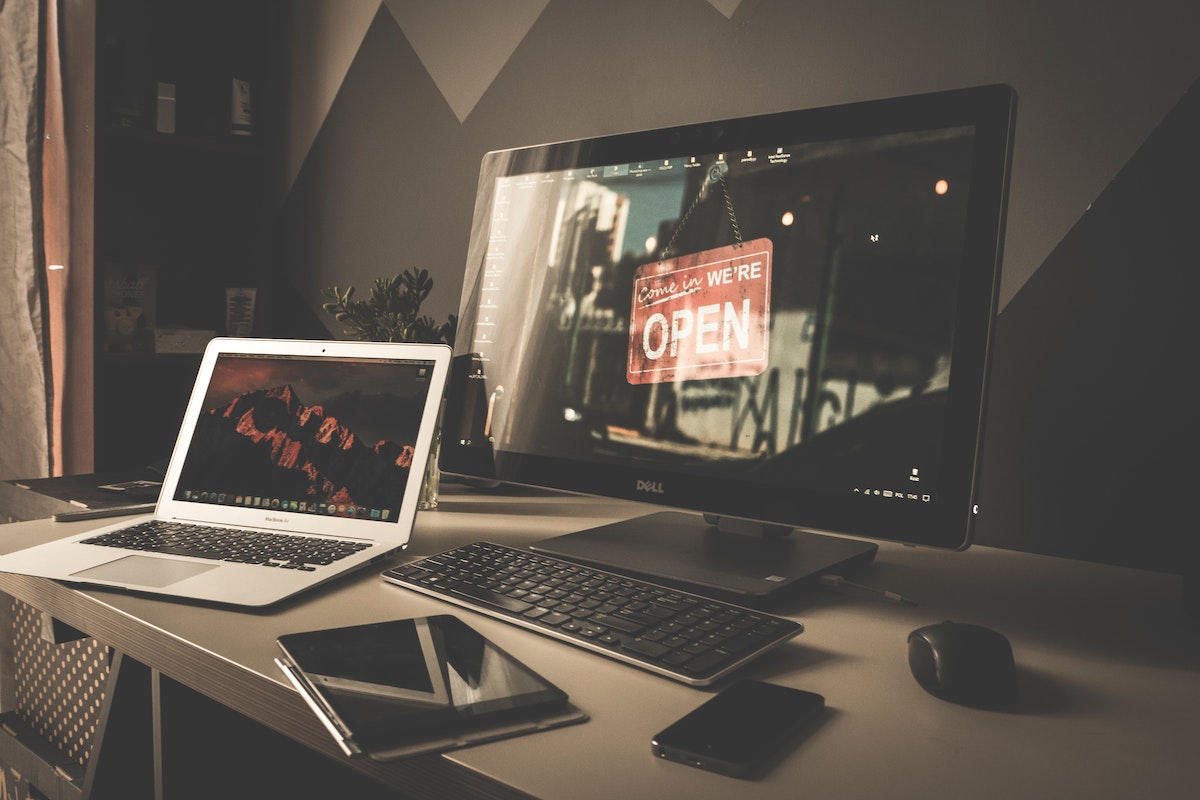
Determine the Type of Connection Needed
Before connecting your laptop to an external monitor, it is important to determine the type of connection that is needed. This will depend on the ports available on both your laptop and the external monitor. There are different types of video connectors, such as HDMI, VGA, DVI, and DisplayPort, each offering varying levels of video quality and compatibility.
The most common type of connection used for connecting laptops to external monitors is HDMI. HDMI (High-Definition Multimedia Interface) provides both high-quality audio and video transmission. It is found on most modern laptops and monitors. However, if your laptop or monitor does not have an HDMI port, there are alternative options available.
VGA (Video Graphics Array) is an older video connector that is still widely used on older laptops and monitors. While VGA does not support high-definition video, it can still provide a decent video quality for regular usage.
DVI (Digital Visual Interface) is another video connector option. It offers better video quality than VGA but does not support audio transmission. DVI ports come in different versions, including DVI-D (digital only), DVI-A (analog only), and DVI-I (integrated digital and analog). Make sure to check the ports on your laptop and monitor to ensure compatibility.
DisplayPort is a newer video connector that provides both high-definition video and audio transmission. It is commonly found on newer laptops and monitors and offers excellent video quality. DisplayPort also supports daisy-chaining, allowing you to connect multiple monitors to your laptop using a single cable.
Once you have determined the type of connection needed, you can proceed with checking the ports on your laptop and monitor to ensure compatibility. This will help you gather the necessary cables and adapters for the connection.
Check the Ports on Your Laptop and Monitor
Before connecting your laptop to an external monitor, it is essential to check the available ports on both your laptop and the monitor. This will help you determine the compatibility and ensure that you have the necessary cables and adapters for the connection.
Start by examining the ports on your laptop. Common port options include HDMI, VGA, DVI, and DisplayPort. These ports are typically located on the sides or back of your laptop. Look for the corresponding labels or symbols next to the ports to identify their type.
Next, inspect the ports on your external monitor. The ports available may vary depending on the make and model of your monitor. Look for the labels or symbols near the ports to identify the type of connections they support.
If both your laptop and monitor have HDMI ports, this is the simplest and most straightforward connection. HDMI cables provide high-quality transmission of both audio and video signals. Simply connect one end of the HDMI cable to the HDMI port on your laptop and the other end to the HDMI port on the monitor.
If your laptop has an HDMI port, but your monitor does not, you may need to use a different type of connector. For example, if your monitor has a VGA port, you will need an HDMI to VGA adapter. This adapter converts the HDMI signal from your laptop to VGA, allowing you to connect the two devices. Remember to also connect an audio cable if you want to transmit sound from your laptop to the monitor.
It is important to note that not all laptops and monitors support all types of connections. Ensure the compatibility of the ports before purchasing any adapters or cables. If you are unsure about the ports or need further assistance, consult the user manuals or contact the manufacturers’ support teams for guidance.
Once you have identified the available ports and gathered the necessary cables and adapters, you are ready to proceed with connecting your laptop to the external monitor.
Gather the Necessary Cables and Adapters
Before connecting your laptop to an external monitor, it is essential to gather the necessary cables and adapters based on the type of connection required. Ensuring that you have the correct cables and adapters will help facilitate a seamless and successful connection.
If both your laptop and external monitor have HDMI ports, you will only need an HDMI cable. Make sure to check the length of the cable to ensure it is long enough to reach between the two devices comfortably. HDMI cables come in various lengths, ranging from a few feet to over 50 feet.
However, if your laptop has an HDMI port, but your monitor has a different type of port, such as VGA, DVI, or DisplayPort, you will need the appropriate adapter. Look for an HDMI to VGA/DVI/DisplayPort adapter that supports audio transmission if needed. These adapters come in different configurations, so make sure to choose the one that matches your specific requirements.
In some cases, you may require additional cables to complete the connection. For example, if you are using a VGA adapter, you will need a separate audio cable to transmit sound from your laptop to the monitor. Check the connection options on both your laptop and monitor to determine if any additional cables are necessary.
It is crucial to ensure that the cables and adapters you choose are of high quality to maintain optimal signal transmission. Cheap or low-quality cables can lead to poor video quality, audio interruptions, or even connection issues. Look for reputable brands and read reviews to ensure you are purchasing reliable and durable cables and adapters.
If you are uncertain about the specific cables or adapters required for your laptop and monitor, consult the user manuals or contact the manufacturers’ support teams. They will be able to provide you with accurate information and guide you in selecting the appropriate cables and adapters for your setup.
Once you have gathered all the necessary cables and adapters, you are ready to proceed with connecting your laptop to the external monitor.
Power Off Your Laptop and Monitor
Before connecting your laptop to an external monitor, it is crucial to power off both your laptop and the monitor. This ensures a safe and proper connection, minimizing the risk of any electrical damage or interference.
Start by shutting down your laptop properly. Save any unsaved work and close all open applications. Once you have done so, click on the “Start” menu, usually located at the bottom left corner of the screen, and select “Shutdown” or “Power Off”. Wait for your laptop to completely power down before proceeding.
Next, turn off the external monitor. Locate the power button, usually located either on the front or side of the monitor. Press the power button to turn the monitor off. Ensure that the power indicator light on the monitor is no longer illuminated, indicating that the monitor is fully powered off.
It is essential to power off both devices to avoid any electrical surges or conflicts when connecting or disconnecting them. This helps protect the sensitive components and ensures a smooth and successful connection between your laptop and the external monitor.
Additionally, powering off both the laptop and monitor allows for a clean start when configuring the display settings and ensures that the connection is recognized correctly by your laptop’s operating system.
Once you have powered off both your laptop and the monitor, you are ready to proceed with the physical connection between the two devices.
Connect Your Laptop to the External Monitor
Now that you have determined the type of connection needed, checked the ports, gathered the necessary cables and adapters, and powered off your laptop and monitor, you can proceed with connecting your laptop to the external monitor. Follow these steps to ensure a successful connection:
- Locate the appropriate video output port on your laptop. For example, if you are using an HDMI connection, find the HDMI port.
- Take one end of the HDMI cable (or the appropriate cable) and insert it into the corresponding port on your laptop. Make sure it is securely connected.
- Now, locate the video input port on your external monitor. Depending on the type of connection, it may be an HDMI, VGA, DVI, or DisplayPort port.
- Take the other end of the cable and insert it into the video input port on the monitor. Ensure that it is firmly connected.
- If you are using an adapter, connect one end of the adapter to the video output port on your laptop and the other end to the video input port on the monitor.
- If applicable, connect any accompanying audio cables into the appropriate ports on both your laptop and the monitor. This will enable the transmission of audio signals from your laptop to the monitor, providing sound.
- Inspect all the connections and ensure that they are secure and properly inserted. This will help avoid any signal interruptions or loose connections during use.
Once you have completed these steps, you have successfully connected your laptop to the external monitor. The two devices should now be ready to be powered on and configured.
Remember, always refer to the user manuals of your laptop and monitor for specific instructions or consult the manufacturers’ support if you encounter any issues or have any concerns during the connection process.
Power on Your Laptop and Monitor
After successfully connecting your laptop to the external monitor, it’s time to power on both devices. Following these steps will ensure that your laptop and monitor are functioning properly together:
- Press the power button on your laptop to turn it on. Wait for the operating system to load.
- If your laptop has multiple display options, such as duplicating or extending the display, press the appropriate key combination, usually Windows key + P on Windows or Command + F1 on Mac, to open the display settings menu. Select the desired display mode based on your preference.
- Next, press the power button on your external monitor to turn it on. Allow a few seconds for the monitor to warm up and display the video signal from your laptop.
- Observe both the laptop and external monitor screens to ensure that the display appears as desired. If not, refer to the troubleshooting tips provided later in this article.
- Once both devices are powered on and the display is functioning correctly, make any additional adjustments you may need, such as adjusting the brightness or contrast levels on the monitor.
Powering on your laptop and monitor in this sequence allows the laptop’s operating system to recognize and configure the external monitor appropriately. By following these steps, you should now have a functioning dual monitor setup with your laptop and the external monitor.
If you experience any difficulties during the power-on process, refer to the troubleshooting tips provided later in this article. These tips can help address common issues that may arise when connecting and configuring an external monitor.
Now that your laptop and monitor are powered on and displaying the desired content, you can proceed to configure the display settings on your laptop for optimal usage and productivity.
Configure Display Settings on Your Laptop
Once your laptop and external monitor are powered on and connected, it’s important to configure the display settings on your laptop to ensure optimal usage and productivity. Follow these steps to adjust the display settings:
- On your laptop, right-click on the desktop and select “Display settings” from the context menu.
- In the display settings menu, you will see options to adjust the resolution, orientation, and other display settings.
- Select the external monitor from the available display options. It may appear as “Monitor 2” or with the name of the monitor itself.
- Choose the desired display mode. You can choose to duplicate the display, extend it, or use the external monitor as the primary display.
- Adjust the resolution based on your preference. Higher resolutions provide sharper images, but they may also make the content appear smaller. Choose a resolution that balances clarity and comfort.
- Depending on your operating system, you may also have options to adjust the screen orientation (landscape, portrait), scale and layout, and color calibration.
- Make any additional adjustments or customizations you desire, such as setting the taskbar to appear on only one screen or adjusting the screen timeout settings.
- Click “Apply” or “OK” to save the changes. Your laptop will now adapt to the configured display settings.
Configuring the display settings allows you to optimize the usage of your laptop and external monitor, whether you’re working, watching videos, or playing games. Take some time to experiment with different settings to find what works best for you.
If you encounter any issues during the configuration process or are unable to make the desired changes, refer to the troubleshooting tips later in this article. Sometimes, certain graphics drivers or software settings may affect the display configuration on your laptop. Updating or reinstalling the relevant drivers can often resolve any display-related issues.
By carefully adjusting and customizing the display settings, you can maximize your productivity and enjoy a seamless dual monitor experience with your laptop and external monitor.
Adjust the Display Position and Resolution
After configuring the display settings on your laptop, you may need to further adjust the display position and resolution to ensure optimal visual alignment and clarity. Follow these steps to make necessary adjustments:
- On your laptop, go to the display settings as mentioned in the previous section.
- Select the external monitor from the available display options.
- Under the display settings for the external monitor, you will find options to adjust the position and resolution.
- If the external monitor is not aligning correctly with your laptop’s screen, you can drag and drop the monitor icon to the desired position.
- Alternatively, you may find options to enter specific coordinates or adjust the orientation (vertical or horizontal) of the monitor.
- To adjust the resolution, choose the desired resolution from the available options. Higher resolutions provide sharper images, while lower resolutions may result in larger and more visible elements.
- After making the necessary adjustments, click “Apply” or “OK” to save the changes.
- Observe the display on both the laptop and the external monitor to ensure that the position and resolution are visually pleasing and optimized for your needs.
By adjusting the display position, you can ensure that the mouse cursor moves seamlessly between the laptop screen and the external monitor. This eliminates the need for any awkward mouse movements.
Additionally, adjusting the resolution allows you to balance between sharpness and size of the content displayed on the external monitor. Choose a resolution that provides clear visuals without sacrificing legibility.
If you find that the adjustments are not resolving any alignment or clarity issues, it is possible that your laptop’s graphics drivers may need updating. Visit the manufacturer’s website or use applicable driver update software to download and install the latest graphics drivers for your laptop.
Take the time to experiment with different display positions and resolutions until you find the setup that works best for you. Adjustable display settings offer the flexibility to create a dual monitor workspace that enhances your productivity and visual experience.
Troubleshooting Tips and Common Issues
While connecting a laptop to an external monitor is generally a straightforward process, there may be certain issues that arise. Here are some troubleshooting tips to help you resolve common problems:
- No display on the external monitor: Double-check the cable connections and ensure they are secure. Try using a different cable or port, and verify that the monitor is powered on. If the issue persists, try updating your laptop’s graphics drivers.
- Incorrect display or resolution: Adjust the display settings on your laptop, ensuring the selected resolution matches the capabilities of the external monitor. Update your graphics drivers if necessary.
- Inconsistent or flickering display: Check if the cable connections are tight and undamaged. Change the refresh rate to the recommended setting, or try a different cable or port. If the issue persists, check for interference from other electronic devices nearby.
- No sound from the external monitor: Ensure that an audio cable is properly connected between your laptop and the monitor, if required. Check the audio settings on your laptop to confirm the correct output device is selected.
- External monitor not detected: Confirm that your laptop supports multiple displays. Try restarting your laptop and monitor, or disconnect and reconnect the cable. Update your graphics drivers if necessary.
- Display sharing or extending issues: Verify that the correct display mode is selected in the display settings. Press the appropriate key combination (e.g., Windows key + P) to toggle between display modes. Ensure that the selected mode matches your intended usage.
If you encounter any other issues not mentioned here, consult the user manuals of your laptop and monitor for specific troubleshooting steps. Additionally, you can reach out to the manufacturers’ support teams for further assistance.
Remember, patience and a systematic approach are key when troubleshooting. By following these tips and utilizing available resources, you can overcome common issues and enjoy a successful connection between your laptop and the external monitor.
Frequently Asked Questions (FAQs)
Here are some frequently asked questions about connecting a laptop to an external monitor:
- 1. Can I connect any laptop to an external monitor?
- 2. What if my laptop and external monitor have different video ports?
- 3. How do I switch between the laptop screen and the external monitor?
- 4. Why is my external monitor not displaying anything?
- 5. Can I use multiple external monitors with my laptop?
- 6. How do I adjust the display resolution on the external monitor?
In most cases, yes. As long as your laptop has a compatible video output port, such as HDMI, VGA, DVI, or DisplayPort, you should be able to connect it to an external monitor.
If your laptop and monitor have different video ports, you can use an adapter or a converter cable to bridge the connection. For example, you can use an HDMI to VGA adapter if one device has an HDMI port and the other has a VGA port.
You can typically switch between the laptop screen and the external monitor by using the appropriate key combination on your keyboard. For Windows laptops, press the Windows key + P to open the display settings menu and choose the desired display mode.
Double-check the cable connections between the laptop and the monitor, ensuring they are secure. Make sure the monitor is powered on. If the issue persists, try using a different cable or port, and update your laptop’s graphics drivers.
It depends on your laptop’s capabilities. Some laptops support multiple external monitors, while others may only support a single external display. Check your laptop’s specifications or the user manual to determine its multi-monitor capabilities.
To adjust the display resolution, go to the display settings on your laptop. Select the external monitor and choose the desired resolution from the available options.
If you have any other questions or encounter specific issues, don’t hesitate to consult the user manuals of your laptop and the monitor, or contact the manufacturers’ support teams for further assistance.