
Check the Ports on Your Dell Laptop and Monitor
Before you can connect your Dell laptop to a monitor, it’s important to check the ports on both your laptop and the monitor to ensure compatibility and determine what cables or adapters you may need.
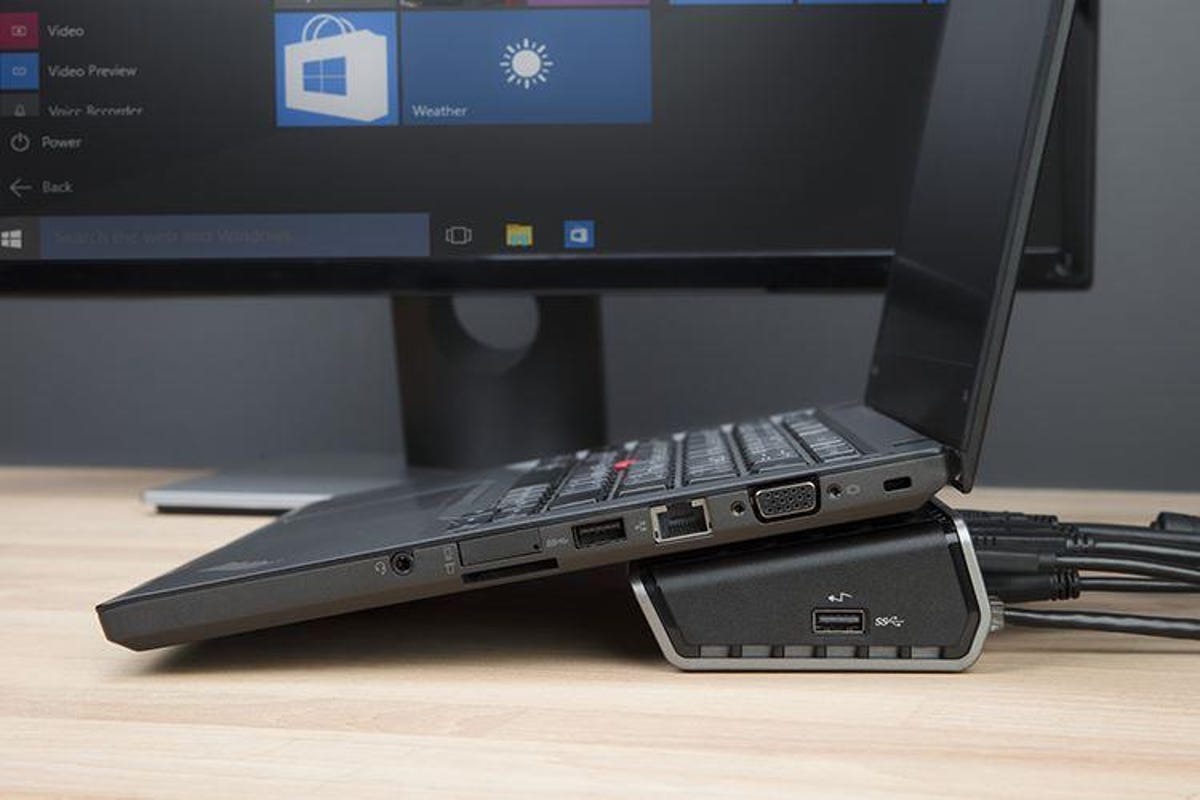
Start by examining the ports on your Dell laptop. Most modern Dell laptops come equipped with at least one HDMI port, which is the most common video output port. Other possible video ports on your Dell laptop might include VGA, DVI, and DisplayPort. Take note of the available ports as this will help you choose the appropriate cable or adapter.
Next, check the ports on your monitor. The most commonly used ports on monitors are HDMI, VGA, and DVI. However, some more recent models might feature DisplayPort or USB-C ports. Make sure the monitor has a compatible port that matches one of the available ports on your Dell laptop.
If your Dell laptop and monitor have matching ports (e.g., HDMI to HDMI or VGA to VGA), you can proceed with a direct cable connection. However, if the ports do not match, you will need to use an appropriate adapter to bridge the connection between the laptop and monitor.
It’s worth noting that different Dell laptop models may have different port configurations, and monitor models may vary as well. So, make sure to consult the documentation for your specific laptop and monitor models or visit the respective Dell support websites to obtain accurate information regarding the ports on your devices.
Once you have identified the available ports on your Dell laptop and monitor, and determined the compatibility between them, you can proceed to gather the necessary cables and adapters, which will be discussed in the next section.
Gather the Necessary Cables and Adapters
Now that you have checked the ports on your Dell laptop and monitor, it’s time to gather the necessary cables and adapters to establish the connection between the two devices. Depending on the available ports and the compatibility of your laptop and monitor, you may need different cables and adapters.
If both your Dell laptop and monitor have HDMI ports, you can simply use an HDMI cable to connect them. HDMI cables are widely available and support high-definition video and audio signals. Make sure to choose a cable that matches the HDMI version supported by your devices, such as HDMI 1.4 or HDMI 2.0.
If your laptop has a DisplayPort and your monitor only has HDMI, you will need a DisplayPort to HDMI adapter. This adapter will allow you to connect the DisplayPort output of your laptop to the HDMI input of your monitor, ensuring compatibility between the two.
In case your Dell laptop only has VGA or DVI ports, and your monitor features HDMI or DisplayPort, you will need a VGA to HDMI or DVI to HDMI adapter, respectively. These adapters will help convert the analog VGA or DVI signals from your laptop into digital HDMI signals that your monitor can recognize.
It’s important to select high-quality cables and adapters to ensure a reliable and stable connection. While there are budget options available, it’s recommended to choose cables and adapters from reputable brands to avoid signal loss or compatibility issues.
Remember to check the length of the cables based on the distance between your laptop and monitor. Opt for a cable that provides ample length to avoid strain or limitation on the placement of your devices.
Once you have gathered the required cables and adapters, you are ready to proceed with the connection process. In the next sections, we will guide you through the steps to connect your Dell laptop to a monitor and adjust the display settings.
Power Off Your Dell Laptop and Monitor
Before you begin connecting your Dell laptop to a monitor, it is essential to power off both your laptop and the monitor to ensure a safe and successful connection.
Start by shutting down your Dell laptop properly. Save any unsaved work, close all applications, and click on the “Start” menu. Select the “Power” option and then choose “Shut down” to turn off your laptop. Wait for the laptop to completely power down before proceeding to the next step.
Next, locate the power button on your monitor and press it to turn off the monitor. The power button is usually located on the front or side of the monitor, and it may have a distinctive icon or label indicating its function. Once the monitor is powered off, ensure that it is disconnected from any power sources, such as the electrical outlet or power strip.
By powering off both your Dell laptop and monitor, you are ensuring that no electrical power is flowing through them, eliminating the risk of any potential electrical shocks or damage during the connection process.
It’s important not to skip this step, as attempting to connect or disconnect cables while the devices are powered on can lead to unexpected issues or even damage the laptop or monitor. Taking the time to power off your devices contributes to a smooth and trouble-free connection experience.
Once you have powered off your Dell laptop and monitor, you are ready to proceed with the next steps of connecting the cables and adapters. In the following sections, we will guide you through the process of connecting the power cable to your monitor and the video cable to your Dell laptop.
Connect the Power Cable to Your Monitor
After powering off your Dell laptop and monitor, you can now proceed with connecting the power cable to your monitor. This step ensures that your monitor receives the necessary electrical power to function properly.
Start by locating the power input port on your monitor. This port is usually located on the back or bottom of the monitor and is labeled as “Power” or may have an icon representing a power plug. Once you have located the power input port, take the power cable that came with your monitor or a compatible power cable and insert one end into the power input port of the monitor.
Make sure that the power cable is securely inserted into the power input port and that it fits snugly. Ensure that there are no loose connections or damages to the power cable before proceeding.
Next, locate the power outlet or surge protector near your setup area. Insert the other end of the power cable into the power outlet or the appropriate socket on the surge protector. Ensure that the power cable is securely plugged in and that there are no exposed wires or loose connections.
Once the power cable is connected to both the monitor and the power source, you can now power on your monitor. Locate the power button on your monitor, usually located on the front or side, and press it to turn on the monitor. You should see an indication light or the monitor’s logo illuminating to show that power is being supplied.
Wait for a few seconds for the monitor to initialize and display the default screen. Depending on your monitor model, it may take a few moments for the display to become active.
Now that your monitor is successfully connected to a power source, you can proceed to the next step of connecting the video cable to your Dell laptop. This will allow you to establish the visual connection between your laptop and the monitor, which we will cover in the next section.
Connect the Video Cable to Your Dell Laptop
With your monitor powered on, it’s time to connect the video cable to your Dell laptop to establish the visual connection between the two devices.
Start by locating the appropriate video output port on your Dell laptop. Common video output ports found on Dell laptops include HDMI, VGA, DVI, and DisplayPort. Take note of the available ports and determine which one matches the video input port on your monitor. This will assist you in selecting the correct video cable or adapter.
If both your Dell laptop and monitor have HDMI ports, use an HDMI cable to connect the two devices. Insert one end of the HDMI cable into the HDMI output port on your laptop and the other end into the HDMI input port on your monitor. Ensure the cable is firmly connected to both devices.
For laptops with DisplayPort output and monitors with HDMI input, you will need a DisplayPort to HDMI adapter. Connect the DisplayPort end of the adapter to the laptop’s DisplayPort output, then connect one end of the HDMI cable to the HDMI input on the adapter, and the other end to the HDMI input on the monitor.
If your Dell laptop has a VGA or DVI output and your monitor has an HDMI or DisplayPort input, you will require a VGA to HDMI or DVI to HDMI adapter. Connect your laptop’s VGA or DVI output to the corresponding adapter, then use an HDMI cable to connect the adapter’s HDMI output to the monitor’s HDMI input. Ensure all connections are secure.
It’s important to note that when using adapters, you may need to connect additional cables for audio transmission, as VGA and some DVI ports do not support audio. In such cases, you might need a separate audio cable to connect the audio output from your laptop to the audio input on your monitor or external speakers.
Once you have connected the video cable from your Dell laptop to the monitor, power on your laptop. The monitor should automatically detect the signal and display the laptop’s screen. In some cases, you might need to configure the display settings on your laptop to extend or duplicate the screen onto the monitor.
In the next section, we will discuss how to adjust the display settings on your Dell laptop to ensure the optimum viewing experience with your connected monitor.
Power On Your Monitor and Dell Laptop
With the video cable successfully connected between your Dell laptop and monitor, it’s time to power on both devices and ensure a proper display connection.
Start by powering on your monitor. Locate the power button on the front or side of the monitor and press it to turn the monitor on. You should see the power indicator light up or the monitor’s logo appear on the screen. Give the monitor a few moments to fully initialize.
Next, turn on your Dell laptop. Locate the power button, usually located on the top or side of the laptop’s keyboard or on the edge of the laptop. Press the power button to boot up your laptop, and wait for the operating system to load. The laptop’s screen will display the startup process and eventually show the desktop or login screen.
As the laptop boots up, it will send a video signal through the connected video cable to the monitor. The monitor should detect the signal and display the laptop’s screen accordingly. If the display does not appear on the monitor, ensure that the video cable is securely connected on both ends and verify that the correct input source is selected on the monitor.
If the laptop’s screen and the monitor’s display do not mirror each other or if you prefer to use the monitor as an extended desktop, you can adjust the display settings on your Dell laptop. Right-click on an empty area of the desktop, select “Display settings” from the context menu, and configure the desired display settings, such as resolution, orientation, and multiple monitor setup.
Once the display settings are adjusted to your preference, you can start using your Dell laptop with the connected monitor. You may find it beneficial to position the monitor at eye level and adjust the laptop’s screen angle for a comfortable viewing experience.
Remember that when you are finished using the monitor or need to disconnect your Dell laptop, it is recommended to power off the devices in reverse order. First, power off the laptop, and then power off the monitor. This sequence ensures a smooth disconnection process.
In the next section, we will discuss how to troubleshoot common display issues that you may encounter when connecting your Dell laptop to a monitor.
Adjust the Display Settings on Your Dell Laptop
Once you have successfully connected your Dell laptop to a monitor, it’s important to adjust the display settings to ensure the best viewing experience.
To begin, right-click on an empty area of the desktop and select “Display settings” from the context menu that appears. This will open the Display settings menu, where you can customize various aspects of the display.
The first setting you may want to adjust is the screen resolution. Screen resolution determines the number of pixels displayed on the screen and affects the clarity and sharpness of the image. Select the desired resolution from the available options. For most users, the recommended resolution is the native resolution of the monitor, which provides the best image quality.
In addition to resolution, you can also adjust the screen orientation. Click on the “Orientation” dropdown menu and select either “Landscape” or “Portrait” mode, depending on your preference and how you have positioned your monitor. This setting is particularly useful if you are using the monitor in a vertical orientation for certain types of work.
If you are using multiple monitors, you can configure their arrangement and positioning in the “Multiple displays” section. You can choose to extend your desktop across multiple monitors, duplicate the display on all connected screens, or use only one of the displays. Drag and drop the monitors in the graphical representation to match their physical arrangement.
Other display settings you can customize include the brightness and contrast, which can be adjusted using the respective sliders. These settings allow you to optimize the visual quality and achieve the desired level of brightness and contrast that suits your preference.
Moreover, some Dell laptops offer additional display features, such as color temperature adjustment or blue light filters, which can enhance the viewing experience and reduce eye strain. Explore the available options in the Display settings menu to see if these features are available on your laptop.
Once you have adjusted the display settings to your liking, click on the “Apply” button to save the changes. Your Dell laptop will update the display accordingly, and you can assess if the changes enhance your viewing experience.
If you encounter any issues or have difficulty adjusting the display settings, consult the user manual or visit Dell’s support website for detailed instructions and troubleshooting guidance specific to your laptop model.
In the next section, we will address common display issues that you may encounter when connecting your Dell laptop to a monitor and provide troubleshooting tips to resolve them.
Troubleshoot Display Issues
While connecting your Dell laptop to a monitor can enhance your workspace and productivity, you may encounter display issues that require troubleshooting. Here are some common display issues and troubleshooting steps to help you address them:
No Display: If your monitor isn’t displaying anything after connecting it to your Dell laptop, double-check that the video cable is securely connected to both devices. Verify that the monitor is powered on and the correct input source is selected. If possible, test the monitor with a different laptop or computer to determine if the issue lies with the monitor or laptop.
Incorrect Resolution: If the display appears blurry or the resolution is not set correctly, go to the display settings on your Dell laptop and adjust the screen resolution to match the native resolution of your monitor. Also, ensure that the monitor’s settings are configured properly. You may need to consult the user manual for your monitor to navigate the menu settings.
Extended Display Not Working: If you are using the extended display mode and it’s not functioning as expected, confirm that the monitor is set to extend the desktop. Right-click on an empty area of the desktop, select “Display settings,” and under the “Multiple displays” section, choose “Extend these displays.” Reboot your laptop and monitor after making any changes to ensure they take effect.
No Audio: If you are using an HDMI or DisplayPort connection and there is no sound coming from the monitor’s speakers, check that the audio is not muted on your laptop. Adjust the audio settings on your laptop by right-clicking on the volume icon in the taskbar, selecting “Open Volume Mixer,” and confirming that the volume levels are not turned down or muted for the specific application or system sounds.
Flickering or Distorted Display: If your monitor’s display is flickering or distorted, ensure that the video cable is firmly connected at both ends, as loose connections can cause display problems. Additionally, update your laptop’s graphics drivers to the latest version, as outdated drivers can sometimes cause display issues. Visit Dell’s support website or the graphics card manufacturer’s website to download and install the latest drivers for your specific laptop model.
Compatibility Issues: In some cases, incompatible hardware or software can cause display issues when connecting your Dell laptop to a monitor. Verify that your laptop and monitor are compatible in terms of video ports and resolution capabilities. Check for any firmware updates for your monitor or BIOS updates for your laptop that may address compatibility issues.
If you have tried the troubleshooting steps above and the display issues persist, consider reaching out to Dell’s support for further assistance. They can provide specific guidance tailored to your Dell laptop model and help you resolve any persistent display problems.
By troubleshooting display issues effectively, you can ensure a smooth and seamless experience when using your Dell laptop with an external monitor.
Connect External Speakers (Optional)
If you prefer to enhance your audio experience while using your Dell laptop with a monitor, you have the option to connect external speakers. This can provide richer sound quality for a more immersive audio experience.
Start by selecting the external speakers that you wish to connect. These can include desktop speakers, bookshelf speakers, soundbars, or even a separate audio system. Ensure that the speakers have the appropriate input options to connect to your Dell laptop. Common connection options include 3.5mm audio jack, USB, or Bluetooth.
If your external speakers have a 3.5mm audio jack, locate the audio output port on your Dell laptop. This is typically a green-colored port labeled with a headphone or speaker icon. Connect one end of the audio cable to the audio output port on your laptop and the other end to the corresponding input port on the speakers.
If your external speakers connect via USB, simply insert the USB connector into an available USB port on your Dell laptop. The speakers should be automatically recognized, and the audio output will be redirected to the external speakers.
For speakers that use Bluetooth connectivity, ensure that Bluetooth is enabled on your Dell laptop. Put your external speakers in pairing mode and search for them using the Bluetooth menu on your laptop. Once the speakers appear in the list of available devices, select them and complete the pairing process. The audio output will now be streamed wirelessly to the speakers.
After connecting the external speakers, adjust the volume on both your Dell laptop and the speakers to achieve the desired sound level. You may need to consult the user manual for your specific speakers to find the volume controls.
If you encounter any issues with audio playback or sound quality, ensure that the speakers are powered on and the volume is turned up. Also, make sure that the speakers are selected as the default audio output device in your laptop’s sound settings. Right-click on the volume icon in the taskbar, select “Open Volume Mixer,” and verify that the default device is set to the external speakers.
Remember that if you have connected external speakers to your Dell laptop, you may need to adjust audio settings specifically for those speakers. Some speakers have their own software or control panels that allow you to customize audio settings such as equalizers or surround sound effects.
Connecting external speakers to your Dell laptop is an optional step that can significantly enhance your audio experience. By following these steps, you can enjoy better sound quality and immerse yourself in your favorite music, movies, or games.
Disconnecting Your Laptop from the Monitor
When you’re ready to disconnect your Dell laptop from the monitor, it’s important to follow the proper steps to ensure a safe disconnection and avoid any potential damage to your devices.
Start by powering off your Dell laptop. Save any unsaved work, close all applications, and click on the “Start” menu. Select the “Power” option and then choose “Shut down” to turn off your laptop. Wait for your laptop to completely power down before proceeding to the next step.
Once your laptop is powered off, locate the video cable that connects your laptop to the monitor. Gently grip the connector that plugs into your laptop and carefully disconnect it by pulling straight out. Avoid twisting or bending the cable excessively, as this can cause damage to the cable or the port on your laptop.
Next, proceed to disconnect the other end of the video cable from the monitor itself. Again, handle the cable with care and remove it by pulling it straight out from the monitor’s input port. Be mindful not to apply excessive force or put strain on the monitor’s port during the disconnection process.
If you have any additional cables or adapters connected to your Dell laptop, such as audio cables or USB connectors, disconnect them in a similar manner, ensuring a gentle and straight pull to release them from their respective ports.
Once all the cables are disconnected, you can power off your monitor by locating the power button and pressing it to turn off the monitor. Wait a few moments for the monitor to complete its shutdown process before proceeding.
Finally, neatly organize and store the cables and adapters for future use, ensuring that they are free from any tangles or knots. This will help prolong their lifespan and make it easier for future connections.
It is important to note that while disconnecting your laptop from the monitor, it’s a good practice to keep the connectors clean and free from dust or debris. Gently wipe the connectors with a soft, lint-free cloth if necessary.
By following these steps and taking care when disconnecting your laptop from the monitor, you can ensure a smooth disconnection process and maintain the longevity of your devices.