
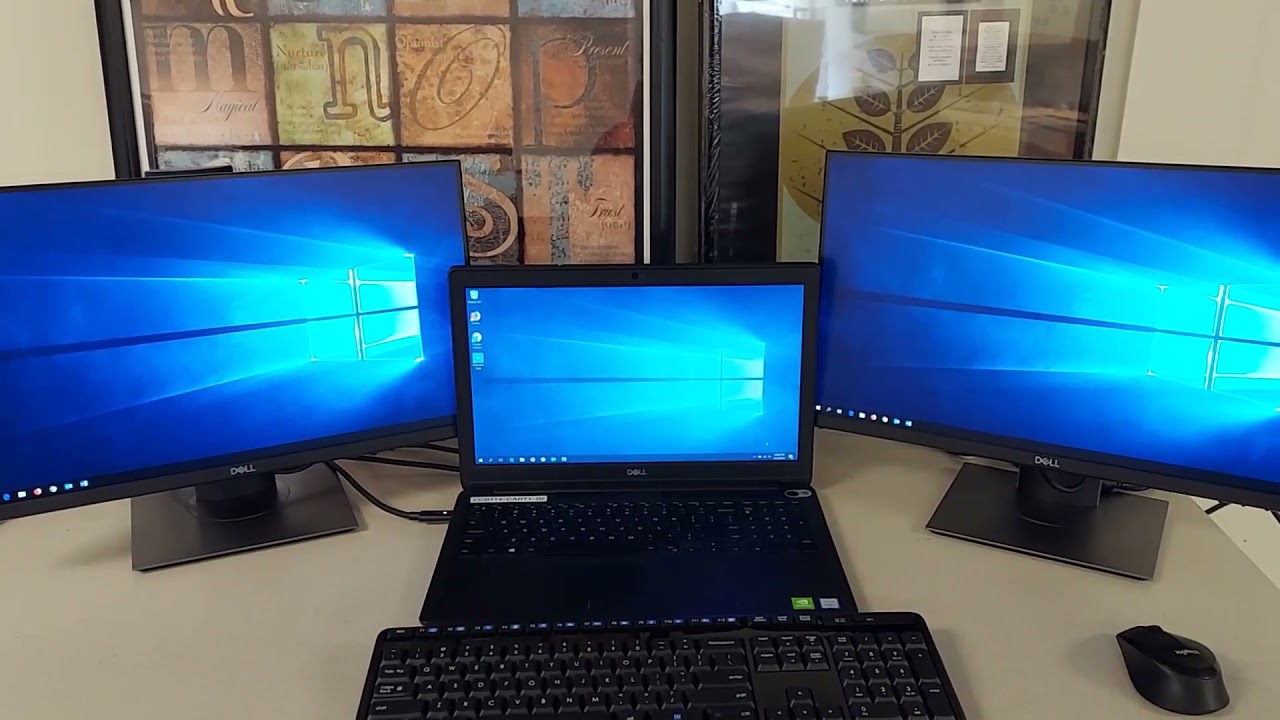
Preparing Your Dell Laptop and Monitor
Before connecting your Dell laptop to a monitor, it is essential to ensure that both devices are ready and compatible for the connection. Follow these steps to prepare your Dell laptop and monitor:
- Check the laptop’s video ports: Examine your Dell laptop to identify the available video ports. Common ports include HDMI, VGA, DVI, and DisplayPort. Take note of the types of ports your laptop has so you can choose the appropriate cable.
- Confirm the monitor’s input ports: Look at the back of your monitor and verify the available input ports. Match the ports with the ones on your laptop to ensure compatibility. If the monitor has multiple ports, consider which one would work best for your needs.
- Ensure the laptop and monitor are powered off: It is advisable to turn off both the laptop and the monitor before making any connections. This prevents any potential damage to the devices or interference during the connection process.
- Gather the necessary cables: Depending on the ports available on your laptop and monitor, gather the appropriate cables for connecting the two devices. Ensure that the cables are in good condition, without any visible damage or fraying.
By following these preliminary steps, you can ensure that both your Dell laptop and monitor are ready for the connection process. Taking the time to prepare properly will help avoid any unnecessary complications during the setup process.
Connecting the Dell Laptop to the Monitor Using an HDMI Cable
Connecting your Dell laptop to a monitor using an HDMI cable is one of the simplest and most common methods. Here’s how you can do it:
- Locate the HDMI port: Identify the HDMI port on your Dell laptop. It is usually found on the side or back of the laptop and is labeled as “HDMI”.
- Identify the HDMI input on the monitor: Look for the HDMI input on the back or side of the monitor. It is usually labeled as “HDMI” and is typically located near the other video input ports.
- Connect one end of the HDMI cable to the laptop: Insert one end of the HDMI cable into the HDMI port on your Dell laptop until it fits securely.
- Connect the other end of the HDMI cable to the monitor: Take the other end of the HDMI cable and connect it to the HDMI input on the monitor. Ensure it is tightly secured.
- Power on the laptop and the monitor: Once both ends of the HDMI cable are securely connected, you can power on both the laptop and the monitor.
- Switch the monitor input: Most monitors have multiple input options. Use the monitor’s menu or buttons to switch the input to HDMI mode. This allows the monitor to recognize the laptop’s signal.
- Adjust display settings: On your Dell laptop, go to the display settings and configure the screen resolution, orientation, and other display preferences according to your requirements.
Once these steps are completed, your Dell laptop should be successfully connected to the monitor using an HDMI cable. You will now be able to extend your screen or use the monitor as the primary display, depending on your desired setup.
Connecting the Dell Laptop to the Monitor Using a VGA Cable
If your Dell laptop and monitor do not have HDMI ports, you can still connect them using a VGA cable. Follow these steps to connect your Dell laptop to the monitor using a VGA cable:
- Find the VGA ports: Locate the VGA port on your Dell laptop. It is a trapezoidal-shaped port usually labeled as “VGA” and is often found on the back or side of the laptop.
- Identify the VGA input on the monitor: Look for the VGA input port on the back or side of the monitor. It is usually labeled as “VGA IN” or “PC IN”.
- Connect the VGA cable to the laptop: Take the VGA cable and insert one end into the VGA port on your Dell laptop. Ensure that it is securely connected.
- Connect the VGA cable to the monitor: On the other end of the VGA cable, plug it into the VGA input on the monitor. Make sure it is tightly secured.
- Attach the audio cable (if needed): If you want to transmit audio from your laptop to the monitor, connect a separate audio cable from the laptop’s audio output to the audio input on the monitor. This step is optional if you plan to use the laptop’s speakers or external speakers instead.
- Power on the laptop and the monitor: Once both ends of the VGA cable are securely connected, you can turn on both the laptop and the monitor.
- Adjust display settings: On your Dell laptop, go to the display settings and configure the screen resolution, orientation, and other display preferences according to your needs.
After following these steps, your Dell laptop should be successfully connected to the monitor using a VGA cable. Remember that VGA does not support high-definition video, so the display quality may be lower compared to HDMI or other digital connections. Nonetheless, it still allows you to use an external monitor to extend your laptop’s screen or set it as the primary display.
Connecting the Dell Laptop to the Monitor Using a DVI Cable
If your Dell laptop and monitor have DVI ports, you can connect them using a DVI cable. Follow these steps to connect your Dell laptop to the monitor using a DVI cable:
- Locate the DVI ports: Identify the DVI port on your Dell laptop. It is usually rectangular in shape with several pins and is often labeled as “DVI”. It may be located on the back or side of the laptop.
- Identify the DVI input on the monitor: Look for the DVI input on the back or side of the monitor. It is typically labeled as “DVI IN” or “DVI-D”.
- Connect the DVI cable to the laptop: Take one end of the DVI cable and insert it into the DVI port on your Dell laptop. Ensure that it is firmly connected.
- Connect the DVI cable to the monitor: On the other end of the DVI cable, plug it into the DVI input on the monitor. Make sure it is securely connected.
- Attach the audio cable (if needed): Similar to VGA, DVI does not transmit audio. If you want to hear audio through the monitor’s speakers, connect a separate audio cable from the laptop’s audio output to the audio input on the monitor.
- Power on the laptop and the monitor: Once both ends of the DVI cable are securely connected, you can power on both the laptop and the monitor.
- Adjust display settings: On your Dell laptop, go to the display settings and configure the screen resolution, orientation, and other display preferences according to your requirements.
After following these steps, your Dell laptop should be successfully connected to the monitor using a DVI cable. DVI offers a digital video signal, which provides better picture quality compared to VGA. However, be aware that DVI does not transmit audio, so if you want audio output through the monitor, use separate audio connections.
Connecting the Dell Laptop to the Monitor Using a DisplayPort Cable
If your Dell laptop and monitor have DisplayPort ports, you can connect them using a DisplayPort cable. Follow these steps to connect your Dell laptop to the monitor using a DisplayPort cable:
- Locate the DisplayPort ports: Identify the DisplayPort port on your Dell laptop. It is a small rectangular port typically labeled as “DisplayPort” and is usually found on the side or back of the laptop.
- Identify the DisplayPort input on the monitor: Look for the DisplayPort input on the back or side of the monitor. It is usually labeled as “DisplayPort” and may have the DisplayPort logo next to it.
- Connect the DisplayPort cable to the laptop: Take one end of the DisplayPort cable and insert it into the DisplayPort port on your Dell laptop. Ensure that it is firmly connected.
- Connect the DisplayPort cable to the monitor: On the other end of the DisplayPort cable, plug it into the DisplayPort input on the monitor. Make sure it is securely connected.
- Power on the laptop and the monitor: Once both ends of the DisplayPort cable are securely connected, you can power on both the laptop and the monitor.
- Adjust display settings: On your Dell laptop, go to the display settings and configure the screen resolution, orientation, and other display preferences according to your needs.
After following these steps, your Dell laptop should be successfully connected to the monitor using a DisplayPort cable. DisplayPort offers excellent video and audio quality, and it allows you to transmit both audio and video signals through a single cable. This eliminates the need for separate audio connections, simplifying the setup process.
Adjusting Display Settings on Your Dell Laptop
Once you have successfully connected your Dell laptop to a monitor, it is important to adjust the display settings to optimize your viewing experience. Here are the steps to adjust the display settings on your Dell laptop:
- Access the display settings: Right-click on an empty area of your desktop and select “Display Settings” from the context menu. This will open the display settings window.
- Configure screen resolution: In the display settings window, you will see a section titled “Resolution” or “Screen Resolution”. Here, you can adjust the resolution to match your monitor’s native resolution. Select the desired resolution from the available options.
- Set screen orientation: Under the “Orientation” section, you can choose how you want the screen to be displayed – landscape, portrait, or other orientations. Select the preferred option that aligns with your monitor’s orientation.
- Adjust display scaling: If the content on your monitor appears too small or too large, you can adjust the scaling settings. Look for the “Scale and layout” or “Display size” option and modify it according to your preference.
- Customize display settings: Explore the various options in the display settings window to customize additional parameters such as brightness, contrast, color calibration, and more. Adjust these settings based on your personal preferences and the characteristics of your monitor.
- Apply the changes: After making the desired adjustments, click the “Apply” button to save the changes. The screen may momentarily go blank as the settings are applied. If prompted, confirm the changes.
- Test and fine-tune: Once the display settings have been adjusted, examine the screen and ensure that it meets your requirements. If necessary, make further adjustments to achieve the desired display quality.
By following these steps, you can optimize the display settings on your Dell laptop when connected to an external monitor. Adjusting the display settings allows you to enhance the visual experience, ensuring that the content is presented accurately and comfortably on the larger screen.
Troubleshooting Common Issues when Connecting a Dell Laptop to a Monitor
While connecting a Dell laptop to a monitor is usually a straightforward process, there may be instances where you encounter some common issues. Here are troubleshooting steps to help you resolve these problems:
- No signal on the monitor: Ensure that both the laptop and the monitor are powered on. Check the cable connections on both ends and make sure they are securely plugged in. Try using a different cable or a different port on the laptop and monitor.
- Poor display quality: If the image on the monitor appears blurry or distorted, verify that you have set the correct screen resolution. Adjust the resolution settings in the display settings and choose the native resolution of your monitor for optimal display quality.
- No audio output on the monitor: If you are using HDMI or DisplayPort to transmit audio, ensure that the monitor’s speakers are not muted and the volume is turned up. Check your laptop’s audio settings and verify that the correct audio output device is selected.
- Monitor not recognized: If the monitor is not being detected by your Dell laptop, try restarting both the laptop and the monitor. Update the graphics driver on your laptop to the latest version from the Dell website. If using a docking station, ensure it is fully connected and functioning properly.
- Incorrect screen orientation: If the screen orientation on the external monitor is not aligned correctly, go to the display settings and adjust the screen orientation to match the physical position of the monitor.
- Limited or no extended display: If you want to extend your laptop screen onto the external monitor but encounter issues, verify that you have selected the correct display mode in the display settings. Ensure that the monitor is recognized as a secondary display and not set to duplicate mode.
- Unsupported resolution: If your Dell laptop’s graphics card does not support the native resolution of the monitor, try adjusting the resolution to a lower setting that is compatible with both the laptop and the monitor.
If you have tried these troubleshooting steps and the issue persists, consult the user manual for your laptop and monitor or reach out to Dell’s customer support for further assistance. Remember to provide detailed information about the problem when seeking support to expedite the troubleshooting process.