
Benefits of using an external monitor
Using an external monitor with your laptop can greatly enhance your productivity and overall computing experience. Whether you are a student, professional, or casual user, here are some key benefits of utilizing an external monitor:
- Increased screen real estate: One of the primary benefits of using an external monitor is the additional screen space it provides. With a larger display, you can multitask more efficiently by having multiple windows or applications open side by side. This is especially useful for tasks like coding, graphic design, video editing, and research.
- Improved visual experience: Laptops usually have smaller screens with limited resolution. By connecting an external monitor, you can enjoy a larger display with higher resolution, resulting in sharper images, better color reproduction, and improved visual clarity. This can greatly enhance your gaming, movie-watching, and graphic-intensive tasks.
- Ergonomic benefits: Working on a laptop for extended periods can strain your neck, back, and eyes. However, with an external monitor, you have the flexibility to position the display at eye level, improving your posture and reducing the risk of discomfort or injury. You can also pair it with an external keyboard and mouse for a more comfortable and ergonomic setup.
- Enhanced collaboration: When collaborating with colleagues or presenting to a group, using an external monitor allows everyone to easily view your work. Whether it’s a slideshow, spreadsheet, or document, sharing your screen on a larger display ensures that everyone can see the details clearly, fostering better communication and understanding.
- Flexibility and versatility: An external monitor offers more flexibility in terms of customization and display options. You can adjust the brightness, contrast, and color settings based on your preferences. Additionally, some monitors have built-in speakers, USB ports, and other features that can further enhance your computing experience.
Overall, incorporating an external monitor into your laptop setup can significantly improve your productivity, visual experience, and comfort level. It is an investment that can make a noticeable difference in your work efficiency and enjoyment.
Connecting your laptop to an external monitor
Connecting your laptop to an external monitor is a straightforward process that can be accomplished in a few simple steps. Here’s a guide to help you get started:
- Check your laptop’s video output ports: Before connecting your laptop to an external monitor, identify the video output ports available on your laptop. Common video output ports include HDMI, DisplayPort, DVI, and VGA. Note the type of port(s) on your laptop as you will need the corresponding cable to connect to the external monitor.
- Select the appropriate cable: Once you know the type of video output port on your laptop, choose the cable that matches both your laptop’s port and the input port on the external monitor. For example, if your laptop has an HDMI port, ensure you have an HDMI cable to connect to the monitor’s HDMI input port.
- Power off your laptop and the external monitor: Before making any connections, it’s recommended to power off both your laptop and the external monitor to avoid any potential damage and ensure a clean connection.
- Connect the cable to your laptop: Take one end of the cable and securely plug it into the appropriate video output port on your laptop. Make sure the connection is firm and tight to ensure a stable connection.
- Connect the cable to the external monitor: Take the other end of the cable and connect it to the corresponding input port on the back or side of the external monitor. Again, ensure the connection is secure and tight.
- Power on your laptop and the external monitor: Once the physical connections are complete, power on your laptop and the external monitor. Your laptop should automatically detect the external monitor. If not, you may need to adjust the display settings on your laptop to recognize the monitor.
- Adjust display settings: Depending on your operating system (e.g., Windows or macOS), you may need to adjust the display settings to configure how the external monitor will function. This includes selecting the display mode (e.g., duplicate, extend, or external monitor as the primary display) and setting the resolution.
- Enjoy your dual-monitor setup: With your laptop successfully connected to the external monitor, you can now enjoy the benefits of a dual-monitor setup. Experiment with different window arrangements and explore the enhanced productivity and visual experience that multiple displays offer.
Remember that the specific steps and settings may vary slightly depending on your laptop’s make, model, and operating system. Therefore, consult your laptop’s user manual or manufacturer’s website for detailed instructions if needed. With a little patience and careful setup, you can easily connect your laptop to an external monitor and unlock a whole new level of computing versatility.
Adjusting display settings on your laptop
Once you have successfully connected your laptop to an external monitor, it’s important to adjust the display settings to optimize your viewing experience. The steps for adjusting display settings may vary slightly depending on your operating system, but here are some general guidelines:
Windows:
- Open the display settings: Right-click on an empty area of your desktop and select “Display settings” from the contextual menu. Alternatively, you can access the display settings by going to “Settings” > “System” > “Display.”
- Select the external monitor: Under the “Display” settings, you should see a diagram showing multiple displays. Identify the external monitor and click on it.
- Choose the display mode: Select the display mode that suits your preference. The available options are usually “Duplicate,” “Extend,” and “Second screen only.” “Duplicate” shows the same content on both the laptop screen and the external monitor, “Extend” extends your desktop across both screens, and “Second screen only” turns off your laptop screen and only displays content on the external monitor.
- Adjust the resolution: Click on “Advanced display settings” to access additional settings. Here, you can adjust the resolution of the external monitor. It’s recommended to set the resolution to the native resolution of the monitor for the best image quality.
- Customize display settings: Explore the other options in the display settings to customize your viewing experience further. You can adjust the orientation, scale, brightness, and contrast of the external monitor, among other settings.
- Apply the changes: Once you have made the desired adjustments, click “Apply” to save the changes. Your laptop’s display settings should now be optimized for the external monitor.
macOS:
- Open the display settings: Click on the Apple menu in the top-left corner of your screen and select “System Preferences.” Then, click on “Displays.”
- Select the external monitor: In the “Displays” settings, you should see both the laptop screen and the external monitor. Click on the “Arrangement” tab and check the box that says “Mirror Displays” if you want to duplicate the content on both screens.
- Adjust the resolution: Click on the “Display” tab and select the external monitor from the dropdown menu. Here, you can adjust the resolution by choosing from the available options.
- Customize display settings: Explore the other tabs in the “Displays” settings to customize your display preferences further. You can adjust the brightness, color profile, and arrangement of the screens.
- Apply the changes: Once you have made the necessary adjustments, close the display settings. Your laptop should now be optimized for the external monitor.
Remember to experiment with different settings to find the configuration that works best for you. Additionally, some graphics drivers may come with their own display settings software, so you can also explore those options if available. With the right adjustments, you can enjoy a seamless and immersive viewing experience on your laptop’s external monitor.
Using the external monitor as the primary display
If you prefer to use your external monitor as the primary display for your laptop, you can easily configure the settings to make that happen. By setting the external monitor as the primary display, all your applications and windows will open on that monitor by default. Here’s how you can do it:
Windows:
- Open the display settings: Right-click on an empty area of your desktop and select “Display settings” from the contextual menu.
- Identify the external monitor: In the display settings, you should see a diagram showing multiple displays. Identify the external monitor and note its number or label (e.g., “Display 2”).
- Set the external monitor as the primary display: Scroll down to the “Multiple displays” section and locate the dropdown menu next to “Multiple displays.” Select “Show only on Display X” (replace “X” with the number or label of your external monitor).
- Apply the changes: Click “Apply” to save the changes. Your laptop screen will turn off, and all your applications and windows will open on the external monitor.
macOS:
- Open the display settings: Click on the Apple menu in the top-left corner of your screen and select “System Preferences.” Then, click on “Displays.”
- Identify the external monitor: In the “Displays” settings, you should see both the laptop screen and the external monitor. Click on the “Arrangement” tab.
- Set the external monitor as the primary display: Drag the white menu bar from the laptop screen to the external monitor. Once the menu bar is on the external monitor, it will become the primary display.
- Apply the changes: Close the display settings. Now, all your applications and windows will open on the external monitor by default.
By setting the external monitor as the primary display, you can enjoy the benefits of a larger screen and improved productivity. This setup is particularly useful for tasks that require extensive multitasking or rely on the additional screen real estate.
Keep in mind that you can always revert to using your laptop screen as the primary display by following the same steps and selecting the appropriate display option. Experiment with different display configurations to find the setup that best suits your needs and working style.
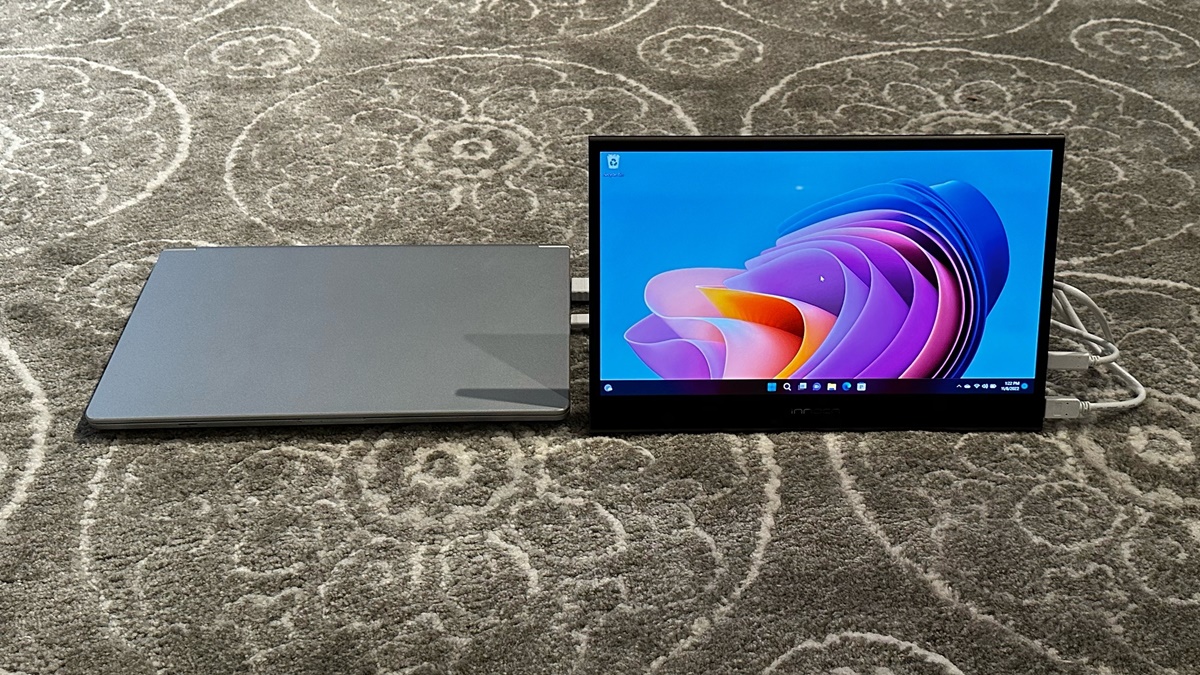
Closing your laptop
There may be times when you want to close your laptop lid while using an external monitor. Closing the laptop lid can help declutter your workspace and provide a more streamlined setup. However, there are a few things to consider when closing your laptop:
- Connect the laptop to the external monitor: Before closing the laptop, ensure that it is securely connected to the external monitor using the appropriate video cable.
- Adjust power settings: By default, closing the laptop lid may cause it to go into sleep mode or hibernate. To prevent this, adjust the power settings on your laptop. In the power settings, look for the option that determines what happens when the lid is closed. Set it to “Do nothing” or “Stay awake” to keep your laptop running even when the lid is closed.
- External monitor as the primary display: If you prefer to use only the external monitor and not the laptop screen, make sure you have set the external monitor as the primary display in the display settings. This ensures that your applications and windows will open on the external monitor when the laptop lid is closed.
- Consider using a laptop stand: To ensure proper airflow and prevent overheating, it is advisable to use a laptop stand when closing the laptop. The laptop stand elevates the laptop, allowing for better air circulation and heat dissipation.
- Use an external keyboard and mouse: Closing the laptop lid means you won’t have access to its keyboard and trackpad. To continue using your laptop with the external monitor, connect an external keyboard and mouse to your laptop via USB or Bluetooth. This way, you can still interact with your laptop while the lid is closed.
Once you have taken these considerations into account, you can confidently close your laptop lid. The external monitor will become your main display, and you can continue working or enjoying your content without the distraction of the laptop screen.
Remember to periodically check the laptop’s temperature and ensure that it is not overheating while the lid is closed. If you notice any excessive heat or performance issues, consider adjusting the laptop’s power settings or using a laptop cooling pad to help with heat dissipation.
Closing your laptop can be a convenient way to fully utilize your external monitor and create a more efficient workspace. Experiment with different setups and find the configuration that works best for you.
Configuring screen settings while the laptop is closed
When you close your laptop, you may still want to adjust the screen settings or make changes to the display configuration. Although the laptop lid is closed, you can continue to configure the screen settings using these methods:
- Keyboard shortcuts: Many laptops have keyboard shortcuts that allow you to adjust the screen settings even when the lid is closed. For example, on Windows laptops, you can press the Windows key + P to open the “Project” menu, which allows you to switch between display modes like duplicating, extending, or using the external monitor as the primary display. On macOS, you can press the Command + F1 keys to toggle between mirrored and extended display modes. Check your laptop’s manual or the manufacturer’s website for a list of available keyboard shortcuts.
- External display controls: Some external monitors have built-in controls or buttons that allow you to adjust the screen settings. These controls usually include options to change the brightness, contrast, and other display parameters. Refer to the monitor’s user manual to learn how to access and navigate these settings.
- Remote desktop software: If you have remote desktop software installed on your laptop, you can use it to access and control your laptop from another device, such as a smartphone or tablet. This way, you can configure the screen settings and make changes to the display configuration remotely while the laptop lid is closed. Popular remote desktop software includes TeamViewer, Chrome Remote Desktop, and Microsoft Remote Desktop.
- Wake the laptop from sleep: If your laptop goes into sleep mode when you close the lid, you can wake it up by pressing a key on the external keyboard or moving the external mouse. Once the laptop wakes up, the external monitor should become active, and you can then access the screen settings and make any necessary adjustments.
It’s important to note that the available methods for configuring screen settings while the laptop is closed may vary depending on your laptop’s operating system, hardware, and settings. Additionally, it’s recommended to check the laptop’s manual or the manufacturer’s website for specific instructions and guidance on configuring screen settings in closed-lid mode.
When making changes to the screen settings while the laptop is closed, ensure that the external display is active and properly connected to your laptop. Adjust the desired settings, such as resolution, brightness, or orientation, to your preference. Once you have made the necessary adjustments, close the screen settings menu or remote desktop session to resume working with your laptop in closed-lid mode.
By familiarizing yourself with the available screen control options and using the appropriate methods, you can easily configure screen settings while your laptop lid is closed and continue to work or enjoy your content on the external monitor with ease.
Reopening your laptop
After closing your laptop, there may come a time when you need to reopen it for various reasons such as accessing the keyboard, touchpad, or other laptop-specific features. Here are some steps to safely reopen your laptop:
- Power off the external monitor: Before reopening your laptop, it’s a good practice to power off the external monitor. This helps prevent any potential flickering or display issues that may occur when you switch between the external monitor and the laptop’s built-in display.
- Safety precautions: When reopening your laptop, be mindful of your fingers and avoid placing any pressure on the screen. Gently lift the display from the closed position until it is fully open.
- Lid angle adjustment: Adjust the angle of the laptop’s screen to a comfortable position for viewing and interaction. Most laptops have hinges that allow a range of motion, allowing you to position the screen at a suitable angle.
- Monitor detection: Once the laptop is opened, it should automatically detect the internal display. If the laptop does not switch from the external monitor to the built-in screen, you may need to adjust the display settings manually. On Windows, you can do this by right-clicking on the desktop and selecting “Display settings.” On macOS, go to “System Preferences” > “Displays.” Select the built-in display as the primary display if necessary.
- Resume operation: After reopening your laptop, you can resume using the built-in keyboard, touchpad, and other laptop-specific features. You may need to enter your password or perform any necessary actions to unlock the laptop, depending on its power settings.
Remember that reopening your laptop while it is running on an external monitor may cause your applications and windows to transition back to the laptop’s screen. Take a moment to arrange or move your windows as needed for a seamless workflow.
If you experience any issues with the display or the laptop not properly recognizing the internal screen, try adjusting the display settings or restarting the laptop. If problems persist, consult your laptop’s user manual or consider seeking technical assistance.
Properly reopening your laptop allows you to make use of all the functionality it offers, including the convenience of the built-in keyboard, touchpad, and other hardware features. Take care when handling the device, and enjoy using your laptop in its fully functional state.
Disconnecting your laptop from the external monitor
When you’re finished using your laptop with an external monitor, it’s important to properly disconnect it to avoid any potential damage or issues. Here are the steps to safely disconnect your laptop from the external monitor:
- Close all applications: Before disconnecting the external monitor, close any applications or windows that you may have open on it. This ensures that you don’t lose any unsaved work or experience any issues when switching back to your laptop’s built-in screen.
- Power off the external monitor: It’s recommended to power off the external monitor before disconnecting it from your laptop. This helps prevent any possible electrical surges or damage to the video ports.
- Disconnect the video cable: Gently unplug the video cable from the video output port on your laptop. Take care not to apply excessive force or bend the cable, as this could cause damage to the connectors or port.
- Return laptop’s display settings to default: If you made any changes to the display settings while using the external monitor, it’s a good practice to reset them to their default values. This ensures that your laptop’s built-in screen functions properly without any unintended configurations or display issues.
- Power on your laptop: Once the video cable is disconnected, power on your laptop. It should automatically revert to using the built-in screen as the primary display. If not, you can adjust the display settings manually to ensure the laptop’s screen is the primary display.
It’s important to note that the specific steps for disconnecting your laptop from an external monitor may vary depending on the type of video cable and the make and model of your laptop. Always refer to your laptop’s user manual for detailed instructions if you are unsure.
Additionally, if you frequently use your laptop with an external monitor, consider organizing your workspace to make the disconnection process easier. You can use cable management solutions to keep your cables organized and prevent tangling or accidents.
By following the proper steps to disconnect your laptop from the external monitor, you can ensure a smooth transition back to using your laptop’s built-in screen without any issues. Take care when handling the equipment, and enjoy the versatility of your laptop in various display configurations.
Troubleshooting common issues
While using an external monitor with your laptop can greatly enhance your computing experience, you may encounter some common issues along the way. Here are a few troubleshooting tips to help you resolve these issues:
- No display on the external monitor: Ensure that the video cable is securely connected to both the laptop and the external monitor. Check if the monitor is powered on and set to the correct input source. You can also try restarting both your laptop and the external monitor to reestablish the connection.
- Incorrect screen resolution: If the external monitor displays a blurry or distorted image, it could be due to an incorrect screen resolution setting. Adjust the display resolution in the display settings of your operating system to match the native resolution of the external monitor for optimal viewing quality.
- No sound from the monitor’s speakers: If your external monitor has built-in speakers and you’re not getting any sound, ensure that the audio cable is properly connected from the laptop to the monitor. Check the audio settings on your laptop to make sure the sound output is set to the correct device (e.g., HDMI audio) for audio to play through the monitor’s speakers.
- External monitor not detected: If your laptop doesn’t detect the external monitor, try disconnecting and reconnecting the video cable. Ensure that the video cable and the ports are clean and free of debris. If the issue persists, try updating your graphics drivers or restart your laptop to reset the display configuration.
- Screen flickering or artifacts: If you experience screen flickering, horizontal lines, or other visual anomalies on the external monitor, check that the video cable is securely connected. If the issue persists, try using a different video cable or port. Additionally, updating your graphics drivers to the latest version may help resolve display-related issues.
- Overheating laptop: Using an external monitor can sometimes cause the laptop to generate more heat. Ensure that the laptop’s cooling vents are not blocked and that it is placed on a hard, flat surface to allow for proper airflow. If the issue persists, consider using a laptop cooling pad or fan to help regulate the laptop’s temperature during extended use.
- Power-related issues: If your laptop’s battery is draining quickly while connected to an external monitor, it may be drawing more power. Connect your laptop to a power source or adjust the power settings to maximize battery life. Additionally, check that the power cable is securely connected to the monitor and power outlet.
- Incompatibility between laptop and monitor: If you continue to experience issues or compatibility problems between your laptop and the external monitor, consult the manufacturer’s documentation or support resources for further troubleshooting. They might provide specific recommendations or firmware updates to address compatibility issues.
If you encounter persistent issues that you cannot resolve on your own, consider seeking technical assistance from the laptop or monitor manufacturer’s support team or consult a qualified technician for further troubleshooting and guidance.
Remember to always refer to your laptop’s user manual and the monitor’s documentation for specific troubleshooting steps that are applicable to your particular devices. With patience and the right troubleshooting approach, you can overcome common issues and enjoy a smooth and reliable experience with your laptop and external monitor setup.