
Step 1: Gather the necessary items
Before you can start charging your Nintendo Switch Joy-Cons, it’s important to make sure you have all the necessary items. Having everything prepared will help ensure a smooth and efficient charging process. Here are the items you will need:
- Nintendo Switch Joy-Cons: These are the detachable controllers that come with your Nintendo Switch console. Make sure they are not attached to the console itself.
- Charging Grip: This is the accessory that allows you to charge the Joy-Cons. It resembles a traditional game controller and has slots to insert the Joy-Cons. The Charging Grip should come with your Nintendo Switch console.
- Power source: You will need a power source to connect the Charging Grip. This can be a wall outlet, a USB port on your computer, or a portable power bank.
- USB cable: Depending on the type of power source you are using, you will likely need a USB cable to connect the Charging Grip. The USB cable should also be included with your Nintendo Switch console.
Take a moment to gather these items and ensure they are readily available. Having everything in place will make the charging process much more convenient.
Once you have gathered the necessary items, you can proceed to the next step of charging your Nintendo Switch Joy-Cons.
Step 2: Remove the Joy-Cons from the Nintendo Switch
Before you can charge your Nintendo Switch Joy-Cons, you need to detach them from the console itself. This step is important to ensure that you have easy access to the Joy-Cons and can properly insert them into the Charging Grip. Here’s how you can remove the Joy-Cons from your Nintendo Switch:
- Power off your Nintendo Switch: Make sure the console is completely powered off. Press and hold the power button on the top of the console until the power options appear on the screen. Select “Power Options” and then “Turn Off.”
- Locate the Joy-Con release button: On the backside of the Nintendo Switch, you will see a small rectangular button next to each Joy-Con. These are the release buttons that allow you to detach the Joy-Cons.
- Press the release button: To detach a Joy-Con, press and hold the corresponding release button. While holding the button, gently slide the Joy-Con upwards to detach it from the console. Repeat this process for the other Joy-Con.
Once you have removed both Joy-Cons from your Nintendo Switch, make sure to set them aside in a safe place. We are now ready to move on to the next step of the charging process.
Step 3: Locate the charging indicators on the Joy-Cons
Before charging your Nintendo Switch Joy-Cons, it’s important to familiarize yourself with the location of the charging indicators on the controllers. These indicators will provide you with useful information about the charging status of the Joy-Cons. Here’s how you can locate the charging indicators:
- Look for the LED lights: On the front edge of each Joy-Con, there is a row of LED lights. These lights serve as charging indicators and will give you visual cues about the battery level and charging status.
- Observe the LED color: When the Joy-Cons are connected to the Charging Grip, the LED lights will turn red, indicating that the controllers are currently charging. As the charge level increases, the lights will change to a green color.
- Pay attention to the placement of the LEDs: The LED lights are positioned in a straight line on both Joy-Cons. The left Joy-Con will have the LEDs on the top edge, while the right Joy-Con will have them on the bottom edge.
By understanding the location and behavior of the charging indicators on the Joy-Cons, you can easily monitor the charging progress and determine when the controllers are fully charged. This information will be helpful in ensuring that your Joy-Cons are always ready for your next gaming session.
Step 4: Insert the Joy-Cons into the Charging Grip
Now that you are familiar with the charging indicators on the Nintendo Switch Joy-Cons, it’s time to insert them into the Charging Grip. The Charging Grip is the accessory that allows you to charge your Joy-Cons conveniently. Here’s how you can insert the Joy-Cons into the Charging Grip:
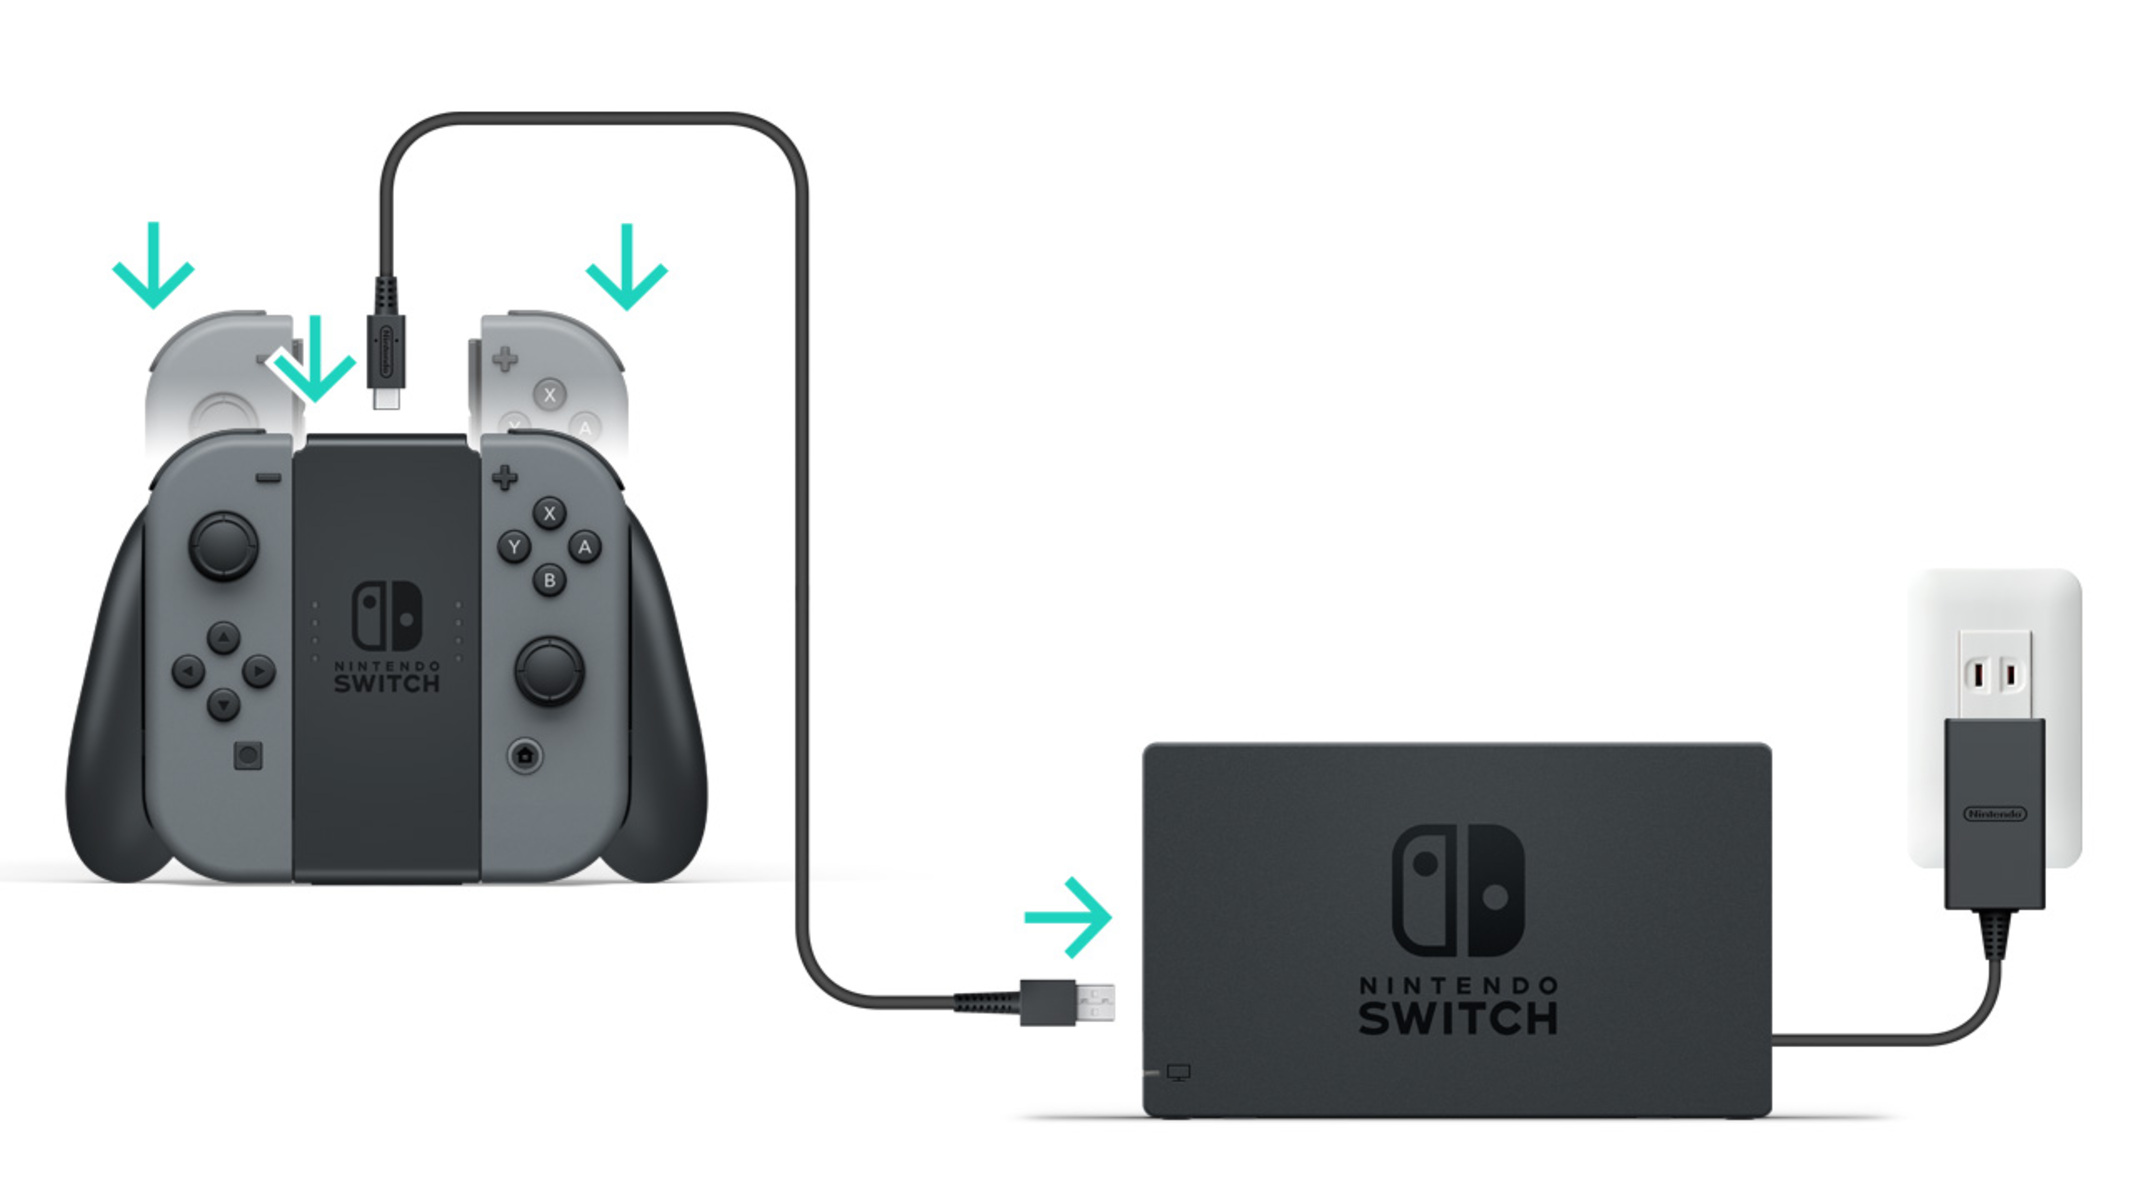
- Take the Charging Grip in your hands: Hold the Charging Grip with both hands, making sure the front-facing side is facing you.
- Identify the slots for the Joy-Cons: On the top edge of the Charging Grip, you will see two slots – one on the left and one on the right. These are the designated slots for the Joy-Cons.
- Align the Joy-Con with the slots: Take one of the Joy-Cons and align it with the corresponding slot on the Charging Grip. The Joy-Con has two small rails on the back that need to fit into the slots.
- Slide the Joy-Con into the slot: Gently slide the Joy-Con into the slot, making sure it is securely connected. You will hear a click sound when the Joy-Con is properly inserted.
- Repeat the process for the other Joy-Con: Take the second Joy-Con and insert it into the remaining slot on the Charging Grip using the same procedure outlined above.
By inserting the Joy-Cons into the Charging Grip, you can ensure that they are properly positioned for charging. Once both Joy-Cons are securely inserted, we can move on to the next step and connect the Charging Grip to a power source.
Step 5: Connect the Charging Grip to a power source
Now that the Nintendo Switch Joy-Cons are inserted into the Charging Grip, it’s time to connect the grip to a power source. This will provide the necessary power to charge the Joy-Cons efficiently. Here’s how you can connect the Charging Grip to a power source:
- Take a USB cable: Depending on the type of power source you are using, whether it’s a wall outlet, a USB port on your computer, or a portable power bank, you will need a compatible USB cable. Ensure that the USB cable matches the port on the Charging Grip.
- Connect the USB cable: Insert one end of the USB cable into the corresponding port on the Charging Grip. Make sure the connection is secure and snug.
- Connect the other end of the USB cable: Take the other end of the USB cable and connect it to your chosen power source. Plug it into a wall adapter, a USB port on your computer, or the power bank.
- Turn on the power source: If you are using a wall adapter or a power bank, make sure it is turned on. If you are using a USB port on your computer, it should provide power automatically.
Once the Charging Grip is connected to a power source, it will start charging the Joy-Cons. You can now move on to the next step and monitor the charging status of the Joy-Cons.
Step 6: Monitor the charging status of the Joy-Cons
While the Nintendo Switch Joy-Cons are connected to the Charging Grip and receiving power, it’s important to monitor their charging status. This will help you determine when the Joy-Cons are fully charged and ready for use. Here’s how you can monitor the charging status of the Joy-Cons:
- Observe the LED lights on the Joy-Cons: As mentioned earlier, the Joy-Cons have LED lights that serve as charging indicators. When connected to the Charging Grip, the lights will turn red, indicating that the controllers are currently charging.
- Keep an eye on the LED color: While the Joy-Cons are charging, the LED lights will remain red. As the charge level increases, the lights will gradually change to a green color. This indicates that the controllers are nearing a full charge.
- Check the charging time: The time it takes for the Joy-Cons to charge will vary depending on the current battery level and the power source. On average, it may take around 3-4 hours for the Joy-Cons to fully charge.
- Unplug the Charging Grip when fully charged: Once the LED lights on the Joy-Cons turn green, it means that they are fully charged. At this point, you can safely unplug the Charging Grip from the power source.
By monitoring the charging status of the Joy-Cons, you can ensure that they are charged adequately and ready for your gaming sessions. Once the controllers are fully charged, you can proceed to the next step and disconnect them from the Charging Grip.
Step 7: Disconnect the Joy-Cons from the Charging Grip
Once the Nintendo Switch Joy-Cons have been fully charged, it’s time to disconnect them from the Charging Grip. This will allow you to remove the controllers from the grip and prepare them for reattachment to the Nintendo Switch console. Here’s how you can safely disconnect the Joy-Cons from the Charging Grip:
- Unplug the Charging Grip: Before you disconnect the Joy-Cons, make sure that the Charging Grip is no longer connected to the power source. Unplug the USB cable from the grip, ensuring a clean and safe disconnection.
- Gently hold the Charging Grip: Hold the Charging Grip with one hand, ensuring a firm grip to provide stability during the disconnection process.
- Press the release button: On the backside of the Charging Grip, you will find a small release button located next to each slot. Press and hold the release button for the Joy-Con you wish to detach.
- Slide the Joy-Con upwards: While holding the release button, gently slide the Joy-Con upwards to detach it from the Charging Grip. You should feel a slight release and hear a click sound indicating a successful disconnection.
- Repeat the process for the other Joy-Con: To disconnect the second Joy-Con, press and hold the release button associated with it and slide it upwards to detach it from the Charging Grip.
Once you have successfully disconnected both Joy-Cons from the Charging Grip, you can safely set the grip aside. The Joy-Cons are now ready to be reattached to the Nintendo Switch console, as we will explore in the next step.
Step 8: Reattach the Joy-Cons to the Nintendo Switch
After disconnecting the Nintendo Switch Joy-Cons from the Charging Grip, it’s time to reattach them to the console itself. This step is essential for you to be able to enjoy your gaming experience on the Nintendo Switch. Here’s how you can safely reattach the Joy-Cons to your Nintendo Switch:
- Power on your Nintendo Switch: Make sure the console is powered off before reattaching the Joy-Cons. To power on the console, press and hold the power button located on the top of the console until the Nintendo logo appears on the screen.
- Identify the rails on the Nintendo Switch: On both sides of the Nintendo Switch console, you will find small rails where the Joy-Cons are designed to attach. These rails are located near the top edge of the console.
- Align the Joy-Con with the rails: Take the left Joy-Con and align it with the left rail on the Nintendo Switch console. The side with the buttons should face towards the screen. Gently slide the Joy-Con downwards until it clicks into place.
- Repeat the process for the right Joy-Con: Take the right Joy-Con and align it with the right rail on the Nintendo Switch console. Slide it downwards just like the left Joy-Con, ensuring a secure connection.
- Ensure proper attachment: After reattaching both Joy-Cons, perform a quick check to confirm they are securely attached. They should not slide or detach easily when lightly tugged.
Once the Joy-Cons are correctly reattached to your Nintendo Switch console, you can power on the console and resume your gaming adventures. It’s important to note that the Joy-Cons will continue to charge whenever the Nintendo Switch is connected to a power source.
By following these steps, you can easily recharge the Joy-Cons and ensure they are ready for your next gaming session. Enjoy your gaming experience with your fully charged Nintendo Switch Joy-Cons!