
Unboxing the Nintendo Switch OLED
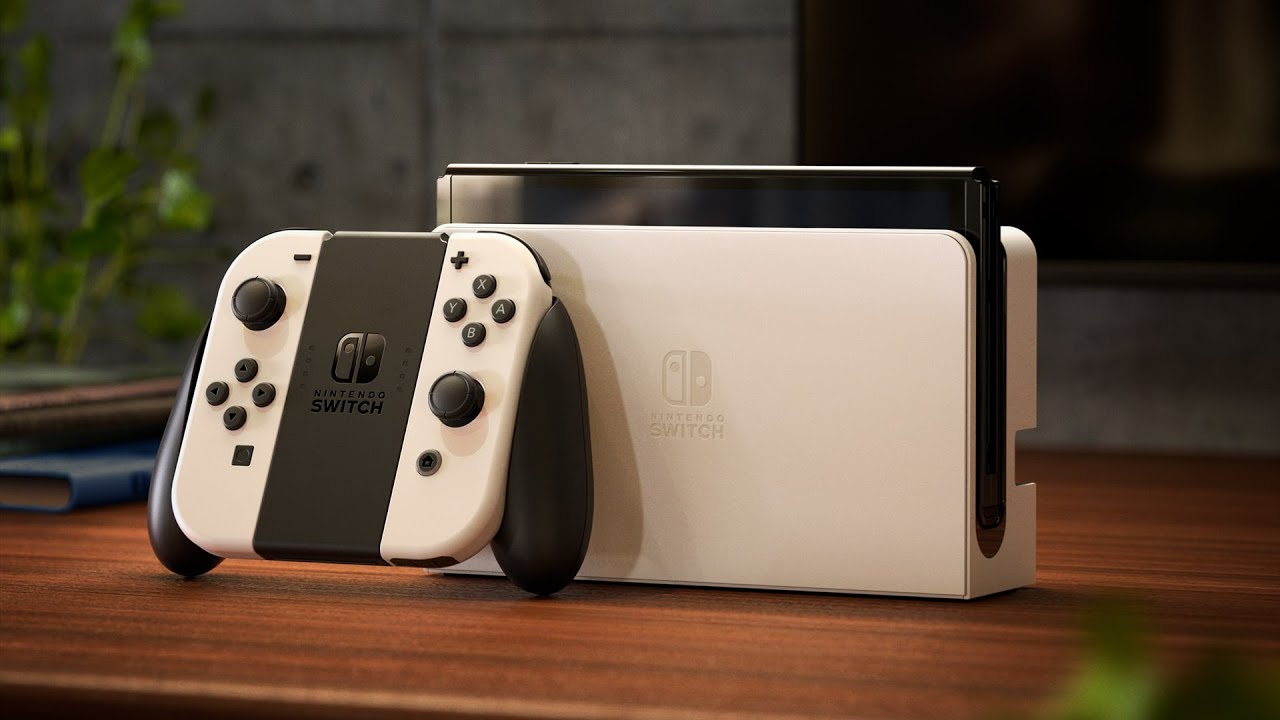
Unboxing a new Nintendo Switch OLED is an exciting experience for any gaming enthusiast. The sleek packaging and the promise of next-level gaming make it a highly anticipated moment. Here’s a step-by-step guide to unboxing your Nintendo Switch OLED and getting it ready for an incredible gaming adventure.
1. Begin by carefully removing the shrink wrap from the box. Slowly slide the cover off, revealing the vibrant Nintendo Switch OLED box with its captivating artwork and images of the console.
2. Lift the top of the box to reveal the console sitting snugly in its dock. Take a moment to appreciate the stunning OLED screen before gently lifting it out, being careful not to touch the screen with your fingers.
3. Underneath the console, you’ll find the Joy-Con controllers securely nestled in their own compartments. Slide them out, taking note of the left and right controllers for future reference.
4. Set the console and the controllers aside for a moment and continue exploring the box. You’ll discover a USB-C charging cable, an HDMI cable, and the Joy-Con grip, which can be used to combine the two controllers into a single gamepad.
5. Lift the compartment that housed the console and you’ll find the essential power adapter. Gently remove it from the box and set it aside. The power adapter is necessary for charging the console and should not be misplaced.
6. Now that you have everything unboxed, it’s time to set up your Nintendo Switch OLED. Connect the dock to your television using the provided HDMI cable, ensuring a secure connection.
7. Take the USB-C charging cable and connect it to the dock. The other end of the cable should be plugged into the power adapter, which can then be connected to a power source.
8. Place the console into the dock, aligning the connectors to ensure a proper fit. The console should fit snugly, and the screen will automatically switch to the television once connected.
9. Finally, insert the Joy-Con controllers into the side slots of the console, ensuring they slide in smoothly. Once attached, the controllers will automatically pair with the console.
With the Nintendo Switch OLED unboxed and set up, you’re now ready to embark on a gaming journey filled with immersive experiences. Whether using handheld mode or playing on your television, the enhanced visuals and improved performance of the OLED screen will elevate your gaming sessions to new heights.
Take a moment to explore the various features and functionalities of the console, and don’t forget to browse the eShop for a wide selection of games to download and enjoy. Get ready to immerse yourself in the world of gaming with the Nintendo Switch OLED!
Charging the Nintendo Switch OLED
Ensuring that your Nintendo Switch OLED is properly charged is essential for uninterrupted gaming sessions. Before diving into the gaming world, take a moment to familiarize yourself with the charging process to keep your console fully powered. Here’s a step-by-step guide on how to charge your Nintendo Switch OLED.
1. Locate the USB-C charging port on the bottom of the console. It is labeled with a small icon and positioned near the kickstand. Make sure to handle the console gently during the charging process.
2. Take the USB-C charging cable that came with your Nintendo Switch OLED. One end of the cable has a USB-C connector, while the other end has a standard USB-A connector.
3. Plug the USB-C connector into the USB-C charging port on the console. Ensure that it is inserted snugly and securely without applying excessive force. The reversible design of the USB-C cable makes it easy to connect.
4. Connect the USB-A end of the cable to the power adapter that came with your Nintendo Switch OLED. The power adapter is a crucial component as it converts the electrical current from the power source to the appropriate level for charging the console.
5. Plug the power adapter into a reliable power source such as a wall outlet. Ensure that the outlet is functioning correctly and can provide a stable power supply. Avoid using power strips or extensions cords to prevent potential power surges.
6. Once the console is connected to the power source, a battery icon will appear on the top-right corner of the screen. It indicates that the charging process has started. You can continue playing games in handheld mode while the console is charging.
7. The Nintendo Switch OLED uses a lithium-ion battery, which provides a relatively long battery life. The duration of the charging process depends on the remaining battery percentage and the amount of power drawn by the console during gameplay or other activities.
8. It is recommended to charge the console until the battery is fully charged. The battery icon will display a charging animation and change to a full battery icon when the console is fully charged.
9. When you’re finished charging, unplug the USB-C cable from the console and the power adapter. Store the cable and power adapter in a safe place for future use.
With your Nintendo Switch OLED properly charged, you can enjoy extended gaming sessions without worrying about the battery running out. Remember to follow these charging steps regularly to maintain the performance and longevity of your console’s battery.
The Nintendo Switch OLED offers the flexibility to play games in handheld mode or docked to a television, providing endless entertainment possibilities. Keep your console charged and ready for action, and get ready to embark on your gaming adventures!
Connecting to a Television
One of the great features of the Nintendo Switch OLED is its ability to be connected to a television, allowing you to enjoy games on the big screen for a more immersive gaming experience. Connecting your console to a television is a straightforward process. Here’s a step-by-step guide on how to connect your Nintendo Switch OLED to a television.
1. Begin by ensuring that your television is turned on and set to the appropriate input source. Most televisions have multiple HDMI ports, so make sure to select the one you’ll be using for your Nintendo Switch OLED.
2. Locate the Nintendo Switch dock that came with your console. The dock serves as a charging station and a bridge between the console and the television.
3. Connect one end of the HDMI cable to the HDMI port on the dock. The HDMI port is located on the back of the dock. Ensure that the cable is inserted securely.
4. Connect the other end of the HDMI cable to an available HDMI input on your television. Remember the HDMI port number you selected earlier and use the corresponding input on your television.
5. Once the HDMI cable is connected, take the USB-C charging cable that came with your Nintendo Switch OLED and plug it into the USB-C port on the dock.
6. Connect the other end of the USB-C cable to a power source using the power adapter that came with your console. This will provide power to the dock and charge the console if necessary.
7. Take your Nintendo Switch OLED console and carefully slide it into the dock. The USB-C connector on the bottom of the console should align with the USB-C port on the dock. Ensure that the console fits snugly into the dock.
8. Once the console is inserted into the dock, the screen will automatically transition from handheld mode to the television. You should see the Nintendo Switch logo appear on the television screen.
9. Use the television remote or the television’s menu settings to adjust the display settings if necessary. You can change the aspect ratio, screen resolution, and other settings to optimize the visual experience based on your preferences.
10. With the Nintendo Switch OLED successfully connected to your television, you can now use the Joy-Con controllers to navigate and play games on the big screen. Enjoy the high-definition graphics and immersive gameplay that the television display offers.
Connecting your Nintendo Switch OLED to a television opens up a whole new world of gaming possibilities. Whether you prefer playing in handheld mode or on the big screen, the versatility of the console allows you to enjoy games in various settings. Get ready to dive into your favorite games and experience them on the large and vibrant television screen.
Setting up Internet Connection
Setting up an internet connection on your Nintendo Switch OLED is crucial for accessing online features, downloading games, and playing multiplayer games with friends and gamers around the world. The process of connecting your console to the internet is straightforward. Here’s a step-by-step guide on how to set up the internet connection on your Nintendo Switch OLED.
1. Begin by turning on your Nintendo Switch OLED console. Make sure that it is in handheld mode or docked to a television.
2. On the home screen, locate and select the “System Settings” option. This can be done by navigating to the gear icon located at the bottom of the screen.
3. In the system settings menu, scroll down and select “Internet” from the list of options. This will take you to the internet settings menu.
4. From the internet settings menu, select “Internet Settings” once again. This will display a list of available internet connections.
5. Choose the Wi-Fi network you want to connect to. If you have multiple networks available, select the one you want to use for your Nintendo Switch OLED.
6. If the Wi-Fi network is password-protected, you will be prompted to enter the password. Use the on-screen keyboard to enter the password, ensuring that it is accurate and correctly capitalized.
7. Once you have entered the password, select “Connect” and wait for the Nintendo Switch OLED to establish a connection to the Wi-Fi network. This may take a few moments.
8. Once the connection is established, you will see a confirmation message on the screen. This indicates that your Nintendo Switch OLED is now connected to the internet.
9. To test the internet connection, you can select the “Test Connection” option from the internet settings menu. This will verify the speed and stability of the connection.
10. With the internet connection successfully set up on your Nintendo Switch OLED, you can now enjoy the full range of online features, including browsing the eShop, participating in online multiplayer games, and downloading games and updates.
It is important to note that maintaining a stable and reliable internet connection is essential for smooth online gaming experiences. Ensure that your Wi-Fi signal is strong and that you are within range of the router. If you encounter any connection issues, check your network settings and try restarting your router if necessary.
With the internet connection in place, you are ready to explore a world of online gaming and connect with fellow gamers. Socialize, compete, and immerse yourself in the vast library of online content available on your Nintendo Switch OLED.
Updating the System Software
Keeping your Nintendo Switch OLED updated with the latest system software is essential for optimal performance, bug fixes, and access to new features and functionalities. Nintendo regularly releases system updates to enhance the gaming experience and ensure compatibility with the latest games. Here’s a step-by-step guide on how to update the system software on your Nintendo Switch OLED.
1. Turn on your Nintendo Switch OLED console and make sure that it is connected to the internet. You can either connect to a Wi-Fi network or use a wired internet connection through the dock.
2. On the home screen, locate and select the “System Settings” option. This can be done by navigating to the gear icon located at the bottom of the screen.
3. Scroll down and select “System” from the list of options in the system settings menu.
4. In the system settings menu, scroll down and select “System Update.” The console will check for any available updates.
5. If an update is available, you will be prompted to download and install it. Select “Update” to proceed with the update process.
6. The update will begin downloading automatically. The time it takes to download the update will depend on the size of the update and the speed of your internet connection. Be patient and ensure that you do not interrupt the download process.
7. Once the download is complete, the console will automatically install the update. This process may take a few minutes, during which the console will restart.
8. After the update is installed, your Nintendo Switch OLED will restart again, and you will be ready to enjoy the latest system software version.
If there were any significant changes or new features in the update, the console will provide you with information about them during the restart.
It is worth noting that the Nintendo Switch OLED supports automatic updates, which can be enabled in the system settings menu. With automatic updates enabled, your console will download and install updates in the background while it is in sleep mode, ensuring that you always have the latest software version.
Updating the system software on your Nintendo Switch OLED is a simple process that ensures you have access to the latest features and improvements. Stay up to date with system updates to make the most out of your gaming experience and enjoy the full capabilities of your console!
Creating a User Account
Creating a user account on your Nintendo Switch OLED is essential for personalized gaming experiences, accessing online features, and saving your game progress. With a user account, you can customize your profile, connect with friends, and enjoy various benefits offered by Nintendo. Here’s a step-by-step guide on how to create a user account on your Nintendo Switch OLED.
1. Turn on your Nintendo Switch OLED and make sure that it is connected to the internet. An internet connection is required to create a user account.
2. On the home screen, select the “System Settings” option. This can be done by navigating to the gear icon located at the bottom of the screen.
3. Scroll down and select “Users” from the list of options in the system settings menu.
4. In the users menu, select “Add User” to begin creating a new user account.
5. You will be presented with two options – “Create New User” or “Use an Existing Account.” Select “Create New User” to proceed with creating a new account.
6. Choose a profile icon for your user account. You can select from a range of pre-made icons or create a custom icon using the built-in tools.
7. Enter a nickname for your user account. The nickname will be visible to other users, so choose a name that represents you or your gaming persona.
8. After entering the nickname, select “OK” to proceed to the next step.
9. The console will prompt you to link a Nintendo Account to your user profile. If you already have a Nintendo Account, select “Sign In and Link.” If you don’t have a Nintendo Account, choose “Create Account” to create a new one.
10. Follow the on-screen prompts to either sign in with your existing Nintendo Account credentials or create a new Nintendo Account. Provide the necessary information, including email address, password, and date of birth.
11. Once your Nintendo Account is linked or created, you will be asked to accept the terms of service and privacy policy. Read through the documents and select “Accept” to proceed.
12. Congratulations! You have successfully created a user account on your Nintendo Switch OLED. You can now customize your profile, set privacy settings, and begin exploring the features and benefits offered by Nintendo.
By creating a user account, you gain access to various online features, including the ability to play multiplayer games, join gaming communities, and participate in special events and promotions. You can also use your user account to sync your game data across multiple Nintendo Switch consoles for a seamless gaming experience.
Enjoy the personalized gaming experience and connect with other players as you embark on exciting adventures with your Nintendo Switch OLED!
Transferring Data from Another Nintendo Switch
If you are upgrading to a Nintendo Switch OLED from another Nintendo Switch console, you have the option to transfer your existing data, including game saves, user profiles, and downloaded content, to your new console. This process allows you to seamlessly continue your gaming progress on the Nintendo Switch OLED without losing any valuable data. Here’s a step-by-step guide on how to transfer data from another Nintendo Switch to your new Nintendo Switch OLED.
1. Ensure that both your old Nintendo Switch console and your Nintendo Switch OLED are updated to the latest system software versions. You can check for updates in the system settings menu.
2. On your old Nintendo Switch console, navigate to the system settings menu by selecting the gear icon on the home screen.
3. Scroll down and select “System” from the list of options in the system settings menu.
4. In the system menu, select “Data Transfer” and then choose “Transfer Your Save Data.”
5. Read and agree to the terms and conditions presented on the screen. This will enable your old Nintendo Switch console to enter the data transfer mode.
6. On your new Nintendo Switch OLED, follow the initial setup process until you reach the screen that asks if you want to transfer data from another console.
7. Select the option to transfer data and choose the transfer method as “Wireless Transfer.”
8. On your old Nintendo Switch console, select “Send from This Console” to initiate the data transfer.
9. On your new Nintendo Switch OLED, select “Receive from Another Console” to prepare it for the data transfer.
10. Both consoles will begin searching for each other. Once they establish a connection, a confirmation screen will be displayed.
11. Confirm the transfer on both consoles to begin the data transfer process. This may take some time depending on the amount of data being transferred.
12. Once the transfer is complete, follow the on-screen prompts to set up your user profiles and complete the initial setup process on the Nintendo Switch OLED.
After the data transfer is done, you will find all your game saves, user profiles, and downloaded content on your new Nintendo Switch OLED. It’s important to note that the data transfer process will remove the data from your old console, so ensure that you have transferred everything you need before proceeding.
By transferring your data to the Nintendo Switch OLED, you can continue your gaming journey seamlessly with enhanced visuals and improved performance. Enjoy the benefits of your new console and dive back into your favorite games without missing a beat!
Setting up Parental Controls
Setting up parental controls on your Nintendo Switch OLED is crucial for managing and monitoring the gaming activities of children in your household. With parental controls, you can control the content accessed, set playtime limits, and ensure a safe and age-appropriate gaming experience. Here’s a step-by-step guide on how to set up parental controls on your Nintendo Switch OLED.
1. Begin by turning on your Nintendo Switch OLED console and navigating to the home screen.
2. Select the “System Settings” option, which can be accessed by selecting the gear icon located at the bottom of the screen.
3. Scroll down in the system settings menu and select “Parental Controls.” If prompted, enter the system PIN to access the parental controls menu.
4. In the parental controls menu, select “Parental Controls Settings.” You will be prompted to set up the parental controls.
5. Follow the on-screen instructions to create a four-digit PIN for the parental controls. Make sure to choose a unique and secure PIN that is not easily guessable.
6. Once the PIN is set, you will be prompted to set up the playtime restrictions. This allows you to specify the amount of time your child can spend playing games on a daily basis.
7. Set the desired playtime limits by specifying the start and end times for each day of the week. You can also set a cumulative playtime limit for the entire week.
8. After setting up the playtime restrictions, you can proceed to set content restrictions. This allows you to filter games and applications based on age ratings and content types.
9. Choose the appropriate age rating restrictions and content types that you want to block or allow for your child. You can also set restrictions for specific online features.
10. Once the content restrictions are set, you can enable or disable communication features, including online multiplayer and in-game chat.
11. In addition to time and content restrictions, you can also set restrictions for certain functionalities, such as suspending the console’s internet browser or disabling the ability to purchase downloadable content.
12. After setting up all the desired parental control options, select “OK” to save your settings and activate the parental controls on your Nintendo Switch OLED.
With parental controls in place, you can have peace of mind knowing that your child’s gaming activities are supervised and within appropriate limits. You can adjust and fine-tune the parental control settings as needed to ensure a safe and enjoyable gaming experience for your child.
Remember to keep your parental control PIN confidential and periodically review and update the settings to align with your child’s age and maturity. With Nintendo’s robust parental control features, you can create a nurturing and responsible gaming environment that strikes the perfect balance between fun and supervision.
Exploring the Main Menu
When you power on your Nintendo Switch OLED console, you are greeted with the main menu, which serves as the central hub for accessing games, settings, and various features. The intuitive and user-friendly design of the main menu makes it easy to navigate and explore. Here’s a guide to help you navigate and discover the features of the main menu on your Nintendo Switch OLED.
1. The first section on the main menu is the game library. This is where you’ll find all the games you have downloaded or inserted into the console. Scroll through your game library to select the game you want to play.
2. As you navigate through the game library, you’ll notice that each game is represented by a tile with the game’s icon or cover art. Selecting a game tile will launch the game.
3. At the top of the main menu screen, you’ll see your user profile icon. Selecting this icon allows you to access your user profile, where you can view your game statistics, change your profile icon, and manage your account settings.
4. The eShop is another important feature on the main menu. By selecting the eShop icon, you can access the online store where you can browse and purchase a wide variety of games, downloadable content, and other multimedia applications.
5. The news section provides updates and announcements about upcoming games, new releases, and special offers. You can select the news icon to view the latest news and stay informed about the gaming world.
6. The album feature allows you to capture and view screenshots and videos of your gaming moments. You can easily access the album by selecting the album icon on the main menu.
7. You may also notice a “Controllers” icon on the main menu. Selecting this icon brings you to the controller settings, where you can manage and customize your Joy-Con controllers, adjust sensitivity, and recalibrate them if needed.
8. Another important feature accessible from the main menu is the system settings. By selecting the gear icon, you can access a wide range of settings, including display and sound configuration, internet connection settings, user account management, parental controls, and more.
9. Additionally, on the main menu, you’ll find a “Sleep Mode” icon that allows you to put the console in sleep mode to conserve power when not in use. Simply select the icon, and the console will enter sleep mode, ready to be awakened when you’re ready to play again.
10. Lastly, there may be additional icons on the main menu depending on the games or applications you have installed. These icons provide quick access to specific games or apps, allowing you to jump right into the action without navigating through the game library.
The main menu of your Nintendo Switch OLED is designed to provide easy access to your games, settings, and various features. Take the time to explore and familiarize yourself with the different sections and icons to make the most out of your gaming experience.
With the intuitive navigation of the main menu, you can effortlessly switch between games, personalize your settings, and stay updated with the latest news and releases. Enjoy the seamless and user-friendly interface as you dive into the world of gaming with your Nintendo Switch OLED!
Configuring Display and Sound Settings
Configuring the display and sound settings on your Nintendo Switch OLED allows you to customize your gaming experience to suit your preferences. Whether you want to adjust the brightness of the screen or fine-tune the audio output, the console offers a range of settings to enhance your gaming immersion. Here’s a guide on how to configure the display and sound settings on your Nintendo Switch OLED.
Display Settings:
1. Start by navigating to the system settings menu on your Nintendo Switch OLED. You can access the settings menu by selecting the gear icon located at the bottom of the main menu screen.
2. Scroll down in the settings menu and select “System” to access the system settings options.
3. Within the system settings, select “Display.” Here, you’ll find various display configuration options.
4. Adjust the screen brightness to your preferred level by selecting the “Brightness” option. You can either manually adjust the slider or choose the “Auto-Brightness” feature to allow the console to automatically adjust the brightness based on the ambient lighting conditions.
5. The console also offers the option to adjust the screen sleep settings. This determines how long the console remains idle before the screen automatically enters sleep mode. Select “Sleep” to configure the sleep settings according to your preference.
6. Within the display settings, you can also choose the TV settings if your console is connected to a television. Here, you can adjust the TV resolution, HDMI output range, and color range. These settings optimize the display output for your specific television.
Sound Settings:
1. In the same system settings menu, navigate to the “System” section.
2. Within the system section, select “Sound” to access the sound settings options.
3. Adjust the system volume by selecting the “Volume” option. You can manually adjust the volume slider or choose the “Auto” option to allow the console to adapt the volume based on the environment.
4. To customize the audio output settings, select “TV Output.” Here, you can select the audio output mode, adjust the surround sound settings, and enable sound effects as desired.
5. The console also offers the option to connect Bluetooth audio devices. To pair a Bluetooth device, navigate to the “Controllers and Sensors” section in the system settings and select “Bluetooth Audio.” Follow the on-screen instructions to pair your Bluetooth audio device.
By adjusting the display and sound settings on your Nintendo Switch OLED, you can create a personalized gaming environment that suits your visual and audio preferences. Find the perfect balance for screen brightness, adjust the volume to your liking, and fine-tune the audio output settings for an immersive gaming experience.
Take the time to explore and experiment with these settings to enhance your gaming enjoyment and create a setup tailored to your preferences.
Adjusting System Settings
Customizing the system settings on your Nintendo Switch OLED allows you to personalize your gaming experience and tailor the console to your preferences. From managing user accounts to configuring internet settings, the system settings menu offers a range of options to enhance your overall gaming satisfaction. Here’s a guide on how to adjust the system settings on your Nintendo Switch OLED.
1. Start by navigating to the home screen of your Nintendo Switch OLED console.
2. Select the gear icon at the bottom of the screen to access the system settings menu.
3. Within the system settings menu, you will find a variety of options to customize your console.
4. One of the first settings you can adjust is the “Users” option. Here, you can manage user accounts, add new users, and customize profiles.
5. The “Internet” option allows you to manage your internet connection settings. You can set up and configure Wi-Fi connections, review network information, and adjust proxy settings if necessary.
6. To manage your Nintendo Account settings, select the “Nintendo Account” option. Here, you can link or unlink your Nintendo Account, review subscription details, and update account information.
7. The “Save Data Cloud” option allows you to manage your saved game data backups. You can view the status of your cloud backups, enable or disable automatic backups, and manually back up or restore your game data.
8. Under the “System” option, you will find settings related to system updates, data transfers between consoles, sleep mode, parental controls, and more. Explore this section to fine-tune various aspects of your console’s operation.
9. The “Controllers and Sensors” option allows you to manage controller settings, including calibrating the Joy-Con controllers, managing connected controllers, and adjusting the controller vibration settings.
10. Within the system settings, you can also manage various display and sound settings. This includes adjusting screen brightness, configuring TV output options, customizing surround sound settings, and managing volume and audio output preferences.
11. The “Notifications” option allows you to control the console’s notification settings. You can enable or disable notifications for friend requests, game updates, news, and more.
12. Lastly, the “Data Management” option provides options to manage game and save data, including archiving and deleting games, managing software updates, and viewing total storage usage.
By adjusting the system settings on your Nintendo Switch OLED, you can tailor the console’s functionality to meet your specific needs. From managing accounts and internet connections to controlling notification preferences and game data, the system settings menu offers a wealth of customization options.
Take some time to explore the various settings available and customize your Nintendo Switch OLED to maximize your gaming enjoyment and create a personalized gaming experience.
Linking Nintendo Switch Online Service
The Nintendo Switch Online service offers a range of features and benefits, including online multiplayer, access to a library of classic NES and Super NES games, cloud backups for game data, and special offers. To take advantage of these features, you’ll need to link your Nintendo Switch OLED console to the Nintendo Switch Online service. Here’s a guide on how to link your Nintendo Switch Online service to your console.
1. Begin by ensuring that your Nintendo Switch OLED console is connected to the internet.
2. On the home screen, select the Nintendo eShop icon to launch the online store.
3. In the eShop, you’ll find the Nintendo Switch Online banner. Select it to access the Nintendo Switch Online service.
4. Choose the membership plan that best suits your needs. There are various options available, including individual and family plans.
5. Once you’ve selected your membership plan, follow the on-screen prompts to provide payment information and complete the subscription process.
6. After subscribing to the Nintendo Switch Online service, return to the home screen of your console.
7. Select the gear icon to access the system settings menu.
8. Scroll down in the settings menu and select “Nintendo Switch Online.” This will allow you to manage your Nintendo Switch Online account settings.
9. In the Nintendo Switch Online settings, select “Membership Options.” Here, you can view your membership status, see the expiration date, and access additional membership features.
10. Adjust the settings according to your preferences, such as turning on or off automatic renewal of your membership.
11. From the Nintendo Switch Online settings, you can also select “Nintendo Account Information” to manage your Nintendo Account details and settings.
By linking your Nintendo Switch OLED console to the Nintendo Switch Online service, you gain access to a variety of online features and benefits. You can now enjoy online multiplayer with friends and players from around the world, play a curated collection of classic NES and Super NES games, store game data in the cloud for easy backups, and take part in exclusive special offers and promotions.
Remember to check for any additional subscription benefits or limited-time promotions that may be available through the Nintendo Switch Online service. Nintendo regularly adds new features and updates to enhance your gaming experience and provide even more value to subscribers.
Take full advantage of the Nintendo Switch Online service by linking it to your Nintendo Switch OLED console. Embrace the online gaming community, relive the nostalgia of classic games, and enjoy the perks and benefits that come with being a Nintendo Switch Online member.
Pairing Joy-Con Controllers
The Joy-Con controllers of the Nintendo Switch OLED are essential for a versatile gaming experience, offering multiple ways to play your favorite games. Whether using them as individual controllers or combining them into a single gamepad, pairing the controllers with your console is crucial for seamless gameplay. Here’s a step-by-step guide on how to pair Joy-Con controllers with your Nintendo Switch OLED.
1. Begin by turning on your Nintendo Switch OLED console.
2. Locate and slide the Joy-Con controllers into the sides of the console. Ensure that they click into place and fit securely.
3. On the home screen, select the gear icon to access the system settings menu.
4. Scroll down and select “Controllers and Sensors” from the list of options.
5. Within the “Controllers and Sensors” menu, choose “Change Grip/Order.” This will allow you to pair additional controllers or change the order of connected controllers.
6. Hold down the small circular button on the side of each Joy-Con controller. The button is located between the SL and SR buttons.
7. While holding down the buttons, the associated lights on the Joy-Con controllers will start flashing. This indicates that the controllers are in pairing mode.
8. On the console’s screen, the “Change Grip/Order” screen will prompt you to press the L and R buttons on the Joy-Con controllers. Follow the on-screen instructions and press the corresponding buttons on the Joy-Con controllers to pair them.
9. Once the Joy-Con controllers are successfully paired, their lights will stop flashing and a notification will appear on the console’s screen confirming the pairing.
10. If you want to pair additional Joy-Con controllers, follow the same steps and hold down the circular button on each controller until they enter pairing mode. Press the L and R buttons as prompted on the console’s screen to pair them.
By successfully pairing your Joy-Con controllers with the Nintendo Switch OLED console, you can now enjoy a variety of gaming styles, including handheld mode, tabletop mode, and docked mode. The console can recognize and seamlessly switch between different combinations of Joy-Con controllers for multiplayer gaming with friends and family.
If you want to use the Joy-Con controllers wirelessly or play games that require more space, you can detach them from the console and use them separately. To do this, simply slide the release buttons on the back of the Joy-Con controllers and slide them out of the console.
Keep in mind that charging the Joy-Con controllers is necessary to ensure they have enough power for extended gaming sessions. You can charge them by sliding them back into the console or by using separate charging accessories.
Now that your Joy-Con controllers are paired with your Nintendo Switch OLED console, you’re ready to immerse yourself in a world of gaming possibilities. Enjoy the flexibility and versatility that these controllers offer and embrace the joy of playing your favorite games!
Exploring the eShop
The eShop is the digital storefront for the Nintendo Switch OLED, offering a wide selection of games, downloadable content, demos, and more. It’s your gateway to a world of gaming adventures, where you can discover new titles, browse through different genres, and access exclusive content. Here’s a guide on how to explore and make the most of the eShop on your Nintendo Switch OLED.
1. From the home screen of your Nintendo Switch OLED, select the eShop icon to launch the digital storefront.
2. On the eShop’s main page, you’ll find various sections and tabs that showcase featured games, best sellers, and recent releases. Take some time to browse through these sections to discover new and popular titles.
3. To search for specific games or content, select the search icon at the top right corner of the screen. You can enter keywords, browse by genre, or discover games based on user ratings and recommendations.
4. As you explore individual game listings, you can read descriptions, view screenshots and videos, and see user reviews and ratings. This information will help you make informed decisions about which games to purchase.
5. The eShop also offers a collection of demos, allowing you to try out games before making a purchase. Look for the “Free Demos” section to find a variety of playable demos available for download.
6. You can filter games by various criteria, such as genre, price, release date, and more. Utilize these filters to narrow down your search and find games that align with your preferences.
7. Purchasing games and downloadable content is straightforward on the eShop. Select the desired title and choose the “Buy” or “Download” option. Follow the prompts to complete your purchase or initiate the download.
8. The eShop also offers a “Wishlist” feature, allowing you to save games that you’re interested in. You can add games to your wishlist and receive notifications when they go on sale or have updates.
9. In addition to games, the eShop features additional content, such as expansion passes, season passes, and downloadable content (DLC) for games. These provide additional game content, including new levels, characters, and quests.
10. Don’t forget to check out the “Sales” section in the eShop to find discounted games and special offers. Nintendo regularly offers sales and promotions, allowing you to grab great deals on popular titles.
11. The eShop also features a “My Nintendo” section, where you can redeem points earned from game purchases and engage in various activities to unlock rewards, discounts, and exclusive content.
12. Finally, keep an eye on the eShop for limited-time events and special releases, such as seasonal events, themed game launches, and pre-orders for highly anticipated titles.
The eShop on your Nintendo Switch OLED provides a convenient and accessible platform to explore, purchase, and enjoy a plethora of games and additional content. With its user-friendly interface and regularly updated library, it’s an essential destination for any gaming enthusiast.
Take the time to navigate through the eShop, discover new titles, and make the most of the features and offers available to enhance your gaming collection and experience.
Downloading and Playing Games
Downloading and playing games on your Nintendo Switch OLED is a straightforward process that allows you to quickly access a vast library of titles and embark on thrilling gaming adventures. Here’s a guide on how to download and play games on your Nintendo Switch OLED.
1. Ensure that your Nintendo Switch OLED console is connected to the internet via a Wi-Fi connection or a wired connection through the dock.
2. From the home screen, select the Nintendo eShop icon to launch the digital storefront.
3. Browse through the eShop’s various sections to discover games or utilize the search function to find specific titles.
4. Once you have found a game you want to download, select it to access its listing page. Here, you can read a description, view screenshots and videos, and see user reviews and ratings.
5. If you decide to purchase the game, select the “Buy” option. If the game is free to download, select the “Download” option.
6. Follow the on-screen prompts to complete your purchase or initiate the download. If necessary, enter your payment information or use available funds from your Nintendo eShop account.
7. The game will begin downloading onto your Nintendo Switch OLED console. Depending on the size of the game and the speed of your internet connection, the download may take some time.
8. Once the download is complete, the game icon will appear on the home screen of your console. You are now ready to play the game.
9. Select the game icon to launch the game. Follow any on-screen instructions or prompts provided by the game to start playing.
10. Enjoy the gaming experience! Utilize the console’s Joy-Con controllers for different play styles – handheld mode, tabletop mode, or docked mode.
11. While playing the game, you can take advantage of various in-game features, such as saving progress, accessing menus, and customizing settings. Refer to the instructions provided by the game for more information on its specific controls and features.
12. You can always download additional games by repeating the process, exploring the eShop for new releases, and taking advantage of promotions and sales.
With the ability to download and play games directly on your Nintendo Switch OLED console, you have the freedom to build an extensive gaming library and immerse yourself in a wide range of captivating titles. From indie gems to blockbuster hits, the console offers a diverse selection of games to cater to every gaming preference and interest.
Remember to manage your console’s storage capacity and make use of the expandable storage options if needed. By downloading and playing games on your Nintendo Switch OLED, you can unlock endless entertainment and embark on unforgettable gaming experiences.
Exploring Additional Features
While gaming is at the heart of the Nintendo Switch OLED, the console offers several additional features that enhance your overall experience and provide even more entertainment options. Here’s a guide to help you explore and make the most of the additional features on your Nintendo Switch OLED.
Album:
Access the Album feature on your Nintendo Switch OLED to view and manage screenshots and videos captured during gameplay. You can easily capture memorable moments by pressing the capture button on the left Joy-Con controller. The Album allows you to organize and share your favorite gaming moments with friends and fellow gamers.
News:
Stay up to date with the latest news and events in the Nintendo gaming world. The News feature provides regular updates on new game releases, exclusive offers, and upcoming events. You can find news articles from various game developers and publishers, ensuring you are always in the loop with the latest happenings.
Sleep Mode:
The Sleep Mode feature allows you to put your Nintendo Switch OLED into a low-power state when not in use while still being able to quickly resume your game. Simply press the power button briefly to enter Sleep Mode and extend your console’s battery life during breaks in your gameplay sessions.
Parental Controls:
Utilize the Parental Controls feature to manage and monitor your child’s gaming activities. Set playtime limits, restrict access to certain content, and control online features to ensure a safe and suitable gaming environment. Parental Controls provide peace of mind and help you strike the right balance between fun and responsible gaming.
System Updates:
Regular system updates for your Nintendo Switch OLED console ensure that you have access to the latest features and improvements. Make sure to keep your console up to date by checking for system updates in the System Settings menu. System updates often provide bug fixes, performance enhancements, and new functionalities to enhance your gaming experience.
My Nintendo Rewards:
Register for a My Nintendo account and take advantage of the My Nintendo Rewards program. By earning points from game purchases, completing missions, and participating in special events, you can unlock exclusive rewards such as discounts on games, unique digital content, and even physical merchandise.
Play Online:
Subscribe to the Nintendo Switch Online service to access online multiplayer features and play with friends and gamers from around the world. Engage in competitive matches, team up in cooperative games, and enjoy multiplayer experiences across a wide selection of titles.
Physical and Digital Games:
Don’t forget that the Nintendo Switch OLED supports both physical game cartridges and digital downloads. You have the flexibility to build a physical game collection, share games with friends, and utilize the expandable storage to download and store digital games directly on your console.
By exploring these additional features, you can maximize your gaming experience on the Nintendo Switch OLED and unlock a wealth of entertainment options beyond traditional gameplay. Embrace the versatility and functionality of your console and enjoy the multitude of features it offers.