
What is Text Wrapping?
Text wrapping is a formatting technique used in PowerPoint to create a visual effect where text appears to flow around or inside an image or shape. It allows you to add a picture inside the text on a PowerPoint slide, making your presentation more engaging and visually appealing.
With text wrapping, you have the flexibility to position the picture within the text and control the flow of the surrounding text. This technique is particularly useful when you want to highlight specific content or add a decorative touch to your slides.
Text wrapping offers different options, such as square, tight, through, and top and bottom. Each option determines how the text interacts with the picture and affects the layout of the slide.
By using text wrapping, you can create visually captivating slides that effectively convey your message. Whether you want to showcase a product image, include a relevant picture, or simply add a decorative element, text wrapping provides a versatile and creative way to enhance your PowerPoint slides.
Inserting and Positioning the Picture
Inserting and positioning the picture is the first step in adding a picture inside the text on a PowerPoint slide. Here’s how you can do it:
- Open your PowerPoint presentation and navigate to the slide where you want to add the picture.
- Click on the Insert tab in the PowerPoint ribbon.
- Click on the Picture button to insert an image from your computer or select Online Pictures to search for an image from various online sources.
- Select the desired picture and click on the Insert button.
- The picture will be inserted onto the slide. Click and drag the picture to the desired position.
- To resize the picture, click on one of the corners and drag it inward or outward.
Positioning the picture is crucial in achieving the desired effect of having the text wrap around it. Experiment with different placements to find the most visually appealing position that complements the content.
Remember that the picture will serve as the focal point, so make sure it doesn’t overpower or distract from the text. Find a balance where the picture enhances the slide’s visual appeal while allowing the text to remain clear and legible.
Once you have inserted and positioned the picture, you can move on to the next step of adding the text to create the effect of having the picture inside the text.
Adding the Text
After inserting and positioning the picture, it’s time to add the text that will appear to be inside the picture. Follow these steps to achieve the desired effect:
- Click on the Insert tab in the PowerPoint ribbon.
- Click on the Text Box button to insert a text box onto the slide.
- Click and drag the cursor on the slide to create a text box.
- Type or paste the text that you want to appear inside the picture.
- Format the text using the options available in the PowerPoint ribbon, such as font size, font style, and color.
When adding the text, make sure to position it in such a way that it appears to be inside the picture. You can adjust the text box’s positioning by clicking and dragging it to the desired location on the slide. Experiment with different placements to find the most visually appealing arrangement.
Additionally, consider the contrast between the text and the picture to ensure readability. Choose a text color that stands out against the picture background, making it easy for the audience to read the content.
Remember, the text should complement the picture and convey your message effectively. Keep the text concise and meaningful, focusing on key points or captions that enhance the visual impact of the image.
Once you have added the text, you can further enhance the visual appeal by formatting the text box itself to seamlessly integrate it with the picture.
Formatting the Text Box
Formatting the text box is an important step in ensuring that it integrates smoothly with the picture and enhances the overall visual appeal of your PowerPoint slide. Here’s how you can format the text box:
- Click on the text box to select it.
- Go to the Format tab in the PowerPoint ribbon.
- In the Text Styles group, choose a predefined text box style that complements your slide’s design or customize the formatting options as per your preference.
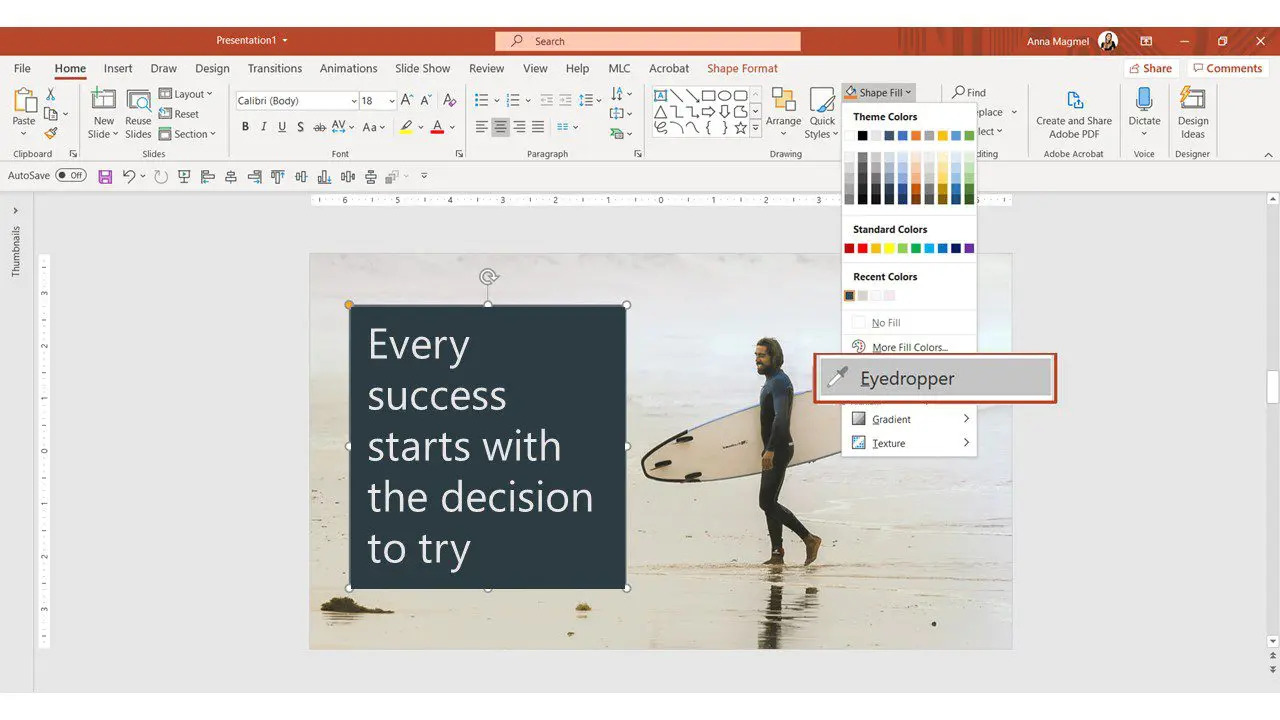
- Modify the text box’s fill color, line color, and other formatting properties using the options available in the Shape Styles and Shape Fill sections.
- Adjust the text box’s position, size, and orientation to ensure it fits seamlessly with the picture and achieves the desired effect.
- Consider adding effects, such as shadows or reflections, to the text box to make it stand out and add depth to your slide.
When formatting the text box, aim for consistency with the overall design and theme of your presentation. Using a consistent font style, color scheme, and alignment will help maintain a cohesive and professional look.
Keep in mind that the formatting should not overpower the content or distract from the picture. The purpose of formatting is to enhance the visual appeal and readability of the text, ensuring that it effectively complements the picture.
Take the time to experiment with different formatting options until you achieve the desired result. Don’t be afraid to be creative and think outside the box to create a visually stunning and engaging PowerPoint slide.
Adjusting the Picture
After inserting the picture and positioning it on your PowerPoint slide, you may need to make some adjustments to ensure it fits seamlessly and enhances the overall visual impact. Here are some steps to help you adjust the picture:
- Click on the picture to select it.
- Go to the Format tab in the PowerPoint ribbon.
- Adjust the picture’s size by clicking and dragging the corner handles. Ensure that the picture is neither too large nor too small, maintaining a visually pleasing proportion.
- Resize the picture while holding the Shift key to maintain its original aspect ratio.
- Rotate or flip the picture if desired. Use the rotation handle at the top of the picture and drag it to the left or right to rotate the picture. Right-click on the picture to access the context menu and choose the Flip Horizontal or Flip Vertical option.
- If necessary, apply image corrections, such as adjusting the brightness, contrast, or sharpness, to enhance the picture’s appearance. These adjustments can be made in the Picture Tools Format tab, under the Adjust group.
- Consider adding effects to the picture, such as a border or a shadow, to make it visually stand out. These options can be found in the Picture Tools Format tab, under the Picture Styles group.
By adjusting the picture, you can ensure that it aligns with your slide’s design and effectively conveys your intended message. Take the time to experiment with different sizes, rotations, and effects until you achieve the desired result.
Keep in mind that the adjustments should complement the overall theme and content of your presentation. The goal is to create a visually appealing and cohesive slide that captivates your audience’s attention.
Once you are satisfied with the adjustments made to the picture, you can proceed to fine-tune the placement and alignment of the text box to complete the effect of having the picture inside the text.
Adjusting the Text Box
After adding the text inside the picture on your PowerPoint slide, you may need to make some adjustments to the text box to ensure it fits seamlessly and visually enhances the overall composition. Here are some steps to help you adjust the text box:
- Click on the text box to select it.
- Drag the text box to the desired location on the slide, ensuring that it aligns well with the picture and visually creates the effect of having the text inside the image.
- Resize the text box by clicking and dragging the corner handles to make it fit perfectly within the picture or adjust its size to accommodate the desired amount of text.
- If necessary, rotate the text box to align it at a different angle or to match the perspective of the picture. Click and drag the rotation handle at the top of the text box to rotate it as needed.
- Format the text box using options available in the PowerPoint ribbon. You can modify the font style, size, color, and alignment to ensure readability and match the overall theme of your presentation.
- Consider applying additional formatting effects to the text box, such as adding a shadow, outline, or fill color, to make it visually stand out and further enhance its integration into the picture.
By adjusting the text box, you can refine the appearance of the text and ensure that it harmonizes with the picture, creating a cohesive and visually appealing effect. Take the time to experiment with positioning, size, and formatting options until you achieve the desired result.
Remember to strike a balance between the text box and the picture, ensuring that the text remains legible and does not overpower or compete with the visual impact of the image. The goal is to create a seamless integration that enhances the overall design and effectively conveys your message.
Once you are satisfied with the adjustments made to the text box, you can proceed to align the text within the box and refine other details to achieve a polished and professional-looking slide.
Aligning the Text with the Picture
Aligning the text with the picture is a crucial step in creating a cohesive and visually appealing slide. Proper alignment ensures that the text integrates seamlessly with the image and enhances the overall composition. Here’s how you can align the text with the picture:
- Click on the text box to select it.
- Go to the Format tab in the PowerPoint ribbon.
- Under the Text Options group, select the Align Text button to choose the desired alignment option:
- Align Left: Aligns the text to the left side of the text box.
- Align Center: Centers the text horizontally in the text box.
- Align Right: Aligns the text to the right side of the text box.
- Align Justify: Aligns the text to both the left and right sides, creating a clean straight edge on both sides of the text box.
- Click on the Align Text button again to toggle the options and choose the alignment that best suits your design and visual preferences.
- Adjust the line spacing, indentation, or other formatting options as needed to ensure the text aligns properly with the picture and enhances the overall aesthetic appeal.
Consider the positioning and overall composition of the slide when aligning the text. Aim for a balanced and visually pleasing arrangement, ensuring that the text does not overlap the picture or appear too distant from it. The goal is to create a harmonious interplay between the text and the image.
Remember, consistent alignment throughout your slide design will contribute to a polished and professional presentation. Take the time to experiment and adjust the alignment until you achieve the desired result.
By aligning the text with the picture, you will create a visually cohesive and engaging slide that effectively communicates your message to your audience.
Working with Multiple Pictures
Using multiple pictures in your PowerPoint slides can add depth and visual interest to your presentation. Here are some tips for effectively working with multiple pictures:
- Insert the first picture onto your slide using the steps mentioned earlier.
- Position and resize the first picture according to your desired layout.
- To insert another picture, click on the Insert tab in the PowerPoint ribbon and follow the same steps as before.
- To arrange the pictures, use the drag-and-drop technique to move them into the desired positions. Alignment guides and grids can help you line up the pictures accurately.
- Experiment with different layouts, such as side-by-side, grid, or staggered positioning, to create a visually pleasing composition.
- Consider using picture placeholders or frames to provide a consistent structure for your pictures.
- If necessary, adjust the order of the pictures by selecting a picture, right-clicking, and choosing the Send to Back or Bring to Front option.
- Apply formatting, effects, or borders to individual pictures to further enhance their visual impact and create a cohesive look.
- Add captions or labels to each picture using text boxes or annotations to provide context or describe the content.
When working with multiple pictures, ensure that they complement each other and align with the overall theme of your presentation. Choose pictures that are relevant to the topic and visually appealing. Maintain a good balance between the pictures and the accompanying text, ensuring that they work together harmoniously.
It’s important to avoid overcrowding your slide with too many pictures. Be selective and use pictures strategically to support your key points or to visually illustrate concepts.
By effectively working with multiple pictures, you can create a visually rich and engaging presentation that captivates your audience’s attention and effectively communicates your message.
Common Mistakes to Avoid
While adding a picture inside the text on a PowerPoint slide can enhance the visual appeal of your presentation, there are some common mistakes that you should avoid. By steering clear of these pitfalls, you can ensure that your slides are professional, visually appealing, and effectively deliver your message. Here are some common mistakes to be aware of:
- Overcrowding: Avoid overcrowding your slide with too much text or too many pictures. Keep the content focused and concise to maintain clarity and prevent your slide from appearing cluttered.
- Poor Image Quality: Ensure that the pictures you use are of high resolution and good quality. Blurry or pixelated images can detract from the overall professional look of your slide.
- Unreadable Text: Make sure that the text is legible and easy to read. Choose an appropriate font size, style, and color that contrast well with the background and the picture to ensure readability for your audience.
- Improper Alignment: Ensure that the text and pictures are properly aligned and positioned. Poor alignment can make your slide appear unprofessional and visually unpleasing.
- Lack of Consistency: Maintain consistency in the design and formatting of your slides. Use the same font, color scheme, and formatting style throughout the presentation to create a cohesive and professional look.
- Irrelevant Images: Avoid using pictures that have no relevance to your topic or do not add value to your presentation. Choose images that support your message and enhance the overall understanding and engagement of your audience.
- Excessive Effects: Refrain from overusing effects such as animations, transitions, and visual embellishments. These effects can be distracting and take away from the clarity and professionalism of your presentation.
- Lack of Proofreading: Always proofread your text to ensure there are no spelling or grammatical errors. Mistakes in your presentation can diminish your credibility and professionalism.
- Failure to Resize and Crop Images: Resize and crop your images appropriately to fit within the available space on your slide. This will prevent distortion and ensure that the focus remains on the important elements of the image.
By avoiding these common mistakes, you can create visually appealing and professional slides that effectively convey your message to your audience, leaving a lasting impression.