Choosing the Right PowerPoint Template
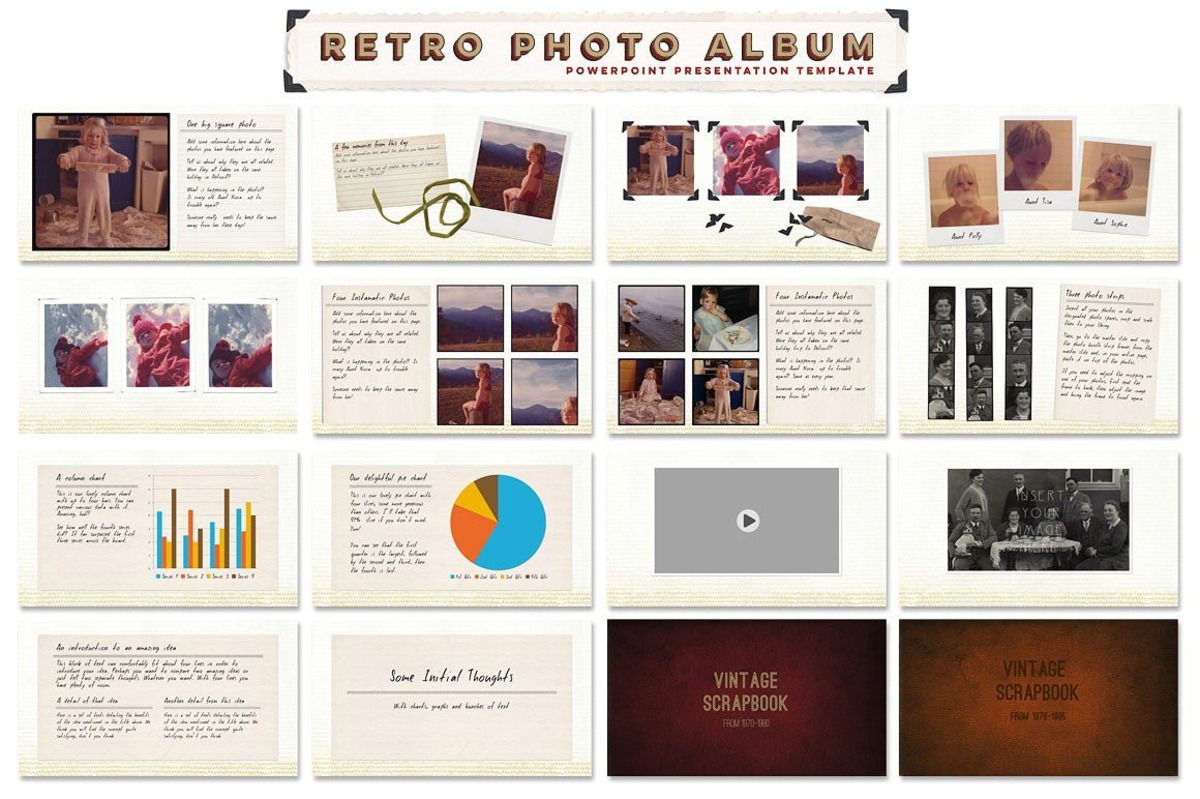
When creating a digital photo album in PowerPoint, choosing the right template is crucial. The template sets the overall design and visual style of your presentation, creating a cohesive and professional look. Here are some tips to help you choose the perfect PowerPoint template for your photo album:
- Consider the theme: Look for a template that matches the theme or mood of your photos. For example, if you’re creating a travel photo album, a template with a vibrant and adventurous design would be fitting. If it’s a wedding album, a template with an elegant and romantic style would be more appropriate.
- Pay attention to colors: Ensure that the template colors complement your photos. Avoid templates with clashing or distracting colors that may take away from the visual impact of your images. Consider the color schemes used in your photos and choose a template that harmonizes with them.
- Simplicity is key: Opt for a clean and uncluttered template that won’t overshadow your photos. The template should provide a consistent and neutral background that allows your images to take center stage. Avoid templates with excessive graphics or busy patterns that can make your album look messy or chaotic.
- Consider the layout: Take into account the layout options offered by the template. Look for a template that provides ample space for your photos, captions, and descriptions. Make sure the layout is user-friendly and easy to navigate, allowing viewers to enjoy your photo album without any confusion.
- Customizability: Choose a template that allows for easy customization. Look for templates that offer flexibility in terms of font style, colors, and placeholders. This will enable you to add your personal touch and make the photo album truly unique.
By considering these factors, you can select a PowerPoint template that perfectly complements your photos and enhances the overall visual appeal of your digital photo album. Remember, the template should serve as a foundation for your creativity and help showcase your photos in the best possible way.
Importing and Formatting Photos
Once you have chosen the perfect PowerPoint template for your digital photo album, it’s time to import and format your photos. Follow these steps to ensure your photos are optimized for your presentation:
- Importing photos: Begin by gathering all the photos you want to include in your album. Open PowerPoint and go to the slide where you want to import the photos. Click on the “Insert” tab, then select “Pictures” from the dropdown menu. Browse your computer for the desired photos and click “Insert” to add them to the slide.
- Resizing and cropping: After importing the photos, you may need to resize or crop them to fit the slide and maintain the desired composition. Click on the photo, then click and drag the corner handles to resize it. To crop the photo, click on the “Crop” icon in the “Picture Format” tab and adjust the cropping handles to remove any unwanted areas.
- Adjusting brightness and contrast: To enhance the visual quality of your photos, you can adjust the brightness and contrast settings. Click on the photo, then navigate to the “Picture Format” tab. Use the “Corrections” section to make adjustments until you’re satisfied with the appearance of the photo.
- Applying filters: If you want to add a unique touch to your photos, you can apply filters to alter their colors and effects. Select the photo, go to the “Picture Format” tab, and click on the “Artistic Effects” option. Experiment with different filters until you achieve the desired artistic effect.
- Adding borders and frames: To make your photos stand out, you can add borders or frames. Click on the photo, go to the “Picture Format” tab, and select the “Picture Styles” option. Choose a preset border or frame, or customize the settings to create a unique look.
- Arranging photos: Arrange the photos on the slide in a visually appealing way. You can align them horizontally or vertically, overlap them, or create a collage effect. Play around with different arrangements to find the one that best showcases your photos.
By importing and formatting your photos in PowerPoint, you can ensure they are tailored to your digital photo album and create a visually stunning presentation. Remember to save your work regularly to avoid losing any changes, and don’t forget to keep backups of your original photos.
Organizing Photos in the Slide Master
One of the key aspects of creating a well-structured digital photo album in PowerPoint is organizing the photos in the slide master. The slide master allows you to define the layout and design elements that will be applied consistently throughout your entire presentation. Here are the steps to efficiently organize your photos in the slide master:
- Access the slide master: Open PowerPoint and go to the “View” tab. Click on “Slide Master” to access the slide master view. You will see a thumbnail preview of all the available slide layouts on the left-hand side.
- Choose a layout: Select a slide layout that you want to use for your photo album. This will serve as the foundation for all the slides in your presentation. Consider choosing a layout that provides adequate space for photos, captions, and any other accompanying elements.
- Insert a picture placeholder: To effectively organize your photos, you can insert a picture placeholder in the slide master. This will ensure consistent sizing and positioning of all the photos on each slide. From the “Slide Master” tab, click on “Insert Placeholder” and choose “Picture”. Drag and resize the picture placeholder to the desired size and position.
- Customize the picture placeholder: With the picture placeholder selected, you can further customize it by adjusting the formatting options. Use the “Picture Format” tab to apply desired effects, borders, or shadows to the placeholder. You can also modify the placeholder’s size and position to fit your specific layout needs.
- Duplicate the layout: In order to apply the organized photo layout to multiple slides, duplicate the layout in the slide master. Right-click on the layout thumbnail and select “Duplicate Layout”. This will create an identical layout which you can modify individually if needed.
- Add more layouts if necessary: If you have different styles or formats for your photo album, you can add additional layouts in the slide master. Simply click on the “Insert Layout” button in the “Slide Master” tab, and customize the new layout accordingly.
By organizing photos in the slide master, you can ensure consistent placement and formatting throughout your entire digital photo album. This saves time and effort as you create individual slides, and ensures a professional and cohesive presentation. Once you have organized the photos in the slide master, you can now proceed to further customize each individual slide with specific photos, captions, and any other desired elements.
Adding Captions and Descriptions to Photos
Adding captions and descriptions to your photos is an important step in creating a visually engaging and informative digital photo album in PowerPoint. Captions provide context and help tell the story behind each photo, while descriptions offer additional details and information. Here’s how you can effectively add captions and descriptions to your photos:
- Select the photo: Start by selecting the photo to which you want to add a caption or description. Click on the photo to ensure it’s active and ready for editing.
- Add a text box: From the “Insert” tab, click on “Text Box” to insert a text box next to or below the selected photo. Position the text box where you want the caption or description to appear.
- Type the caption or description: Double-click inside the text box and enter the desired caption or description. You can adjust the font size, color, and style of the text to match the overall design of your presentation.
- Format the text box: Customize the appearance of the text box by adjusting its size, position, and background fill. You can also add borders or shadows to make the caption or description stand out.
- Align and position: Ensure that the caption or description is aligned properly with the photo. You can use the alignment tools in PowerPoint to center or align the text box with the photo or adjust it according to your preferred layout.
- Repeat for other photos: Repeat the above steps to add captions and descriptions to other photos in your digital photo album. Consistency in formatting and positioning will create a polished and professional look throughout the presentation.
Remember that captions and descriptions should be concise and focused, providing relevant information without overwhelming the viewer. Use clear and descriptive language to convey the essence of each photo and highlight any important details. Additionally, ensure that the captions and descriptions do not obstruct the view or distract from the visual impact of the photo.
By adding captions and descriptions to your photos, you not only enhance the storytelling aspect of your digital photo album but also provide a deeper level of engagement and understanding for your audience.
Customizing Transitions and Animations
Transitions and animations play a significant role in creating a dynamic and visually appealing digital photo album in PowerPoint. They help to smoothly transition between slides and add movement to your presentation. Here’s how you can customize transitions and animations to enhance your photo album:
- Select the slide: Start by selecting the slide to which you want to apply a transition or animation. Click on the slide in the slide thumbnails pane to ensure it’s active and ready for customization.
- Add a transition: From the “Transitions” tab, choose a transition effect that suits the overall theme and mood of your photo album. Use the dropdown menu to explore different transition options and see a live preview of how it will look.
- Adjust transition settings: Once you’ve selected a transition effect, you can customize its settings. Set the duration or speed of the transition, add sound effects, and choose whether the transition should be applied to all slides or just the selected one.
- Preview the transition: Click on the “Preview” button in the “Transitions” tab to see how the selected transition effect will look on your slide. This allows you to make any necessary adjustments before finalizing the transition.
- Add animations to objects: To bring your photos to life, you can add animations to specific objects within a slide. Click on the object (e.g., a photo or text box) to select it, then go to the “Animations” tab.
- Choose an animation effect: From the “Animations” tab, select an animation effect that you want to apply to the selected object. Choose from a range of entrance, exit, emphasis, or motion path animations to add movement and visual interest.
- Customize animation settings: Once you’ve selected an animation effect, you can customize its settings. Set the animation’s duration, delay, or timing options to control when and how the animation occurs.
- Preview the animation: Use the “Preview” button in the “Animations” tab to see how the animation effect will appear on your slide. Adjust settings or choose a different effect if necessary.
- Apply animation to multiple objects: To save time and maintain consistency, you can apply the same animation effect to multiple objects within a slide or across multiple slides. Simply select the objects, go to the “Animations” tab, and choose the desired animation effect.
Customizing transitions and animations allows you to create a captivating and visually engaging digital photo album. However, it’s essential to use transitions and animations sparingly, ensuring they enhance the overall flow and storytelling of your presentation without distracting or overpowering the photos.
Remember to consider the pace of the transitions and animations, tailoring them to match the tone and mood of your photo album. Experiment with different effects and combinations to find what works best for your presentation while maintaining a visually appealing and cohesive experience.
Inserting Audio and Video into your Photo Album
Incorporating audio and video elements into your digital photo album can bring a whole new level of engagement and storytelling to your presentation. By combining visuals with sound, you can create a truly immersive experience for your audience. Follow these steps to seamlessly insert audio and video into your PowerPoint photo album:
- Prepare your audio/video files: Ensure that your audio and video files are in a compatible format for PowerPoint, such as MP3 for audio and MP4 for video. If needed, convert your files using a reliable file converter available online.
- Insert audio: From the “Insert” tab, click on “Audio” and select “Audio on My PC”. Browse your computer for the desired audio file and click “Insert”. The audio file will appear as a speaker icon on the slide.
- Customize audio playback: With the audio file selected, you can customize its playback settings. Use the “Audio Tools” tab to set the audio to play automatically or on click, adjust the volume, trim the audio file, or loop it if necessary.
- Position and size the audio icon: Click and drag the audio icon to reposition it on the slide. Adjust its size and placement to ensure it doesn’t interfere with the visual elements of your photo album.
- Insert video: Similarly, click on “Video” from the “Insert” tab and select “Video on My PC”. Locate the desired video file on your computer and click “Insert”. The video will appear as a video player icon on the slide.
- Customize video playback: With the video file selected, customize its playback settings using the “Video Tools” tab. Set the video to play automatically or on click, adjust volume, add captions, or trim the video to the desired length.
- Resize and position the video: Resize and position the video player icon to fit within your slide layout. Ensure it doesn’t overlap or obstruct any important visual elements in your photo album.
- Play audio and video: During your presentation, the audio will play automatically or when clicked, depending on the settings you’ve chosen. To play the video, click on the video player icon during the slide show.
- Test and rehearse: Before presenting your photo album, make sure to test the audio and video elements to ensure they play correctly. Rehearse your presentation to ensure seamless transitions between slides and smooth operation of audio and video.
By inserting audio and video elements into your photo album, you can create a multimedia experience that captures the viewers’ attention and adds depth to the storytelling. However, it’s important to use audio and video sparingly and strategically, ensuring they enhance rather than overshadow your photos and message.
Remember to consider the file size and compatibility of the audio and video files to ensure smooth playback on different devices and platforms. Additionally, make sure you have the necessary permissions and rights to use the audio and video content in your photo album.
Adding Navigation Buttons and Hyperlinks
Adding navigation buttons and hyperlinks to your digital photo album in PowerPoint can greatly improve the user experience and allow for seamless navigation between slides and sections. With the right setup, you can create an interactive and intuitive presentation. Here’s how you can add navigation buttons and hyperlinks:
- Create a slide for navigation: Start by creating a dedicated slide that will serve as a navigation hub. This slide will contain the navigation buttons or hyperlinks to different sections or slides within your photo album.
- Insert shapes for buttons: On the navigation slide, go to the “Insert” tab and click on “Shapes”. Choose a shape that will serve as your navigation button, such as a rectangle or a circle.
- Add text and formatting: Click on the shape to select it, then add text to the shape to indicate its purpose or destination. Customize the formatting of the shape and text to match the overall design of your photo album.
- Add hyperlinks: With the button shape still selected, go to the “Insert” tab and click on “Hyperlink”. Choose the “Place in This Document” option, and select the destination slide or section to which the button will link. Click “OK” to apply the hyperlink.
- Repeat for additional buttons: Repeat the above steps to add more navigation buttons, each linking to a different slide or section within your photo album.
- Customize button appearance: Customize the appearance of the navigation buttons by adjusting their size, color, and position on the slide. Consider grouping the buttons or aligning them in a visually appealing way.
- Test the hyperlinks: In the slide show mode, click on the navigation buttons to test if the hyperlinks are working correctly. Ensure that each button takes you to the intended slide or section.
- Add home or back buttons: To enhance navigation further, consider adding a “Home” button or a “Back” button that allows users to return to the navigation slide or the previous slide. Follow the same steps as above to create and link these buttons.
- Apply consistent navigation: To provide a seamless user experience, ensure that the navigation buttons or hyperlinks are consistent throughout your photo album. Maintain the same layout, design, and functionality across all slides.
By adding navigation buttons and hyperlinks, you empower your audience to explore your photo album at their own pace and navigate through the content easily. This interactivity adds an extra layer of engagement and helps viewers navigate through your presentation with ease.
Remember to test the navigation buttons and hyperlinks thoroughly before presenting your photo album. Make sure they function correctly and smoothly transition between slides. With well-designed navigation, your audience will have a more enjoyable and interactive experience throughout the entire photo album.
Editing and Rearranging Photos in your Album
Editing and rearranging photos is an essential step in perfecting your digital photo album in PowerPoint. By fine-tuning your photos and arranging them in a visually pleasing order, you can create a seamless and captivating presentation. Here’s how you can edit and rearrange the photos in your album:
- Edit photos: Before placing your photos in the presentation, consider editing them to enhance their visual impact. Use photo editing software to adjust brightness, contrast, color saturation, or apply filters as desired. This will help make your photos even more captivating and polished.
- Insert photos: Open PowerPoint and navigate to the slide where you want to add a photo. Click on the “Insert” tab and select “Pictures” to import your edited photos into the presentation. Browse your computer, select the desired photo, and click “Insert”. Repeat this step for each photo you want to include in your album.
- Resize and crop: Once your photos are inserted, you may need to resize and crop them to fit the desired layout. Click on a photo, then click and drag the corner handles to resize it. To crop the photo, click on the “Crop” icon in the “Picture Format” tab and adjust the cropping handles to remove any unwanted areas.
- Apply formatting: Customize the formatting of your photos to match the overall style of your presentation. Use the options in the “Picture Format” tab to apply effects, borders, or shadows to enhance the visual appeal. Ensure consistency in formatting across all your photos.
- Rearrange photos: To achieve an optimal visual flow, rearrange the order of your photos. Click on a photo, then drag and drop it to a new position within the slide or between different slides. Experiment with different arrangements until you find the most effective order.
- Group photos: If you have groups of related photos, you can group them together for a cohesive look. Click and drag to select multiple photos, then right-click and choose “Group” from the context menu. Grouped photos can be resized and moved together as a single unit.
- Add transition effects: To enhance the visual transition between photos, you can add transition effects. Select the slide containing the photo, go to the “Transitions” tab, and choose a desired transition effect. Ensure that the transition complements the overall mood and style of your photo album.
- Preview and fine-tune: Regularly preview your photo album in slide show mode to ensure the photos are arranged and edited to your satisfaction. Make any necessary adjustments or refinements to achieve a seamless and visually engaging presentation.
By editing and rearranging photos in your digital photo album, you can create a visually stunning presentation that tells a compelling story. Remember to maintain consistency in editing styles, formatting, and transitions throughout your album to create a cohesive and professional-looking result.
Take your time with this process, experimenting with different arrangements and adjustments to find the most visually pleasing and impactful layout for your photo album.
Sharing and Presenting your Photo Album
After putting the finishing touches on your digital photo album in PowerPoint, it’s time to share and present your creation. Here are some key steps to effectively share and present your photo album:
- Save and make a backup: Before sharing your photo album, save your presentation and create a backup copy. This ensures that your hard work is secured and easily accessible.
- Choose a sharing method: Determine how you want to share your photo album. You have various options, such as sharing it directly from PowerPoint, converting it into a PDF, uploading it to a cloud storage service, or even publishing it on a website.
- Share within PowerPoint: If you want to share your photo album directly from PowerPoint, go to the “File” tab and click on “Share”. Choose the desired sharing method, such as sending it via email, saving it to OneDrive, or presenting it online using PowerPoint Online.
- Convert to PDF: Converting your photo album to PDF format allows compatibility with different devices and platforms. In PowerPoint, go to the “File” tab, click on “Save As”, and choose “PDF” as the file format. Save the PDF to your desired location.
- Upload to cloud storage: If you prefer sharing your photo album via a cloud storage service, save the presentation to your chosen cloud storage folder. This enables easy access for others to view and download the photo album.
- Publish on a website: For more widely accessible sharing, you can consider publishing your photo album on a website or a photo sharing platform. Export your presentation as a video or convert it to a compatible web format, and then upload it to the platform of your choice.
- Prepare for presenting: Before presenting your photo album, ensure that all multimedia elements, such as audio and video, are functioning correctly. Test your presentation on the actual equipment you plan to use during the presentation to ensure compatibility.
- Engage your audience: During your presentation, actively engage with your audience by providing context, storytelling, and explanations for each photo. Maintain a steady pace and allow time for viewers to fully appreciate each image and absorb the story behind it.
- Use slide show features: Take advantage of the slide show features in PowerPoint, such as slide transitions, animations, and navigation buttons, to enhance the delivery and interactivity of your photo album.
- Address questions and feedback: After the presentation, encourage your audience to ask questions or provide feedback. This allows for a deeper connection and dialogue, creating a more meaningful experience for both you and your viewers.
By effectively sharing and presenting your photo album, you can showcase your creative work and evoke emotions, memories, and connections through your visuals. Remember to tailor your sharing method to the preferences of your audience and the platforms they are most comfortable using.
Enjoy the experience of presenting your photo album and sharing your passion with others, as it is a powerful way to connect with your audience and leave a lasting impression.