
Reasons to Transfer Slides to Digital
Transferring your slides to a digital format offers numerous benefits and advantages. Whether you have cherished memories captured on old slides or valuable historical photographs, digitizing them can help preserve them for future generations and make them easier to access and share. Here are some compelling reasons to consider transferring your slides to digital:
- Preservation: Slides degrade over time due to exposure to light, moisture, and other environmental factors. By digitizing your slides, you can preserve them in a format that won’t fade, discolor, or deteriorate. This will ensure that your precious memories and important images are safe for years to come.
- Convenience: Digital slides offer convenience and ease of use. Instead of searching through physical slides and setting up a projector, you can access your digital images with a few clicks on your computer or mobile device. This makes viewing and sharing them a breeze, whether you want to reminisce with family and friends or showcase your work professionally.
- Space-saving: Physical slides can take up substantial storage space, especially if you have a large collection. By converting them to digital, you can free up physical space and eliminate the need for bulky slide storage boxes. This is particularly beneficial for those with limited storage options or those who prefer a clutter-free living space.
- Enhanced accessibility: Digital slides can be easily accessed and shared across different devices, platforms, and social media channels. You can send them to loved ones via email, share them on social networks, or even create online albums for wider distribution. This eliminates the need for multiple physical copies and allows you to reach a larger audience with your treasured photos.
- Improved image quality: Scanning your slides allows you to enhance and improve the image quality. You can adjust brightness, contrast, and color balance, eliminate dust and scratches, and even crop or resize images as needed. This gives you more control over how your photos look and ensures they are presented in the best possible way.
These are just a few of the reasons why transferring your slides to digital is a smart choice. Not only does it protect your precious memories from loss or damage, but it also allows for greater flexibility in sharing and enjoying your images. Whether you have personal photos or historical slides, digitizing them is a worthwhile investment in preserving and sharing your visual heritage.
Equipment Needed for Transferring Slides to Digital
Transferring your slides to a digital format requires specific equipment to ensure high-quality scans and a smooth conversion process. Here are the essential tools you’ll need:
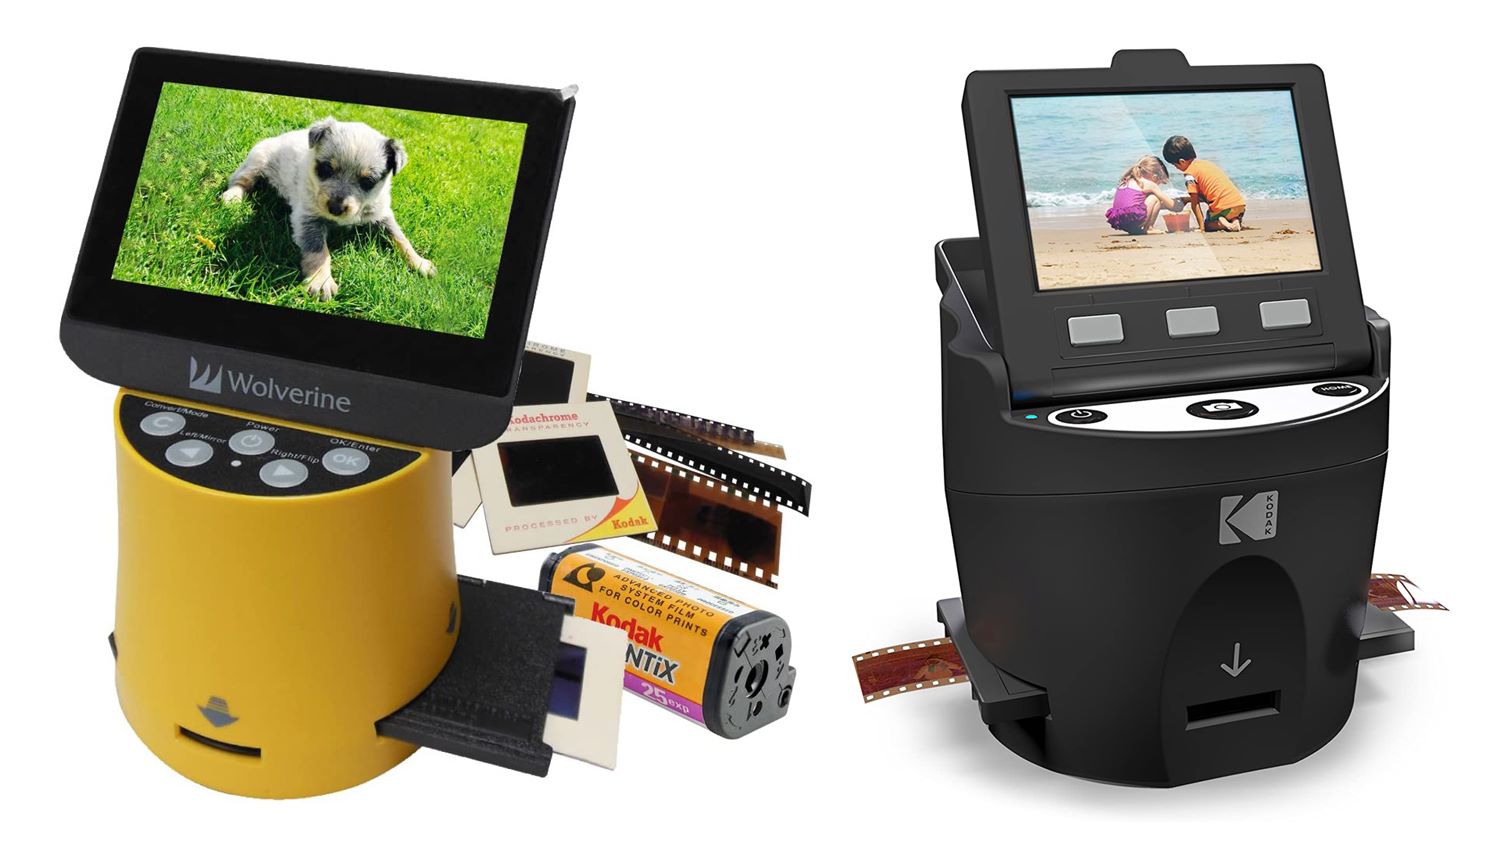
- Slide Scanner: The most critical piece of equipment for slide digitization is a slide scanner. There are several options available, including flatbed scanners with built-in transparency units and dedicated slide scanners. Look for a scanner that offers high resolution, adjustable settings for color correction, and compatibility with your computer’s operating system.
- Cleaning Tools: Before scanning your slides, it’s important to clean them to remove dust, fingerprints, and smudges. You can use an anti-static brush or compressed air to gently clean the slides and a lint-free cloth or microfiber cloth to wipe the scanner glass. Keeping your slides and the scanner clean will ensure optimal scan quality.
- Slide Holders or Carriers: Slide holders or carriers are accessories that hold your slides in place during scanning, preventing them from shifting or getting damaged. They help maintain a consistent positioning and focus, resulting in sharp and accurate scans. Make sure to choose holders that are compatible with your scanner and slide format.
- Computer and Software: To save and edit your digital slides, you’ll need a computer with sufficient processing power and storage capacity. Additionally, you’ll need scanning software that comes with the slide scanner or third-party software that supports slide scanning. This software allows you to adjust settings, crop images, and save them in various file formats.
- Storage Devices: Once your slides are scanned and converted to digital format, you’ll need storage devices to store and back up your precious images. External hard drives, USB flash drives, or cloud storage services are ideal for keeping your digital slide collection organized and secure.
- Optional Accessories: Depending on your specific needs and preferences, you may also consider investing in a slide projector to view your slides in a traditional way, negative and slide holders for scanning film negatives, and color calibration tools to ensure accurate color reproduction.
Having the necessary equipment not only makes the process of transferring slides to digital more efficient but also ensures the best possible results. By investing in quality equipment and maintaining cleanliness throughout the process, you can preserve your slides in a digital format that captures their beauty and keeps your memories alive for generations to come.
Preparing Slides for Transfer
Before you begin transferring your slides to a digital format, it’s important to properly prepare them to ensure the best possible results. Here are some steps to follow in preparing your slides for transfer:
- Clean the Slides: Start by gently cleaning your slides to remove any dust, dirt, or smudges. Use a soft, lint-free cloth or an anti-static brush to wipe away debris. Avoid using liquids or abrasive materials that could damage the surface of the slides.
- Organize and Sort: If you have a large collection of slides, it’s helpful to organize them before scanning. Sort them by chronology, subject matter, or any other system that makes sense to you. This will make it easier to locate specific slides and create a more organized digital library.
- Inspect for Damages: Carefully examine each slide for any signs of damage or deterioration. Look for scratches, mold, or fading images. If you notice any damaged slides, you may consider consulting a professional restoration service to salvage or repair them before scanning.
- Remove Dust and Fingerprint Marks: Even after cleaning, you may still find some dust particles or fingerprint marks on your slides. Use a can of compressed air or an anti-static brush to remove any remaining debris. Be gentle to avoid scratching the surface of the slides.
- Handle with Care: When handling your slides, make sure to hold them by the edges to avoid touching the image area. Your fingers contain natural oils that can transfer onto the slides and leave smudges or fingerprints. Treat your slides with care to maintain their quality.
- Protect from Light: Exposure to excessive light can cause your slides to fade or discolor over time. While preparing your slides for transfer, keep them away from direct sunlight or bright artificial light sources. Store them in a cool, dark environment to minimize the risk of damage.
By properly preparing your slides before transferring them to a digital format, you can ensure that the resulting scans are of the highest quality. Taking the time to clean, sort, and protect your slides will not only preserve your cherished memories but also make the transfer process smoother and more efficient. Now that your slides are ready, let’s move on to choosing the right scanner for slide conversion.
Choosing the Right Scanner for Slide Conversion
When it comes to transferring slides to a digital format, choosing the right scanner is crucial in achieving high-quality results. With various options available on the market, it’s important to consider several factors to ensure your chosen scanner meets your specific needs and requirements. Here are some factors to consider when selecting a slide scanner:
- Resolution: Look for a scanner with a high optical resolution for capturing fine details in your slides. The higher the resolution, the more clarity and sharpness your digital images will have. A resolution of at least 2400 dots per inch (dpi) is recommended for scanning slides.
- Transparency Unit: Ensure that the scanner has a built-in transparency unit or the capability to scan slides. This is important as it allows for direct scanning of slides without the need for additional accessories or attachments. A dedicated slide scanner or a flatbed scanner with a transparency unit is ideal.
- Color Depth: Check the scanner’s color depth, which determines the range of colors it can capture. Higher color depth, usually measured in bits per pixel (bpp), allows for more accurate and vibrant color reproduction. A scanner with a color depth of 24 bits or higher is recommended for accurate color representation.
- Compatibility: Ensure that the scanner you choose is compatible with your computer’s operating system. Most scanners work with both Windows and Mac systems, but it’s always good to double-check before making a purchase. Also, consider the connectivity options (USB, Wi-Fi) supported by the scanner.
- Scanning Software: Assess the included scanning software or third-party options that are compatible with the scanner. Look for software that offers features like color correction, dust removal, image enhancement, and the ability to save scanned images in various file formats. Intuitive and user-friendly software can make the scanning process more efficient and enjoyable.
- Budget: Set a budget for your slide scanner purchase. Prices can vary depending on the brand, features, and scanning capabilities. Consider the value for money, deciding what features are essential for your needs and finding a scanner that meets your budgetary constraints.
By considering these factors, you can make an informed decision when choosing a slide scanner that best suits your requirements. Take the time to research and read reviews to ensure you select a reliable and high-performing scanner that will deliver exceptional results. With the right scanner in hand, you’re ready to move on to the next step – scanning your slides.
How to Scan Slides
Scanning slides is a crucial step in transferring them to a digital format. To achieve the best results, it’s important to follow these steps:
- Set up the Scanner: Start by connecting your slide scanner to your computer and installing any necessary software. Ensure that the scanner is properly calibrated and ready to use.
- Prepare the Slide Holder: Depending on the type of scanner you have, insert the slide holder or carrier into the scanner. Make sure it is aligned correctly and securely in place to prevent any movement during scanning. Refer to the scanner’s manual for instructions specific to your model.
- Adjust Scanning Settings: Open the scanning software on your computer and adjust the scanning settings according to your preferences. Set the resolution, color depth, and file format for the scans. Consider saving the scans as uncompressed TIFF or high-quality JPEG files for maximum image quality.
- Place the Slides: Carefully place the slides into the slide holder or carrier, ensuring they are positioned correctly and facing the right direction. Be gentle to avoid damaging the slides or causing them to shift during the scanning process.
- Preview and Adjust: Use the scanning software to preview the slides before beginning the actual scanning process. This allows you to ensure that the slides are properly aligned and focused. Make any necessary adjustments, such as cropping or rotating, to enhance the scan quality.
- Start Scanning: Once you are satisfied with the preview, start the scanning process. Depending on your scanner and settings, the time it takes to scan each slide can vary. Avoid moving or disturbing the scanner during the scanning process to prevent blurry or distorted scans.
- Review and Save: After scanning each slide, review the scanned images on your computer screen. Check for any scanning errors, such as dust or scratches, and adjust the settings if needed. Save each scanned slide in the desired file format and location on your computer or external storage device.
- Continue the Process: Repeat the scanning process for each slide in your collection. Take breaks as needed to prevent fatigue and maintain the quality of your scans. Stay organized by labeling and categorizing each scan as you go.
- Clean the Scanner and Slides: Regularly clean the scanner glass and slide holder to remove any dust or debris that may affect scan quality. Also, keep the slides clean throughout the process to minimize the need for excessive editing or retouching.
- Backup and Store: Once all slides are scanned, make sure to back up your digital files on external storage devices or cloud storage platforms. Store the physical slides in a safe and secure location to maintain their original condition.
By following these steps, you can successfully scan your slides and create high-quality digital representations of your precious images. Take the time and care necessary to ensure accurate scans, and don’t hesitate to adjust the settings or seek assistance if needed. Once your slides are scanned, you can move on to the next step – editing and enhancing the scanned slides to bring out their full potential.
Editing and Enhancing Scanned Slides
After scanning your slides and converting them to a digital format, you have the opportunity to enhance and edit the scanned images to bring out their full potential and restore any imperfections. Here are some tips on editing and enhancing your scanned slides:
- Adjust Brightness and Contrast: One of the most common adjustments is to tweak the brightness and contrast levels of the scanned slides. This helps to improve the overall tonal range and make the details more visible. Experiment with the settings to achieve the desired balance without overprocessing the image.
- Correct Color Balance: Slide scans may suffer from color shifts or fading over time. Use your photo editing software to adjust the color balance and restore the original hues. This can involve tweaking the white balance, adjusting saturation levels, or using tools specifically designed for color correction.
- Remove Dust and Scratches: Despite your best efforts to clean the slides before scanning, some dust and scratches may still appear in the scans. Utilize the healing or clone stamp tool in your editing software to remove these imperfections. Be careful not to overdo it and maintain the authenticity of the original image.
- Sharpen the Image: Depending on the quality of the scan, you may need to enhance the sharpness of the image. Utilize sharpening tools in your editing software to bring out the finer details and make the image appear crisp and clear. Use caution to avoid oversharpening, which can result in unnatural-looking artifacts.
- Crop and Straighten: Adjust the composition of the scanned slides by cropping out unnecessary elements or straightening any tilted horizons or angles. This can help improve the overall aesthetics and focus of the image. Maintain the aspect ratio and consider the rule of thirds as a general guideline.
- Apply Filters or Effects (Optional): If desired, you can apply various filters or effects to give your scanned slides a different look or style. This can include black and white conversions, vintage or retro effects, or artistic filters. Remember to keep the original image as a backup and use these enhancements sparingly.
Keep in mind that the goal of editing and enhancing scanned slides is not to completely change the image but to enhance its visual appeal while maintaining the authenticity and integrity of the original contents. Save your edited images in a high-quality file format, such as TIFF or PNG, to preserve the details and allow for future adjustments if needed.
If you’re unsure about editing techniques or if your slides require extensive restoration, consider consulting a professional photo restoration service. They have the expertise and tools to handle complex restoration projects while preserving the original qualities of your scanned slides.
Once the editing and enhancement process is complete, you can move on to organizing and storing your digitized slides to keep them well-organized and easily accessible.
Organizing and Storing Digitized Slides
After digitizing your slides, it’s essential to properly organize and store them to ensure easy access and long-term preservation. Here are some tips for organizing and storing your digitized slides:
- Create a Folder Structure: Start by creating a folder structure on your computer to organize your digital slide collection. Create main categories, such as “Family,” “Vacations,” or “Events,” and create subfolders within each category to further categorize the slides. This hierarchical structure will help you find specific slides quickly and easily.
- Use Descriptive Filenames: When saving your scanned slide files, use descriptive filenames that provide information about the content. Include details such as the date, location, and subject matter of the slide. This will make it easier to search for specific slides and ensure that the filenames accurately represent the image.
- Add Metadata: Consider adding metadata to your digital slide files. This can include information such as keywords, captions, or tags that further describe the content of the slide. This additional information can be valuable for organizing, searching, and retrieving specific slides in the future.
- Backup Your Files: Maintain multiple backup copies of your digitized slides to protect against data loss. Use external hard drives, cloud storage services, or both to create redundant backups of your slide collection. Regularly update these backups to ensure that all your digitized slides are safely preserved.
- Create Digital Albums: Utilize photo management software or online platforms to create digital albums for your scanned slides. These platforms allow you to view, organize, and share your slide collection with ease. Add tags, captions, or comments to enhance the organization and add context to your images.
- Consider Physical Backup: While digital storage is convenient, consider creating physical backup copies of your most cherished or valuable slides. Print select images or create a photo book to have a tangible copy of your digitized slides. This can serve as an additional layer of backup and provide a nostalgic viewing experience.
- Protect from Environmental Factors: To ensure the longevity of your digitized slides, store them in a cool, dry, and dust-free environment. Avoid exposure to direct sunlight, extreme temperatures, or moisture, as these factors can damage the digital files. Use archival-quality storage options such as acid-free sleeves or boxes.
- Regularly Review and Maintain: Periodically review your digital slide collection to ensure that it remains organized and well-maintained. Delete duplicates, update metadata if necessary, and make adjustments as your collection grows. Regularly check the integrity of your file backups to ensure that your digitized slides are preserved securely.
By following these organizing and storing practices, you can easily manage your digitized slide collection and protect it for future generations. Whether you choose to organize them in a digital folder structure or create physical backups, maintaining an organized system will ensure that your digitized slides remain accessible and well-preserved for years to come.
Sharing Digital Slides with Friends and Family
Once you have digitized your slides, sharing them with friends and family becomes effortless and enjoyable. Here are some ways you can share your digital slides and cherish your precious memories together:
- Email: One of the simplest ways to share your digital slides is through email. You can attach the scanned slides or create a compressed file containing multiple slides. Write a brief description or message to accompany the slides and send them to your loved ones. Remember to consider the file size limitations when sending large files.
- Cloud Storage: Upload your digital slides to cloud storage platforms such as Google Drive, Dropbox, or OneDrive. Create folders or albums to organize them and share the access link with your friends and family. This allows them to view and download the digital slides at their convenience.
- Photo-Sharing Platforms: Utilize photo-sharing platforms like Flickr, SmugMug, or Imgur to showcase your digitized slides. Create albums and set privacy preferences to control who can view and access your slides. These platforms often provide additional features such as commenting and tagging, enhancing the interactive experience with your shared slides.
- Social Media: Share your digital slides on social media platforms like Facebook, Instagram, or Twitter. Create albums or post individual photos with captions to engage your friends and family. Consider creating a dedicated hashtag to make it easy for others to find and follow your shared slide collection.
- Online Slideshows: Create engaging online slideshows using websites or software like Adobe Spark, PowerPoint, or Canva. Customize the layout, transitions, and music to add a personalized touch. Share the link to the slideshow with your loved ones, providing them with an interactive and immersive experience.
- Family Websites or Blogs: If you have a family website or blog, consider creating a dedicated section to share your digitized slides. You can write accompanying stories or descriptions to provide context and create a more comprehensive family history. Share the website or blog link with your family members to access the shared slides.
- Printed Photo Books or Calendars: For a more tangible and sentimental approach, consider printing your digitized slides into photo books or calendars. Compile a selection of your favorite images and create custom-designed books or calendars to gift to your friends and family. This enables them to cherish the memories in a physical format.
Remember to consider the privacy and preferences of your friends and family when sharing your digitized slides. Seek their consent and respect their boundaries. Offer them the flexibility to download, print, or share the slides as they desire.
Sharing your digitized slides with friends and family not only allows you to reminisce together but also strengthens the bonds and creates lasting memories. Embrace the convenience and versatility of digital sharing to spread joy and preserve your visual history.
Preserving Digital Slides for the Future
Preserving your digitized slides is important to ensure their longevity and accessibility for future generations. Here are some essential practices to help you safeguard your digital slide collection:
- Multiple Backups: Maintain multiple copies of your digitized slides on different storage devices or cloud storage services. This redundancy protects against data loss due to hardware failure, accidental deletion, or natural disasters. Regularly update your backups to include any newly digitized slides.
- Verify Data Integrity: Periodically verify the integrity of your digital slide files. Use checksum verification tools to ensure that your files have not been corrupted or modified over time. This helps identify any potential issues and allows you to restore the original files from your backups if necessary.
- Upgrade Storage Formats: As technology advances, storage formats may become obsolete. To avoid the risk of losing access to your digitized slides, periodically upgrade your storage formats to current standards. Migrate your files to new media or file formats as needed, keeping them compatible with modern devices and software.
- Metadata and Documentation: Embed metadata and relevant information within the digital slide files. Include details such as the date, location, event, and individuals in the photo. Additionally, maintain a separate document or database that serves as a comprehensive inventory with detailed descriptions and tagging information.
- Regular Maintenance: Regularly review your digitized slide collection for any issues or errors. Check for file corruption, broken links, or missing files. Perform routine maintenance tasks such as organizing and updating metadata, revisiting backups, and validating data integrity to ensure everything remains intact.
- Future-Proof File Formats: Save your digitized slides in file formats that are widely supported and more likely to remain compatible in the future. Use non-proprietary file formats like TIFF or JPEG and avoid proprietary or niche formats that may become obsolete or unsupported over time.
- Stay Informed: Keep up to date with advancements in digital preservation practices. Understand emerging technologies, file formats, and best practices for long-term preservation. Stay connected with online communities, forums, or professional organizations to learn from experts and gain insights into new preservation techniques.
- Consider Donating or Archiving: If your digitized slides hold historical or cultural significance, consider donating them to appropriate archives, libraries, or museums. These institutions specialize in preserving and providing long-term access to valuable collections, ensuring that your digital slides are available to future researchers and enthusiasts.
Preserving your digital slides ensures that your cherished memories and valuable images can be enjoyed and shared by future generations. By implementing these practices, you can safeguard your digital slide collection and contribute to the preservation of your personal or collective visual heritage.