
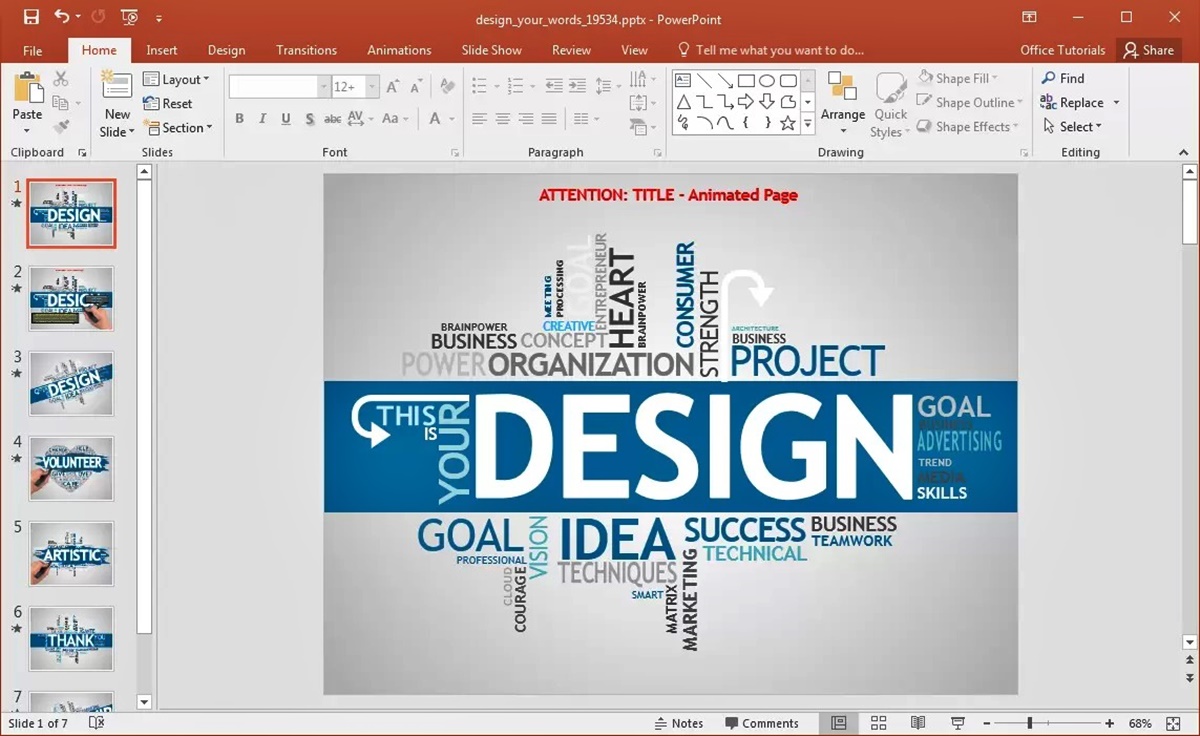
Step 1: Open PowerPoint
Creating a word cloud in PowerPoint is a simple and effective way to visually represent data or highlight key concepts. To get started, you’ll first need to open Microsoft PowerPoint on your computer.
If you already have PowerPoint installed, locate the program icon on your desktop or in your Start menu and double-click it to launch the application. If you don’t have PowerPoint installed, you can download it from the official Microsoft website or through your preferred software provider.
Once you have opened PowerPoint, you will be presented with a blank slide, ready to be customized according to your needs. The PowerPoint interface typically consists of a ribbon at the top, which contains various tabs like Home, Insert, and Design, and a slide preview area in the middle.
Take a moment to familiarize yourself with the different options available in PowerPoint. This will help you navigate through the application and make the most out of its features while creating your word cloud.
Creating a visually appealing and effective word cloud requires a combination of design skills and content knowledge. With PowerPoint, you have a wide range of tools and formatting options at your disposal to create a stunning and customized word cloud that suits your needs.
Now that you have opened PowerPoint and are ready to embark on your word cloud creation journey, let’s move on to the next step where we’ll start adding the text to our word cloud.
Step 2: Insert a Text Box
Once you have PowerPoint open and ready, the next step in creating a word cloud is to insert a text box. A text box is where you will type or paste in the words that you want to include in your word cloud.
To insert a text box, navigate to the “Insert” tab in the PowerPoint ribbon at the top of the screen. Click on the “Text Box” option, which is represented by a square with a dotted border and a capital “A” inside.
After selecting the “Text Box” option, you will see your cursor change into a crosshair. Click and drag on the slide to create a text box of the desired size. Alternatively, you can click once on the slide to create a default-sized text box and resize it later.
Once you have created the text box, you can start entering your desired words. You can type in the words manually, or you can copy and paste them from a document or website. Remember, the words you choose should be relevant to the topic or theme you want to represent in your word cloud.
As you enter the words, they will automatically wrap within the text box. If a word exceeds the width of the text box, it will continue on the next line. You can adjust the font size and formatting of the text using the options available in the “Home” tab of the ribbon.
Keep in mind that the size of the text will influence its prominence in the word cloud. Larger words will stand out more, while smaller words will be less prominent. You can modify the size of individual words later to create emphasis or hierarchy within your word cloud.
Now that you have inserted a text box and entered your desired words, it’s time to move on to the next step: formatting the text box to enhance the appearance of your word cloud.
Step 3: Type or Paste in Your Desired Words
Now that you have inserted a text box, it’s time to type or paste in your desired words for the word cloud. The words you choose should be relevant to the topic or concept you want to represent visually.
To add words to your text box, simply click inside the text box and start typing. You can enter single words, short phrases, or a combination of both. If you have a pre-written list of words, you can copy and paste them directly into the text box from another document or website.
When selecting the words for your word cloud, consider the importance or prominence you want to give to each word. Keywords or main ideas can be repeated multiple times, while supporting words or less significant concepts can be included once or with less frequency.
Remember, the appearance of the word cloud will depend on the frequency of the words and the size you assign to them later during the formatting step. Having a variety of words with different sizes will create visual interest and hierarchy within the word cloud.
As you add words to your text box, pay attention to the layout and positioning of the words. You can manually adjust their placement by clicking and dragging individual words within the text box. Experiment with different arrangements to find the most visually appealing configuration.
In addition to adding words, you can also add punctuation marks or special characters to enhance your word cloud. For example, you can include exclamation marks or question marks to emphasize certain words or phrases.
Once you have added all your desired words to the text box, you are ready to move on to the next step, where we will format the text box to further customize the appearance of the word cloud.
Step 4: Format the Text Box
After typing or pasting in your desired words, the next step in creating a word cloud is to format the text box to enhance its appearance. Formatting the text box allows you to customize the font, size, color, and other visual aspects of the words within the word cloud.
To format the text box, make sure it is selected by clicking on it. You will see handles or selection points around the edges of the text box, indicating that it is active.
Next, navigate to the “Home” tab in the PowerPoint ribbon. Here, you will find various formatting options to modify the appearance of the text box and the text within it.
You can change the font by selecting the text and choosing a different font from the drop-down menu in the “Font” section. Experiment with different fonts to find one that matches the style and theme of your word cloud.
In addition to the font, you can also adjust the font size to make certain words stand out more prominently. Select the text and choose a larger or smaller font size from the “Font Size” drop-down menu.
To further customize the appearance of the text, you can change the color of the words. Select the text and click on the “Font Color” icon in the “Font” section of the ribbon. Choose a color from the available palette or use the “More Colors” option to select a specific color.
Furthermore, you can modify the formatting of individual words or phrases within the text box. This means you can apply different formatting options to certain words to create emphasis or add visual variety to the word cloud.
Once you have formatted the text box and its contents to your liking, you can move on to the next step, where we will adjust the size and position of the text box within the slide.
Step 5: Adjust the Size and Position of the Text Box
Now that you have formatted the text box and its contents, the next step in creating a word cloud is to adjust the size and position of the text box within the slide. This step allows you to ensure that the word cloud is well-placed and fits nicely within your PowerPoint presentation.
To adjust the size of the text box, click on one of the handles or selection points located at the edges of the text box. You can click and drag the handles to resize the text box according to your desired dimensions. Alternatively, you can also click and drag any corner handle to resize the text box proportionally.
As you adjust the size of the text box, make sure to keep in mind the overall layout and design of your slide. The text box should fit neatly within the available space without overlapping or obscuring any important information or visuals on the slide.
In addition to resizing, you can also reposition the text box on the slide. To do this, click and drag the text box to any desired location. The text box can be moved freely within the slide, allowing you to position it wherever you find it most visually appealing or where it best complements the content of your presentation.
Take your time to experiment with different sizes and positions until you find the best placement for the text box and your word cloud. Remember that the size and position of the text box will play a crucial role in the overall visual impact of the word cloud.
Once you have adjusted the size and position of the text box, you can proceed to the next step, where we will add a shape as a background for the word cloud.
Step 6: Add a Shape as a Background for the Word Cloud
Adding a shape as a background for your word cloud can help visually enhance the overall presentation and make the words stand out. By placing the word cloud within a shape, you can create a more cohesive and visually appealing design.
To add a shape, navigate to the “Insert” tab in the PowerPoint ribbon and click on the “Shapes” option. A drop-down menu with various shape options will appear.
Select the shape you want to use as the background for your word cloud. Popular choices for background shapes include rectangles, circles, and clouds. However, feel free to choose any shape that suits the theme or concept of your word cloud.
After selecting the desired shape, click and drag on the slide to draw the shape. You can resize and reshape the shape by clicking and dragging the handles or selection points located at the edges of the shape.
Position the shape in a way that allows the word cloud to fit comfortably inside it, without being cramped or overflowing. The shape should provide a visually appealing frame for the word cloud.
Once you have added the shape, you can customize its appearance to further enhance the overall visual impact. With the shape selected, navigate to the “Format” tab in the PowerPoint ribbon. Here, you will find options to change the shape’s fill color, outline, and other formatting details.
Experiment with different colors, gradients, and patterns to find the best style for your background shape. You can also adjust the transparency or add effects to create a more dynamic and engaging background for your word cloud.
Remember to strike a balance between the shape’s visual appeal and its ability to highlight and complement the word cloud. The background shape should enhance the readability and impact of the words, rather than overpowering or distracting from them.
Once you have added and customized the shape as a background, you are ready to move on to the next step, where we will adjust the shape to fit your word cloud.
Step 7: Adjust the Shape to Fit Your Word Cloud
After adding a shape as the background for your word cloud, the next step is to adjust the shape to ensure it fits well with your word cloud. This step is crucial to create a cohesive and visually appealing composition.
To adjust the shape, you first need to select it by clicking on it. You will see handles or selection points around the edges of the shape, indicating that it is active.
Once the shape is selected, you can resize and reposition it to best accommodate your word cloud. Click and drag the handles or selection points at the edges of the shape to resize it according to your desired dimensions. Ensure that the shape is large enough to contain all the words in the word cloud without them spilling over or looking cramped.
If needed, you can also adjust the shape’s proportions by clicking and dragging the corner handles. This allows you to resize the shape while maintaining its original aspect ratio.
Consider the overall aesthetics of your slide when adjusting the shape. The shape should complement the design and layout, and create a visually pleasing composition. Pay attention to the alignment and spacing between the shape and other slide elements, ensuring a balanced and harmonious visual arrangement.
After resizing the shape, you can also reposition it on the slide by clicking and dragging it to your desired location. Experiment with different positions to find the best placement for your word cloud and the shape background.
Keep in mind that the shape should act as a supportive element, enhancing the visual impact of the word cloud without overpowering it. Strive for a harmonious balance between the shape and the words within, making the word cloud the focal point of attention.
Once you have adjusted the shape to fit your word cloud, you’re ready to move on to the next step, where we will arrange the text and shape layers to create a visually appealing composition.
Step 8: Arrange the Text and Shape Layers
Creating a visually appealing word cloud involves arranging the text and shape layers in a way that creates balance and visual interest. This step focuses on positioning and layering the elements to achieve an aesthetically pleasing composition.
Begin by selecting both the text box containing your word cloud and the shape background. You can do this by clicking on one element and holding down the Shift key while clicking on the other. This will allow you to move and manipulate both elements simultaneously.
Once the elements are selected, you can adjust their positioning within the slide. Click and drag to move the text box and shape around, experimenting with different configurations to find the most visually appealing arrangement.
Consider the principles of composition, such as the rule of thirds or visual balance, when positioning the elements. Aim for a balanced distribution of visual weight and create a focal point where the viewer’s attention is drawn.
Try different layouts, such as aligning the text box along the edge of the shape or placing it slightly off-center. You can also experiment with overlapping the text box and shape to create depth and dimension within the word cloud.
As you arrange the layers, pay attention to the visibility of the text. Ensure that the words are not obscured by any part of the shape or other visual elements on the slide. Adjust the size and position of the text box if necessary to improve legibility.
Furthermore, you can explore creative techniques such as adding shadows or gradients to the shape or text box to enhance the visual appeal of the word cloud. However, make sure that any effects applied do not compromise the readability of the words.
Continue refining the arrangement until you are satisfied with the overall look and feel of your word cloud composition. Take the time to step back and assess the balance, harmony, and visual impact of the elements on the slide.
Once you have successfully arranged the text and shape layers, you are ready to move on to the next step, where we will group the text and shape layers for easier editing and manipulation.
Step 9: Group the Text and Shape Layers
Grouping the text and shape layers in your word cloud allows for easier editing and manipulation as a single unit. This step ensures that any modifications or transformations you make to the word cloud will be applied to all elements collectively.
To group the text and shape layers, start by selecting both the text box and the shape background. You can do this by clicking on one element and holding down the Shift key while clicking on the other element.
With both elements selected, right-click on either one and choose the “Group” option from the context menu. Alternatively, you can use the “Ctrl + G” keyboard shortcut to group the selected elements.
Once the group has been created, you will notice that the text box and shape are now treated as a single entity. This means that if you click anywhere on the group, both elements will be selected and manipulated together.
Grouping the layers simplifies the editing process, allowing you to move, resize, or format the word cloud as a whole without having to make individual adjustments to the text box and shape separately.
Additionally, grouping preserves the alignment and relative positioning of the elements within the word cloud. If you want to make further adjustments to the positioning or formatting of the text or shape, you can ungroup the elements temporarily to work on them individually.
To ungroup the elements, select the grouped word cloud and right-click on it. From the context menu, choose the “Ungroup” option, or use the “Ctrl + Shift + G” keyboard shortcut.
Remember to select the elements individually, rather than the grouped word cloud, before ungrouping to ensure that the text box and shape are ungrouped as separate entities.
After making desired adjustments, you can regroup the elements following the same steps mentioned earlier.
Grouping the text and shape layers provides convenience and flexibility in editing your word cloud. It allows for efficient management of the elements while maintaining the integrity of your design.
Now that you have successfully grouped the text and shape layers, you can proceed to the next step, where we will apply formatting effects to the word cloud for added visual impact.
Step 10: Apply Formatting Effects to the Word Cloud
Applying formatting effects to your word cloud can add visual interest and enhance its overall impact. By incorporating various effects, you can make your word cloud more engaging and eye-catching. This step focuses on applying formatting effects to make your word cloud stand out.
To apply formatting effects, start by selecting the grouped text and shape layers of your word cloud. You can do this by clicking on the grouped word cloud or by selecting it from the slide’s selection pane.
Once the word cloud is selected, navigate to the “Format” tab in the PowerPoint ribbon. Here, you will find a variety of formatting options to customize the appearance of the word cloud.
One of the commonly used effects is applying a fill color to the shape background. Click on the “Shape Fill” option and choose a color that complements your overall design or matches the theme of your presentation. You can also experiment with gradients or patterns to add depth and texture to the shape.
In addition to fill colors, you can also apply borders or outlines to the shape. Using the “Shape Outline” option, choose a color and thickness for the outline, or customize it with different line styles to provide a defined boundary to the word cloud.
To give the text in your word cloud more emphasis, you can apply effects directly to the words. Select the text box within the grouped word cloud, and navigate to the “Format” tab. Here, you can make adjustments to the font style, size, and color to ensure readability and enhance visual appeal.
Consider adding text effects such as shadows, reflections, or 3D effects to the words. These effects can make the words appear more dynamic and help them stand out from the background. However, exercise caution to avoid overusing effects, as they can distract from the main message of the word cloud.
Another useful formatting effect is adjusting the transparency or opacity of the text or shape. This can create a subtle, layered effect and allow the background or other slide elements to show through, adding depth and visual interest to your word cloud.
As you apply formatting effects, remember to maintain a balance and cohesiveness within the overall design. The effects should enhance the readability and impact of the word cloud without overwhelming or overshadowing its content.
Continue to experiment with various formatting options until you achieve the desired visual effect for your word cloud.
Now that you have applied formatting effects to your word cloud, it’s time to move on to the next step, where we will focus on customizing the appearance of the word cloud with additional design elements.
Step 11: Customize the Appearance of the Word Cloud
Customizing the appearance of your word cloud allows you to add personal touches and make it unique to your needs. This step is all about adding additional design elements and fine-tuning the overall look of your word cloud.
There are several ways to customize the appearance of your word cloud:
1. Font Styles: Experiment with different font styles to find one that aligns with the theme and tone of your presentation. You can choose from a variety of options, such as sans-serif, serif, script, or decorative fonts. Select a font that is legible and visually appealing.
2. Word Layout: Explore different arrangements for the words within the text box. You can try aligning them in a specific shape, such as a circle or a wave, or create a more free-form layout. Adjust the size, spacing, and orientation of the words to achieve a balanced and visually pleasing composition.
3. Color Palette: Choose a color palette that complements your overall design. You can select colors that align with your brand or presentation theme. Consider using contrasting or complementary colors to make certain words or phrases stand out and create visual interest.
4. Images or Icons: Incorporate relevant images or icons into your word cloud to reinforce the message or concept. You can place them within the shape background or position them strategically around the word cloud. Ensure that the images or icons do not overpower the words and maintain a cohesive visual theme.
5. Background Effects: Experiment with different background effects, such as gradients, textures, or patterns, to enhance the visual appeal of your word cloud. These effects can add depth and texture, making the word cloud more visually interesting.
6. Animation: If you are using PowerPoint for a dynamic presentation, consider adding animation effects to your word cloud. Animate the appearance of the words, their movement, or their emphasis to make your presentation more engaging and interactive.
Remember to strike a balance between customization and readability. While it’s important to add personalized touches, ensure that the words remain clear and legible within the word cloud.
Take your time to experiment with different customization options until you achieve a word cloud that represents your message or concept effectively and captures the attention of your audience.
Now that you have customized the appearance of your word cloud, you’re ready to move on to the next step, where we will discuss how to save and use your word cloud in PowerPoint.
Step 12: Save and Use Your Word Cloud in PowerPoint
After creating and customizing your word cloud in PowerPoint, the final step is to save it and incorporate it into your presentation. This step will guide you on how to save your word cloud as a PowerPoint file and how to use it effectively.
To save your word cloud, go to the “File” tab in the PowerPoint ribbon and select the “Save As” option. Choose a location on your computer where you want to save the file and give it a descriptive name. Select the file format as PowerPoint Presentation (.pptx) and click the “Save” button.
By saving your word cloud as a PowerPoint file, you can easily access and edit it in the future, preserving all the formatting, customization, and layering you have applied.
To use your word cloud in a presentation, open the PowerPoint file where you want to insert it. Navigate to the slide where you want the word cloud to appear, and go to the “Insert” tab in the PowerPoint ribbon.
Click on the “Pictures” option if you have saved your word cloud as an image file (such as PNG or JPEG). Select your saved word cloud image from the file browser and click the “Insert” button to add it to the slide. You can resize and reposition the image as needed.
If you saved your word cloud as a PowerPoint file, you can go to the “Insert” tab and click on the “Object” option. Choose “Create from File” and browse for your saved word cloud PowerPoint file. Select it and click the “Insert” button to embed the entire word cloud slide into your presentation.
Once inserted, you can further customize the position, size, and formatting of the word cloud within your presentation. You can also apply animations or transitions to the slide containing the word cloud to enhance its visual impact during the presentation.
Remember to preview your presentation in slide show mode to ensure that the word cloud appears as desired and is visually engaging for your audience.
By following these steps, you have successfully saved your word cloud and incorporated it into your PowerPoint presentation. Your carefully created and customized word cloud will now capture attention and convey information effectively within your presentation.