
Overview of Microsoft PowerPoint
Microsoft PowerPoint is a widely used presentation software that allows users to create visually appealing slideshows for various purposes, such as business presentations, educational lectures, and project demonstrations. With its user-friendly interface and powerful features, PowerPoint provides a powerful platform for organizing and delivering information in a dynamic and engaging manner.
One of the key features of PowerPoint is its ability to create slides that combine multimedia elements, including text, images, videos, and audio. Users can easily customize the appearance of their slides by choosing from a wide range of pre-designed templates, themes, and slide layouts. They can also add transitions, animations, and effects to create a professional and polished presentation.
The software offers a range of options for entering and formatting text. Users can choose from different fonts, sizes, and styles to enhance the visual impact of their text. They can also apply formatting options such as bold, italic, underline, and color to emphasize key points and make the content more visually appealing.
PowerPoint also allows users to insert images into their slides. They can add pictures from their own files or choose from a variety of clip art, icons, and online images. The software provides tools for resizing, cropping, and rotating images to fit the slide layout and to ensure that they convey the intended message effectively.
Another useful feature of PowerPoint is the ability to create and customize shapes and SmartArt graphics. Users can draw shapes such as circles, rectangles, and arrows, and then modify their properties, such as color, size, and position. SmartArt graphics offer a range of predefined layouts and styles for creating visually appealing diagrams, organizational charts, and process flows.
PowerPoint also provides tools for creating charts and graphs to represent data and statistics in a visually impactful way. Users can choose from different chart types, such as bar graphs, pie charts, and line graphs, and customize them with various formatting options. This feature is particularly useful for presenting numerical information and making it easier for the audience to understand complex data.
Collaboration is made easy with PowerPoint through its ability to share presentations online. Users can save their presentations in cloud storage services like OneDrive and SharePoint, and invite others to view and edit them. This enables seamless collaboration with team members, allowing them to work on the same presentation simultaneously and make real-time updates.
Finally, PowerPoint offers a range of saving, printing, and sharing options. Users can save their presentations in different file formats, such as PowerPoint file (.pptx), PDF, and video formats. They can also print their slides to create handouts or notes for their audience. PowerPoint presentations can be shared via email, uploaded to websites, or delivered through online meeting platforms, making it easy to distribute and present information to a wide audience.
Starting a New Presentation
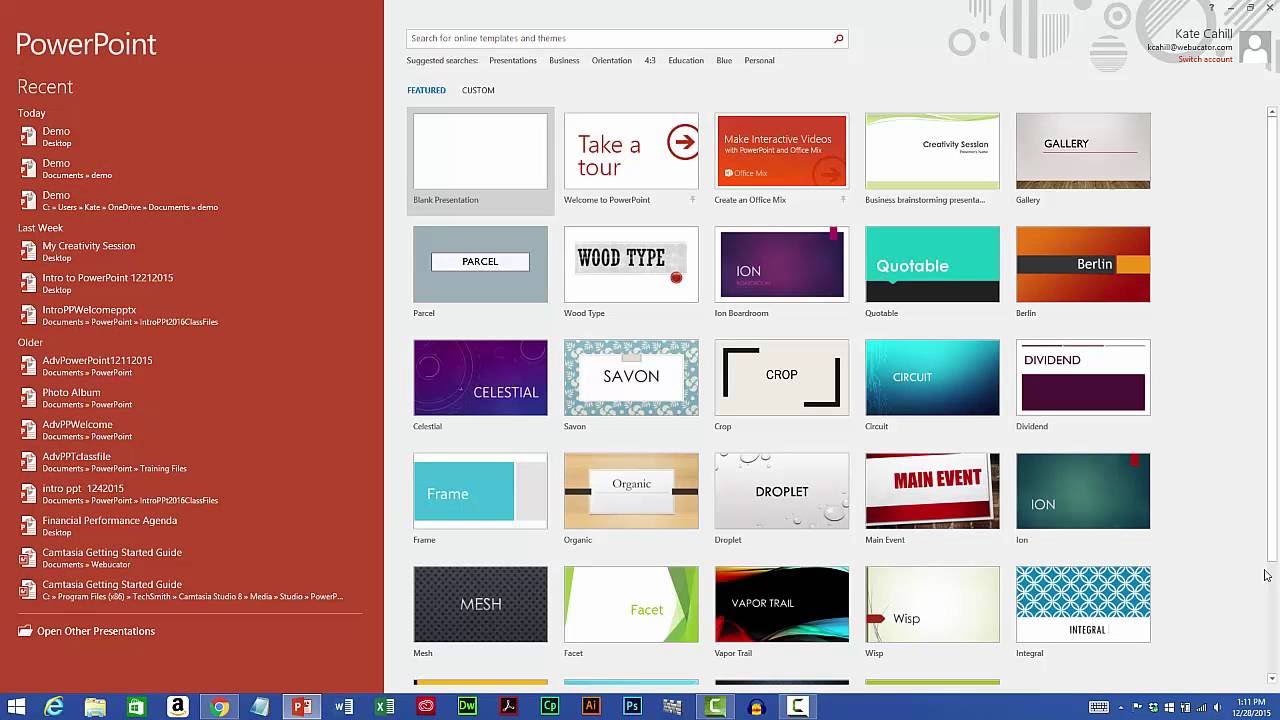
When launching Microsoft PowerPoint, you have the option to start a new presentation from scratch or use a pre-designed template. Starting a new presentation allows you to have complete control over the content, layout, and design of your slides. Here’s how you can get started:
1. Open PowerPoint Application: First, locate the PowerPoint application on your computer and launch it by double-clicking the icon. This will open the PowerPoint workspace, ready for you to begin creating your presentation.
2. Choose a Blank Presentation: Upon launching PowerPoint, you’ll be presented with a list of options. Select “Blank Presentation” to start from scratch with a blank slide. Alternatively, you can choose from a variety of built-in templates available under the “New” tab to give your presentation a head start with a pre-designed layout.
3. Select Slide Layouts: Once you have chosen a blank presentation or a template, you can select the slide layouts that best suit your content. PowerPoint provides a range of layout options, such as title slide, content slide, picture slide, and more. You can choose different layouts for different slides based on the type of information you want to present.
4. Add Title and Content: After selecting your desired slide layout, start by adding the title of your presentation on the designated text box. This title will appear on the title slide and help communicate the main topic of your presentation. Below the title, insert the main content on the content slide, whether it’s text, images, or a combination of both.
5. Customize Slide Design: PowerPoint offers various options to customize the design of your presentation. You can change the background color or add a picture as the slide background. Additionally, you can modify the font type, size, and color to suit the overall look and feel of your presentation.
6. Organize Slides with Sections: As your presentation grows, you may find it helpful to organize your slides into sections. This is especially useful for larger presentations with multiple topics or sections. To create sections, click on the “Section” button under the “Home” tab, and then choose “Add Section.” You can then rename the sections to reflect the different parts of your presentation.
7. Save Your Presentation: It’s important to save your work regularly to avoid losing any changes you’ve made. To save your presentation, click on the “File” tab and select “Save” or use the shortcut Ctrl + S (Command + S on Mac). Choose a location on your computer or cloud storage and provide a suitable name for your presentation.
With these initial steps, you have successfully started a new presentation in PowerPoint. Now it’s time to unleash your creativity and begin adding content, formatting your slides, and incorporating multimedia elements to make your presentation shine.
Understanding the PowerPoint Interface
Microsoft PowerPoint’s interface is designed to provide a user-friendly experience, allowing you to navigate seamlessly through the various features and functionalities. Here’s an overview of the main components of the PowerPoint interface:
1. Ribbon: The Ribbon is located at the top of the PowerPoint window and consists of multiple tabs, such as Home, Insert, Design, Transitions, and more. Each tab contains commands and options related to specific functions, making it easy to access the tools you need for creating and editing your presentation.
2. Quick Access Toolbar: Situated above the Ribbon, the Quick Access Toolbar offers shortcuts to commonly used commands, providing convenient access to frequently used tools like Save, Undo, and Redo. You can customize the toolbar by adding or removing commands according to your preferences.
3. Slides/Outline Pane: On the left side of the PowerPoint window, you’ll find the Slides or Outline pane. The Slides pane displays thumbnails of all the slides in your presentation, enabling you to easily navigate between them. The Outline pane allows you to create and edit the textual content of your slides in an outline format, making it convenient for restructuring and organizing your presentation.
4. Slide Area: The central area of the PowerPoint interface is the Slide area. This is where you design and edit individual slides. It displays the selected slide, allowing you to add and format text, insert images and multimedia elements, and apply transitions and animations.
5. Notes Pane: The Notes pane, located beneath the Slide area, provides a space for you to add and view speaker notes. Speaker notes are helpful for referencing important talking points or reminders during a presentation and are only visible to the presenter on their screen.
6. Zoom Slider: In the bottom-right corner of the PowerPoint window, you’ll find the Zoom Slider, which allows you to adjust the zoom level of your slides. Click and drag the slider to zoom in or out to get a closer look or to see more slides at once.
7. Status Bar: The Status Bar, positioned at the bottom of the PowerPoint window, displays information about the current status of your presentation. It provides details such as the slide number, the view mode you are in (Normal, Slide Sorter, or Reading View), and the zoom percentage.
By familiarizing yourself with these key components of the PowerPoint interface, you can navigate through the software with ease and efficiently create and edit your presentations. Take the time to explore the various tabs and commands in the Ribbon to discover the full range of features and tools available to enhance your PowerPoint experience.
Adding and Formatting Text
Adding and formatting text in Microsoft PowerPoint allows you to effectively communicate your message to the audience. Whether you want to create titles, bullet points, or paragraphs, PowerPoint offers a range of options to customize the appearance and style of your text. Here’s how you can add and format text:
1. Adding Text Boxes: To add text to your slide, you need to insert a text box. Go to the “Insert” tab on the Ribbon and click on the “Text Box” button. Click and drag on the slide to create a text box. You can place text boxes anywhere on the slide and resize them according to your preference.
2. Entering Text: Once you have inserted a text box, you can start entering your text. Simply click inside the text box and begin typing. You can also copy and paste text from other sources, such as Word documents or web pages, directly into the text box.
3. Formatting Text: PowerPoint provides several formatting options to enhance the appearance of your text. Select the text you want to format, and then use the formatting tools in the “Home” tab on the Ribbon. Here are some common formatting options:
- Font Styles: Choose from a variety of fonts to give your text a unique look. Experiment with different font sizes to ensure readability.
- Text Effects: Apply text effects, such as bold, italic, underline, and strikethrough, to emphasize certain words or phrases.
- Font Color: Modify the color of your text to make it stand out. Use contrasting colors for better visibility.
- Alignment: Align your text to the left, right, center, or justify it for a clean and organized appearance.
- Line Spacing: Adjust the spacing between lines of text to improve readability. Increase or decrease the line spacing as needed.
4. Bulleted and Numbered Lists: To create bulleted or numbered lists, select the text and click on the respective buttons in the Ribbon. This will automatically apply the bullet points or numbering to your text, making it easier for the audience to follow along.
5. Text Boxes and WordArt Styles: PowerPoint offers a variety of pre-designed text box and WordArt styles to add visual interest to your text. Simply select the text, go to the “Format” tab, and choose a style from the available options. You can customize the color, shape, and effects of the text box or WordArt style to match your presentation theme.
Remember that readability is key in presentations. Use clear and concise language, avoid overcrowding your slides with text, and utilize appropriate font sizes to ensure that your audience can easily read and understand the content. By adding and formatting text effectively, you can create visually appealing and impactful slides that engage and inform your audience.
Inserting and Formatting Images
Incorporating images into your Microsoft PowerPoint presentation can greatly enhance its visual appeal and engage your audience. PowerPoint provides convenient tools to insert, format, and customize images to fit your presentation needs. Here’s how you can insert and format images in PowerPoint:
1. Inserting Images: To insert an image, go to the “Insert” tab on the Ribbon and click on the “Pictures” or “Online Pictures” button. From here, you can choose an image from your local files or search for images online using keywords. Select the desired image and click “Insert” to place it on your slide.
2. Resizing Images: Once you’ve inserted an image, you can resize it to fit your slide layout. Click on the image, and then use the resize handles at the corners to adjust the size proportionally. To resize without maintaining proportions, hold down the Shift key while dragging the resize handles.
3. Cropping Images: If you want to focus on a specific part of an image, you can crop it. Select the image and click on the “Crop” button in the “Picture Format” tab. Adjust the crop handles to remove unwanted portions of the image and retain the desired area.
4. Rotating and Flipping Images: PowerPoint allows you to rotate or flip images to change their orientation or create visual effects. Select the image, and then go to the “Picture Format” tab. Click on the “Rotate” or “Flip” options to make the necessary adjustments.
5. Formatting Image Styles: PowerPoint offers a range of image formatting options to enhance the visual impact of your images. With the image selected, go to the “Picture Format” tab and explore the various options. You can add effects like shadows, reflections, and 3D rotations. Additionally, adjust the brightness, contrast, and color saturation for optimal image appearance.
6. Aligning Images: Aligning images precisely on a slide helps create a neat and organized presentation. PowerPoint offers alignment tools in the “Arrange” group of the “Picture Format” tab. You can align images relative to the slide or to other objects on the slide, ensuring a balanced and professional look.
7. Image Transparency: If you want to adjust the transparency of an image to overlay it on other objects or create a subtle effect, PowerPoint provides easy-to-use transparency settings. Select the image, go to the “Picture Format” tab, and use the transparency slider to adjust the opacity of the image.
8. Image Effects and Borders: PowerPoint offers a variety of pre-designed image effects and borders that can add a creative touch to your images. Experiment with different effects and borders to find the style that complements your presentation theme. Access these options in the “Picture Format” tab.
Remember to choose high-quality, relevant images that support your presentation content. Use visuals sparingly and strategically to avoid overwhelming your audience. By inserting and formatting images effectively, you can create visually stunning slides that captivate and enhance the impact of your message.
Working with Shapes and SmartArt
Microsoft PowerPoint offers a wide range of shapes and SmartArt graphics that allow you to visually communicate information and enhance the visual appeal of your presentations. From basic shapes to complex diagrams, PowerPoint provides tools to create eye-catching visuals. Here’s how you can work with shapes and SmartArt in PowerPoint:
1. Adding Shapes: To insert a shape, go to the “Insert” tab on the Ribbon and click on the “Shapes” button. A drop-down menu will appear, showcasing a variety of shapes, such as rectangles, circles, arrows, and more. Select the desired shape and then click and drag on your slide to create it. You can resize and move the shape as needed.
2. Formatting Shapes: Once you’ve added a shape, you can customize its appearance by formatting it. With the shape selected, go to the “Format” tab on the Ribbon. Here you can modify attributes such as fill color, outline color, line style, and shape effects. You can also adjust the shape’s size, rotation, and position using the handles or options in the “Size & Position” group.
3. Combining Shapes: PowerPoint allows you to combine multiple shapes into more complex designs. Select the shapes you want to combine by holding down the Ctrl key and clicking on each shape. Then, right-click and choose “Group” or “Merge Shapes” from the options. This will create a new shape that incorporates the selected shapes. You can also use the “Union,” “Intersect,” “Subtract,” or “Combine” options under “Merge Shapes” to create different shapes.
4. Using SmartArt Graphics: SmartArt graphics offer a library of pre-designed diagrams and charts that can be used to illustrate concepts and ideas. To add SmartArt, go to the “Insert” tab on the Ribbon and click on the “SmartArt” button. Choose a category, such as Process, Hierarchy, or Cycle, and select a specific layout from the available options. A new SmartArt graphic will be inserted on your slide, ready for customization.
5. Customizing SmartArt Graphics: Once you’ve inserted a SmartArt graphic, you can modify it to fit your content. Click on the graphic, and then go to the “Design” and “Format” tabs on the Ribbon to access various customization options. You can change colors, styles, layouts, and even add or remove shapes within the SmartArt graphic. SmartArt graphics are highly customizable, allowing you to create clear and visually appealing diagrams effortlessly.
6. Adding Text to Shapes and SmartArt: Both shapes and SmartArt graphics can contain text, making them ideal for displaying information. Simply click on the shape or SmartArt graphic and start typing to add text. You can also resize and reposition the text box within the shape or SmartArt layout for optimal readability.
Shapes and SmartArt graphics offer a versatile and intuitive way to visually represent ideas and concepts in your presentations. By leveraging these tools effectively, you can create engaging and informative slides that resonate with your audience.
Using Charts and Graphs
Charts and graphs are valuable tools in Microsoft PowerPoint that allow you to present data and statistics in a visually appealing and easy-to-understand format. The software offers various chart types and customization options to help you effectively communicate information to your audience. Here’s how you can use charts and graphs in PowerPoint:
1. Inserting Charts: To insert a chart, go to the “Insert” tab on the Ribbon and click on the “Chart” button. A gallery of chart types, such as column, line, pie, and bar, will appear. Select the desired chart type, and a sample chart will be inserted on your slide along with an Excel-like spreadsheet for you to enter your data.
2. Entering Data: Double-click on the spreadsheet that appears when you insert a chart to enter your data. Replace the sample data with your own values, or copy and paste data from an external source. As you enter the data, the chart will automatically update to reflect the changes.
3. Customizing Chart Elements: PowerPoint provides various options to customize different elements of your chart. Select the chart and go to the “Design” and “Format” tabs on the Ribbon to access formatting options. You can modify the chart’s title, axes, labels, gridlines, and legends. You can also change the chart’s colors, styles, and layout to align it with your presentation’s visual theme.
4. Changing Chart Types: PowerPoint allows you to easily change the type of chart you’re using if you find it better suits your data or presentation goals. With the chart selected, go to the “Design” tab and click on the “Change Chart Type” button. A window will appear displaying all available chart types. Select the desired type, and your chart will be converted accordingly.
5. Formatting Data Series: PowerPoint allows you to format individual data series within a chart. This can help draw attention to specific data points or highlight trends. Select a data series within the chart, right-click, and choose the “Format Data Series” option. Here, you can modify the series’ fill color, border, marker style, and more.
6. Adding Data Labels and Annotations: Data labels provide valuable information about specific data points on your chart. With the chart selected, go to the “Layout” tab and click on the “Data Labels” button. You can choose to display labels for individual data points, series, or categories. Additionally, you can add annotations or callouts to provide additional context or explanations for specific elements or data points.
7. Animating Charts: PowerPoint offers animation options to add visual interest and engage your audience when presenting charts and graphs. With the chart selected, go to the “Animations” tab and choose from various animation effects. You can animate the entire chart or specific elements within it to reveal data and trends dynamically during your presentation.
Using charts and graphs in PowerPoint allows you to present complex data and information in a clear and visually compelling way. By leveraging the customization options and animation features, you can create impactful charts and graphs that effectively convey your message to your audience.
Applying Transitions and Animations
Transitions and animations in Microsoft PowerPoint add visual interest and enhance the flow of your presentation. By incorporating these dynamic effects, you can engage your audience, emphasize key points, and create a polished and professional delivery. Here’s how you can apply transitions and animations in PowerPoint:
1. Applying Transitions: Transitions control how your slides appear and disappear during a presentation. To apply a transition to a slide, go to the “Transitions” tab on the Ribbon. A variety of transition options will be displayed. Select a transition effect by clicking on it, and PowerPoint will apply it to the selected slide. You can apply the same or different transitions to each slide in your presentation.
2. Modifying Transitions: PowerPoint allows you to further customize transitions to suit your presentation style. With a slide selected, go to the “Transitions” tab and click on the “Effect Options” button. A drop-down menu will appear, providing additional options for controlling the timing and behavior of the selected transition. You can adjust the speed, direction, and other settings to fine-tune the transition effect.
3. Previewing Transitions: Previewing transitions allows you to see how they will look and feel before presenting your slideshow. To preview a transition, select the slide with the transition, go to the “Transitions” tab, and click on the “Preview” button. This will initiate a preview of the transition effect so you can ensure it aligns with your intended presentation style.
4. Applying Animations to Objects: Animation effects can be applied to individual objects on a slide, such as text boxes, images, or shapes. To animate an object, select it, and go to the “Animations” tab on the Ribbon. Choose from a wide range of animation effects to apply to the selected object. You can add entrance, exit, emphasis, or motion path animations to bring your content to life.
5. Modifying Animation Effects: PowerPoint offers tools to customize animation effects for precise control over their appearance and timing. With an object selected, go to the “Animations” tab and click on the “Effect Options” button. This will open a menu where you can adjust various parameters related to the selected animation effect, such as duration, delay, direction, and trigger options.
6. Sequencing Animations: By sequencing animations, you can control the order in which objects appear and disappear on your slides. With multiple objects selected, go to the “Animations” tab and choose the desired sequence, such as “One by One” or “All at Once,” from the “Animation Pane.” This allows you to create smooth and organized transitions as you move from one slide to the next.
7. Previewing Animations: Previewing animations allows you to visualize how objects will animate on your slides. To preview an animation, select the object with the animation effect, go to the “Animations” tab, and click on the “Preview” button. This will play a preview of the animation effect on the selected object, helping you refine and adjust it as needed.
Remember, while transitions and animations can enhance your presentation, it’s important to use them judiciously. Avoid overusing effects that may distract or detract from your content. Aim for a cohesive and seamless visual experience that supports your message and engages your audience.
Collaborating on PowerPoint Presentations
Collaboration is an essential aspect of creating effective PowerPoint presentations, allowing multiple individuals to contribute and work on a presentation simultaneously. Microsoft PowerPoint provides several features and tools that make collaboration seamless and efficient. Here’s how you can collaborate on PowerPoint presentations:
1. Co-Authoring: PowerPoint offers real-time co-authoring, enabling multiple users to work on a presentation at the same time. When you save your presentation on a cloud storage service like OneDrive or SharePoint, you can invite others to access and edit the presentation. Each collaborator can make changes in real-time, and their edits will be visible to all participants. This feature promotes efficient teamwork and minimizes version control issues.
2. Sharing and Permissions: PowerPoint allows you to easily share your presentations with others. When you’re ready to share, click on the “Share” button in the top right corner of the PowerPoint window. You can then enter email addresses or choose from your contacts to send the presentation. Additionally, you can set permissions to control who can view or edit the presentation. This gives you the flexibility to collaborate with specific individuals while controlling access rights.
3. Comments and Feedback: PowerPoint enables collaborators to leave comments and provide feedback on specific slides or elements within the presentation. To add a comment, select the desired slide or object, go to the “Review” tab on the Ribbon, and click on the “New Comment” button. Type your comment, and it will be visible to all collaborators. This feature streamlines communication and allows for collaborative discussion and improvement of the presentation.
4. Version History: PowerPoint keeps track of the version history of a presentation, allowing you to view and restore previous versions if needed. To access the version history, go to the “File” tab, click on “Info,” and select “Version History.” Here, you can see a list of previous versions with dates and authors. You can restore a previous version or create a new version from a particular point in the version history, providing flexibility and security during collaborative editing.
5. Integration with Microsoft 365 and other Tools: PowerPoint seamlessly integrates with Microsoft 365, allowing collaborative editing and access to other productivity tools such as Word, Excel, and OneNote. You can embed content from these applications directly into your PowerPoint presentation, facilitating collaboration across different platforms and creating a unified workflow.
6. Offline Editing: PowerPoint also enables offline editing for collaborators. If someone is working on a presentation offline, their changes will automatically sync with the online version once they’re back online. This ensures that everyone can contribute to the presentation, regardless of their internet connection.
Collaborating on PowerPoint presentations not only saves time but also brings diverse perspectives and expertise to the table, leading to better overall outcomes. By leveraging the collaboration features in PowerPoint, you can work seamlessly with others to create dynamic and impactful presentations.
Saving, Printing, and Sharing Presentations
Once you’ve created and finalized your Microsoft PowerPoint presentation, it’s crucial to save, print, and share it in various formats to ensure accessibility and distribution. PowerPoint offers several options to help you save, print, and share your presentations efficiently. Here’s how you can manage these tasks:
1. Saving Presentations: To save your presentation, click on the “File” tab in the top left corner of the PowerPoint window, and then select “Save” or “Save As.” Choose a location on your computer or cloud storage (such as OneDrive or SharePoint) to save your presentation. Additionally, you can select the file format for saving, including PowerPoint file (.pptx), PDF, or other formats compatible with older versions of PowerPoint.
2. AutoSave and AutoRecover: PowerPoint includes the AutoSave and AutoRecover features to help protect your work. AutoSave automatically saves your presentation as you work, preventing any accidental loss of data in case of a power outage or system crash. AutoRecover saves a temporary copy of your presentation at regular intervals, allowing you to recover your progress in the event of an unexpected disruption.
3. Printing Presentations: If you need hard copies of your presentation, you can easily print it directly from PowerPoint. Click on the “File” tab, select “Print,” and choose the desired print settings such as the number of copies, paper size, and layout. Preview the printout before proceeding to ensure that the slides appear as intended. Once you’re satisfied with the settings, click on the “Print” button to initiate the print process.
4. Sharing Presentations: PowerPoint provides various ways to share your presentation with others. You can send the presentation as an email attachment, upload it to a file-sharing service, or share it directly from PowerPoint. Click on the “Share” button located in the top right corner of the PowerPoint window to access sharing options. Specify the recipients’ email addresses or choose to generate a link that allows others to view or edit the presentation, depending on the permissions you set.
5. Embedding Presentations: PowerPoint allows you to embed your presentation into websites, blogs, or other digital platforms for easy viewing and sharing. By generating an embed code, you can seamlessly integrate your presentation into different webpages. This enables others to view and navigate through your presentation without the need to download or open it with PowerPoint.
6. Presenting Online: PowerPoint enables you to present your slides online to remote audiences. By using the “Present Online” feature, you can share a link with participants, allowing them to follow along as you present. This option is particularly useful for virtual meetings, webinars, or remote collaborations, as it eliminates the need for everyone to be in the same physical location.
By effectively saving, printing, and sharing your PowerPoint presentations, you can ensure accessibility, distribution, and collaboration. Select the appropriate file format and sharing methods based on the specific requirements of your audience and the platform you’re using, thereby maximizing the impact of your presentation.
Tips and Tricks for Creating Effective Presentations
Creating an effective PowerPoint presentation involves more than just adding content to slides. It’s important to consider design, organization, and engagement to deliver a presentation that captivates and informs your audience. Here are some tips and tricks to help you create effective presentations:
1. Establish Clear Objectives: Before starting your presentation, clearly define the objectives and key messages you want to convey. This will help you structure your content and ensure that every slide serves a purpose in supporting your main points.
2. Keep it Simple: Avoid cluttering your slides with excessive text and images. Use concise bullet points and visuals to convey your message effectively. Remember, your slides should complement your presentation, not overpower it.
3. Use Legible Fonts and Color Contrast: Choose fonts that are easy to read, even from a distance. Stick to a limited number of fonts for consistency. Additionally, ensure there is enough contrast between your text and background colors to ensure optimal visibility.
4. Visualize Data with Charts and Graphs: Instead of presenting raw data, use charts and graphs to convey information in a visually appealing manner. Choose the appropriate chart type that best represents your data, and keep it simple and easy to interpret.
5. Design Consistency: Maintain a consistent design throughout your presentation. Use the same color scheme, fonts, and styles across all slides. This helps create a professional and cohesive look, making it easier for your audience to follow along.
6. Limit Bullet Points: Avoid overcrowding your slides with too many bullet points. Instead, use short, concise phrases or keywords to highlight key information. Remember, you should be the main presenter, and your slides should support and enhance your spoken presentation.
7. Engage with Multimedia: Incorporate relevant multimedia elements to make your presentation more engaging. This can include images, videos, audio clips, or interactive elements. However, use media sparingly and ensure it adds value to your presentation rather than distracting from your message.
8. Practice and Rehearse: Practice your presentation beforehand to ensure a smooth delivery. Rehearse your timing, transitions, and the flow of your content. This will help you build confidence, familiarize yourself with the material, and ensure a clear and well-paced presentation.
9. Utilize Slide Transitions and Animations Mindfully: While slide transitions and animations can enhance your presentation, use them judiciously. Avoid excessive animations that may distract or confuse your audience. Ensure that the transitions and animations enhance the visual flow and support your message.
10. Engage Your Audience: Encourage audience participation and engagement by asking questions, sharing relevant stories, or incorporating interactive elements. This helps create a connection with your audience and keeps them actively involved throughout your presentation.
11. Anticipate Potential Questions: Consider potential questions or areas of clarification your audience may have and address them proactively during your presentation. This demonstrates your expertise and ensures that your audience leaves with a clear understanding of your topic.
12. Seek Feedback and Iterate: After delivering your presentation, seek feedback from colleagues, friends, or mentors. This feedback will help you identify areas for improvement and refine your presentation skills for future presentations.
By implementing these tips and tricks, you can create effective PowerPoint presentations that engage your audience, convey information clearly, and leave a lasting impact. Remember, practice and preparation are key to delivering a successful presentation.