
Advantages of Using the List View Option
The list view option is a powerful tool that provides numerous advantages for users managing their files and folders. By displaying files in a concise and organized list format, users can easily navigate, sort, and access their data efficiently. Let’s explore some of the key advantages of using the list view option:
- Enhanced File Management: The list view option allows users to have a comprehensive overview of their files and folders, making it easier to manage and organize large quantities of data. With a simple glance, users can get information such as file names, sizes, modifications dates, and file types.
- Easy Sorting and Filtering: In list view, files and folders can be sorted based on different criteria such as name, size, date modified, and file type. Sorting options can be applied in ascending or descending order, enabling users to quickly locate desired files. The ability to filter files based on specific attributes further enhances the efficiency of file management.
- Quick Access to File Information: List view displays key file information such as file size, creation date, and modification date directly on the list, allowing users to gather vital details at a glance without opening individual files. This feature saves time and enables users to make informed decisions without interrupting their workflow.
- Improved File Organization: With the list view option, users have the ability to rearrange files and folders within the list by simply dragging and dropping them into the desired location. This flexibility allows for easy reorganization and restructuring of files, enabling users to maintain a clean and organized file system.
- Effortless File Comparison: List view makes it seamless to compare files side by side, as it provides a clear and consistent layout of file attributes. Users can easily identify differences in file names, sizes, and modification dates, facilitating efficient file comparison and identification of duplicates or similar files.
Overall, the list view option offers a wealth of advantages for users managing their files and folders. Its ability to provide a comprehensive overview, easy sorting and filtering, quick access to file information, improved organization, and effortless file comparison make it an invaluable tool for efficient file management.
How to Access List View
Accessing the list view option is a straightforward process that varies depending on the operating system and file management application you are using. Here are some common methods to access list view:
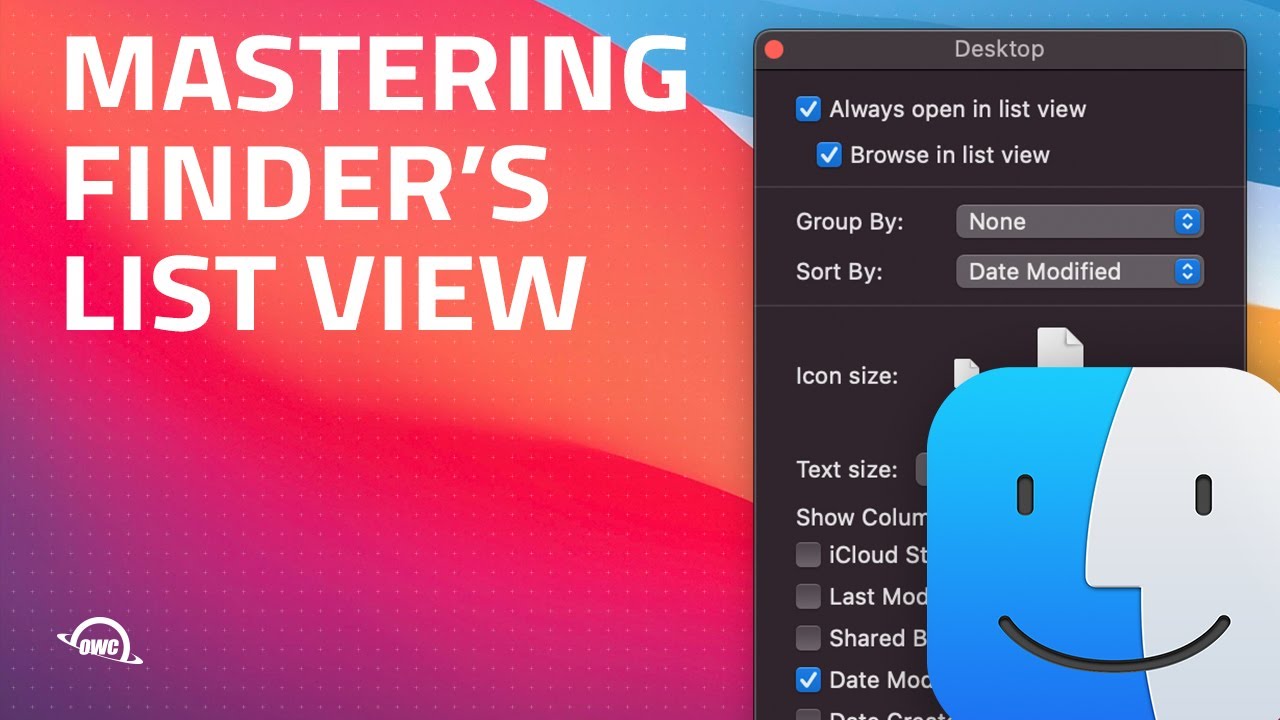
- Finder in macOS: To access the list view option in Finder on macOS, open a Finder window and navigate to the desired folder. From the top menu, click on “View” and then select “As List” or choose the “List” view icon represented by three lines.
- File Explorer in Windows: In Windows File Explorer, navigate to the folder you want to view in list format. Click on the “View” tab in the top menu and select “List” from the “Layout” group.
- Third-Party File Managers: If you are using a third-party file manager application, the process to access list view may vary. However, most file managers provide an option to switch to list view either through a dedicated button/icon or through the “View” or “Layout” menu.
Once you have accessed list view, you will see a list of files and folders displayed in a vertical format, with each item represented by its name and additional file attributes.
It’s worth noting that some file management applications may offer additional options to customize the list view, such as changing the column layout, adjusting the width of columns, or enabling specific file information to be displayed.
By understanding how to access list view in your specific operating system or file management application, you can take advantage of its features and benefits for efficient file navigation and management.
Understanding the List View Layout
The list view layout provides a streamlined and organized display of files and folders, allowing users to easily navigate and manage their data. By understanding the key components of the list view layout, users can make the most of this efficient file management tool. Here’s a breakdown of the list view layout:
- File/Folder Name: The first column in the list view displays the names of the files and folders. This column serves as the primary identifier for each item.
- File Attributes: Adjacent to the file/folder names are additional attributes that provide information about the files. Common attributes include file size, date modified, file type, and file owner. These attributes help users quickly identify and understand the characteristics of each file.
- Column Headers: Each attribute in the list view has a column header that allows users to sort the files and folders based on that particular attribute. Clicking on a column header will toggle between ascending and descending order, enabling users to organize their files according to their preferences.
- Resizing Columns: Users have the ability to resize the columns in the list view to accommodate their preferences. By clicking and dragging the column divider, users can expand or shrink the width of each column to display the desired amount of information.
- Scrolling: In cases where the list view contains more files and folders than can be displayed in the available space, a scrollbar appears on the right side of the window. Users can scroll vertically to view additional items.
- Contextual Actions: Depending on the file management application, right-clicking on a file or folder in list view may reveal a context menu with various actions that can be performed, such as opening, copying, moving, renaming, or deleting the selected item.
Understanding the layout of the list view allows users to effectively navigate and manage their files and folders. By utilizing the column headers for sorting, resizing columns for optimal display, and utilizing contextual actions, users can streamline their file management tasks and increase productivity.
Sorting Files and Folders in List View
Sorting files and folders in list view is a powerful feature that enables users to organize their data based on different criteria. By sorting files and folders, users can easily locate specific items and arrange them in a desired order. Here’s how to sort files and folders in list view:
- Column Headers: In list view, each attribute has a corresponding column header. Clicking on a column header will sort the files and folders based on that attribute. For example, clicking on the “Name” column header will sort the items alphabetically by their names.
- Ascending and Descending Order: When you click on a column header, the sorting order is initially set to ascending (A-Z, 0-9). Clicking on the same column header again will toggle the sorting order to descending (Z-A, 9-0).
- Multiple Column Sorting: Some file management applications allow users to sort files and folders based on multiple attributes simultaneously. This feature is particularly useful when organizing large amounts of data. To do this, hold the Shift or Command (Ctrl for Windows) key and click on additional column headers to add them to the sorting criteria.
- Custom Sorting: In certain cases, the default attributes provided by the column headers may not fully meet your sorting needs. Some file management applications offer the option to create custom sorting criteria. This may involve accessing the preferences or settings menu to define the specific attributes and order by which you want to sort the items in list view.
- Reverting to Default Sorting: To revert back to the default sorting order, you can click on the column header labeled “Name” or a similar option. This will reset the sorting to the original arrangement of files and folders.
By utilizing the sorting capabilities of list view, users can easily find and organize their files and folders. Whether sorting in ascending or descending order, using multiple column sorting, or customizing the sorting criteria, this feature empowers users to efficiently manage their data in a way that suits their needs.
Changing the View Settings in List View
List view offers users the flexibility to customize the view settings according to their preferences and needs. By modifying the view settings, users can personalize the appearance and functionality of list view to enhance their file management experience. Here are some ways to change the view settings in list view:
- Column Display: Users can choose which columns to display in list view. This allows for customization based on the specific file attributes that are relevant to the user. By right-clicking on a column header or accessing the view settings menu, users can select or deselect the columns they want to display in list view.
- Column Width: Users can adjust the width of columns in list view to accommodate the length of file names or to emphasize certain file attributes. By placing the cursor on the column divider line and dragging it left or right, users can resize the width of columns to their desired size.
- Default View: Some file management applications allow users to set the list view as the default view option. This ensures that whenever a new window or folder is opened, it automatically appears in list view, saving users the time and effort of switching to this view manually.
- Font Size and Style: Users have the option to customize the font size and style used in list view. They can adjust the font size to make it more readable, and choose a font style that suits their preferences and enhances the overall visual experience.
- File Highlighting: Customizing the file highlighting settings can help users distinguish between files and folders more easily. This can be done by changing the background color, text color, or other visual indicators that differentiate files and folders in list view.
By changing the view settings in list view, users can tailor the display and functionality to suit their individual workflow and preferences. Whether adjusting the column display and width, setting a default view, customizing font size and style, or modifying file highlighting, these options allow users to optimize their file management experience.
Customizing the List View Columns
Customizing the list view columns allows users to tailor the display of file attributes according to their specific needs and preferences. By choosing which columns to include and adjusting their order, users can create a personalized view that showcases the most relevant information for efficient file management. Here’s how to customize the list view columns:
- Right-click Method: In many file management applications, users can right-click on a column header in list view to access a context menu with various options. From this menu, users can select or deselect columns to add or remove them from the view. Additionally, users can click and drag columns to rearrange their order.
- View Settings or Preferences: Some file management applications offer a dedicated “View Settings” or “Preferences” option where users can access more advanced customization options. Within these settings, users can find options to enable/disable specific columns, adjust column widths, and set default column configurations.
- Commonly Customized Columns: The most commonly customized columns include file name, date modified, file size, and file type. Users may choose to prioritize these attributes based on their file management needs. Additionally, other columns such as date created, file path, file owner, or file permissions may also be available for customization depending on the platform and file management application.
- Resizing Columns: Users can resize the columns in list view to display more or less information. By hovering the cursor over the column divider, users can click and drag it to the left or right to expand or shrink the column width. This allows users to control the amount of space allocated to each column.
- Column Organization: Users have the flexibility to arrange columns in a specific order that best suits their workflow. By clicking and dragging a column header, users can reposition it and adjust the order of the columns in list view accordingly.
By customizing the list view columns, users can create a personalized and efficient file management experience. Tailoring the columns to display the most relevant file attributes, resizing columns for optimal viewing, and organizing the columns in an order that aligns with their workflow enhances productivity and makes it easier to locate and manage files.
Viewing and Modifying File Information in List View
List view provides users with a convenient way to view and modify file information without the need to open individual files. By displaying key file attributes directly in the list view, users can gather important details at a glance and make necessary modifications easily. Here’s how to view and modify file information in list view:
- File Attributes Display: In list view, each file is accompanied by various attributes such as file size, date modified, file type, and more. These attributes are displayed as columns alongside the file names, allowing users to quickly retrieve information about each file.
- Sorting by Attributes: By clicking on the column headers, users can sort the files and folders based on specific attributes such as name, size, or date modified. This allows users to organize the list based on their preferred attribute and easily identify files with specific characteristics.
- Quick Edit: Some file management applications offer a quick edit feature directly in list view. This enables users to modify certain file attributes, such as the file name, without the need to open a separate dialog or file properties window. Users can simply click on the file name or use a designated edit button/icon to make instant changes.
- Detailed File Information: In addition to displaying basic file attributes, list view may also provide the option to view more detailed file information. This information includes attributes like file creation date, file owner, file permissions, and file path. Users can access this detailed information through a right-click context menu or an information icon/button within the list view interface.
- Opening Files: Users can open files directly from list view by double-clicking on the file name or by using the appropriate Open button or context menu option. This allows for quick access to file content or the associated application for further editing or viewing.
The ability to view and modify file information within list view streamlines the file management process. By conveniently displaying key attributes, allowing for sorting and quick editing, and providing access to detailed file information, users can efficiently manage their files without the need for additional steps or opening individual files.
Navigating the List View Option
Navigating the list view option allows users to easily browse through their files and folders, locate specific items, and navigate between different directories. Understanding the various navigation methods and shortcuts available in list view can greatly enhance efficiency and workflow. Here’s how to navigate the list view option:
- Scrolling: When the list of files and folders exceeds the visible area in the list view, users can use the scroll bar on the right side of the window to vertically scroll through the content. Alternatively, on touch-enabled devices, users can swipe up or down to scroll through the list.
- Keyboard Navigation: Utilizing keyboard navigation shortcuts can significantly speed up navigation in list view. For instance, pressing the arrow keys (up and down) allows users to move through the list one item at a time. To quickly jump to the top or bottom of the list, users can press the Home or End key, respectively.
- Page Up and Page Down: The Page Up and Page Down keys, located on most keyboards, allow users to navigate through the list view more quickly. Pressing Page Down scrolls down the view by one page, while Page Up scrolls up by one page, helping users navigate through long lists more efficiently.
- Keyboard Search: In some file management applications, users can use the keyboard to search for specific files or folders within the list view. By typing the desired name or keyword, the list view will automatically scroll to and highlight the matching items, making it easier to locate them.
- Folder Navigation: To navigate between folders within the list view, users can double-click on a folder name to open it. Some file management applications may also provide a breadcrumb trail or a path bar at the top of the list view, allowing users to click on specific directories to jump directly to them.
- Back and Forward Buttons: If available, back and forward buttons in the file management application interface allow users to navigate to previously visited folders or revert back to the previous view, similar to a web browser’s navigation buttons.
By utilizing these navigation methods and shortcuts, users can efficiently explore their files and folders in list view, locate specific items, and move between different directories with ease. These techniques contribute to a seamless and productive file management experience.
Using Quick Look in List View
Quick Look is a handy feature that allows users to preview the content of files directly within the list view, without the need to open them in separate applications. This feature provides a quick and convenient way to glance at file contents and make informed decisions about which files to open. Here’s how to use Quick Look in list view:
- Selecting a File: To activate Quick Look, users can simply select a file in the list view by clicking on it once. This highlights the file and activates the Quick Look feature.
- Using a Keyboard Shortcut: In some file management applications, users can use a keyboard shortcut to activate Quick Look. Common shortcuts include pressing the Spacebar or pressing and holding the Command (Ctrl for Windows) key while selecting a file.
- Previewing File Contents: Once Quick Look is activated, a preview window usually appears, displaying the file’s content. The content can include text, images, videos, audio files, or even document previews. Users can scroll through the content, zoom in or out, play a video or audio file, or navigate through a multi-page document preview.
- Additional Actions: Depending on the file management application, Quick Look may provide additional actions for the selected file. Users might be able to share the file, open it in a specific application, rotate an image, or perform other operations directly from the Quick Look preview window.
- Closing Quick Look: To close the Quick Look preview window, users can either click outside the window or press the Spacebar again. This returns the focus to the list view, allowing users to continue browsing through files.
Quick Look is a valuable feature that saves time and offers a convenient way to preview file contents without fully opening them. By utilizing Quick Look in list view, users can quickly assess the relevance and content of files, helping them make informed decisions about which files to open for further examination or editing.
Tips and Tricks for Using List View
List view is a versatile tool for efficient file management. With its customizable columns, sorting options, and various navigation methods, users can optimize their workflow and maximize productivity. Here are some tips and tricks for getting the most out of list view:
- Customize Column Display: Take advantage of the ability to customize the columns displayed in list view. Choose the attributes that are most relevant to your workflow and hide those that are less important. This declutters the view and allows you to focus on the key file information you need.
- Utilize Sorting: Experiment with different sorting options to organize your files and folders effectively. Whether sorting by name, date, size, or other attributes, find the sorting criteria that works best for your specific needs. Consider using the “multiple column sorting” feature to refine your organization even further.
- Master Keyboard Navigation: Learn the keyboard shortcuts for navigating in list view, such as using the arrow keys, Page Up and Page Down keys, and the Home and End keys. This allows for quick and efficient movement through long lists of files.
- Take Advantage of Quick Look: Use Quick Look to preview file contents directly in list view. This saves time by allowing you to quickly assess the content of files without opening them in separate applications.
- Group Files: Some file management applications offer the option to group files in list view based on certain criteria, such as file type or date. This can make it easier to locate specific groups of files and maintain a more organized view.
- Use Filtering: Explore the filtering options available in list view to quickly narrow down the displayed files based on specific attributes. This can be especially useful when dealing with large directories or when searching for specific file types.
- Experiment with Different View Settings: Play around with the view settings and preferences offered by your file management application. Adjust the font size, column widths, and file highlighting to create a visually pleasing and personalized list view experience.
- Learn Contextual Actions: Familiarize yourself with the contextual actions available in list view. These actions, accessed through right-clicking on files or folders, provide quick access to common operations such as copying, moving, renaming, and deleting.
By implementing these tips and tricks, you can harness the full potential of list view for seamless file management. With customization options, efficient navigation techniques, and the utilization of Quick Look, you can enhance your productivity and optimize your workflow.