
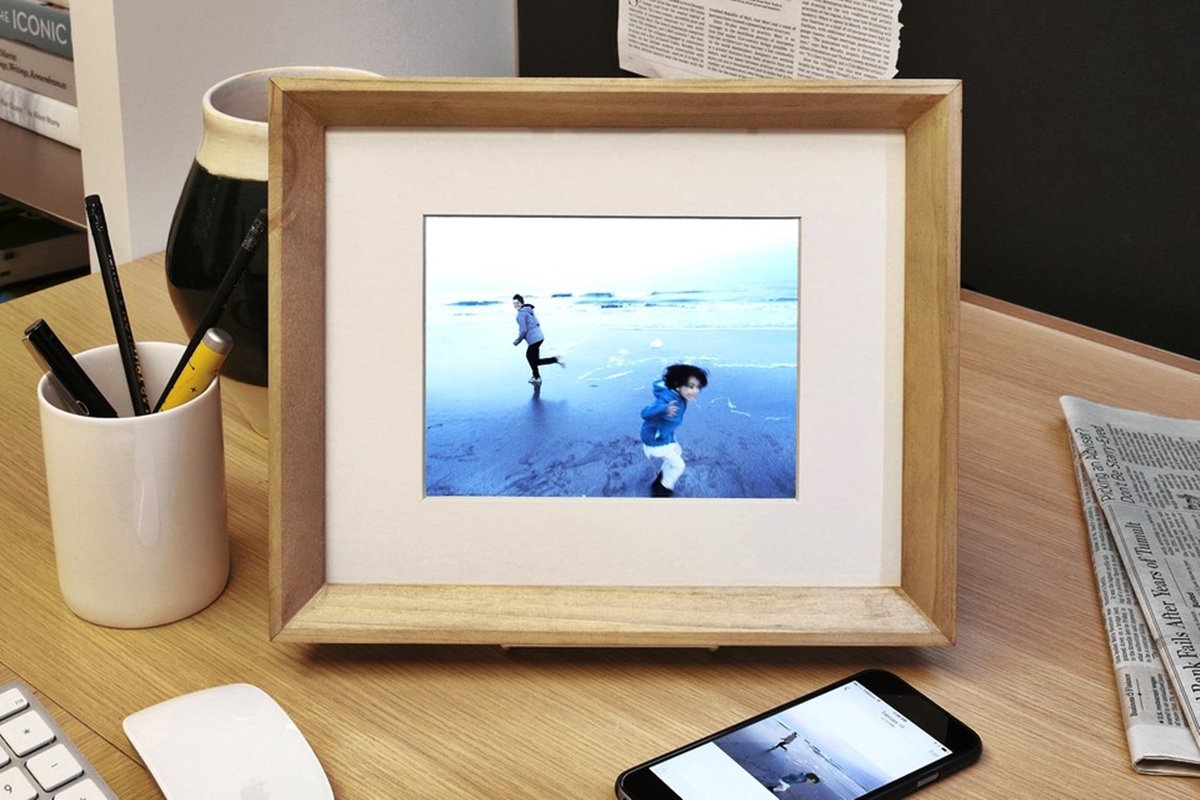
Common Issues with Digital Photo Frames
Digital photo frames are a fantastic way to display and enjoy your favorite memories. However, like any electronic device, they can experience a range of issues that may hinder their functionality. In this section, we will delve into some of the most common issues users encounter with digital photo frames and explore troubleshooting tips to help resolve them.
1. Frame Not Turning On
One of the most frustrating issues is when the digital photo frame refuses to turn on. Ensure that the power cable is properly connected, and try plugging the frame into a different power outlet. Additionally, check if the power button is functioning correctly.
2. Blank/Black Screen on Display
If you see a blank or black screen, it could be due to a loose connection between the frame and the memory card or USB drive. Remove and reinsert the memory card or USB drive, ensuring a snug fit. Also, check if the display settings are correctly configured.
3. Photos Not Displaying Properly
If your photos appear distorted, pixelated, or fail to display altogether, it may indicate compatibility issues with the image file format. Ensure that your digital photos are in a supported format such as JPEG or PNG. It’s also worth checking if the frame’s firmware is up to date.
4. Incorrect Date and Time Displayed
If the date and time displayed on your digital photo frame are incorrect, navigate to the settings menu and manually adjust them. Some models may have an option to sync with an internet time server, which ensures accurate timekeeping.
5. Slideshow Not Playing
If your slideshow isn’t playing, verify that the slideshow feature is enabled and that the proper folder or album is selected. Check if the interval between photos is set appropriately and ensure that the photos are not stored in subfolders that the frame cannot access.
6. Incorrect Aspect Ratio or Image Distortion
When you notice a distorted aspect ratio or image distortion, it may indicate that the frame is unable to properly resize or scale the photos. To resolve this, resize the photos to match the frame’s recommended aspect ratio before transferring them.
7. Memory Card/USB Drive Not Detected
If your digital photo frame fails to detect the memory card or USB drive, try cleaning the contacts on both the frame and the storage device. Ensure that the memory card or USB drive is properly formatted and that the files are compatible with the frame’s supported formats.
These are just a few of the common issues users may encounter with digital photo frames. In the next section, we will explore more troubleshooting tips to help address additional issues that may arise.
Frame Not Turning On
One of the most frustrating issues that users may encounter with digital photo frames is when they fail to turn on. It can be disheartening to see a lifeless frame when you’re eager to showcase your cherished memories. However, there are a few troubleshooting steps you can take to address this problem.
The first thing to check is whether the power cable is properly connected to both the frame and the power outlet. Sometimes, a loose connection can prevent the frame from receiving power. Ensure that the power cable is securely plugged in, and try using a different power outlet to rule out any issues with the existing one.
Another thing to consider is the power button on the frame itself. Press and hold the power button for a few seconds to see if the frame responds. In some cases, the button may be stuck or unresponsive, requiring further investigation or repair.
If the frame still doesn’t turn on, it’s worth checking if there is a battery compartment on the frame. Some digital photo frames have a built-in battery that may need to be charged or replaced. Follow the manufacturer’s instructions to access and troubleshoot the battery if applicable.
In certain situations, a power surge or electrical issue may have caused the frame to go into a protective mode. To resolve this, disconnect the power cable from both the frame and the power outlet, and let it sit unplugged for a few minutes. This will allow any residual power to dissipate. Then, reconnect the power cable and try turning on the frame again.
If none of these steps work, it may be worthwhile to contact the manufacturer’s customer support for further assistance. They will be able to provide specific troubleshooting steps for your particular digital photo frame model.
Blank/Black Screen on Display
Another common issue with digital photo frames is encountering a blank or black screen on the display. This can be a frustrating experience, especially when you’re eager to see your precious photos. Fortunately, there are troubleshooting steps you can take to address this problem.
The first thing to check is the connection between the frame and the memory card or USB drive. Sometimes, a loose connection can result in a blank screen. Remove the memory card or USB drive from the frame and then reinsert it, ensuring a snug fit. Make sure there are no obstructions or debris that could interfere with the connection.
If you’re using a memory card, it’s also possible that it needs to be formatted. Try inserting the memory card into a computer and formatting it using the appropriate file system (such as FAT32). Once formatted, reinsert the memory card into the frame and check if the screen displays properly.
Another factor to consider is the display settings on the digital photo frame. Navigate through the menu options and ensure that the display settings are correctly configured. Adjust the brightness, contrast, and other display settings to see if it resolves the issue.
If you’ve already checked the connections and adjusted the display settings but still encounter a blank screen, it’s worth verifying the image file format compatibility. Ensure that your digital photos are in a supported format, such as JPEG or PNG. Some digital photo frames may have limitations on the image resolution, so check if your photos exceed the maximum supported resolution. If necessary, resize the photos to a lower resolution before transferring them to the frame.
In some cases, a firmware update may be required to resolve the blank screen issue. Check the manufacturer’s website or user manual for instructions on how to update the firmware of your digital photo frame. Follow the provided guidelines carefully to avoid any potential issues during the update process.
If none of these troubleshooting steps resolve the blank screen issue, it may indicate a hardware problem with the frame. In such cases, it’s recommended to contact the manufacturer’s customer support for further assistance or to inquire about possible repairs or replacements.
Photos Not Displaying Properly
One of the most disappointing issues users may encounter with digital photo frames is when their photos fail to display properly. Whether it’s distorted images, pixelation, or photos not displaying at all, this issue can prevent you from fully enjoying your memories. Fortunately, there are several troubleshooting steps you can take to resolve this problem.
The first thing to consider is the compatibility of the image file format with your digital photo frame. Different frames support different formats, with JPEG being the most commonly supported format. Make sure your photos are saved in a compatible format. If your photos are in a different format or a newer file format like HEIC, you may need to convert them to JPEG or the supported format before transferring them to the frame.
In addition to file format compatibility, check if your digital photo frame has any specific requirements for image resolution. Some frames may have limitations on the maximum resolution they can display. If your photos have a higher resolution, they may appear distorted or not be displayed at all. Resize your photos to match the recommended resolution and transfer them to the frame again.
Another factor to consider is the aspect ratio of your photos. If the aspect ratio of the photos doesn’t match the frame’s display ratio, they may appear stretched or distorted. Ensure that your photos are in the correct aspect ratio, typically 4:3 or 16:9, depending on the frame model.
If you’re still facing issues, it’s possible that the frame’s firmware needs to be updated. Firmware updates often include bug fixes and improvements in image rendering. Check the manufacturer’s website or user manual for instructions on how to update the firmware of your digital photo frame. Follow the provided guidelines carefully to avoid any potential issues during the update process.
It’s also worth checking if there are any options within the frame’s settings for adjusting image display preferences. Some frames offer options to adjust brightness, contrast, or even apply filters to enhance image quality. Experiment with these settings to see if they improve the display of your photos.
If none of these troubleshooting steps resolve the issue, it’s recommended to contact the manufacturer’s customer support for further assistance. They can provide specific troubleshooting steps or advice for your particular digital photo frame model.
Incorrect Date and Time Displayed
One of the common issues that users may come across with their digital photo frames is when the date and time displayed are incorrect. Having accurate date and time information is essential for organizing and enjoying your photos. Fortunately, there are a few troubleshooting steps you can take to address this problem.
The first thing to do is access the settings menu on your digital photo frame. Look for an option related to date and time settings. From there, you can manually adjust the date and time to the correct values. Make sure to select the appropriate time zone as well.
Some digital photo frames have the capability to sync with an internet time server. This feature ensures that your frame always displays the accurate date and time. Check if your frame supports this feature and enable it in the settings menu. It may take a few moments for the frame to establish a connection with the time server and update the displayed date and time.
If your frame does not have an internet time sync option or if it’s not resolving the issue, check the frame’s power source. In some cases, if the frame loses power or is disconnected from the power source for an extended period, it may lose track of the date and time. Reconnect the frame to the power source and let it stay connected for a few minutes. It should automatically update the date and time based on the power supply.
If the date and time displayed on your digital photo frame continue to be incorrect despite the troubleshooting steps mentioned above, it’s a good idea to check if there is a firmware update available for your device. Manufacturers often release firmware updates to address various issues and improve functionality. Visit the manufacturer’s website or refer to the user manual to find instructions on how to update the firmware. Follow the provided guidelines carefully to ensure a successful update.
In rare cases, if the issue persists, it may indicate a hardware problem with the frame. It’s advisable to contact the manufacturer’s customer support for further assistance. They may be able to provide specific troubleshooting steps or recommend repair options for your particular digital photo frame model.
Slideshow Not Playing
A common issue that users may encounter with their digital photo frames is when the slideshow feature fails to play their photos. The slideshow function is a popular way to enjoy a continuous display of your cherished memories. If you’re experiencing difficulties with your slideshow, there are several troubleshooting steps you can take to resolve the problem.
The first thing to check is if the slideshow feature is enabled on your digital photo frame. Navigate to the settings menu or display options and ensure that the slideshow function is turned on. Some frames may have different display modes, so make sure you have selected the correct option for the slideshow.
If the slideshow is enabled but not playing, verify that the proper folder or album is selected for the slideshow. It’s possible that your photos are stored in a different location or subfolder that the frame is not accessing. Check the file organization on your memory card or USB drive and ensure that the photos are placed in the appropriate folder or album designated for the slideshow.
Another factor to consider is the interval between photos during the slideshow. Some frames allow you to set the duration for each photo display. If the interval is set too short, it may appear as if the slideshow is not playing. Adjust the interval to a longer duration and see if the slideshow starts playing properly.
It’s also important to check the compatibility of your photo file formats with the digital photo frame. Ensure that your photos are saved in supported formats such as JPEG or PNG. Some frames may have limitations on compatible file formats or image resolutions, so make sure your photos meet the required specifications.
If you’ve checked all these settings and the slideshow still isn’t playing, it’s worth considering a firmware update for your digital photo frame. Manufacturers often release firmware updates to address various issues and improve functionality, including slideshow performance. Check the manufacturer’s website or refer to the user manual for instructions on how to update the firmware of your frame. Follow the provided guidelines to ensure a successful update.
If none of these troubleshooting steps resolve the issue with the slideshow not playing, it’s recommended to contact the manufacturer’s customer support for further assistance. They will be able to provide specific troubleshooting steps or advise on possible repairs or replacements for your particular digital photo frame model.
Incorrect Aspect Ratio or Image Distortion
One frustrating issue that users may encounter with their digital photo frames is when there is an incorrect aspect ratio or image distortion. Photos may appear stretched, distorted, or improperly scaled on the display, which can detract from the overall viewing experience. Fortunately, there are several troubleshooting steps you can take to address this problem.
The first thing to consider is the aspect ratio of your photos. Digital photo frames typically have a specific aspect ratio, such as 4:3 or 16:9. If your photos have a different aspect ratio, they may appear stretched or distorted when displayed. To ensure optimal viewing, resize your photos to match the recommended aspect ratio of your digital photo frame before transferring them.
If your photos are already in the correct aspect ratio, but still appear distorted or stretched on the display, it’s possible that your digital photo frame is unable to properly resize or scale the photos. In this case, you may need to adjust the photo display settings on the frame. Look for options related to image resizing or aspect ratio in the settings menu and experiment with different settings to find the one that best displays your photos without distortion.
In some cases, you may encounter image distortion due to the file format of your photos. Ensure that your digital photos are saved in a compatible format such as JPEG or PNG. Some frames may have limitations on the supported file formats, and using an incompatible format may result in image distortion. If necessary, convert your photos to a supported format before transferring them to the frame.
Another potential cause of image distortion is the resolution of your photos. If your photos have a higher resolution than what the digital photo frame can display, they may appear pixelated or distorted when viewed. Check the maximum supported resolution of your frame and resize your photos to match that resolution for optimal clarity.
It’s also worth checking if your digital photo frame has a firmware update available. Manufacturers often release firmware updates to address various issues, including image distortion. Visit the manufacturer’s website or refer to the user manual to find instructions on how to update the firmware of your frame. Follow the provided guidelines carefully to ensure a successful update.
If none of these troubleshooting steps resolve the issue with incorrect aspect ratio or image distortion, it is recommended to contact the manufacturer’s customer support for further assistance. They will be able to provide specific troubleshooting steps or offer advice based on your particular digital photo frame model.
Memory Card/USB Drive Not Detected
One frustrating issue that users may encounter with their digital photo frames is when the device fails to detect their memory card or USB drive. This can prevent you from accessing and displaying your photos, which can be disheartening. However, there are several troubleshooting steps you can take to address this problem.
The first thing to check is the physical connection between the memory card/USB drive and the digital photo frame. Make sure the memory card or USB drive is fully inserted into the respective slot on the frame. Sometimes, a loose connection can cause detection issues. Remove and reinsert the memory card or USB drive, ensuring a snug fit. Be mindful not to force it in, as this can damage the slot or connector.
If the memory card or USB drive is properly inserted but still not being detected, check for any signs of damage or debris on the memory card/USB drive or the frame’s slot. Clean the contacts on both the memory card/USB drive and the frame using a soft, lint-free cloth. This will remove any dirt, dust, or residue that may be hindering the connection.
Another factor to consider is the compatibility of the memory card/USB drive with the digital photo frame. Ensure that you are using a compatible memory card format (such as SD, SDHC, or SDXC) and that the capacity of the memory card or USB drive does not exceed the maximum supported by the frame. Some frames may have limitations on the size or format of the memory cards or USB drives they can detect.
If you were previously able to access the photos on the memory card/USB drive but are now experiencing detection issues, it’s possible that the file system on the storage device has become corrupted. In this case, you may need to format the memory card or USB drive and transfer your photos back onto it. Note that formatting the storage device will erase all data, so make sure to back up any important files beforehand.
If you’re still experiencing detection issues, it’s recommended to test the memory card or USB drive on another device to see if it is recognized. If it is not detected on any device, it may indicate a faulty storage device that requires replacement.
If none of these troubleshooting steps resolve the issue with the memory card/USB drive not being detected, it’s advisable to contact the manufacturer’s customer support for further assistance. They can provide specific troubleshooting steps or offer guidance on possible repairs or replacements for your particular digital photo frame model.
WiFi Connection Problems
One of the conveniences of modern digital photo frames is their ability to connect to the internet via WiFi, allowing you to display photos from online albums and enjoy other online features. However, WiFi connection problems can hinder this functionality. If you’re experiencing difficulties with your WiFi connection on the digital photo frame, there are several troubleshooting steps you can take to address this issue.
The first thing to check is the WiFi signal strength in the vicinity of your digital photo frame. Low signal strength or interference from other devices can often lead to connection problems. Move the frame closer to the WiFi router or try repositioning the router itself to improve the signal. Keeping the frame away from other electronic devices that may interfere with the WiFi signal can also help.
Verify that the correct WiFi network is selected on your digital photo frame. Sometimes, nearby networks with similar names can cause confusion, leading to connection issues. Check the list of available networks on the frame and select the correct one. If your network has a password, ensure that you have entered the password correctly.
Another troubleshooting step is to power cycle the digital photo frame and the WiFi router. Turn off both devices, then turn on the router and wait for it to establish a stable connection. After that, turn on the digital photo frame and attempt to connect to the WiFi network again. This can often resolve temporary connection glitches.
If the above steps do not address the WiFi connection problem, it’s worth resetting the network settings on the digital photo frame. Look for a “Reset Network” option in the device settings and select it. This will clear any saved WiFi credentials and allow you to reconnect to the network from scratch.
Ensure that your digital photo frame firmware is up to date. Manufacturers often release firmware updates that can improve WiFi stability and address connectivity issues. Check the manufacturer’s website or refer to the user manual for instructions on how to update the firmware. Follow the provided guidelines carefully to ensure a successful update.
If you’ve tried all the above troubleshooting steps and still cannot establish a stable WiFi connection, it’s recommended to contact the manufacturer’s customer support for further assistance. They may be able to provide specific troubleshooting steps or offer advice based on your particular digital photo frame model. In some cases, they may recommend specific routers or network settings that are compatible with their device to improve WiFi connectivity.
Remote Control Not Working
A convenient feature of digital photo frames is the ability to control them using a remote control. However, encountering issues with the remote control not working can be frustrating. If you’re facing this problem, there are several troubleshooting steps you can take to address it.
Firstly, check the batteries in the remote control. Ensure they are properly inserted and have enough power. Sometimes, weak or depleted batteries can cause the remote control to stop functioning. Replace the batteries with fresh ones and try using the remote control again.
If the remote control still doesn’t work after changing the batteries, make sure you’re pointing it towards the digital photo frame and that there are no physical obstructions between the remote control and the frame. Sometimes, obstacles or being too far away from the frame can prevent the infrared signal from reaching the receiver on the frame.
Another step to try is to reset the digital photo frame and remote control. Turn off the frame, remove the batteries from the remote control, and disconnect the power source from the frame. Wait for a few minutes, then reconnect the power source, insert the fresh batteries into the remote control, and turn on the frame. This can sometimes reset any communication issues between the remote control and the frame.
Check if there are any obstructions on the remote control or the infrared sensor on the digital photo frame. Dust, dirt, or other debris can interfere with the infrared signal. Use a clean, dry cloth to gently wipe the surface of both the remote control and the infrared sensor on the frame.
Ensure that you’re operating the remote control within the operational range of the device. Refer to the user manual or the manufacturer’s specifications to determine the maximum distance the remote control can function from.
If none of the above troubleshooting steps resolve the issue, there may be a problem with the remote control or the infrared sensor on the frame. Try replacing the remote control with a new one to see if that solves the problem. If the issue persists, it’s recommended to contact the manufacturer’s customer support for further assistance. They can provide specific troubleshooting steps or offer information on how to obtain a replacement remote control or repair the device.
Frame Freezing or Operating Slowly
Experiencing a frozen or slow-operating digital photo frame can be frustrating, as it hinders your ability to enjoy and navigate through your cherished photos. If you’re encountering this issue, there are several troubleshooting steps you can take to address it.
The first step is to check the power source of your digital photo frame. Ensure that it is properly connected and that the power supply is stable. In some cases, an unstable power source can cause the frame to freeze or operate slowly. Try connecting the frame to a different power outlet or using a different power adapter if available.
Next, power cycle the digital photo frame by turning it off and unplugging it from the power source. Wait for a few minutes, then reconnect the power and turn on the frame. This can sometimes clear any temporary glitches or issues that were causing the frame to freeze or operate slowly.
If the frame continues to freeze or operate sluggishly, it’s worth checking the internal memory or storage capacity of the device. If the memory is nearing its limit, it can affect the performance of the frame. Delete unnecessary photos or files from the internal memory or storage device to free up space. It’s also recommended to regularly transfer and delete photos to keep the memory usage in check.
Another factor to consider is the firmware of the digital photo frame. Manufacturers occasionally release firmware updates to address performance issues and improve overall functionality. Visit the manufacturer’s website or refer to the user manual for instructions on how to update the firmware of your frame. Follow the provided guidelines carefully to ensure a successful update.
Check if the frame is running multiple processes or applications simultaneously. Some frames may have the ability to play music, videos, and display photos simultaneously. Closing unnecessary applications or processes can help alleviate the strain on the frame’s resources and improve its performance.
If none of the above steps resolve the issue, it’s recommended to contact the manufacturer’s customer support for further assistance. They can provide specific troubleshooting steps or offer information on potential repairs or replacements for your particular digital photo frame model.
Frame Displaying Error Messages
Encountering error messages on your digital photo frame can be concerning and may disrupt your enjoyment of the device. These error messages can appear for various reasons and can range from simple issues to more complex technical problems. If you’re facing error messages on your frame, there are several troubleshooting steps you can take to address them.
The first step is to carefully read and understand the error message displayed on the screen. Error messages often provide valuable information about the issue at hand. Take note of any specific error codes or descriptions, as they can assist you in troubleshooting or help determine the source of the problem.
A common cause of error messages is a corrupted or incompatible memory card or USB drive. If the error message is related to the memory card or USB drive, try removing and reinserting it into the frame. Ensure that the memory card or USB drive is properly formatted and contains compatible file formats that the frame can read. If the error persists, you may want to test the memory card or USB drive on another device to see if it functions properly.
Another step is to inspect the memory card or USB drive for any physical damage. Bent pins, scratches, or other signs of damage can prevent the frame from reading the data properly and trigger error messages. If you notice any physical damage, try using a different memory card or USB drive to see if the error persists.
If the error message is related to connectivity or network issues, such as “No Internet Connection” or “Network Error,” ensure that your WiFi is functioning properly and that the frame is connected to the correct network. Check the WiFi settings on the frame and verify that the password and network information are accurate. If you’re unable to establish a stable connection, refer to the troubleshooting steps for WiFi connection problems mentioned earlier in this article.
If the error message references a software or firmware issue, it’s essential to check for any available updates. Manufacturers often release software patches or firmware updates to address known issues and improve device performance. Visit the manufacturer’s website or refer to the user manual for instructions on how to update the software or firmware of your digital photo frame. Follow the provided guidelines carefully to ensure a successful update.
If you’ve exhausted all troubleshooting steps and the error message still persists, it’s recommended to contact the manufacturer’s customer support for further assistance. Provide them with specific details about the error message and any troubleshooting steps you’ve already taken. They can offer additional guidance or recommend further actions, such as factory resetting the frame or seeking professional repair services.
Audio Not Playing in Slideshow
Having audio accompany your slideshow can enhance the overall viewing experience and bring your memories to life. However, encountering the issue of audio not playing in your digital photo frame’s slideshow can be disappointing. If you’re facing this problem, there are several troubleshooting steps you can take to address it.
The first step is to verify that your digital photo frame supports audio playback during the slideshow. Not all frames have built-in speakers or audio capabilities. Check the specifications or user manual of your frame to ensure that it is equipped for audio playback.
Next, confirm that the audio files you are using are compatible with your digital photo frame. Ensure that the audio files are in a supported format, such as MP3 or WAV. Check the frame’s specifications or user manual for information regarding supported audio file formats.
If your audio files are in a compatible format but still not playing during the slideshow, check if the volume level on your frame is appropriately set. Increase the volume to make sure it is not set too low or muted. Some frames have physical volume buttons or touch controls, while others may have volume adjustments in the settings menu.
It’s also worth checking if there are any specific settings related to audio playback in the frame’s settings menu. Look for options related to audio settings, such as audio synchronization or audio output. Adjust these settings as needed to troubleshoot the audio playback issue.
If you’re using a memory card or USB drive, ensure that the audio files are stored in the same location and folder as the corresponding photo files. Some frames require the audio and photo files to be located in the same directory or folder for synchronized playback.
Check if the audio files themselves are properly encoded and not corrupted. Try playing the audio files on a computer or another device to ensure they are functioning correctly. If the audio files play fine on other devices, but not on the digital photo frame, it may indicate an issue with the frame’s audio playback capabilities.
If none of the above troubleshooting steps resolve the issue, it’s recommended to update the firmware of your digital photo frame. Manufacturers often release firmware updates to address various issues, including audio playback problems. Visit the manufacturer’s website or refer to the user manual for instructions on how to update the firmware. Follow the provided guidelines carefully to ensure a successful update.
If the issue persists after trying all the troubleshooting steps, it’s advisable to contact the manufacturer’s customer support for further assistance. They may be able to provide specific troubleshooting steps or recommend further actions, such as resetting the frame or seeking professional repairs, depending on your particular digital photo frame model.
Frame Overheating or Shutting Down
Experiencing issues with your digital photo frame overheating or unexpectedly shutting down can be a cause for concern. Overheating can not only affect the frame’s performance but also potentially damage the internal components. If you’re facing this problem, it’s important to take immediate action to address it. Here are some troubleshooting steps to alleviate overheating or unexpected shutdown issues.
The first step is to ensure that your digital photo frame is in a well-ventilated area and not placed in direct sunlight or near heat sources. Overheating may occur if the frame is exposed to excessive heat. Move the frame to a cooler location and ensure that there is proper airflow around it.
Check if the frame’s vents or cooling fans are obstructed by dust or debris. Dust accumulation can hinder the cooling process, causing the frame to overheat. Gently clean the vents or fans using a soft brush or canned air to remove any accumulated dust or debris.
If your frame has a removable back cover, consider removing it to facilitate better air circulation to dissipate heat. However, be mindful of any warranty restrictions or manufacturer guidelines before removing any covers or panels.
Ensure that the latest firmware is installed on your digital photo frame. Manufacturers often release firmware updates to address overheating concerns and improve the overall performance and stability of the device. Visit the manufacturer’s website or refer to the user manual for instructions on how to update the firmware. Follow the provided guidelines carefully to ensure a successful update.
Check if the frame’s display settings are optimized for energy efficiency. Reducing the screen brightness or adjusting the sleep/standby settings can help to minimize heat generation. Refer to the frame’s user manual for guidance on adjusting these settings.
If your digital photo frame is powered by a battery, overheating or unexpected shutdowns may indicate a faulty battery. Replace the battery with a new one of the same type and configuration as recommended by the manufacturer.
If the overheating or unexpected shutdown issues persist even after attempting the above troubleshooting steps, it’s advisable to contact the manufacturer’s customer support for further assistance. They will have specific troubleshooting steps suitable for your particular digital photo frame model. In some cases, they may recommend a factory reset or offer information on repairs or warranty coverage that may be applicable.
Monitoring the temperature of your digital photo frame during operation can also help identify potential overheating issues. If you notice excessively high temperatures or frequent unexpected shutdowns, it’s essential to contact customer support or seek professional assistance to avoid further damage to the device.
Image Quality Issues
Image quality is a crucial aspect of digital photo frames, as it directly impacts the visual enjoyment of your photos. If you notice image quality issues on your digital photo frame, such as pixelation, blurriness, or color distortion, there are several troubleshooting steps you can take to address this problem.
Firstly, check the resolution of the digital photos you are using. If the resolution is lower than the recommended resolution of the frame, the images may appear pixelated or lack sharpness. Try using higher-resolution photos that match or exceed the frame’s recommended resolution to improve image quality.
Another factor to consider is the file format of the digital photos. Ensure that your photos are saved in a format supported by the frame, such as JPEG or PNG. Some frames may have limitations on the supported file formats or may display images in higher quality in specific formats.
Check the aspect ratio of your photos and the display settings of the digital photo frame. If the aspect ratio of the photos doesn’t match the frame’s display ratio, the images may appear stretched or distorted. To resolve this, resize the photos to match the frame’s recommended aspect ratio before transferring them.
Clean the screen of the digital photo frame. Fingerprints, dust, or smudges on the screen can impact image clarity. Use a soft, lint-free cloth to gently wipe the screen. Be cautious not to apply excessive pressure that could damage the screen.
Tweak the brightness and contrast settings on your digital photo frame. Sometimes, adjusting these settings can help improve image quality and enhance the overall appearance of the photos. Refer to the frame’s user manual for instructions on adjusting these settings.
If you notice color distortion or a tint in the images, check the color temperature settings on the frame. Adjust the color temperature to your preference or try resetting it to default settings to see if it resolves the issue. Each frame has its own settings menu and options, so refer to the user manual for specific guidance.
If your photos are displayed from an external memory card or USB drive, ensure that the storage device is functioning properly. Test the memory card or USB drive on another device to ensure there are no issues with the files themselves.
If you’ve tried all the troubleshooting steps and continue to experience image quality issues, it’s recommended to contact the manufacturer’s customer support for further assistance. They may be able to provide specific troubleshooting steps or offer information on potential repairs or replacements for your particular digital photo frame model.
Power Adapter or Battery Problems
Power adapter or battery problems can greatly impact the functionality and reliability of your digital photo frame. If you’re facing issues related to the power source, it’s important to address them promptly. Here are several troubleshooting steps you can take to resolve power adapter or battery problems.
Firstly, check the power adapter’s connection to both the digital photo frame and the power outlet. Ensure that the power adapter is firmly plugged in at both ends. Sometimes, a loose connection can cause power interruptions leading to unexpected shutdowns or a lack of power supply. Consider trying a different power outlet or replacing the power adapter if you suspect it to be faulty.
For frames that are powered by batteries, replace the batteries with fresh ones of the same type and configuration as recommended by the manufacturer. Weak or depleted batteries can result in power-related issues such as inconsistent power supply or failure to turn on. Follow the correct battery installation instructions for your specific digital photo frame model.
Check if there are any visible signs of damage or wear on the power adapter or battery compartment. Corrosion, bent pins, or other physical damage can impact the power supply. If you notice any damage, it’s advisable to seek a replacement power adapter or contact the manufacturer’s customer support for further assistance.
If your digital photo frame has both battery and power adapter options, try using the device with just the power adapter connected. In some cases, batteries that are low or faulty may cause power-related issues. By solely relying on the power adapter, you can determine whether the battery is the cause of the problem.
Examine the battery compartment for any signs of debris, dirt, or corrosion. Clean the battery contacts using a soft, dry cloth or a cotton swab dipped in a small amount of alcohol. Ensure that the contacts are clean and free from any obstructions that may hinder proper power transmission.
If you have ruled out power adapter or battery malfunctions, it’s worth considering a firmware update for your digital photo frame. Manufacturers often release firmware updates to address power-related issues and improve device performance. Visit the manufacturer’s website or refer to the user manual for instructions on how to update the firmware. Follow the provided guidelines carefully to ensure a successful update.
When all troubleshooting steps have been exhausted, and power adapter or battery problems persist, it’s recommended to contact the manufacturer’s customer support for further assistance. They can provide specific troubleshooting steps for your particular digital photo frame model or recommend further actions, such as repairing or replacing the device if it is still under warranty.