
Choosing the Right Digital Picture Frame
When it comes to choosing a digital picture frame, there are several factors to consider. These frames not only display your cherished memories but also add a touch of sophistication to your home or office. Here are some essential factors to keep in mind when selecting the right digital picture frame for your needs.
1. Display Quality: The quality of the display is crucial, as it directly affects how your photos will appear. Look for frames with high-resolution screens and adjustable brightness to ensure clear and vibrant images.
2. Size and Aspect Ratio: Consider the size and aspect ratio of the frame, depending on where you plan to display it. A larger frame might be more suitable for hanging on a living room wall, while a smaller frame can be ideal for a desk or bedside table.
3. Internal Storage Capacity: Check the internal storage capacity of the frame. Some models offer ample space to store a large number of photos, while others may have limited storage options. Consider whether you need the flexibility of adding and swapping photos frequently or prefer to store a fixed set of images.
4. Connectivity Options: Look for frames that offer multiple connectivity options such as USB, Wi-Fi, or Bluetooth. USB allows you to transfer photos directly from your computer, while Wi-Fi or Bluetooth connectivity enables wireless transfer from your smartphone or online photo storage accounts.
5. User-Friendly Interface: Ensure that the frame has an intuitive and user-friendly interface. This will make it easier to navigate through your photo collection, create slideshows, adjust settings, and make any necessary edits.
6. Additional Features: Some digital picture frames come with extra features such as built-in speakers, video playback capabilities, calendar or clock displays, and remote controls. Consider which additional features are important to you and choose accordingly.
7. Design and Aesthetics: Select a frame that complements your personal style and the décor of the space where you plan to display it. Digital picture frames come in various designs and finishes, ranging from sleek and modern to classic and ornate.
8. Budget: Determine your budget range beforehand. Digital picture frames are available in a wide range of prices, so it’s important to know how much you are willing to spend.
By keeping these factors in mind and weighing the pros and cons of different options, you’ll be able to choose the perfect digital picture frame that showcases your photos in the best possible way. Remember to consider your specific needs and preferences to make an informed decision.
Preparing Your Photos for Transfer
Before transferring your photos to a digital picture frame, it’s important to ensure that they are prepared and optimized for the best viewing experience. Here are some steps to follow when preparing your photos:
1. Photo Selection: Start by selecting the photos you want to transfer. Sort through your collection and choose the ones that hold special meaning or perfectly capture a particular moment.
2. Editing and Enhancing: You may want to edit your photos for improved clarity, brightness, or color balance. Use photo editing software or apps to make necessary adjustments and enhancements before transferring them to the frame.
3. Resize and Crop: Check the specifications of your digital picture frame to determine the optimal resolution and aspect ratio. Resize and crop your photos accordingly to ensure they fit perfectly on the screen without any distortion or black borders.
4. File Format: Most digital picture frames support popular image file formats such as JPEG and PNG. Convert your photos into a compatible format if needed, to ensure they can be displayed on the frame.
5. Folder Organization: To simplify navigation and browsing on the digital picture frame, organize your photos into folders. Create separate folders for different events, trips, or themes, making it easier to locate specific photos when desired.
6. Remove Duplicates: It’s common to have multiple versions of the same photo in your collection. Before transferring them to the frame, delete any duplicates to free up storage space and avoid cluttering the frame’s interface.
7. Backup Your Photos: Always create a backup of your photos before transferring them to the digital picture frame. This ensures that even if there are any technical issues or accidental deletions, you have a separate copy of your precious memories.
8. Test Compatibility: If you are using a memory card or USB drive to transfer photos, ensure that the digital picture frame recognizes and supports the storage format. Test the compatibility by inserting the memory card or USB drive into the frame before transferring all your photos.
By following these steps, you can ensure that your photos are well-prepared and optimized for transfer to a digital picture frame. Taking the time to select, edit, resize, and organize your photos will result in a visually appealing and enjoyable viewing experience on your digital picture frame.
USB Transfer Method
One of the most common and straightforward methods of transferring photos to a digital picture frame is through the USB connection. Follow these steps to transfer your photos using the USB transfer method:
1. Connect the Frame: Start by connecting your digital picture frame to your computer or laptop using a USB cable. Ensure that both devices are powered on and properly connected.
2. Select USB Mode: On your digital picture frame, navigate to the settings or options menu and choose the USB mode. This mode allows the frame to function as a removable storage device, similar to a USB flash drive.
3. Copy Photos: On your computer, open the file explorer and locate the folder containing the photos you want to transfer. Select the desired photos and copy them by right-clicking and choosing the “Copy” option or pressing Ctrl+C.
4. Paste Photos: In the file explorer, open the removable storage device corresponding to your digital picture frame. It is usually labeled as “Removable Disk” or the specific name of your frame. Right-click inside the folder and choose the “Paste” option or press Ctrl+V to transfer the photos to the frame.
5. Safely Eject the Frame: Once the transfer is complete, safely eject the digital picture frame from your computer. This ensures that all files are properly saved and prevents any data loss.
6. Disconnect and Display: Disconnect the USB cable from the digital picture frame and enjoy browsing your transferred photos. The frame should automatically detect and display the newly added photos for you to view and enjoy.
7. Additional Tips: Remember to follow the specific instructions provided with your digital picture frame for the USB transfer method. Some frames may have a dedicated USB port, while others may require a specific USB adapter or cable.
The USB transfer method allows for a quick and direct way to transfer photos to a digital picture frame. It eliminates the need for wireless connectivity and provides a reliable and secure transfer process. Simply connect, transfer, disconnect, and enjoy your photos on the frame’s vivid display.
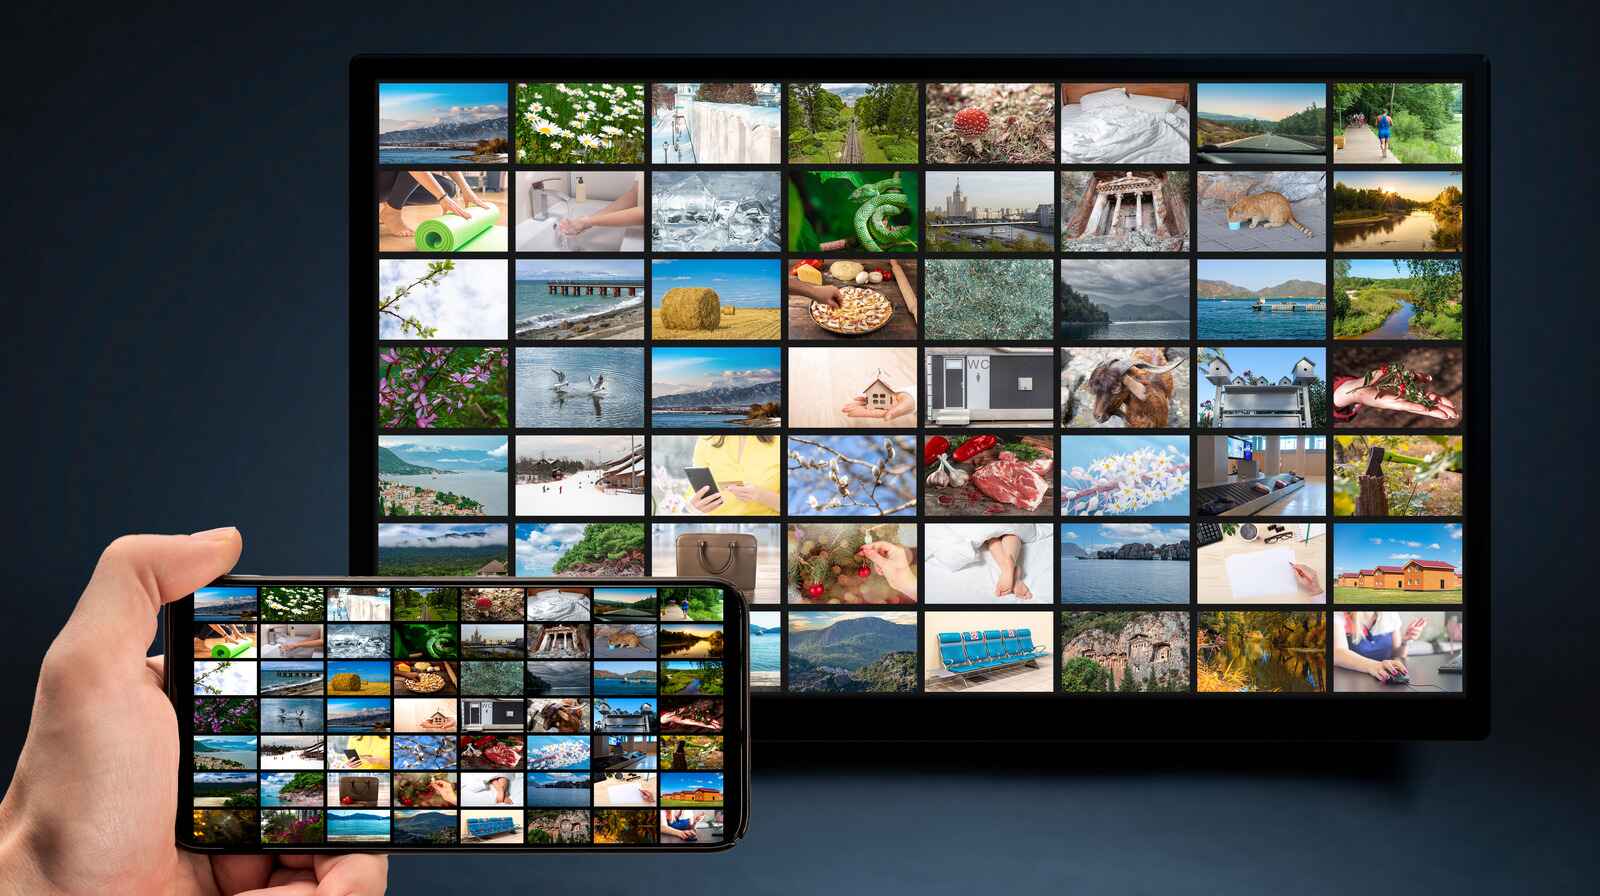
Wi-Fi Transfer Method
The Wi-Fi transfer method offers a convenient and wireless way to transfer photos to your digital picture frame. Follow these steps to transfer your photos using the Wi-Fi transfer method:
1. Check Wi-Fi Capability: Ensure that your digital picture frame has built-in Wi-Fi capability or supports Wi-Fi connectivity through a compatible adapter. Consult the user manual or manufacturer’s website for specific instructions.
2. Connect to Wi-Fi: On your digital picture frame, navigate to the settings or options menu and select the Wi-Fi option. Follow the on-screen prompts to connect the frame to your local Wi-Fi network. Enter your network name and password if prompted.
3. Enable Wi-Fi Transfer Mode: Once connected to Wi-Fi, access the settings menu on the digital picture frame and enable the Wi-Fi transfer mode. This mode allows the frame to receive photos wirelessly from other devices.
4. Download Compatible App: On your smartphone or tablet, download and install the compatible app provided by the manufacturer of your digital picture frame. The app allows you to transfer photos from your mobile device to the frame over Wi-Fi.
5. Open the App: Launch the app on your mobile device and follow the instructions to connect it to the digital picture frame. This typically involves selecting the frame from a list of available devices on the app and confirming the connection.
6. Select and Transfer Photos: Once the app is connected to the digital picture frame, you can browse your photo gallery or albums on your mobile device. Select the photos you want to transfer and choose the option to send them to the frame. The app will use the Wi-Fi connection to transfer the photos seamlessly.
7. Monitor Transfer Progress: Depending on the number and size of the photos, the transfer process may take a few moments or longer. Monitor the transfer progress on both the app and the digital picture frame’s display to ensure that all photos are successfully transferred.
8. Disconnect and Display: Once the transfer is complete, you can disconnect your mobile device from the Wi-Fi connection or close the app. Your photos will now be available for viewing on the digital picture frame’s screen.
It’s worth noting that the Wi-Fi transfer method may vary slightly depending on the brand and model of your digital picture frame. Always refer to the specific instructions provided by the manufacturer for detailed guidelines.
The Wi-Fi transfer method eliminates the need for cables and allows for remote photo transfer, providing a convenient and hassle-free way to update and display your favorite memories on your digital picture frame. Enjoy the freedom of wireless photo transfer and effortlessly showcase your photos on a stunning display.
Transferring Photos from a Memory Card
If your digital picture frame has a memory card slot, transferring photos from a memory card is a simple and efficient method. Follow these steps to transfer photos from a memory card to your digital picture frame:
1. Insert the Memory Card: Locate the memory card slot on your digital picture frame. Insert the memory card into the appropriate slot, ensuring that it is properly aligned. Most frames support popular memory card formats such as SD, SDHC, and SDXC.
2. Access the Memory Card: Once the memory card is inserted, the digital picture frame should automatically detect and access the content on the card. You can now browse through the folders and files on the memory card using the frame’s interface.
3. Select Photos: Navigate through the folders on the memory card and select the photos you want to transfer to the frame. You can often preview the photos on the frame’s screen to help you choose the desired ones.
4. Copy Photos: Once you have selected the photos, choose the option to copy or transfer them to the digital picture frame. The interface may vary depending on the frame, but there is usually an option to copy selected files from the memory card to the frame’s internal storage or directly display them from the card.
5. Transfer in Batches: If you have a large number of photos or if the memory card storage is limited, consider transferring the photos in batches to ensure a smooth and efficient transfer process. This also allows you to manage and organize your photos more effectively.
6. Safely Eject the Memory Card: Once the transfer is complete, safely eject the memory card from the digital picture frame by following the proper procedure. This helps to prevent data corruption and ensures that the memory card can be safely removed without any damage.
7. Display the Transferred Photos: Once the photos are successfully transferred, the digital picture frame will automatically display them for your viewing pleasure. You can enjoy browsing through your photos and reliving your favorite moments.
Remember to handle memory cards with care and keep them in a safe place when not in use. Regularly backup your photos from the memory card to ensure that your precious memories are protected.
Transferring photos from a memory card provides a convenient way to access and display your favorite images on your digital picture frame. Whether you want to showcase vacation photos, family portraits, or breathtaking landscapes, the memory card transfer method allows you to easily update your frame’s content with a simple plug-and-play process.
Connecting to a Computer for Photo Transfer
If you prefer to transfer photos to your digital picture frame using a computer or laptop, you can make use of the connection options available. Follow these steps to connect your frame to a computer for photo transfer:
1. Check Available Connection Ports: Examine your digital picture frame for available connection ports. Common options include USB ports, HDMI ports, and memory card slots. Confirm which ports are available on your frame and identify the appropriate connection method.
2. USB Connection: If your frame has a USB port, you can connect it directly to your computer using a USB cable. Ensure that both the digital picture frame and the computer are powered on and properly connected.
3. HDMI Connection: Some digital picture frames support HDMI connectivity. Check if your frame has an HDMI port and connect it to your computer using an HDMI cable. This method allows for high-quality photo transfer and display.
4. Memory Card Connection: If your digital picture frame has a memory card slot, you can transfer photos by removing the memory card from the frame and inserting it into a memory card reader on your computer. This method requires a memory card reader that is compatible with the specific memory card format.
5. Computer Recognition: Once the connection is established, your computer should recognize the digital picture frame as a connected device. It may appear as a removable storage device or as a second monitor, depending on the connection method used.
6. File Transfer: Open the file explorer on your computer and access the digital picture frame as a removable storage device. Navigate through the folders on the frame and locate the location where photos can be transferred. This may be the internal storage of the frame or a designated folder.
7. Copy and Paste: Select the photos you want to transfer from your computer to the digital picture frame. Copy the selected photos by right-clicking and choosing the “Copy” option or pressing Ctrl+C. Open the frame’s storage location and paste the photos by right-clicking and selecting the “Paste” option or pressing Ctrl+V.
8. Safely Eject: Once the photo transfer is complete, safely eject the digital picture frame from your computer. This ensures that all files are properly saved, and it prevents any data loss or corruption.
9. Display and Enjoy: Disconnect the connection cable or remove the memory card from the computer. Your transferred photos should now be available for display on the digital picture frame. Enjoy browsing through your collection and reliving your cherished memories.
Connecting your digital picture frame to a computer provides a direct and reliable method for photo transfer. It allows you to access your entire photo library and provides efficient control over the files you want to transfer. Choose the appropriate connection method based on the available ports on your frame and computer, and enjoy seamless photo transfer and display.
Organizing and Managing Photos on Your Digital Picture Frame
Organizing and managing your photos on a digital picture frame ensures that you can easily find and enjoy your favorite memories. Here are some tips to help you effectively organize and manage the photos on your frame:
1. Create Folders: Use the organizing feature of your digital picture frame to create folders or albums. Group your photos based on themes, events, or dates. This makes it convenient to browse through specific collections or to showcase photos from a particular occasion.
2. Rename Photos: If your digital picture frame allows it, consider renaming your photos with descriptive titles. This can help you quickly identify and locate specific photos when browsing through your photo collection.
3. Set Slideshow Preferences: Take advantage of the slideshow feature on your digital picture frame. Set preferences such as slideshow duration, transition effects, and display order to create a personalized and engaging viewing experience.
4. Delete Unwanted Photos: Regularly review and delete unwanted or duplicate photos from your digital picture frame. This helps to free up storage space and keep your photo collection organized and clutter-free.
5. Sort by Date or Name: Choose a sorting option that best suits your preference. You can sort the photos on your frame by date, allowing you to view them in chronological order. Alternatively, you can sort by name to arrange them alphabetically.
6. Rotate and Crop Photos: If any of your photos appear sideways or upside down on the digital picture frame, use the frame’s built-in editing features to rotate them to the correct orientation. You can also crop photos to remove unwanted parts or to adjust the composition for a better display.
7. Manage Storage: Depending on the storage capacity of your digital picture frame, you may need to manage the space carefully. Consider transferring photos to a computer or external storage device to create room for new memories. Alternatively, delete photos that are no longer relevant or meaningful to make space for fresh content.
8. Update and Refresh: To keep your digital picture frame visually appealing and exciting, periodically update and refresh the photos on display. Add new photos to your frame and remove older ones to keep your collection relevant and vibrant.
9. Use Remote or Smartphone Apps: Some digital picture frames come with remote control or smartphone apps that allow you to manage and control your photos wirelessly. Take advantage of these features to conveniently organize, edit, and display your photos.
By following these tips, you can efficiently organize and manage the photos on your digital picture frame. Creating folders, sorting, deleting unwanted photos, and taking advantage of editing features can enhance your experience and make it enjoyable to showcase and browse through your cherished memories.
Troubleshooting Common Issues
While digital picture frames are generally user-friendly, you may occasionally encounter some common issues that can be easily resolved. Here are some troubleshooting tips to help you overcome common problems:
1. Screen Display Issues:
- If the screen is blank or not displaying any photos, check the power connection and ensure that the frame is turned on.
- Adjust the brightness settings of the frame to ensure optimal visibility.
- If the images appear blurry or distorted, check the resolution and file format of the photos. Resize and convert them to a compatible format if needed.
2. Memory Card or USB Connection Problems:
- If the memory card or USB drive is not recognized, ensure that it is properly inserted or connected to the frame.
- If the connection still fails, try cleaning the memory card or USB drive and the corresponding ports on the frame to remove any debris or dust.
- Check the compatibility of the memory card or USB drive with your digital picture frame. Some frames may have specific requirements for storage devices.
3. Slideshow Issues:
- If the slideshow is not working, check the slideshow settings on your digital picture frame. Ensure that the correct timing, transition effects, and display order are selected.
- If the photos in the slideshow are not in the desired order, check their file names or sorting options. Rename the photos or adjust the sorting preferences to correct the order.
4. Remote Control or App Problems:
- If you are using a remote control or smartphone app to control your digital picture frame, check the batteries of the remote or ensure that the app is properly synced with the frame.
- If the remote control is not functioning, check for any obstructions between the remote and the frame, such as furniture or objects.
- If the app is not working, try restarting your smartphone or reinstalling the app to resolve any temporary glitches.
5. Internal Storage Limitations:
- If you are experiencing storage issues, consider transferring photos to a computer or external storage device to free up space.
- Delete unnecessary or duplicate photos from the internal storage or memory card to maximize available storage capacity.
6. Firmware Updates:
- Check if there are any available firmware updates for your digital picture frame. Keeping the firmware up to date can help resolve compatibility issues and improve overall performance.
- Refer to the manufacturer’s website or user manual for instructions on how to download and install firmware updates.
If you continue to experience issues with your digital picture frame, consult the manufacturer’s support resources or contact their customer service for further assistance. They will be able to provide specific troubleshooting steps or arrange for repairs if necessary.
Tips for Displaying and Enjoying Your Photos on a Digital Picture Frame
A digital picture frame is a wonderful way to showcase and enjoy your favorite photos. Here are some tips to help you make the most out of your digital picture frame and enhance your photo viewing experience:
1. Rotate and Change the Orientation:
- Periodically rotate the frame or change its orientation to keep your viewing experience fresh. Displaying your photos in different positions adds variety and prevents you from getting accustomed to the same perspective.
2. Play with Slideshow Settings:
- Experiment with different slideshow settings to add visual interest. Adjust the transition effects, timing, and display order to create a dynamic and engaging slideshow of your photos.
- Consider adding background music or sound effects to enhance the slideshow experience. Choose tunes that evoke memories or complement the mood of your photos.
3. Mix and Match Themes:
- Organize your photos into themed folders or albums. Mix and match the themes while creating slideshows to tell a story or create a unique visual journey.
- For example, you could create a “Family” folder that includes photos from vacations, birthdays, and everyday moments, and another folder for “Nature” photos showcasing landscapes, animals, and scenic beauty.
4. Vary the Display Time:
- Adjust the display time per photo to avoid any images being displayed for too long or too briefly. Find a balance that allows you to fully appreciate each photo without getting bored or feeling rushed.
5. Edit and Enhance Photos:
- Take advantage of built-in editing features on your digital picture frame to enhance your photos. Adjust the brightness, contrast, and color saturation to make your images pop and look their best on the screen.
- If your frame supports photo filters or effects, experiment with different settings to add a creative touch to your photos.
6. Regularly Update Your Photo Collection:
- Keep your digital picture frame updated with fresh and meaningful photos. Replace old images with new ones to continuously enjoy a variety of memories.
- Consider setting a reminder to update your frame with new photos each month or season, ensuring that your frame always reflects your latest adventures and cherished moments.
7. Adjust the Frame’s Brightness:
- Take into account the ambient lighting in the room when adjusting the brightness of your digital picture frame. This ensures that the photos are presented in the most optimal lighting conditions for viewing.
- Dim the brightness in low-light situations and increase it when the room is brighter to maintain clarity and visibility.
8. Experiment with Photo Arrangements:
- Display your photos in different arrangements on the frame’s screen. Try grid layouts, mosaic patterns, or even overlapping images to create unique and visually appealing displays.
- Alternatively, experiment with displaying a single large photo at a time to create a striking focal point.
By following these tips, you can make the most out of your digital picture frame and immerse yourself in the joy of reliving your precious memories. Explore the various features and settings, and get creative in how you showcase and enjoy your photos on your digital picture frame.