
COMMANDS:
The MS-DOS (Microsoft Disk Operating System) commands are a crucial part of the computer’s operating system. These commands allow users to interact with the system by executing various tasks and operations. In this section, we will explore some of the most useful and commonly used MS-DOS commands.
1. ATTRIB:
The ATTRIB command is used to display or change the attributes (such as Read-only, Hidden, Archive, and System) of a specific file or directory. It provides users with control over the file and directory attributes.
2. CHKDSK:
The CHKDSK command is used to check and repair disk-related issues, such as bad sectors, cross-linked files, and file system errors. By running CHKDSK, users can ensure the integrity and stability of their disks.
3. DEL:
The DEL command is used to delete one or more files. It allows users to permanently remove unwanted files from the system.
4. DIR:
The DIR command is used to display a list of files and subdirectories within a directory. It provides users with detailed information, such as file names, sizes, and timestamps.
5. ECHO:
The ECHO command is used to display messages or enable/disable the echoing of commands in a batch file. It is often used to provide information or feedback to the user during the execution of a script.
6. EDIT:
The EDIT command is used to open the MS-DOS Editor, a simple text editor that allows users to create and modify text files.
7. EXIT:
The EXIT command is used to exit the MS-DOS command prompt or terminate a batch file. It allows users to gracefully exit the MS-DOS environment.
8. FORMAT:
The FORMAT command is used to format a disk or create a new file system on a disk. It erases all data on the disk and prepares it for use.
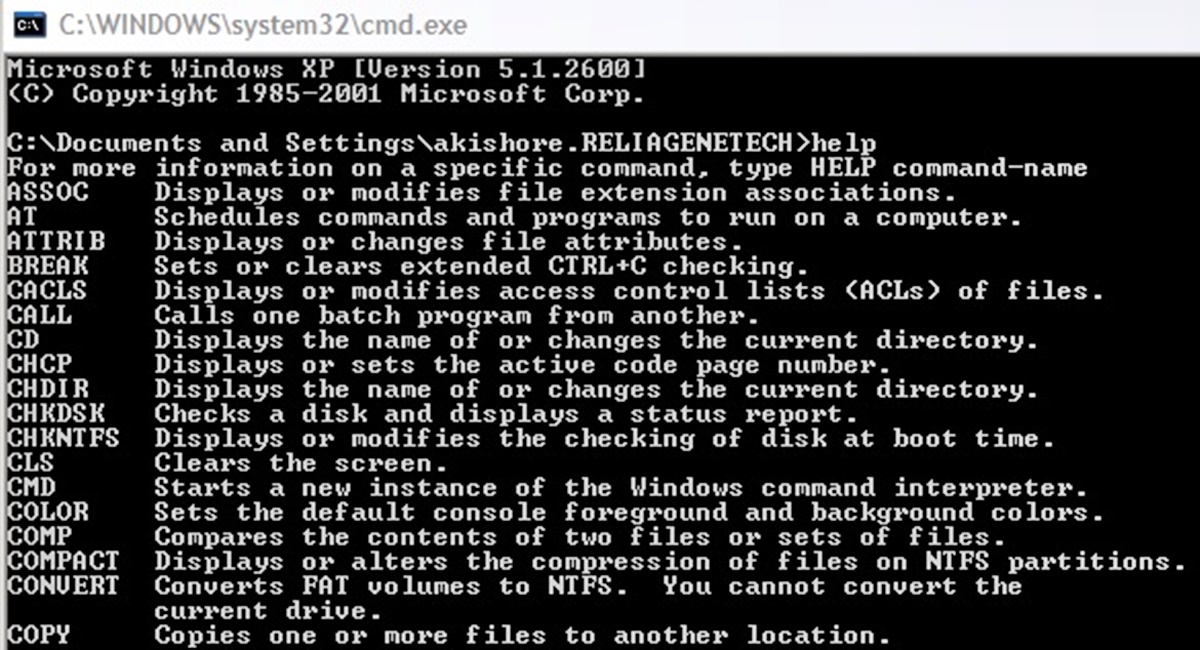
9. HELP:
The HELP command is used to display information and help topics for MS-DOS commands. It provides users with detailed instructions on how to use specific commands.
10. MD:
The MD command is used to create a new directory or subdirectory within an existing directory. It allows users to organize their files and folders in a hierarchical structure.
11. MOVE:
The MOVE command is used to move one or more files from one location to another. It can be used to reorganize files or transfer them to a different directory.
12. PING:
The PING command is used to send a network request to a specific IP address or domain name and receive a response. It is commonly used to check network connectivity and troubleshoot network-related issues.
13. RD:
The RD command is used to remove (delete) an empty directory or subdirectory. It allows users to clean up their directory structure by removing unnecessary empty folders.
14. REN:
The REN command is used to rename a file or directory. It allows users to change the name of a file or folder without altering its content.
15. SYSTEMINFO:
The SYSTEMINFO command is used to display detailed information about the computer’s hardware and software configuration. This includes information about the operating system, processor, memory, and installed software.
16. TYPE:
The TYPE command is used to display the contents of a text file. It allows users to view the text within a file without modifying or executing it.
17. VER:
The VER command is used to display the version number of MS-DOS. It provides users with information about the current version of the operating system.
18. VOL:
The VOL command is used to display the volume label and serial number of a specified disk. It provides users with information about the disk’s volume and identification.
19. XCOPY:
The XCOPY command is used to copy files and directories from one location to another. It provides users with more advanced options and capabilities compared to the regular COPY command.
These are just a few examples of the many MS-DOS commands available. Each command has its own unique functionality and usage. By familiarizing yourself with these commands, you can enhance your productivity and efficiency when navigating and managing the MS-DOS environment.
ATTRIB:
The ATTRIB command in MS-DOS is a powerful tool for managing file and directory attributes. Attributes provide additional information and control over how files and directories are handled in the system. This command allows users to view and modify these attributes as needed.
To use the ATTRIB command, simply type “ATTRIB” followed by the file or directory path. Here are some of the most commonly used options:
- +/-R: This option adds or removes the “Read-only” attribute of a file or directory. When the Read-only attribute is set, the file or directory cannot be modified or deleted without first clearing the attribute.
- +/-H: This option adds or removes the “Hidden” attribute of a file or directory. When the Hidden attribute is set, the file or directory is not visible when browsing through directories, unless the “Show hidden files” option is enabled in the file explorer.
- +/-A: This option adds or removes the “Archive” attribute of a file. The Archive attribute is primarily used by backup programs to determine whether a file needs to be backed up or not.
- +/-S: This option adds or removes the “System” attribute of a file or directory. When the System attribute is set, the file or directory is considered a critical part of the system and is normally hidden from users.
For example, to make a file named “example.txt” Read-only, you would use the command:
ATTRIB +R example.txt
Similarly, to remove the Read-only attribute, you would use:
ATTRIB -R example.txt
The ATTRIB command is particularly useful for managing file and directory permissions, especially when dealing with sensitive or important files that should not be accidentally modified or deleted. It provides a simple and efficient way to control access to files and directories within the MS-DOS environment.
In summary, the ATTRIB command in MS-DOS is a valuable tool for managing file and directory attributes. With this command, users can easily view and modify attributes such as Read-only, Hidden, Archive, and System. By understanding and utilizing the ATTRIB command, users can maintain better control over their files and directories, ensuring their integrity and security.
CHKDSK:
The CHKDSK command, short for “Check Disk,” is a fundamental utility in MS-DOS used to scan and repair disk-related issues. It helps to identify and fix problems that may be affecting the integrity and performance of a disk.
When running CHKDSK, it performs a series of checks on the selected disk, including:
- File System Integrity: CHKDSK examines the file system’s structure and verifies that it is consistent and free from errors. It checks for issues such as cross-linked files, lost clusters, and invalid file names.
- Bad Sectors: CHKDSK scans for bad sectors on the disk. Bad sectors are areas where the disk’s surface has become damaged and can result in data loss or corruption. CHKDSK attempts to repair or mark these sectors as unusable.
- Directory Structure: CHKDSK validates the directory structure and ensures that it is organized correctly. It checks for issues such as orphaned files or directories that are no longer linked properly.
To run CHKDSK, you need to specify the drive letter or the path to the drive you want to check. For example, to check the C: drive, you would use the command:
CHKDSK C:
By default, CHKDSK operates in read-only mode, which means it scans the disk for errors but does not make any changes. However, you can also use additional parameters to customize the behavior of CHKDSK:
- /F: This parameter fixes errors on the disk. If CHKDSK finds any issues, it automatically attempts to repair them.
- /R: This parameter not only detects and fixes disk errors but also locates and recovers readable data from bad sectors. It is a more comprehensive scanning and repair option.
For example, to run CHKDSK with both the fix and recovery options on the C: drive, you would use the command:
CHKDSK C: /F /R
Running CHKDSK is essential for maintaining the health and reliability of your disks. It helps to prevent data loss, improve disk performance, and ensure the proper functioning of the file system. Regularly running CHKDSK as part of your system maintenance routine is recommended to detect and repair any disk-related issues promptly.
In summary, the CHKDSK command in MS-DOS is a powerful tool for checking and repairing disk-related problems. By scanning the file system, checking for bad sectors, and validating the directory structure, CHKDSK plays a crucial role in maintaining disk integrity and preventing data loss. Running CHKDSK regularly is an important part of disk maintenance to ensure the smooth functioning of your computer system.
DEL:
The DEL command in MS-DOS, short for “Delete,” is used to permanently remove one or more files from the system. It offers a simple and efficient way to clean up your disk and free up storage space by deleting unnecessary or unwanted files.
To use the DEL command, you need to specify the file or files that you want to delete. For example, to delete a file named “example.txt” located in the current directory, you would use the command:
DEL example.txt
If the file is located in a different directory, you need to specify the file’s full path. For example, to delete a file named “example.txt” located in the “Documents” directory on the C: drive, you would use the command:
DEL C:\Documents\example.txt
The DEL command can also be combined with wildcards to delete multiple files that match a specific pattern. For example, to delete all text files in the current directory that start with “sample,” you would use the command:
DEL sample*.txt
It’s important to note that the DEL command permanently deletes files, and they cannot be recovered once they are deleted. Therefore, it is recommended to double-check the files you are deleting before executing the command.
In addition to the basic usage, the DEL command offers some additional options for more specific file deletion:
- /P: This option prompts for confirmation before deleting each file. It provides an extra layer of protection to avoid accidentally deleting important files.
- /S: This option instructs the command to delete files in all subdirectories within the specified directory. It allows for bulk deletion of files in multiple directories at once.
- /F: This option forces the deletion of read-only files or files with other attributes without prompting for confirmation. It overrides any restrictions imposed on files.
For example, to delete all text files in the current directory and its subdirectories without prompting for confirmation, you would use the command:
DEL /S /F *.txt
The DEL command offers a convenient way to remove unwanted files quickly. Whether you need to clean up your disk space, remove temporary files, or get rid of outdated documents, the DEL command provides the necessary functionality to achieve that efficiently within the MS-DOS environment.
DIR:
The DIR command is a fundamental command in MS-DOS used to list the files and subdirectories within a specified directory. It provides users with a detailed view of the files and directories present in a particular location.
To use the DIR command, simply type “DIR” followed by the path to the directory you want to list. For example, to view the contents of the current directory, you would use the command:
DIR
If you want to list the contents of a specific directory, you need to specify the directory’s path. For example, to view the contents of a directory named “Documents” located on the C: drive, you would use the command:
DIR C:\Documents
The DIR command provides various information about the listed files and directories, including file names, sizes, and modification timestamps. By default, it displays the information in a formatted list, showing one entry per line.
In addition to the basic usage, the DIR command offers several options to customize the displayed information:
- /W: This option displays the information in a wide format, using multiple columns. It allows for a more compact view of the directory contents.
- /P: This option pauses after each screenful of information, allowing you to scroll through the results at your own pace.
- /A: This option specifies the attributes of the files to be displayed. For example, “/A:H” displays only hidden files, while “/A:-H” excludes hidden files from the list.
- /O: This option allows you to specify the order in which the files and directories are sorted. For example, “/O:N” lists the entries in alphabetical order by name, while “/O:S” sorts them by size in ascending order.
For example, to display the contents of the current directory in wide format, pausing after each screenful of information, you would use the command:
DIR /W /P
The DIR command is invaluable for quickly assessing the contents of a directory and identifying specific files or directories of interest. Whether you need to locate a particular file, check the size of files, or review the latest modifications, the DIR command provides a comprehensive listing of the directory information within the MS-DOS environment.
ECHO:
The ECHO command in MS-DOS is used to display messages or enable/disable the echoing of commands within a batch file. It provides users with a way to communicate information or provide feedback during the execution of a script or batch file.
To use the ECHO command, simply type “ECHO” followed by the message you want to display. For example, to display the message “Hello, world!” in the command prompt, you would use the command:
ECHO Hello, world!
By default, the ECHO command is set to ON, which means that any command or text following the ECHO command will be displayed on the screen.
You can use the ECHO command in combination with other MS-DOS commands to create more complex batch files. For example, if you have a batch file that performs a series of operations, you can use ECHO to provide the user with information about each step:
ECHO Performing task 1...
REM Rest of the commands for task 1
ECHO Task 1 completed.
ECHO Performing task 2...
REM Rest of the commands for task 2
ECHO Task 2 completed.
The ECHO command can also be used with special characters to display variables or system information. For example, to display the value of a variable named “count,” you would use the command:
ECHO The count is %count%
Furthermore, the ECHO command can be used to enable or disable the echoing of commands within a batch file. To turn off command echoing, you would use the command:
ECHO OFF
This is particularly useful when you want to hide the commands being executed, especially if you have a long batch file with multiple commands.
In summary, the ECHO command in MS-DOS provides a way to display messages and enable/disable the echoing of commands within batch files. It allows users to communicate information, provide feedback, and control the visibility of commands during script execution. By utilizing the ECHO command effectively, users can enhance the functionality and user experience of their batch files in the MS-DOS environment.
EDIT:
The EDIT command in MS-DOS opens the MS-DOS Editor, a simple text editor that allows users to create and modify text files. It provides a user-friendly interface for editing files within the MS-DOS environment.
To use the EDIT command, simply type “EDIT” followed by the file name you want to edit. If the file does not exist, the MS-DOS Editor creates a new file with that name. For example, to open a file named “example.txt” in the MS-DOS Editor, you would use the command:
EDIT example.txt
When you open a file in the MS-DOS Editor, you can make any necessary changes to the text. The editor provides basic editing functionalities such as inserting, deleting, and modifying text. You can navigate within the file using the arrow keys and make changes using the keyboard.
The MS-DOS Editor supports various editing features, including:
- Find and Replace: You can search for specific words or phrases within the file and replace them with your desired text. This feature helps in making bulk changes or finding specific content within a large file.
- Formatting: The editor allows you to change the font size, text color, and background color for a more personalized editing experience.
- Spell Check: The MS-DOS Editor includes a spell-checking feature that helps identify and correct spelling errors in the text.
Once you have finished editing the file, you can save your changes and exit the MS-DOS Editor. Press “Ctrl” + “F” to access the file menu and choose the “Save” option to save the changes.
It’s important to note that the MS-DOS Editor is a basic text editor and lacks advanced features found in modern text editors. However, it serves as a lightweight and reliable option for editing text files within the MS-DOS environment.
In summary, the EDIT command in MS-DOS opens the MS-DOS Editor, allowing users to create and modify text files. Although it is a basic text editor, it provides essential editing functionalities and allows users to make changes to text files with ease. By utilizing the EDIT command, users can efficiently edit text files within the MS-DOS environment.
EXIT:
The EXIT command in MS-DOS is used to exit the MS-DOS command prompt or terminate a batch file. It allows users to gracefully exit the MS-DOS environment or end the execution of a batch file.
To use the EXIT command, simply type “EXIT” and press Enter. This will close the command prompt window and return you to the operating system’s interface.
When used within a batch file, the EXIT command will terminate the execution of the batch file and return control to the command prompt or the calling program.
The EXIT command can be combined with an exit code to provide feedback to the calling program or to indicate the success or failure of a batch file’s execution. The exit code is a numeric value ranging from 0 to 255, commonly used to communicate a specific error or success status.
For example, to exit a batch file and return an exit code of 0, indicating successful execution, you would use the command:
EXIT 0
If you want to indicate an error or failure, you can use a non-zero exit code. For example:
EXIT 1
By utilizing exit codes, you can make your batch files more robust and provide meaningful feedback to the calling program or user.
In addition to the basic usage, the EXIT command can be combined with conditional statements and error handling techniques within a batch file. This allows for more advanced program flow control, enabling you to handle various scenarios and exit conditions dynamically.
Overall, the EXIT command in MS-DOS provides a simple and effective way to exit the MS-DOS command prompt or terminate the execution of a batch file. By using exit codes and incorporating error handling techniques, you can enhance the functionality of your batch files and provide informative feedback to the operating system or calling program.
FORMAT:
The FORMAT command in MS-DOS is used to format a disk or create a new file system on a disk. It prepares the disk for use by erasing all existing data and setting up the necessary file system structures.
Before using the FORMAT command, it’s important to note that formatting a disk will permanently erase all data on it. Therefore, it is crucial to back up any important files before proceeding.
To use the FORMAT command, you need to specify the drive letter or the path to the drive you want to format. For example, to format the C: drive, you would use the following command:
FORMAT C:
The FORMAT command supports various options to customize the format process:
- /Q: This option performs a quick format, which only erases the file system metadata and structures. It does not scan for bad sectors or perform a comprehensive disk check. Quick formatting is faster but does not thoroughly check the disk for errors.
- /S: This option transfers the MS-DOS system files to the formatted disk, making it bootable. It prepares the disk to be used as a startup disk with the MS-DOS operating system.
- /U: This option specifies an unconditional format, which removes all data from the disk. It does not ask for confirmation or display a warning message before formatting.
For example, to perform a quick format on the D: drive, you would use the following command:
FORMAT D: /Q
Formatting a disk may take some time, depending on the size and type of the disk. During the format process, the command prompt will display progress information, including the percentage completed and the estimated time remaining.
After the format is complete, the disk will be ready to use with the specified file system. By default, the FORMAT command formats the disk using the FAT file system. However, you can specify a different file system using additional parameters, such as NTFS or exFAT.
The FORMAT command is a powerful tool for initializing disks and preparing them for use. It allows users to create a clean slate and set up a file system that suits their needs. Whether you are setting up a new disk, repurposing an existing one, or troubleshooting disk-related issues, the FORMAT command provides an efficient and reliable solution within the MS-DOS environment.
HELP:
The HELP command in MS-DOS is a valuable tool for accessing information and help topics related to MS-DOS commands. It provides users with detailed instructions and explanations, helping them understand and utilize the various commands available within the MS-DOS environment.
To use the HELP command, simply type “HELP” followed by the command name or topic you want to learn more about. For example, to access help for the DIR command, you would use the command:
HELP DIR
The HELP command displays relevant information about the command, including its syntax, usage, and available parameters. It also provides examples to illustrate how the command can be used effectively.
In addition to providing help for specific commands, the HELP command also gives access to general help topics through the built-in MS-DOS Help system. By typing “HELP” without any additional parameters, you can browse through various help topics and subtopics related to MS-DOS commands and concepts.
The MS-DOS Help system is organized hierarchically, allowing users to navigate through topics using the “Enter” key, arrow keys, and other navigation commands. It provides comprehensive documentation and explanations on different aspects of MS-DOS, ensuring users can find the information they need.
The HELP command is particularly useful for users who are new to MS-DOS and need guidance on specific commands or general computing concepts. It serves as a self-contained reference, providing users with the necessary information to understand and effectively use MS-DOS commands.
It’s important to note that the exact help content available through the HELP command may vary depending on the version of MS-DOS and the specific command interpreter being used.
In summary, the HELP command in MS-DOS is a valuable resource for accessing information and help topics related to MS-DOS commands. By utilizing the HELP command, users can obtain detailed instructions, syntax, and usage examples for specific commands, as well as access the comprehensive MS-DOS Help system, enabling them to effectively navigate and utilize the MS-DOS environment.
MD:
The MD command in MS-DOS, short for “Make Directory,” is used to create a new directory or subdirectory within an existing directory. It provides an efficient way to organize files and folders in a hierarchical structure within the MS-DOS environment.
To use the MD command, simply type “MD” followed by the name and path of the directory you want to create. For example, to create a directory named “Documents” in the current directory, you would use the command:
MD Documents
If you want to create a directory in a different location, you need to specify the full path to that location. For example, to create a directory named “Pictures” within the “Documents” directory on the C: drive, you would use the command:
MD C:\Documents\Pictures
The MD command allows you to create multiple directories at once by specifying multiple directory names separated by spaces. For example, to create directories named “Folder1,” “Folder2,” and “Folder3” in the current directory, you would use the command:
MD Folder1 Folder2 Folder3
The MD command creates the specified directories in the order they are listed. If any of the directories already exist, the MD command will display an error message. To create directories recursively (including all intermediate directories), you can use the /P option along with the MD command.
For example, to create the directory “C:\NewFolder\SubFolder” and ensure that both “NewFolder” and “SubFolder” are created if they don’t already exist, you would use the following command:
MD C:\NewFolder\SubFolder /P
The MD command is an essential tool for organizing files and folders within the MS-DOS environment. By creating directories and subdirectories, you can better structure your files, making them easier to locate and manage.
In summary, the MD command in MS-DOS enables users to create new directories and subdirectories. By organizing files into a hierarchical structure, the MD command helps improve file management and facilitates efficient navigation within the MS-DOS environment.
MOVE:
The MOVE command in MS-DOS is used to move one or more files or directories from one location to another. It allows users to reorganize files, transfer them to different directories, or rename them efficiently within the MS-DOS environment.
To use the MOVE command, simply type “MOVE” followed by the file or directory you want to move, and then specify the destination path. For example, to move a file named “example.txt” from the current directory to a different directory, you would use the command:
MOVE example.txt C:\NewDirectory
If the file or directory you’re moving has spaces in its name, enclose the name in quotation marks. For example, to move a file named “my file.txt” to the “Documents” directory, you would use the command:
MOVE "my file.txt" C:\Documents
The MOVE command can also be used to rename files or directories. Simply specify the original name and provide the new name as the destination. For example, to rename a file named “oldname.txt” to “newname.txt” within the current directory, you would use the command:
MOVE oldname.txt newname.txt
When moving multiple files or directories, you can use multiple source arguments and provide a destination directory. For example, to move files named “file1.txt,” “file2.txt,” and “file3.txt” to the “Archive” directory, you would use the command:
MOVE file1.txt file2.txt file3.txt C:\Archive
The MOVE command also has options that provide additional control and functionality:
- /Y: This option suppresses confirmation prompts when overwriting existing files in the destination directory. It allows for batch operations without user interruption.
- /-Y: This option enables confirmation prompts when overwriting existing files, even if the “Y” default response is set in the system.
For example, to move a file and overwrite an existing file with the same name in the destination directory without being prompted, you would use the command:
MOVE /Y sourcefile.txt C:\Destination
The MOVE command provides a versatile and efficient way to manage files and directories within the MS-DOS environment. By allowing users to move or rename files and directories, it facilitates flexible organization and enhances file management capabilities.
In summary, the MOVE command in MS-DOS enables users to move files and directories to different locations or rename them within the MS-DOS environment. By providing efficient file organization and management capabilities, the MOVE command enhances navigation and flexibility when working with files in the MS-DOS environment.
PING:
The PING command in MS-DOS is used to send a network request to a specific IP address or domain name and receive a response. It is a valuable tool for troubleshooting network connectivity issues, checking the availability of a remote host, and measuring network latency.
To use the PING command, simply type “PING” followed by the IP address or domain name of the target host. For example, to ping the Google website, you would use the command:
PING www.google.com
The PING command sends ICMP (Internet Control Message Protocol) Echo Request packets to the target host. Once the packets reach the destination, the host responds with ICMP Echo Reply packets, indicating its availability and response time.
The PING command displays various output information, including the IP address of the host being pinged, the size of the packets, the number of packets sent and received, and the response time (usually measured in milliseconds).
The PING command also allows for customization using additional parameters:
- -t: This parameter sends continuous pings until interrupted, allowing for continuous monitoring of a host’s availability and response time.
- -n count: This parameter specifies the number of ping requests to be sent. For example, “-n 5” sends five ping requests instead of the default four.
- -w timeout: This parameter sets the timeout (in milliseconds) for each ping request. If a response is not received within the specified timeout period, the request is considered timed out.
For example, to continuously ping a server with a timeout of 1000 milliseconds, you would use the command:
PING -t -w 1000 server-ip-address
The PING command helps identify network connectivity issues, such as high latency, packet loss, or unresponsive hosts. It is a valuable tool for network administrators, IT professionals, and general users who want to troubleshoot network-related problems.
It’s important to note that some systems may not allow ICMP Echo Request packets, or they may prioritize their handling differently. In such cases, the PING command may not provide accurate results or may be blocked altogether.
In summary, the PING command in MS-DOS is a useful tool for troubleshooting network connectivity issues and checking the availability and response time of a remote host. By sending ICMP Echo Request packets and interpreting the responses, the PING command assists in diagnosing network problems and measuring network performance within the MS-DOS environment.
RD:
The RD command in MS-DOS, short for “Remove Directory,” is used to delete an empty directory or subdirectory. It provides a quick and straightforward way to clean up your file system by removing unnecessary empty folders.
To use the RD command, simply type “RD” followed by the name of the directory you want to remove. For example, to delete a directory named “OldFolder” in the current directory, you would use the command:
RD OldFolder
If the directory you want to remove is located in a different location, you need to specify the full path to that location. For example, to delete a directory named “Temp” within the “C:\Windows” directory, you would use the command:
RD C:\Windows\Temp
The RD command can also remove multiple directories simultaneously by specifying multiple directory names separated by spaces. For example, to delete directories named “Folder1,” “Folder2,” and “Folder3” from the current directory, you would use the command:
RD Folder1 Folder2 Folder3
It’s important to note that the RD command can only delete directories that are empty. If a directory contains files or subdirectories, you’ll need to remove them first before using the RD command.
In addition to deleting empty directories, the RD command also allows for the removal of directories and their contents recursively using the /S parameter. For example, to delete a directory named “ParentFolder” and all its contents, including files and subdirectories, you would use the command:
RD /S ParentFolder
When using the /S parameter, exercise caution as it permanently removes all files and subdirectories within the target directory.
The RD command provides a convenient way to clean up your file system by removing unnecessary empty directories. It helps maintain an organized file structure and frees up disk space.
However, it’s important to be cautious when using the RD command, as the deletion of directories and their contents is irreversible. Always double-check the directory you are removing to ensure that it is empty or that you have backed up any important files.
In summary, the RD command in MS-DOS allows users to remove empty directories or subdirectories from the file system. By providing a straightforward and efficient way to clean up the file structure, the RD command aids in maintaining a well-organized and clutter-free file system within the MS-DOS environment.
REN:
The REN command in MS-DOS, short for “Rename,” is used to rename a file or directory. It allows users to change the name of a file or folder without altering its content.
To use the REN command, simply type “REN” followed by the current name and the new name of the file or directory. For example, to rename a file named “oldname.txt” to “newname.txt” within the current directory, you would use the command:
REN oldname.txt newname.txt
If the file you want to rename is located in a different directory, you need to specify the full path to that file. For example, to rename a file named “data.csv” located in the “Documents” directory on the C: drive, you would use the command:
REN C:\Documents\data.csv C:\Documents\newdata.csv
The REN command can also rename directories in a similar manner by providing the current directory name and the desired new name. For example, to rename a directory named “OldFolder” to “NewFolder” within the current directory, you would use the command:
REN OldFolder NewFolder
It’s important to note that the REN command only allows for renaming files or directories within the same location. If you want to move a file or directory to a different location and rename it simultaneously, you should use the MOVE command instead.
The REN command is a useful tool for quickly renaming files or directories within the MS-DOS environment. Whether you need to update file names to adhere to a new naming convention or simply want to make them more descriptive, the REN command provides a straightforward solution.
When using the REN command, exercise caution and ensure that the new name you choose does not conflict with existing files or directories. Additionally, be aware that renaming a file or directory does not modify the contents or attributes of the item itself; it simply changes its name.
In summary, the REN command in MS-DOS allows users to rename files and directories within the file system. By providing a simple and efficient way to update names, the REN command facilitates better organization and improved file naming within the MS-DOS environment.
SYSTEMINFO:
The SYSTEMINFO command in MS-DOS is used to display comprehensive information about the computer’s hardware and software configuration. It provides users with detailed insights into the operating system, processor, memory, and installed software.
To use the SYSTEMINFO command, simply type “SYSTEMINFO” and press Enter. The command will gather and display various information about the computer’s configuration.
The SYSTEMINFO command provides a vast amount of details, including:
- Operating System: It displays information about the installed operating system, such as the name, version, build number, and installation date.
- Processor: It provides details about the computer’s processor, including the model, speed, architecture, and number of cores.
- Memory: It shows information about the computer’s memory (RAM), including the total installed memory and available memory.
- Network Adapter(s): It lists details about the installed network adapters, including the name, type, and MAC address.
- Display: It displays information about the computer’s display adapter, including the name, manufacturer, and resolution.
- Software: It provides a list of installed software, including the name, version, and publisher.
In addition to the above, the SYSTEMINFO command provides many other system-related details, such as BIOS information, boot device, system model, hotfixes, and more. It offers a comprehensive overview of the computer’s configuration in one centralized location.
The SYSTEMINFO command is particularly helpful for system administrators, IT professionals, and users who need to gather specific information about their computer’s hardware and software. It allows for easy access to important system details without the need for third-party tools or utilities.
It’s important to note that the information displayed by the SYSTEMINFO command is based on the specific computer’s configuration and can vary between systems, depending on the hardware and software installed.
In summary, the SYSTEMINFO command in MS-DOS provides users with a wealth of information about their computer’s hardware and software configuration. By displaying details about the operating system, processor, memory, network adapters, and more, the SYSTEMINFO command helps users gain a comprehensive understanding of their computer’s setup within the MS-DOS environment.
TYPE:
The TYPE command in MS-DOS is used to display the contents of a text file. It allows users to view the text within a file without modifying or executing it.
To use the TYPE command, simply type “TYPE” followed by the name of the text file you want to view. For example, to display the contents of a file named “example.txt” located in the current directory, you would use the command:
TYPE example.txt
The TYPE command reads the specified file and displays its contents on the screen. This is particularly useful when you want to quickly review the contents of a text file without opening it in a text editor.
The TYPE command can handle various types of text files, including plain text files and files with special characters or formatting. It accurately represents the content and structure of the text file as it is stored.
In addition to displaying the contents of a single file, the TYPE command can also be used with wildcards to display the contents of multiple files that match a specific pattern. For example, to view the contents of all text files in the current directory that start with “file,” you would use the command:
TYPE file*.txt
The TYPE command can also be combined with output redirection to save the displayed text into a new file. For example, to create a new file named “copy.txt” containing the contents of an existing file named “original.txt,” you would use the command:
TYPE original.txt > copy.txt
By utilizing the TYPE command, users can quickly and easily view the contents of text files without the need for complex text editor applications. It provides a convenient way to inspect the text within files, allowing for efficient file management and debugging within the MS-DOS environment.
In summary, the TYPE command in MS-DOS allows users to display the contents of text files. By providing a simple and efficient way to view file content, the TYPE command enhances file management and enables users to quickly assess the text within files within the MS-DOS environment.
VER:
The VER command in MS-DOS is used to display the version number of the operating system. It provides users with information about the current version of MS-DOS running on their computer.
To use the VER command, simply type “VER” and press Enter. The command prompt will display the version number of MS-DOS installed on your system.
The version number typically consists of a combination of numbers and characters that represent the specific release or build of the operating system. The format of the version number may vary depending on the version of MS-DOS being used.
The VER command serves multiple purposes, including:
- Confirming the MS-DOS Version: The VER command enables users to quickly verify the version of MS-DOS on their system.
- Script Compatibility: In batch files or scripts, the VER command can be used to check the operating system version and execute specific commands based on the version number, ensuring compatibility with different versions of MS-DOS.
- Troubleshooting: In some cases, knowing the version of MS-DOS can be helpful for troubleshooting purposes, as different versions may have specific issues or limitations.
For example, the VER command may output a version number such as “MS-DOS Version 6.22” or “MS-DOS Version 7.10”. This indicates the specific release or build of MS-DOS running on the system.
It’s important to note that due to the advancements in operating systems over time, newer versions of Windows have deprecated the pure MS-DOS environment. As a result, the VER command may provide information about the underlying Windows version rather than the MS-DOS version.
The VER command provides a quick way to identify the version number of the operating system running on your MS-DOS-based system. By referencing this information, users can ensure compatibility, troubleshoot issues, and confirm their system’s operating system version.
In summary, the VER command in MS-DOS is used to display the version number of the operating system. It allows users to quickly identify the specific release or build of MS-DOS running on their system.
VOL:
The VOL command in MS-DOS is used to display the volume label and serial number of a specified disk. It provides users with information about the disk’s volume and identification.
To use the VOL command, simply type “VOL” followed by the drive letter or path of the disk you want to retrieve information about. For example, to display information about the C: drive, you would use the command:
VOL C:
The VOL command retrieves and displays the volume label and serial number assigned to the specified disk. The volume label is usually a descriptive name given to the disk for easy identification, while the serial number is a unique identifier assigned by the operating system.
For example, the VOL command may output information such as:
Volume in drive C is System
Volume Serial Number is AB12-3456
The volume label and serial number can provide useful information about the disk, especially when dealing with multiple disks or when identifying specific volumes during disk management tasks.
It’s important to note that not all disks have a volume label or may not have a serial number assigned to them. In such cases, the VOL command may display default or blank values for these properties.
In addition to displaying the volume label and serial number, the VOL command also shows the total disk space, free space, and file system type for the specified disk. This information provides an overview of the disk’s capacity and file system structure.
The VOL command is particularly useful when managing and organizing storage devices within the MS-DOS environment. By providing details about the disk’s volume label and serial number, it helps users differentiate between different disks, especially when multiple disks are present.
In summary, the VOL command in MS-DOS is used to display the volume label and serial number of a specified disk. By providing information about the disk’s volume and identification, the VOL command aids in disk management and differentiation within the MS-DOS environment.
XCOPY:
The XCOPY command in MS-DOS is used to copy files and directories from one location to another. It provides more advanced options and capabilities compared to the standard COPY command, allowing for flexible and efficient file management within the MS-DOS environment.
To use the XCOPY command, simply type “XCOPY” followed by the source location and the destination location. For example, to copy all files and subdirectories from the “Source” directory to the “Destination” directory, you would use the command:
XCOPY C:\Source D:\Destination /E
The /E option ensures that all subdirectories, including empty ones, are copied. This allows for a comprehensive copy operation that replicates the entire directory structure.
The XCOPY command offers various options and switches that enhance its functionality:
- /S: This option copies directories and subdirectories without copying empty directories.
- /Y: This option suppresses prompting for confirmation before copying each file.
- /D: This option only copies files that are newer in the source compared to the destination.
- /C: This option continues copying even if errors occur.
- /H: This option copies hidden and system files in addition to normal files.
For example, to copy only the files that are newer in the “Source” directory to the “Destination” directory, you would use the command:
XCOPY C:\Source D:\Destination /D
The XCOPY command is particularly useful when you need to copy large numbers of files, maintain directory structures, or perform backups within the MS-DOS environment. Its advanced options provide efficient ways to manage files and directories, saving time and effort.
It’s important to note that the XCOPY command does not copy operating system files or files with certain attributes by default. To override this behavior and copy these files, you can use the /O and /X options, respectively.
In summary, the XCOPY command in MS-DOS is a powerful tool for copying files and directories. With its advanced options and capabilities, it provides efficient ways to manage and organize files within the MS-DOS environment, enabling users to perform comprehensive file copying operations with ease.