
Checking Compatibility
Before formatting a USB flash drive on your Mac, it is important to ensure that it is compatible with your system. Mac computers support various filesystem formats, such as HFS+ (Mac OS Extended), APFS (Apple File System), and FAT32.
To check the compatibility of your USB flash drive, follow these steps:
- Insert the USB flash drive into one of the USB ports on your Mac.
- Go to your Finder and click on the Applications folder.
- Open the Utilities folder and launch the Disk Utility application.
- In the left-hand sidebar of Disk Utility, you should see your USB flash drive listed. Click on it to select it.
- Check the information displayed at the bottom of the Disk Utility window. Look for the “Format” field which indicates the current filesystem format.
If the USB flash drive is already formatted as HFS+ or APFS, it is compatible with your Mac and you can proceed to the next section on backing up your data. However, if the drive is formatted as FAT32 or any other format, it may not be fully compatible with macOS and may require reformatting.
It’s important to note that formatting a USB flash drive erases all data on it. Therefore, make sure you have a backup of any important files before proceeding. In the next section, we’ll discuss how to back up your data before formatting the USB flash drive.
Backing Up Data
Before you format a USB flash drive on your Mac, it is crucial to back up any important data stored on the drive. Formatting will erase all existing files and partitions, so taking the time to create a backup ensures that you do not lose any valuable information.
Here is a step-by-step guide on how to back up your data before formatting a USB flash drive:
- Connect the USB flash drive to your Mac.
- Open the Finder and locate the USB flash drive in the sidebar.
- Select and copy any files or folders that you want to back up.
- Choose a destination for your backup. This could be an external hard drive, cloud storage, or another location on your computer.
- Paste the copied files and folders into the backup destination.
- Ensure that all the files have been successfully copied by verifying their presence in the backup location.
Once you have successfully backed up your data, you can proceed with formatting the USB flash drive using the methods explained in the following sections.
Remember that regular backups are essential to safeguard your important files. It is good practice to keep multiple copies of your data in different locations, providing extra protection against data loss.
Formatting Options
When formatting a USB flash drive on your Mac, you have several formatting options to choose from. The formatting option you select will depend on your specific needs and the intended use of the USB drive. Here are the different formatting options available:
- HFS+ (Mac OS Extended): This is the default filesystem format used by macOS. It offers support for large file sizes and is compatible with both Mac and Windows systems. However, it may not be compatible with some older systems.
- APFS (Apple File System): Introduced in macOS High Sierra, APFS is the newer and more advanced filesystem format. It provides improved performance, better data protection, and native encryption capabilities. However, APFS is only compatible with macOS 10.13 or later versions.
- FAT32: This is a widely supported filesystem format that offers compatibility with both Mac and Windows systems, as well as other devices like game consoles and media players. However, it has limitations on file size and partition size.
- ExFAT: ExFAT is a newer filesystem format that addresses some of the limitations of FAT32. It provides support for large file sizes and partition sizes, as well as compatibility with both Mac and Windows systems.
When choosing a formatting option, consider the compatibility needs of the USB drive. If you primarily use the drive with Mac computers, formatting it as HFS+ or APFS would be a suitable choice. If you need cross-platform compatibility, consider using FAT32 or ExFAT.
It’s important to note that the formatting process will erase all data on the USB flash drive. Therefore, ensure that you have made a backup of any important files before proceeding. In the next sections, we will explore different methods to format a USB flash drive on a Mac using Disk Utility and Terminal.
Using Disk Utility
Disk Utility is a built-in application on macOS that allows you to manage and format storage devices, including USB flash drives. It provides a user-friendly interface for formatting and partitioning the drive. Here’s how you can use Disk Utility to format a USB flash drive:
- Connect the USB flash drive to your Mac.
- Go to your Finder and click on the Applications folder.
- Open the Utilities folder and launch the Disk Utility application.
- In the left-hand sidebar of Disk Utility, you should see your USB flash drive listed. Click on it to select it.
-
Formatting the USB Drive:
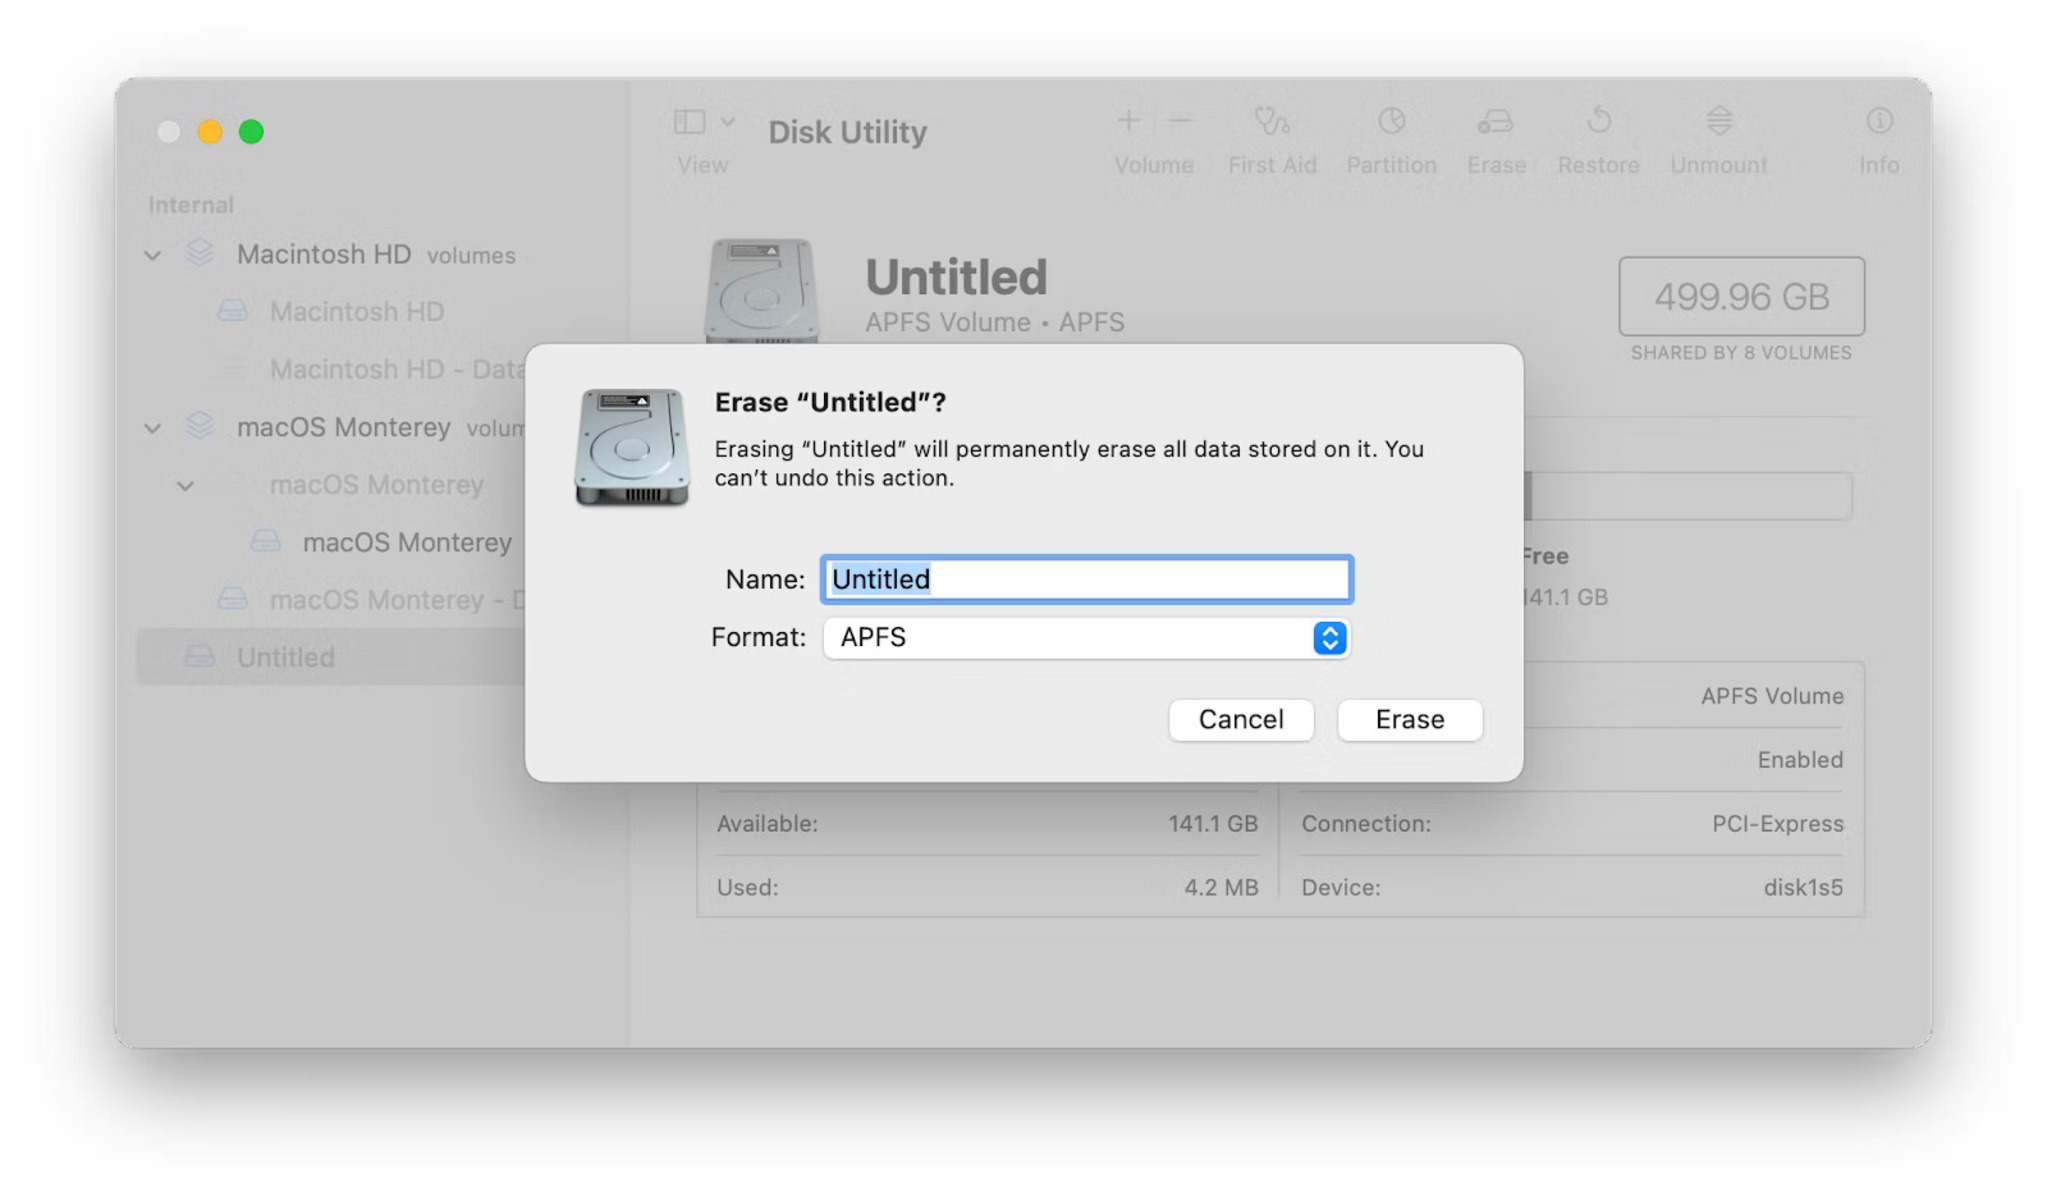
- If you want to format the drive with the default macOS format (HFS+), click on the Erase button at the top of the Disk Utility window.
- A pop-up window will appear, allowing you to choose a name and format for the drive. Enter a desired name for the drive and select the filesystem format you prefer (HFS+ or APFS).
- Click on the Erase button to begin the formatting process.
-
Erasing the USB Drive:
- If you want to erase the drive without changing the format, click on the Erase tab at the top of the Disk Utility window.
- Choose a desired name for the drive or keep the current name.
- Select the desired format for the drive from the “Format” dropdown menu.
- Click on the Erase button to initiate the erasing process.
-
Partitioning the USB Drive:
- If you want to create multiple partitions on the USB drive, click on the Partition tab at the top of the Disk Utility window.
- Click on the “+” button below the partition layout to add a new partition.
- Adjust the size of each partition by dragging the dividing line between them.
- Choose a desired format for each partition from the “Format” dropdown menu.
- Click on the Apply button to initiate the partitioning process.
Once the formatting, erasing, or partitioning process is complete, you can safely eject the USB flash drive and start using it for your desired purposes.
Formatting USB Drive
Formatting a USB drive is a process that prepares the drive for use by creating a file system structure. This allows the operating system to organize, store, and retrieve data on the drive efficiently. If you want to format a USB drive on your Mac, follow the steps below:
- Connect the USB drive to your Mac.
- Open the Finder and click on the Applications folder.
- Go to the Utilities folder and launch the Disk Utility application.
- In the left-hand sidebar of Disk Utility, you should see your USB drive listed. Click on it to select it.
-
Choose the formatting option:
- If you want to format the drive with the default macOS format (HFS+), click on the Erase button at the top of the Disk Utility window.
- If you prefer a different format, such as FAT32 or ExFAT, click on the Erase tab at the top of the Disk Utility window.
- Ensure that you have selected the correct drive, as formatting will erase all data on it.
-
Formatting the USB drive with default format (HFS+):
- In the pop-up window, enter a desired name for the drive.
- Choose either “Mac OS Extended (Journaled)” or “APFS” as the format.
- Click on the Erase button to begin the formatting process.
-
Formatting the USB drive with a different format (FAT32 or ExFAT):
- In the “Format” dropdown menu, select either “MS-DOS (FAT)” for FAT32 or “ExFAT” as the format.
- Enter a desired name for the drive.
- Click on the Erase button to initiate the formatting process.
- Wait for the process to complete – The duration of the formatting process depends on the size of the USB drive.
- Once the formatting is complete, the USB drive is now ready for use with the selected file system format.
- Remember to eject the USB drive properly before removing it from your Mac.
Formatting a USB drive will erase all data on it, so ensure you have backed up any important files before proceeding. Additionally, choose the file system format that best suits your needs for compatibility and file size limitations.
Erasing a USB Drive
If you want to completely remove all data from a USB drive without changing the file system format, you can simply erase the drive. Erasing a USB drive will delete all files and partitions, making it a blank slate for future use. Here’s how to erase a USB drive on your Mac:
- Connect the USB drive to your Mac.
- Open the Finder and click on the Applications folder.
- Navigate to the Utilities folder and launch the Disk Utility application.
- In the left-hand sidebar of Disk Utility, select the USB drive that you want to erase.
-
Erase the USB drive:
- Click on the Erase tab at the top of the Disk Utility window.
- Enter a desired name for the drive or keep the current name.
- From the “Format” dropdown menu, choose the file system format you prefer, such as HFS+, APFS, FAT32, or ExFAT.
- Click on the Erase button to initiate the erasing process.
- Wait for the erasing process to complete – The duration will depend on the size of the USB drive.
- After the erasing process is finished, the USB drive will be empty and ready for use.
- Remember to eject the USB drive properly before removing it from your Mac.
Erasing a USB drive deletes all data on it, so ensure you have backed up any important files beforehand. By erasing the drive, you start with a clean slate for storing new data or using it for different purposes.
Partitioning a USB Drive
Partitioning a USB drive involves dividing it into multiple sections or partitions, each functioning as a separate storage unit. This can be useful for organizing data, creating separate volumes for different operating systems, or creating a bootable partition. Here’s how to partition a USB drive on your Mac:
- Connect the USB drive to your Mac.
- Open the Finder and click on the Applications folder.
- Go to the Utilities folder and launch the Disk Utility application.
- In the left-hand sidebar of Disk Utility, select the USB drive that you want to partition.
-
Partition the USB drive:
- Click on the Partition tab at the top of the Disk Utility window.
- Click on the “+” button below the partition layout to add a new partition.
- Adjust the size of each partition by dragging the dividing line between them.
- From the “Format” dropdown menu, choose the file system format for each partition (e.g., HFS+, APFS, FAT32, or ExFAT).
- Enter a desired name for each partition.
- Click on the Apply button to initiate the partitioning process.
- Wait for the partitioning process to complete – The duration will depend on the size of the USB drive and the number of partitions created.
- Once the partitioning process is finished, each partition will appear as a separate volume on the USB drive.
- Remember to eject the USB drive properly before removing it from your Mac.
Partitioning a USB drive allows you to create distinct storage areas with different file system formats and purposes. Keep in mind that partitioning a drive will erase all existing data, so make sure to back up any important files before proceeding.
Formatting a USB Drive in Terminal
In addition to using Disk Utility, you can also format a USB drive on your Mac through the Terminal. Formatting a USB drive using Terminal offers more control and flexibility in terms of custom formatting options. Follow the steps below to format a USB drive using Terminal:
- Connect the USB drive to your Mac.
- Open the Finder and go to the Applications folder.
- Open the Utilities folder and launch the Terminal application.
- Type
diskutil listin the Terminal and press Enter to view a list of connected disks and their identifiers. - Identify the USB drive from the list based on its size and name.
-
Format the USB drive:
- Type
diskutil eraseDisk [format] [name] [identifier]in the Terminal, replacing[format]with the desired file system format (e.g.,MS-DOS FAT32,ExFAT,MacOS Extended (Journaled), etc.),[name]with the desired name for the drive, and[identifier]with the disk identifier of the USB drive. - Press Enter to begin the formatting process.
- Type
- Wait for the formatting process to complete – The duration will depend on the size of the USB drive and the chosen format.
- Once the formatting is complete, the USB drive will be ready to use with the specified file system format.
- Remember to eject the USB drive properly before removing it from your Mac.
Formatting a USB drive in Terminal gives you more control over the formatting process and allows for customization based on your specific needs. Ensure that you have a backup of any important files before proceeding with the formatting process.
Troubleshooting Tips
Formatting a USB drive on your Mac is usually a straightforward process. However, you may encounter certain issues or errors along the way. Here are some troubleshooting tips to help you resolve common problems:
1. USB drive not recognized:
- Try connecting the USB drive to a different USB port on your Mac.
- Ensure that the USB cable is securely connected to both the USB drive and your Mac.
- Restart your Mac and try connecting the USB drive again.
2. Disk Utility fails to format or erase the USB drive:
- Check if the USB drive is locked or write-protected. Some drives have physical switches or software-based protection that prevents formatting. Unlock or disable write protection if necessary.
- Verify the USB drive for any errors using Disk Utility’s First Aid feature.
- If Disk Utility still fails, you can try formatting the USB drive using Terminal, following the instructions mentioned in the previous section.
3. Slow formatting process:
- For larger capacity USB drives, the formatting process may take longer. Be patient and allow enough time for the process to complete.
- Avoid interrupting the formatting process by disconnecting the USB drive or shutting down your Mac. This can potentially corrupt the drive or cause formatting issues.
4. Persistent issues:
- If you continue to encounter issues with formatting a USB drive, it may indicate a problem with the drive itself. Try using the drive on a different computer or seek professional assistance if necessary.
- Ensure that you are using a reliable and reputable USB drive. Cheaper or counterfeit drives may have compatibility or reliability issues.
By following these troubleshooting tips, you can overcome common challenges related to formatting USB drives on your Mac. If the issues persist, it is recommended to seek further assistance from Apple support or consult a professional for guidance.