
The Basics of the Name Box in Excel
The Name Box is a powerful tool in Excel that allows users to navigate, select, and manipulate data within a worksheet. Located just above the columns in the Excel interface, the Name Box provides a convenient way to interact with cells and ranges.
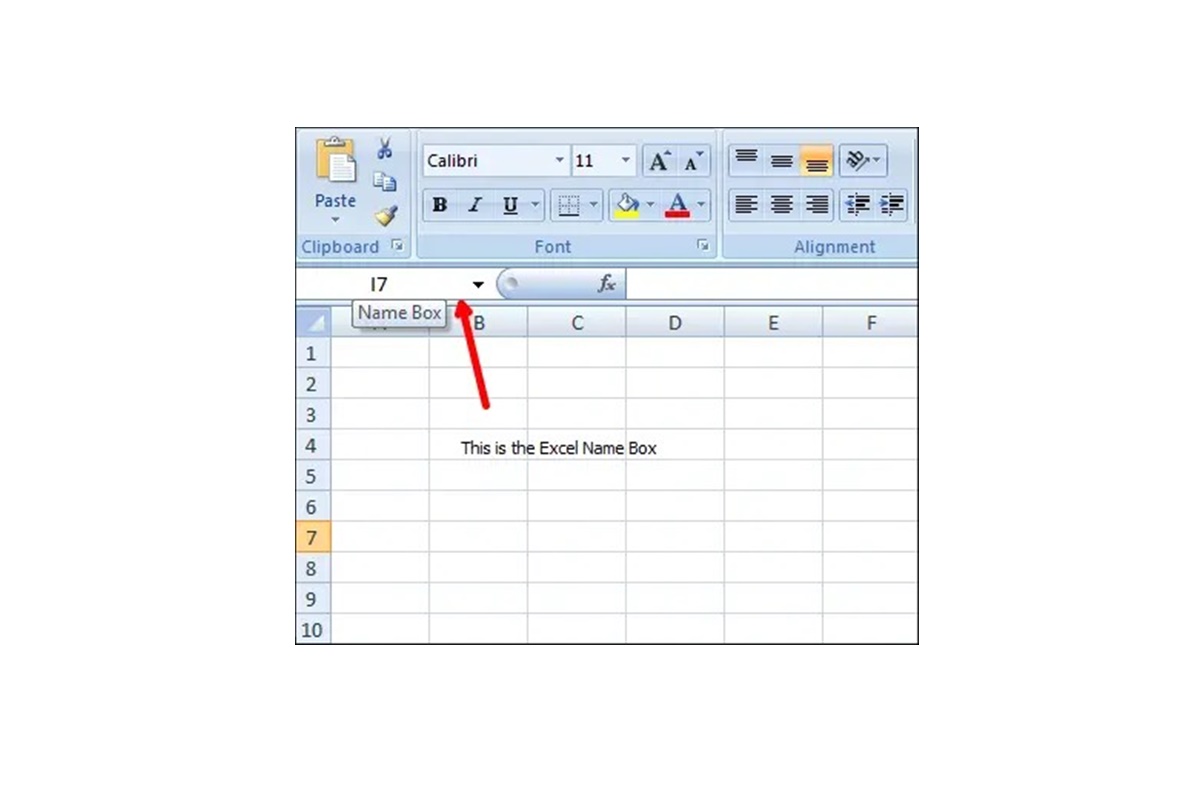
At its most basic level, the Name Box displays the cell reference of the currently selected cell. For example, if cell A1 is selected, the Name Box will display “A1”. This can be particularly useful when working with large worksheets, as it provides a quick way to identify the location of a specific cell.
However, the Name Box offers much more than just displaying cell references. It can also be used to create and manage named ranges, which are user-defined labels for cells or ranges of cells. By assigning a meaningful name to a cell or range, users can easily refer to it in formulas and functions, making their spreadsheet formulas more readable and easier to maintain.
To create a named range using the Name Box, simply select the desired cell or range, type the desired name into the Name Box, and press Enter. The name can be a combination of letters, numbers, and underscores, but it cannot start with a number or contain spaces. Once the name is entered and confirmed, the named range can be used in formulas by simply typing the name instead of the cell reference.
In addition to creating named ranges, the Name Box also allows users to quickly navigate through a worksheet. Simply click on the drop-down arrow in the Name Box to reveal a list of named ranges and other useful navigation options, such as defined tables and external references. This can save time and effort when working with large and complex worksheets, as users can easily jump to specific areas without scrolling or searching.
In summary, the Name Box in Excel is a versatile tool that provides various functionalities to improve efficiency and organization. Whether it’s creating named ranges, navigating through a worksheet, or selecting cells using meaningful names, the Name Box is a valuable asset for Excel users who want to streamline their workflow and optimize their spreadsheet experience.
Naming Cells and Ranges Using the Name Box
The Name Box in Excel not only allows users to navigate and select data, but it also provides a convenient way to name cells and ranges. By assigning descriptive names to specific cells or ranges, users can improve the readability and manageability of their spreadsheets.
Naming cells and ranges using the Name Box is a straightforward process. First, select the desired cell or range that you want to name. Then, click on the Name Box and type the desired name. It’s important to use a name that accurately reflects the purpose or content of the cell or range. Once the name is entered, press Enter to save it.
When naming cells or ranges, it’s essential to follow naming conventions. Excel allows names to have a maximum of 255 characters and can include letters, numbers, underscores, and periods. However, names cannot start with a number or contain spaces. Additionally, Excel is not case-sensitive, so “Sales” and “sales” would be considered the same name.
One of the benefits of naming cells and ranges using the Name Box is that it simplifies formulas and functions. Instead of referencing cells by their coordinates, you can use the named range as a shorthand reference. For example, if you named a range of cells “Expenses,” you could write a formula like “=SUM(Expenses)” instead of “=SUM(A1:A10)”.
Another advantage of using named ranges is that they automatically adjust when new data is added or removed. If you insert or delete rows or columns within a named range, the range will automatically expand or contract to accommodate the changes. This eliminates the need to manually update formulas when the structure of the worksheet is modified.
To manage named cells and ranges, you can access the Name Manager from the Formulas tab in the Excel ribbon. The Name Manager allows you to view and edit the names defined in your workbook. From here, you can modify the cell or range assigned to a name, delete unwanted names, or create new names.
In summary, the Name Box in Excel provides a handy tool for naming cells and ranges. By assigning meaningful names, users can enhance the readability of their formulas, simplify navigation within a worksheet, and ensure that formulas remain accurate even when the structure of the worksheet changes. Take advantage of the Name Box to unlock the full potential of Excel in managing and organizing your data.
Using Named Ranges in Formulas
Named ranges in Excel offer a powerful way to streamline formulas and improve the readability of your spreadsheets. By assigning names to cells or ranges using the Name Box, you can replace complex cell references with more meaningful and easier-to-understand names in your formulas.
To use a named range in a formula, simply type the name of the range instead of the cell reference. For example, instead of writing “=SUM(A1:A10)”, you can write “=SUM(Sales)”. This not only makes the formula more concise but also makes it easier to understand and maintain, especially in large and complex worksheets.
Using named ranges in formulas is particularly useful when you need to refer to the same range multiple times in different formulas. Instead of typing out the range each time, you can simply use the assigned name. Not only does this save time, but it also reduces the chance of errors that may occur when manually inputting cell references repeatedly.
Named ranges can also be used in a variety of Excel functions. For example, you can use a named range in the VLOOKUP function to search for a value in a specific range without needing to remember or input the cell references. Additionally, named ranges can be used in conditional formatting rules, data validation, and chart data series, allowing for a more consistent and streamlined spreadsheet design.
Another benefit of using named ranges in formulas is the flexibility they provide when modifying or expanding your worksheet. If you need to add or remove rows or columns within a named range, formulas that reference the range will automatically adjust to accommodate the changes. This saves time and effort, as you don’t have to manually update formulas to reflect the new cell references.
It’s important to note that named ranges can be scoped to a specific worksheet or to the entire workbook. This allows you to use the same name for different ranges in different worksheets, without causing conflicts. When referencing a named range from a different worksheet, you simply need to include the worksheet name followed by an exclamation mark before the named range. For example, “=SUM(Sheet2!Sales)”.
In summary, using named ranges in formulas is a valuable technique to enhance the clarity and efficiency of your spreadsheets. By assigning meaningful names to cells or ranges using the Name Box, you can create more readable formulas, save time by eliminating the need for repetitive cell references, and ensure that your formulas adjust automatically when your worksheet structure changes. Embrace the power of named ranges to elevate your Excel skills and optimize your spreadsheet workflow.
Changing or Deleting Named Ranges
Excel provides flexibility when it comes to managing named ranges. If you need to modify or delete a named range, you can easily make the necessary changes using the Name Manager tool. By accessing the Name Manager, you can update the range that a name refers to or delete unwanted names altogether.
To edit a named range, go to the Formulas tab in the Excel ribbon and click on the Name Manager button. The Name Manager will display a list of all the names defined in your workbook. From here, you can select the name you want to modify and click on the Edit button. In the Edit Name dialog box, you can change the range reference by typing in the desired cell or range. Once you’ve made the necessary modifications, click OK to save the changes.
If you no longer need a named range, you can easily delete it using the Name Manager. Simply select the name you wish to remove and click on the Delete button. A confirmation dialog box will appear, asking if you’re sure you want to delete the name. Click OK, and the named range will be permanently deleted from your workbook.
When modifying or deleting a named range, it’s important to consider the impact on any formulas or functions that use that named range. If you change the range reference for a named range, any formulas or functions that reference that name will automatically update to reflect the new range. However, if you delete a named range that is used in formulas, the formulas will return a #NAME? error. Therefore, it’s a best practice to review and update any affected formulas when making changes to named ranges.
To ensure that named ranges are properly managed and organized, it’s recommended to use the Name Manager regularly. By keeping track of all the names defined in your workbook, you can easily modify or delete names as needed, making your spreadsheet more efficient and easier to work with. Additionally, you can also use the Name Manager to create new names, allowing you to further customize your Excel experience.
In summary, Excel offers a convenient way to change or delete named ranges through the Name Manager. Whether you need to modify the range reference of a name or remove unwanted names, the Name Manager provides the necessary tools to manage your named ranges effectively. Take advantage of these features to maintain a well-organized and efficient workbook.
Managing Named Ranges with the Name Manager
The Name Manager in Excel is a powerful tool for managing and organizing named ranges within your workbooks. This feature provides a central location where you can view, edit, and create named ranges, making it easier to maintain and work with your spreadsheet.
To access the Name Manager, go to the Formulas tab in the Excel ribbon and click on the Name Manager button. The Name Manager dialog box will open, displaying a list of all the named ranges in your workbook. From here, you can perform various actions to manage your named ranges.
One of the primary functions of the Name Manager is to view and review the details of each named range. The dialog box provides information such as the name itself, the range it refers to, the scope of the name (whether it applies to the whole workbook or a specific worksheet), and any comments associated with the name. This allows you to have a comprehensive overview of all the named ranges in your workbook and helps with maintaining accurate and up-to-date information.
The Name Manager also allows you to edit existing named ranges. By selecting a name from the list and clicking on the Edit button, you can modify the range reference or rename the name itself. This is particularly helpful when you need to update a range that a name refers to or when you want to give a name a more descriptive or intuitive label. Just be cautious when modifying names, as any changes made may affect formulas or functions that reference those names.
Creating new named ranges is another capability offered by the Name Manager. By clicking on the New button, you can define a new name for a specific cell or range. This simplifies the process of referencing cells in your formulas since you can use the assigned names instead of complex cell references. When creating new named ranges, it’s important to choose meaningful names that accurately describe the data or purpose of the range.
In addition to editing and creating named ranges, the Name Manager also enables the deletion of unwanted or obsolete names. By selecting a name from the list and clicking on the Delete button, you can remove the name from the workbook. It’s important to be cautious when deleting named ranges, as any formulas or functions that reference those names may return errors.
By utilizing the Name Manager, you can effectively manage named ranges in your workbook. Regularly reviewing and organizing your named ranges ensures that your formulas remain accurate and your spreadsheet is easier to navigate and maintain. Take advantage of the Name Manager to streamline your spreadsheet management and improve your Excel workflow.
Using the Name Box to Navigate in a Worksheet
The Name Box in Excel is not only useful for naming cells and ranges, but it also provides a convenient way to navigate within a worksheet. By utilizing the features of the Name Box, users can quickly jump to specific areas of a worksheet, saving time and effort.
To use the Name Box for navigation, click on the drop-down arrow located on the right side of the Name Box. This will reveal a list of named ranges and other navigation options. Simply select the desired name or option, and Excel will automatically scroll to the corresponding cell or range.
Named ranges allow for easy and efficient navigation within a worksheet. By assigning meaningful names to important cells or ranges, you can quickly jump to specific sections without the need for manual scrolling. This is particularly helpful in large and complex worksheets that may span multiple pages or contain vast amounts of data.
In addition to named ranges, the Name Box also provides other navigation options, such as defined tables and external references. Defined tables are structured ranges in Excel that allow you to manage and analyze data more effectively. By selecting a defined table from the drop-down list in the Name Box, you can instantly navigate to that table and work with the data it contains.
External references are references to cells or ranges in other workbooks. These references can be incredibly useful when working on interconnected spreadsheets. By selecting an external reference from the Name Box, you can quickly navigate to the linked cell or range, making it easier to work with data from multiple sources.
Another useful feature of the Name Box is the ability to create hyperlinks. Typing a URL directly into the Name Box will automatically create a hyperlink to that website. This allows users to access external websites directly from Excel, without the need to leave the spreadsheet.
Overall, the Name Box in Excel provides a powerful tool for navigating within a worksheet. Whether it’s using named ranges, defined tables, external references, or hyperlinks, the Name Box offers various options to help users quickly find and access specific cells or ranges. Take advantage of the Name Box to enhance your workflow and improve efficiency when working with Excel.
Selecting and Editing Cells Using the Name Box
The Name Box in Excel not only serves as a handy navigation tool but also provides the ability to select and edit cells directly from its interface. By utilizing the features of the Name Box, users can easily choose specific cells or ranges to work with, improving efficiency and streamlining the editing process.
To select a cell or range using the Name Box, simply click on the drop-down arrow located on the right side of the box. This will display a list of named ranges and other navigation options. Instead of selecting a name, users can start typing the desired cell reference directly into the Name Box. As you type, Excel will suggest matching cell references, and you can press Enter to select the desired cell or range.
Using the Name Box to select cells is particularly useful in large or densely populated worksheets. Rather than manually scrolling or using keyboard shortcuts, users can quickly jump to a specific cell by typing its reference directly into the Name Box. This saves time and makes it easier to work with data in complex spreadsheets.
In addition to selecting cells, the Name Box can also be used to edit the contents of a cell. After selecting a cell by typing its reference into the Name Box, simply start typing to edit the cell’s contents. This eliminates the need to locate the cell on the worksheet and click directly into it before making changes.
If a named range is selected in the Name Box, editing its contents is just as straightforward. By clicking on the drop-down arrow and selecting the desired named range, users can then start typing to edit the contents of that named range. This method can be particularly useful when working with large ranges or when needing to quickly make changes to multiple cells within a named range.
The Name Box also supports some simple formulas and functions. Instead of typing in a constant value, users can enter a formula directly into the Name Box and press Enter to apply it to the selected cell or range. This allows for quick calculations or modifications without needing to navigate to the formula bar or another part of the worksheet.
In summary, the Name Box in Excel provides a convenient way to select and edit cells or ranges, offering an alternative to traditional methods of navigation and editing. By typing cell references or selecting named ranges directly in the Name Box, users can save time and streamline their workflow when working with data in Excel. Incorporate the use of the Name Box to enhance your cell selection and editing capabilities in Excel.
Using the Name Box to Create Hyperlinks in Excel
In addition to its navigation and editing capabilities, the Name Box in Excel can also be used to create hyperlinks within a worksheet. With just a few simple steps, users can easily insert hyperlinks to external websites or locations within their Excel files using the Name Box, enhancing the overall functionality and accessibility of their spreadsheets.
To create a hyperlink using the Name Box, start by typing the desired URL directly into the box. As soon as an entry matches the format of a URL, Excel will automatically convert it into an active hyperlink. Once entered, the hyperlink will appear as blue and underlined text within the Name Box, indicating that it is clickable and will direct users to the specified destination.
The ability to create hyperlinks using the Name Box provides a convenient way to include external references or web resources in your Excel files. By simply typing the URL, users can quickly navigate to websites or access external documents directly from their spreadsheet, without the need to leave Excel and open a web browser or file explorer separately.
Not only can the Name Box create hyperlinks to external content, but it can also link to specific locations within the same Excel file. By typing the name of a named range or a specific cell reference into the Name Box, Excel will automatically generate an internal hyperlink to that location within the worksheet. This feature is particularly useful when creating complex spreadsheets with multiple sections or when needing to jump to specific areas within a large dataset.
The created hyperlinks can be easily edited or modified if needed. To change the destination URL or cell reference, simply click on the drop-down arrow of the Name Box and select the hyperlink name. The existing URL or cell reference can then be modified accordingly, allowing for easy updates or corrections to the hyperlinks.
Excel also provides the option of removing hyperlinks directly from the Name Box. By selecting the hyperlink from the drop-down list and pressing the Delete key, the hyperlink will be removed from the Name Box, effectively turning the text back into regular cell content.
In summary, the Name Box in Excel offers a convenient way to create hyperlinks to external websites and internal locations within a spreadsheet. By simply typing the desired URL or cell reference into the Name Box, users can streamline the process of inserting hyperlinks and improve the accessibility of their spreadsheet. Take advantage of this feature to enhance the functionality and usability of your Excel files.
Advanced Techniques with the Name Box
While the Name Box in Excel is commonly used for basic navigation, naming cells and ranges, and selecting and editing cells, there are advanced techniques that can further enhance your productivity and efficiency when working with Excel. These techniques leverage the functionality and versatility of the Name Box to perform complex tasks and streamline your spreadsheet workflow.
One advanced technique is using the Name Box to jump to predefined areas within your worksheet. By assigning names to specific sections, you can quickly navigate to those areas with a few keystrokes. For example, you can create names like “Data”, “Sales”, or “Expenses” for different ranges in your worksheet. Then, simply type the name in the Name Box, and Excel will instantly take you to the corresponding section. This is particularly useful in large worksheets with numerous data tables or multiple areas of interest.
Another advanced technique involves using the Name Box to select non-adjacent cells or ranges. Excel allows you to create named ranges that consist of non-contiguous cells or ranges. By typing the name(s) of the non-adjacent range(s) into the Name Box, you can select them all at once. This is especially helpful when you need to format or apply functions to multiple disjoint ranges without selecting them individually.
Furthermore, the Name Box can be used to interact with filtered data. When a range with filtered data is selected, you can open the Name Box and type the name of a criteria or a specific value to filter the data further. This can help you quickly isolate and analyze specific subsets of data without the need for complex filtering operations.
The Name Box can also be used to toggle between different worksheets within a workbook. By typing the name of a sheet into the Name Box, you can switch to that sheet directly without scrolling through the Sheet tabs. This saves time and makes it easier to navigate between different worksheets, especially in workbooks with a large number of sheets.
Additionally, advanced users can use the Name Box in combination with keyboard shortcuts to perform actions more efficiently. For example, you can press F5 to open the Go To dialog box, and then type the name of a named range directly into the Go To box. This allows for quicker navigation to specific named ranges instead of using the drop-down list in the Name Box.
In summary, the Name Box in Excel offers advanced techniques that can improve your productivity and efficiency when working with spreadsheets. By utilizing features such as navigating to predefined areas, selecting non-adjacent ranges, filtering data, switching between worksheets, and incorporating keyboard shortcuts, you can streamline your workflow and perform complex tasks more effectively. Explore these advanced techniques to maximize the potential of the Name Box and enhance your Excel skills.
Troubleshooting Name Box Issues in Excel
While the Name Box in Excel is a useful tool for navigation, selecting cells, and managing named ranges, there may be instances where you encounter issues or unexpected behavior. Understanding common problems and their solutions can help you troubleshoot and resolve any Name Box-related issues you may face.
One common issue is when the Name Box shows unexpected or incorrect values. This can occur when a named range is not properly defined or when its range reference is modified without updating the corresponding name. To resolve this issue, open the Name Manager and verify the range reference for the affected names. Modify the range reference as needed and ensure that it accurately reflects the desired cells or ranges.
Another issue that may arise is when the Name Box dropdown list is not displaying all the named ranges or options. This can occur if the workbook contains hidden sheets, or if the named ranges are scoped to specific worksheets that are currently not visible. To resolve this, unhide any hidden sheets or show the necessary worksheets where the named ranges are defined. This will ensure that all the available options are visible in the Name Box dropdown list.
If you have a large number of named ranges in your workbook, you may encounter issues with scrolling or locating specific names within the Name Box. To make navigation easier, increase the width of the Name Box by clicking and dragging the right edge of the Name Box area. This allows for more names to be displayed within the Name Box, reducing the need for excessive scrolling.
In some cases, you may encounter errors when using the Name Box in formulas or functions. This could be due to incorrect or misspelled names, conflicting names, or circular references. To troubleshoot this issue, review and verify the names used in the formulas, and ensure that they are spelled correctly and refer to the correct ranges. Additionally, check for any circular dependencies or conflicting names in your workbook that may be causing the error.
If you are unable to select or edit cells using the Name Box, it could be due to worksheet protection or restricted access. Ensure that the worksheet is not protected, and you have the necessary permissions to make changes. If the cells or ranges you are trying to select or edit are specifically locked or protected, you may need to modify the worksheet protection settings to grant access.
In summary, troubleshooting Name Box issues in Excel requires understanding common problems and their solutions. By verifying and updating range references, unhiding sheets, increasing the width of the Name Box, checking for errors in formulas, and ensuring the appropriate permissions, you can resolve most Name Box-related issues. Use these troubleshooting techniques to effectively navigate, select, and manage cells and ranges using the Name Box in Excel.