
Why is it Important to Know How to Move Around and Between Worksheet Tabs in Excel?
Excel is a powerful tool for data management and analysis, and it offers various features to organize and manipulate data effectively. One of these features is worksheet tabs, which allow you to work with multiple sheets in a single workbook. Knowing how to move around and between worksheet tabs in Excel is essential for several reasons:
- Efficient navigation: When dealing with large workbooks that contain numerous worksheets, being able to quickly navigate between different tabs can save you a significant amount of time. Instead of scrolling through the entire workbook, you can simply switch to the desired worksheet tab.
- Organizational flexibility: Worksheets tabs enable you to compartmentalize your data, separating it into logical sections or categories. This makes it easier to maintain a clear structure, locate specific information, and manage complex projects.
- Data analysis: Excel allows you to perform various calculations, create charts, and analyze data within a single workbook. By moving between worksheet tabs, you can compare different datasets, perform calculations across multiple sheets, or create summary reports based on the information contained in different tabs.
- Collaboration: When collaborating with others on a workbook, understanding how to navigate between worksheet tabs becomes vital. By efficiently accessing and interacting with different tabs, you can collaborate more effectively, review and edit specific sections of the workbook, and contribute to the overall project.
Whether you are a professional using Excel for work-related tasks or a student managing academic data, mastering the skills to move around and between worksheet tabs is essential for optimizing your workflow, increasing productivity, and achieving accurate data analysis.
How to Navigate between Worksheet Tabs Using Keyboard Shortcuts
In Excel, using keyboard shortcuts is a quick and efficient way to navigate between worksheet tabs. Here are some keyboard shortcuts that will help you easily move between tabs:
- Ctrl + Page Up / Page Down: Pressing Ctrl and Page Up will take you to the previous worksheet tab, while Ctrl and Page Down will take you to the next worksheet tab. This method is ideal when you want to move between adjacent tabs.
- Ctrl + Tab / Shift + Ctrl + Tab: Just like in web browsers, you can use Ctrl and Tab to move to the next worksheet tab and Shift + Ctrl + Tab to move to the previous tab. This method is useful when you want to navigate through multiple tabs in a non-sequential order.
- Ctrl + F6: This shortcut enables you to cycle through all open workbooks, including their worksheets. It is particularly helpful when you have several workbooks open and need to access a specific worksheet tab in a different workbook.
- Ctrl + 1 / Alt + V + H: These shortcuts allow you to open the Format Cells dialog box, where you can change the tab color. While this doesn’t directly navigate between tabs, it can be beneficial for visually identifying specific worksheet tabs, making it easier to find and navigate to them.
Keep in mind that these keyboard shortcuts may vary slightly depending on the version of Excel you are using. It is always a good idea to consult the Excel Help documentation or explore the keyboard shortcut options within the application to familiarize yourself with the specific shortcuts available to you.
By incorporating these keyboard shortcuts into your Excel workflow, you can navigate between worksheet tabs swiftly, saving time and improving your overall productivity when working with multiple sheets.
How to Switch between Worksheets Using the Mouse
In Excel, switching between worksheets using the mouse is another convenient way to navigate through different tabs. Here are a few methods to help you switch between worksheets using the mouse:
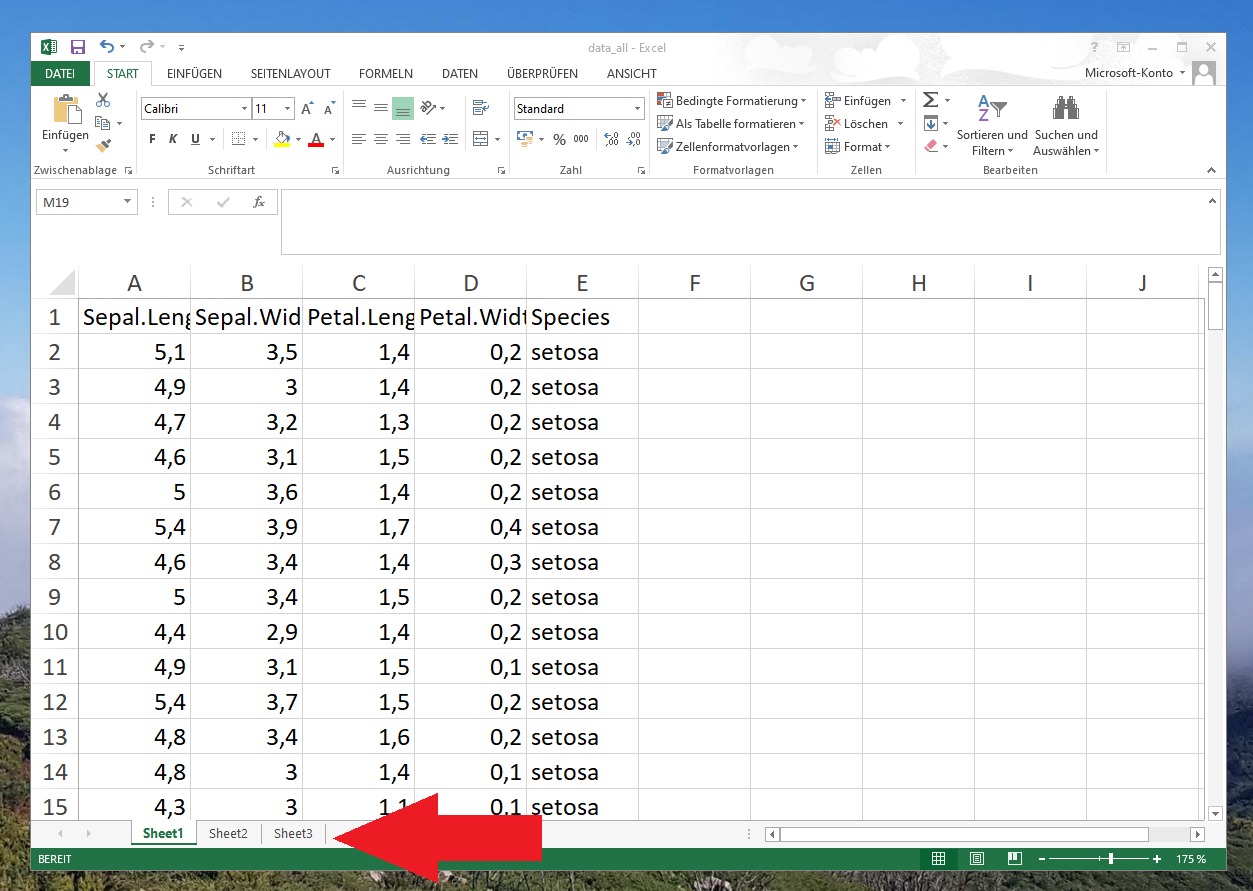
- Click on the Sheet Tab: The most straightforward method is to click directly on the desired sheet tab at the bottom of the Excel window. Each worksheet tab represents a different sheet in the workbook, and clicking on the tab will instantly switch to that sheet.
- Scroll through the Sheet Tabs: If you have a large number of worksheets, and they don’t all fit within the available space on the screen, Excel will display a scroll bar at the bottom of the sheet tabs. You can use the scroll bar to scroll through the sheet tabs and click on the desired tab to switch to it.
- Right-Click and Select: Another method is to right-click on any sheet tab. This will open a context menu displaying all the worksheets in the workbook. You can then simply click on the name of the sheet you want to switch to, and it will become the active sheet.
- Keyboard + Mouse Combination: To switch between worksheets using a combination of keyboard and mouse, you can hold down the Ctrl key on your keyboard and scroll the mouse wheel up or down. Scrolling up will move to the previous worksheet, while scrolling down will move to the next worksheet.
These methods allow you to easily switch between worksheets using the mouse, providing a visual and intuitive way to navigate within your Excel workbook. Experiment with these techniques to find the one that suits your preferences and makes your workflow more efficient.
How to Rename Worksheet Tabs
In Excel, renaming worksheet tabs is a useful way to provide meaningful names to your sheets, making it easier to identify and locate specific information. Here’s how you can rename worksheet tabs:
- Right-Click on the Sheet Tab: To rename a worksheet tab, start by right-clicking on the tab you wish to rename. This will open a context menu with various options.
- Select “Rename” from the Context Menu: From the context menu, choose the “Rename” option. This action will put the cursor at the beginning of the existing sheet name, allowing you to edit it.
- Edit the Sheet Name: Once you are in rename mode, you can edit the sheet name directly. Use your keyboard to type the desired name.
- Press Enter or Click Outside the Tab: After you have entered the new name, press Enter on your keyboard, or click outside the tab area. This will confirm the name change and update the worksheet tab with the new name.
- Alternatively, Double-Click on the Sheet Tab: Another shortcut to rename a worksheet tab is to double-click on the existing tab name. This will activate the rename mode, allowing you to edit the sheet name right away. Once you are done editing, press Enter or click outside the tab to finalize the name change.
Renaming worksheet tabs can help you create a more organized and user-friendly Excel workbook. You can use descriptive names that reflect the content or purpose of each worksheet. For example, you might name tabs based on department names, project names, or specific data categories.
By customizing the sheet names, you can quickly identify and locate the sheet you need, improving your productivity and streamlining your data management process.
How to Move Worksheet Tabs to a New Position
In Excel, you have the flexibility to rearrange worksheet tabs to a new position within your workbook. This can be beneficial when you want to change the order of your sheets or group related sheets together. Here’s how you can move worksheet tabs to a new position:
- Click and Drag: The simplest method to move a worksheet tab is to click and drag it to the desired position. To do this, click on the sheet tab you want to move, hold down the left mouse button, and drag the tab to the left or right until you reach the desired position. A visual indicator will show you where the sheet tab will be placed.
- Use the Context Menu: Another way to move a worksheet tab is by using the context menu. Right-click on the sheet tab you want to move and select the “Move or Copy” option from the context menu. In the Move or Copy dialog box, you will see a list of all the worksheets in the current workbook. Select the worksheet before which you want to insert the selected tab and click the “OK” button.
- Keyboard Shortcut: Excel also allows you to move a worksheet tab using a keyboard shortcut. Hold down the Alt key on your keyboard, press the Page Up or Page Down key to move the selected tab to the left or right, respectively.
Remember that the order of the sheet tabs determines the order in which the sheets appear in your workbook. By moving worksheet tabs to a new position, you can organize your worksheets in a way that makes sense to you, making it easier to navigate through the workbook and locate specific information.
Experiment with different arrangements and find the configuration that best suits your needs and enhances your productivity when working with multiple sheets in Excel.
How to Copy Worksheet Tabs to a New Workbook
In Excel, there may be times when you need to copy specific worksheet tabs to a new workbook. This can be useful when you want to create a separate file containing specific data or share specific worksheets with others. Here’s how you can copy worksheet tabs to a new workbook:
- Select the Worksheet(s) to Copy: Begin by selecting the worksheet(s) you want to copy. You can do this by clicking on the sheet tab of the first worksheet and then holding down the Ctrl key while clicking on the additional sheet tabs you wish to copy. If you want to copy all the sheets, right-click on any sheet tab and select “Select All Sheets.”
- Right-Click on the Selected Tab(s): Once you have selected the worksheet(s), right-click on any of the selected tabs. This will open a context menu with several options.
- Choose “Move or Copy” from the Context Menu: From the context menu, select the “Move or Copy” option. This will open the Move or Copy dialog box.
- Choose the New Workbook: In the Move or Copy dialog box, you will see a dropdown menu labeled “To book.” Click on the dropdown menu and select the option “New book” to create a new workbook for the copied sheet(s).
- Click the “OK” Button: Once you have selected the new workbook option, click the “OK” button to start the copying process. The selected worksheet(s) will be copied to a new workbook, while the original workbook remains unchanged.
Copying worksheet tabs to a new workbook allows you to isolate specific data or share specific sheets without sharing the entire workbook. This can be particularly useful when collaborating with others or creating focused reports for different departments or stakeholders.
Remember to save the new workbook separately and give it an appropriate name to avoid confusion and maintain organization in your files.
How to Delete Worksheet Tabs
In Excel, deleting unnecessary worksheet tabs can help declutter your workbook and improve overall efficiency. It is important to note that deleting a worksheet tab permanently removes the associated data and cannot be undone. Here’s how you can delete worksheet tabs:
- Right-Click on the Sheet Tab: Start by right-clicking on the sheet tab you want to delete. This will open a context menu with various options.
- Select the “Delete” Option: From the context menu, select the “Delete” option. A confirmation dialog box will appear, asking if you want to delete the worksheet.
- Confirm the Deletion: To proceed with the deletion, click the “OK” button in the confirmation dialog box. The worksheet tab and its associated data will be permanently deleted from your workbook.
- Keyboard Shortcut: An alternative method to delete a worksheet tab is by using a keyboard shortcut. To do this, select the worksheet tab you want to delete and press the Alt key on your keyboard. While holding the Alt key, press the H key, followed by the D key. This is the shortcut for the “Delete” option in the ribbon.
Deleting worksheet tabs can be useful when you have completed a particular task, no longer need specific data, or want to remove unnecessary sheets from your workbook. However, exercise caution when deleting worksheets, as this action cannot be undone. It is always recommended to make a backup of your workbook before proceeding with any deletion.
By periodically removing unused or irrelevant worksheets, you can keep your Excel workbooks organized, streamline your data management, and improve overall productivity.
How to Hide Worksheet Tabs
In Excel, hiding worksheet tabs can be beneficial when you want to restrict access to certain sheets or create a cleaner and more focused view of your workbook. Hiding worksheet tabs can be particularly useful when sharing the workbook with others or presenting data. Here’s how you can hide worksheet tabs:
- Right-Click on the Sheet Tab: Start by right-clicking on the sheet tab you want to hide. This will open a context menu with various options.
- Select the “Hide” Option: From the context menu, select the “Hide” option. The sheet tab will disappear from the bottom of the Excel window.
- Multiple Sheets: If you want to hide multiple worksheet tabs, you can do so by holding down the Ctrl key on your keyboard while selecting the sheet tabs. Once you have selected the desired tabs, right-click on any of the selected tabs and choose the “Hide” option from the context menu.
- Unhide Tabs: To unhide a hidden worksheet tab, right-click on any visible sheet tab and select the “Unhide” option from the context menu. This will open a dialog box displaying the hidden sheets. Select the sheet you want to unhide and click the “OK” button.
When you hide worksheet tabs, they are not permanently deleted or removed from the workbook. They are simply hidden from view. It is important to note that anyone with access to the workbook can unhide the hidden tabs unless you protect the workbook structure.
Hiding worksheet tabs can help improve the appearance, organization, and usability of your Excel workbook. It allows you to focus on the relevant sheets and simplifies navigation, especially when dealing with complex workbooks or presenting data in a professional setting.
Remember to save and share the workbook accordingly to ensure that others can still access the hidden sheets if necessary.
How to Unhide Worksheet Tabs
In Excel, worksheet tabs can be hidden to declutter the workspace or limit visibility to specific sheets. When hidden, these tabs are not permanently removed from the workbook and can be easily unhidden when needed. Here’s how you can unhide worksheet tabs:
- Right-Click on a Visible Sheet Tab: Begin by right-clicking on any visible sheet tab. This will open a context menu with various options.
- Select the “Unhide” Option: From the context menu, choose the “Unhide” option. A dialog box will appear, showing all the hidden sheets in the workbook.
- Select the Sheet to Unhide: In the Unhide dialog box, select the sheet tab that you want to unhide. You can select multiple sheets if necessary.
- Click the “OK” Button: After selecting the sheet(s) to unhide, click the “OK” button. The hidden sheet tab(s) will reappear at the bottom of the Excel window.
Alternatively, if you know the name of the hidden sheet, you can also use the following method:
- Right-Click on a Visible Sheet Tab: Again, right-click on any visible sheet tab to open the context menu.
- Select the “Move or Copy” Option: Choose the “Move or Copy” option from the context menu. This will open the Move or Copy dialog box.
- Choose the Hidden Sheet: In the Move or Copy dialog box, you will see a dropdown menu labeled “To book.” Click on the dropdown menu and select the hidden sheet you want to unhide.
- Select the Position: Decide on the position where you want the unhidden sheet to appear by choosing the appropriate sheet in the Before sheet section.
- Click the “OK” Button: Once you have made your selections, click the “OK” button. The hidden sheet will now be unhidden and placed in the desired position.
Unhiding worksheet tabs allows you to regain access and visibility to specific sheets within your workbook. Whether you accidentally hid a sheet or intentionally hid it for temporary purposes, unhide the tabs to conveniently access and work with the hidden content.
How to Color Worksheet Tabs for Easy Identification
Excel allows you to customize the appearance of worksheet tabs by applying different colors. By color-coding the tabs, you can easily identify and differentiate between various sheets within your workbook. Here’s how you can color worksheet tabs:
- Right-Click on the Sheet Tab: Start by right-clicking on the sheet tab you want to color. This will open a context menu with various options.
- Select the “Tab Color” Option: From the context menu, hover your cursor over the “Tab Color” option. This action will expand a palette of colors.
- Choose a Color: Click on your desired color from the palette. Excel offers a wide range of colors to choose from, allowing you to pick the one that suits your preferences or helps with identification.
- Apply the Color: As soon as you click on the color, the selected sheet tab will instantly take on the chosen color, making it easy to identify among the other tabs.
- Repeat for Other Tabs: If you want to color other worksheet tabs, repeat the process by right-clicking on each tab and selecting a color from the palette.
Coloring worksheet tabs can help you visually organize and distinguish different types of sheets, departments, or projects within your workbook. For example, you might choose to color sales-related sheets in blue, finance-related sheets in green, and marketing-related sheets in yellow.
By color-coding your worksheet tabs, you can quickly spot and navigate to the desired sheet, saving time and increasing efficiency when working with multiple sheets.
It’s important to note that tab color changes only appear on the current workbook. If you want the color to remain when sharing or saving the workbook, make sure to save the file in the appropriate format, such as .xlsx or .xlsm, which retains the tab color information.
How to Group Worksheet Tabs for Better Organization
In Excel, grouping worksheet tabs can greatly improve the organization and structure of your workbook. By grouping related sheets together, you can easily manage and navigate through your data. Here’s how you can group worksheet tabs:
- Select the Worksheets to Group: Begin by selecting the sheets you want to group. To select multiple sheets, hold down the Ctrl key on your keyboard while clicking on the desired sheet tabs. Alternatively, you can select a range of sheets by clicking on the first sheet tab, holding down the Shift key, and clicking on the last sheet tab.
- Right-Click on a Selected Sheet Tab: Once you have selected the sheets, right-click on any of the selected sheet tabs. This will open a context menu with various options.
- Select the “Group Sheets” Option: From the context menu, choose the “Group Sheets” option. The selected sheets will now be grouped together.
- Expand or Collapse the Grouped Tabs: By default, the grouped tabs will be displayed in a collapsed format with a small bracket icon to indicate the group. You can expand or collapse the group by clicking on the bracket icon, making it easier to work with the grouped sheets.
- Rename the Group: If desired, you can rename the group to provide a clear description of the contained sheets. To rename the group, right-click on the bracket icon and select the “Group” option from the context menu. This will allow you to enter a new name for the group.
- Ungroup the Sheets: If you want to remove the sheets from the group, simply right-click on the bracket icon and select the “Ungroup” option from the context menu.
Grouping worksheet tabs provides a visual structure to your workbook, allowing you to easily locate and manage related sheets. This feature is particularly helpful when working on complex projects with multiple sheets or when analyzing data from different perspectives.
Keep in mind that when you group sheets, any changes made to one sheet (such as formatting or data entry) will be applied to all the sheets within the group. This can be advantageous when you want to make consistent changes across multiple sheets simultaneously.
By utilizing the grouping feature, you can enhance the organization and manageability of your Excel workbook, leading to improved efficiency and a smoother workflow.
How to Protect Worksheet Tabs from Deletion or Renaming
In Excel, it is important to protect certain worksheet tabs to prevent accidental deletion or renaming. By protecting the tabs, you can maintain the integrity of your workbook and ensure that critical information remains intact. Here’s how you can protect worksheet tabs:
- Select the Worksheet(s) to Protect: Begin by selecting the worksheet(s) that you want to protect from deletion or renaming. You can do this by holding down the Ctrl key on your keyboard while clicking on the desired sheet tabs.
- Right-Click on a Selected Sheet Tab: Once you have selected the sheet(s), right-click on any of the selected sheet tabs. This will open a context menu with various options.
- Select the “Protect Sheet” Option: From the context menu, choose the “Protect Sheet” option. This will open the Protect Sheet dialog box.
- Set Protection Options: In the Protect Sheet dialog box, you can set different protection options based on your specific requirements. For example, you can choose to allow certain users to select locked cells or format cells, while prohibiting them from deleting or renaming the protected sheet.
- Enter a Password (optional): If you want to restrict access to the protected sheet, you can enter a password in the Password field. This will require anyone attempting to make changes to the protected sheet to enter the password.
- Click the “OK” Button: Once you have set the protection options and entered a password (if desired), click the “OK” button to apply the protection to the selected sheet(s).
- Save the Workbook: After protecting the worksheet tabs, it is important to save the workbook to preserve the protection settings. This will ensure that the protection remains in place even after closing and reopening the workbook.
Protecting worksheet tabs helps safeguard important data and formulas from accidental or unauthorized changes. It is particularly useful when sharing workbooks with others or when specific sheets contain sensitive or confidential information.
Remember to keep a record of the password used to protect the worksheet tabs. Losing the password may result in permanent loss of access to the protected sheets.
By taking the necessary steps to protect your worksheet tabs, you can maintain the integrity and security of your Excel workbook.
How to Insert New Worksheet Tabs
In Excel, you have the flexibility to insert new worksheet tabs into your workbook whenever you need additional sheets to organize your data or perform different tasks. Here’s how you can insert new worksheet tabs:
- Right-Click on an Existing Sheet Tab: Start by right-clicking on any existing sheet tab located at the bottom of the Excel window. This will open a context menu with various options.
- Select the “Insert” Option: From the context menu, select the “Insert” option. This action will open a submenu with different insertion options.
- Select the “Worksheet” Option: From the submenu, select the “Worksheet” option. A new blank worksheet tab will be inserted to the left of the currently selected sheet tab.
- Keyboard Shortcut: Alternatively, you can use a keyboard shortcut to insert a new worksheet tab. Press Shift + F11, and a new blank worksheet tab will be inserted to the left of the currently selected sheet tab.
By default, the new worksheet tab will be named “SheetX,” where X is a number corresponding to the order in which the sheet was inserted. You can rename the sheet tab to provide a more descriptive name by right-clicking on the new tab and selecting the “Rename” option.
Inserting new worksheet tabs allows you to expand your workbook and add as many sheets as necessary to accommodate your data and analysis requirements. Whether you need separate sheets for different data sets, calculations, or reports, inserting new worksheet tabs provides the flexibility to organize your work effectively.
Remember to save the workbook after inserting new worksheet tabs to preserve your changes and ensure that they are retained for future use.
How to Move Worksheets between Different Excel Files
Sometimes, you may need to move worksheets from one Excel file to another. This can be useful when consolidating data from multiple sources or transferring specific sheets to a new workbook. Here are the steps to move worksheets between different Excel files:
- Open the Source and Target Files: Begin by opening both the source file (the file that contains the sheet you want to move) and the target file (the file where you want to move the sheet to). Arrange the Excel windows so that you can view both files simultaneously.
- Select the Sheet(s) to Move: In the source file, select the sheet(s) you want to move. To select multiple sheets, hold down the Ctrl key on your keyboard while clicking on the desired sheet tabs.
- Right-Click on the Selected Sheet Tab(s): Once you have selected the sheet(s), right-click on any of the selected sheet tabs. This will open a context menu with various options.
- Select the “Move or Copy” Option: From the context menu, choose the “Move or Copy” option. This action will open the Move or Copy dialog box.
- Choose the Target Workbook: In the Move or Copy dialog box, you will see a dropdown menu labeled “To book.” Click on the dropdown menu and select the target workbook (the file where you want to move the sheet to).
- Select the Position: Decide on the position where you want the moved sheet(s) to appear within the target workbook. You can select a specific worksheet before which you want to place the moved sheet(s).
- Click the “OK” Button: Once you have made your selections, click the “OK” button. The selected sheet(s) will be moved to the target workbook and appear in the designated position.
Moving worksheets between different Excel files allows you to organize and consolidate data from various sources into a single workbook. It provides the flexibility to rearrange and restructure your data to suit your specific needs.
Remember to save the target workbook after moving the sheets to ensure that your changes are preserved. Additionally, move any dependent sheets or update formula references within the target workbook if necessary.
By mastering the process of moving worksheets between Excel files, you can easily transfer and integrate data from different sources, optimizing your data management and analysis capabilities.