
Keyboard Shortcuts in Excel
Working efficiently in Microsoft Excel can be a game-changer for productivity. While many users are accustomed to navigating through the various menus and options, using keyboard shortcuts can significantly speed up everyday tasks. Keyboard shortcuts allow you to perform actions quickly without having to rely on the mouse. In this article, we will explore the different keyboard shortcuts available in Excel and specifically focus on how to use them to add worksheets.
Excel offers a wide range of shortcuts for various functions, from simple formatting to complex calculations. By mastering these shortcuts, you can streamline your workflow and minimize time spent on repetitive actions. Let’s dive into the specific shortcuts that will allow you to add worksheets effortlessly.
To start, let’s take a look at the shortcut for adding a worksheet. Simply press Shift + F11, and a new worksheet will be inserted to the left of the currently active worksheet. This shortcut is a quick and convenient way to expand your workbook without interrupting your workflow.
If you need to duplicate a worksheet, the shortcut is as easy as Ctrl + Shift + ‘ (apostrophe). This will create an exact copy of the selected worksheet. Duplicating worksheets can be useful when you want to create multiple versions of the same data or retain a backup copy for reference.
Inserting a new worksheet is another common task that can be accomplished with a shortcut. With Shift + F11, you can quickly insert a new worksheet at the end of your workbook. This can be helpful when you need to add new data or separate information into different sections.
Moving worksheets can also be done with a keyboard shortcut. By pressing Ctrl + Page Up or Ctrl + Page Down, you can navigate through your worksheets and rearrange them in the desired order. This feature is particularly handy when working with large workbooks that contain numerous sheets.
Renaming a worksheet is a simple task that can be accomplished using the F2 key. Select the worksheet you wish to rename, press F2, and type in the new name. This shortcut saves you time compared to manually right-clicking and choosing the “Rename” option.
If you ever need to delete a worksheet, the shortcut is straightforward. Just press Ctrl + Shift + F12, and a prompt will appear asking for confirmation before deleting the selected worksheet. This shortcut eliminates the need to right-click and navigate through menus, making the deletion process quicker and more efficient.
Hiding and unhiding worksheets can also be done with shortcuts. To hide a worksheet, press Ctrl + Shift + H. To unhide a worksheet, press Ctrl + Shift + U. These shortcuts are particularly useful for organizing your workbook and hiding sensitive or unnecessary information without disrupting your overall layout.
By utilizing these keyboard shortcuts, you can navigate through Excel with ease and add, duplicate, move, rename, delete, hide, and unhide worksheets efficiently. Incorporating these shortcuts into your Excel workflow will undoubtedly enhance your productivity and help you become a more proficient Excel user.
How to Use Shortcuts to Add Worksheets
Adding worksheets in Microsoft Excel is a fundamental task, and using shortcuts can make this process even easier. In this section, we will explore how to use keyboard shortcuts to add worksheets quickly and efficiently.
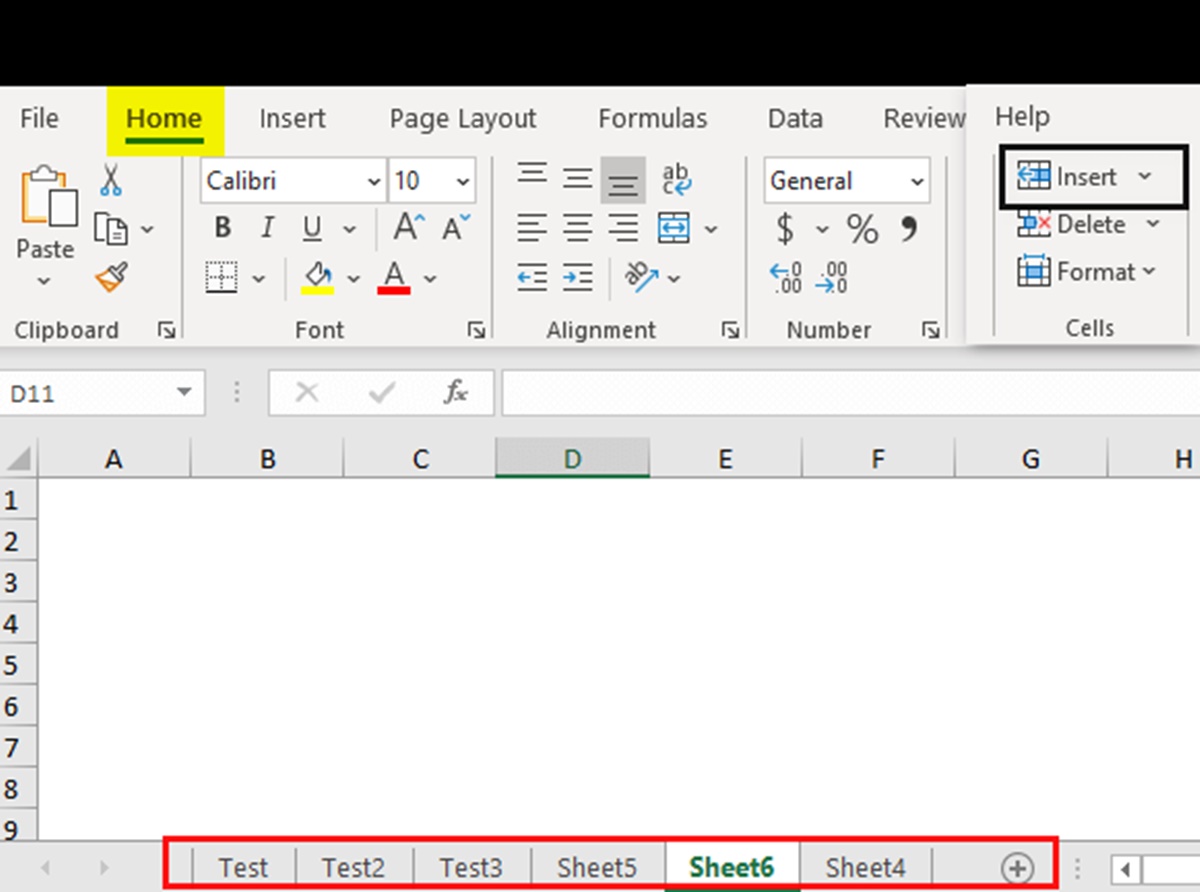
The first shortcut we will discuss is Shift + F11. With this combination, you can add a new worksheet to your workbook. Simply position your cursor on the tab of an existing worksheet and press Shift + F11. You’ll immediately see a new worksheet inserted to the left of the selected worksheet. This shortcut saves you time compared to manually right-clicking and selecting the “Insert” option.
In addition to adding a new worksheet, you may sometimes need to duplicate an existing worksheet. The shortcut for this action is Ctrl + Shift + ‘ (apostrophe). To duplicate a worksheet, select the worksheet you want to duplicate, press Ctrl + Shift + ‘, and Excel will create an exact copy of that worksheet. Duplicating worksheets can be useful when you want to create multiple versions of the same data or keep a backup copy for reference.
If you prefer to insert a new worksheet at the end of your workbook, the shortcut to do so is Shift + F11. This keyboard combination enables you to quickly add a new worksheet without disrupting your current workflow. For instance, if you need to separate different sections or add new data, this shortcut can be a time-saver.
Moving worksheets within your workbook is another common task. To navigate through your worksheets and rearrange their order, you can use the shortcuts Ctrl + Page Up and Ctrl + Page Down. Pressing Ctrl + Page Up moves you to the previous worksheet, while Ctrl + Page Down takes you to the next one. This feature is particularly useful when handling large workbooks with numerous sheets.
Renaming a worksheet can also be done with a simple shortcut: F2. To rename a worksheet, select the worksheet tab, press F2, and you can then type in the desired name. This shortcut eliminates the need to right-click and choose the “Rename” option, allowing for a faster and more efficient renaming experience.
Deleting a worksheet is another task that can be accomplished with a shortcut. By using Ctrl + Shift + F12, you can quickly delete the selected worksheet. Excel prompts you for confirmation before permanently removing the worksheet. This shortcut saves you the time it would take to right-click, select the “Delete” option, and confirm the deletion through additional dialog boxes.
Lastly, if you need to hide or unhide a worksheet, there are specific shortcuts for these actions. To hide a worksheet, press Ctrl + Shift + H. Conversely, to unhide a worksheet, use Ctrl + Shift + U. These shortcuts are beneficial for organizing your workbook and hiding sensitive or unnecessary information without disrupting the overall layout.
Incorporating these shortcuts into your Excel workflow will enable you to add, duplicate, move, rename, delete, hide, and unhide worksheets more efficiently. By utilizing these time-saving techniques, you can enhance your productivity and navigate through Excel with ease.
Shortcut for Adding a Worksheet
Adding a new worksheet to your Microsoft Excel workbook doesn’t have to be a time-consuming process. With a simple keyboard shortcut, you can quickly insert a new worksheet and keep your workflow smooth. The shortcut for adding a worksheet in Excel is Shift + F11.
To use this shortcut, start by positioning your cursor on the tab of an existing worksheet. Then, press Shift + F11 simultaneously. Instantly, a new worksheet will be inserted to the left of the currently active worksheet. This shortcut eliminates the need to manually navigate through menus or right-click to add a new worksheet.
The Shift + F11 shortcut is an efficient way to expand your workbook by adding new worksheets. Whether you need to separate different sections of data or create additional sheets for different purposes, this shortcut simplifies the process.
By using the Shift + F11 shortcut, you can seamlessly add worksheets to your Excel workbook without interrupting your workflow. This allows you to maintain focus on your tasks and ensures a smoother experience when organizing and analyzing data.
It’s important to note that the Shift + F11 shortcut inserts a new worksheet to the left of the active worksheet. If you prefer to add worksheets at the end of your workbook, you can utilize the Ctrl + Shift + F11 shortcut instead. This will insert a new worksheet at the end, making it handy for appending data or creating sections at the bottom of your workbook.
Adding worksheets is a fundamental part of working with Excel, and using shortcuts like Shift + F11 or Ctrl + Shift + F11 can greatly enhance your productivity. Incorporating these shortcuts into your Excel workflow will allow you to breeze through your tasks and keep your work organized effectively.
Shortcut for Duplicating a Worksheet
Creating a duplicate copy of a worksheet in Microsoft Excel can be a valuable time-saving technique, especially when you need to work with similar data or preserve a backup copy. Fortunately, Excel offers a simple keyboard shortcut for duplicating worksheets effortlessly. The shortcut for duplicating a worksheet is Ctrl + Shift + ‘ (apostrophe).
To use this shortcut, start by selecting the worksheet you want to duplicate. Then, press Ctrl + Shift + ‘ together. Instantly, Excel creates an exact copy of the selected worksheet. The duplicated worksheet will have the same layout, content, and formatting as the original.
The Ctrl + Shift + ‘ shortcut is particularly useful when you want to create multiple versions of the same data. For example, if you have a worksheet that contains a template or a master dataset, duplicating it allows you to generate new copies without starting from scratch.
Duplicating a worksheet is also beneficial when you need to make changes or perform actions on a separate copy without affecting the original data. By duplicating the worksheet, you can experiment, apply different formulas or formatting, or share the duplicated copy with colleagues or clients while retaining the original intact.
Furthermore, the Ctrl + Shift + ‘ shortcut saves you time compared to other methods of duplicating worksheets. Instead of right-clicking and selecting the “Move or Copy” option, going through dialog boxes, and selecting the destination, using this shortcut provides a more direct and efficient way to create duplicates.
Remember that the Ctrl + Shift + ‘ shortcut duplicates the entire worksheet, including all the data, formatting, and calculations. If you only want to copy specific data or range, you can accomplish that by selecting the desired cells, pressing Ctrl + C to copy, and then moving to the desired location and pressing Ctrl + V to paste.
By mastering the Ctrl + Shift + ‘ shortcut, you can save time and effort when working with Excel worksheets. Whether you need to create multiple versions of data, preserve backups, or experiment with changes, this shortcut allows you to efficiently duplicate worksheets and streamline your tasks.
Shortcut for Inserting a Worksheet
When working with Microsoft Excel, you may find yourself needing to insert a new worksheet to accommodate additional data or to organize your workbook more effectively. Excel offers a simple keyboard shortcut that allows you to insert a new worksheet quickly and effortlessly. The shortcut for inserting a worksheet is Shift + F11.
To use this shortcut, position your cursor on the tab of an existing worksheet where you want the new worksheet to be inserted. Then, press Shift + F11 simultaneously. Excel will immediately add a new worksheet to the left of the active worksheet, making room for your new data or section.
The Shift + F11 shortcut is a convenient way to expand your workbook without disrupting your workflow. It eliminates the need to manually navigate through menus or right-click to insert a new worksheet. With just a quick keystroke, you can seamlessly insert a new worksheet and continue your work without any interruptions.
In some cases, you may prefer to insert the new worksheet at the end of your workbook rather than before the active worksheet. For this scenario, Excel provides an alternate shortcut, which is Ctrl + Shift + F11. By using this combination, a new worksheet will be inserted at the end of your workbook, allowing you to easily add new sections or data.
Inserting a new worksheet can be particularly useful when you want to separate different categories of data or when you need to work on different sections of your workbook. It allows you to maintain a logical structure and keeps your data organized, making it easier to navigate and analyze.
Additionally, inserting a new worksheet using the Shift + F11 or Ctrl + Shift + F11 shortcut is much faster than going through the traditional method of right-clicking, selecting the “Insert” option, and choosing “Worksheet.” By incorporating these shortcuts into your Excel workflow, you can save valuable time and increase your overall productivity.
With the Shift + F11 and Ctrl + Shift + F11 shortcuts, adding new worksheets to your Excel workbook is a breeze. By utilizing these shortcuts, you can efficiently insert new sections, accommodate additional data, and keep your workbook well-organized and easy to navigate.
Shortcut for Moving a Worksheet
Microsoft Excel provides a range of shortcuts to help users efficiently navigate through their worksheets. One such shortcut is the ability to move worksheets within a workbook. By using the keyboard shortcut Ctrl + Page Up or Ctrl + Page Down, you can easily rearrange your worksheets to suit your needs.
To move to the previous worksheet in your workbook, press Ctrl + Page Up. This shortcut allows you to navigate through your worksheets in a sequential order, moving from right to left. It’s particularly useful when you have a large number of worksheets in your workbook and want to quickly move between them.
Similarly, to move to the next worksheet in your workbook, press Ctrl + Page Down. This shortcut enables you to progress forward through your worksheets, moving from left to right. As with the previous shortcut, it facilitates easy navigation and organization of your workbook.
The ability to move worksheets quickly can be highly advantageous when working with extensive workbooks that contain numerous sheets. It allows you to arrange your worksheets in a logical order, grouping related sheets together or separating different sections of your data.
For example, if you have a workbook with multiple worksheets that represent different months of the year, you can use the Ctrl + Page Up or Ctrl + Page Down shortcut to effortlessly navigate between the sheets and keep them in chronological order.
In addition to rearranging worksheets horizontally, you can also move worksheets vertically within your workbook. Simply hold the Ctrl key and press either the Up or Down arrow key to move the selected worksheet up or down.
By using these keyboard shortcuts, you can fine-tune the organization of your workbook and enhance your productivity when working with Excel. Whether you’re sorting data, creating reports, or managing multiple sections in your workbook, these shortcuts make it easier to navigate and manipulate your worksheets.
Remember, the Ctrl + Page Up and Ctrl + Page Down shortcuts are efficient tools for moving between worksheets and adjusting the order of your workbook. By incorporating these shortcuts into your Excel workflow, you can save time, streamline your tasks, and maintain an organized and efficient workbook.
Shortcut for Renaming a Worksheet
Renaming a worksheet is a common task in Microsoft Excel, whether it’s to provide a more descriptive name or to organize your workbook. Excel offers a simple keyboard shortcut to make renaming worksheets effortless. The shortcut for renaming a worksheet is F2.
To use this shortcut, select the worksheet tab that you want to rename. Once you’ve selected the tab, press the F2 key on your keyboard. The selected worksheet tab will become editable, allowing you to type in the desired name. Once you’ve entered the new name, simply press Enter to apply the change.
The F2 shortcut for renaming worksheets is a time-saving technique that eliminates the need for manual right-clicking and selecting the “Rename” option. With just a quick keystroke, you can access and edit the worksheet name directly, making the renaming process faster and more efficient.
This shortcut is particularly useful when you have a large workbook with multiple worksheets that require naming. It allows you to quickly navigate through the tabs, rename each worksheet, and move on to the next one without interruptions or unnecessary clicks.
In addition to the F2 shortcut, Excel also provides another method of renaming worksheets. You can double-click on the worksheet tab, and it will become editable for renaming. While this approach may require an extra click, it can be convenient for users who prefer using the mouse instead of keyboard shortcuts.
Renaming worksheets in Excel is not only a way to provide more descriptive names but also a means of organizing your workbook. By giving meaningful names to your worksheets, you can easily identify and locate specific data or sections within your workbook.
It’s worth noting that worksheet names in Excel have certain limitations. They cannot exceed 31 characters, and they cannot include any special characters such as * ? [ ] : \ /.
By utilizing the F2 keyboard shortcut, you can save time and effort when renaming worksheets in Excel. Whether you’re working on a small workbook or a complex project, this shortcut allows you to stay focused and efficiently organize your worksheets with meaningful names.
Shortcut for Deleting a Worksheet
Deleting a worksheet in Microsoft Excel is a common task, whether you want to remove unnecessary data or streamline your workbook. Excel provides a convenient keyboard shortcut to make deleting worksheets quick and straightforward. The shortcut for deleting a worksheet is Ctrl + Shift + F12.
To use this shortcut, first, select the worksheet that you want to delete. Once selected, press the Ctrl + Shift + F12 keys simultaneously. Excel will display a prompt asking for confirmation before permanently deleting the selected worksheet.
The Ctrl + Shift + F12 shortcut offers a fast and efficient way to delete worksheets without the need to navigate through multiple menus or perform additional clicks. It simplifies the deletion process and saves you time when managing your workbook.
Deleting worksheets can be beneficial for a variety of reasons. It allows you to remove unnecessary data, tidy up your workbook, or eliminate sheets that are no longer needed. Additionally, deleting worksheets can help reduce the file size of your Excel workbook, especially if it contains large amounts of data.
When using the Ctrl + Shift + F12 shortcut to delete a worksheet, it’s essential to exercise caution as the deletion is irreversible. Excel’s confirmation prompt serves as an extra safety measure to prevent accidental deletion. Take a moment to review the prompt and ensure that you’re deleting the correct worksheet before confirming.
In addition to the shortcut, you can also delete worksheets by right-clicking on the worksheet tab, selecting the “Delete” option, and confirming the deletion through additional dialog boxes. However, the Ctrl + Shift + F12 shortcut provides a faster and more direct method for deleting worksheets.
By utilizing the Ctrl + Shift + F12 shortcut, you can efficiently manage your Excel workbook by quickly deleting unnecessary worksheets. This feature allows you to maintain an organized and clutter-free workbook, improving your productivity and making it easier to work with your data.
Remember to exercise caution when using the Ctrl + Shift + F12 shortcut, double-checking the worksheet you intend to delete, and confirming the action in the prompt. With this shortcut, you can maintain a streamlined workbook and simplify your data management in Microsoft Excel.
Shortcut for Hiding a Worksheet
Hiding a worksheet in Microsoft Excel can be useful when you want to temporarily conceal sensitive data, focus on specific sections, or simply declutter your workbook. Excel provides a convenient keyboard shortcut to quickly hide a worksheet. The shortcut for hiding a worksheet is Ctrl + Shift + H.
To hide a worksheet, start by selecting the worksheet you want to hide. Once selected, press the Ctrl + Shift + H keys simultaneously. Excel will instantly hide the selected worksheet from view. This shortcut allows you to streamline your work without disrupting your workflow.
The Ctrl + Shift + H shortcut offers a fast and efficient way to hide a worksheet without the need to navigate through menus or perform additional clicks. It simplifies the process and allows you to focus on the visible worksheets, making it easier to analyze and edit data.
Hiding a worksheet can be especially valuable when you’re working with a complex workbook that contains multiple sheets. By hiding irrelevant or unnecessary worksheets, you can create a clutter-free environment and concentrate on the data that requires immediate attention.
Furthermore, hiding worksheets can also be helpful when you need to protect sensitive information. Instead of deleting the data, which may be permanent, hiding the worksheet can provide a temporary solution and maintain the integrity of your workbook.
Restoring a hidden worksheet is as simple as unhiding it, which is also achieved through a keyboard shortcut. To unhide a worksheet, press Ctrl + Shift + U. This shortcut will reveal any hidden worksheets in your workbook, allowing you to access and work with the data.
By utilizing the Ctrl + Shift + H shortcut, you can easily hide specific worksheets in Excel, reducing clutter, enhancing focus, and protecting sensitive information. Incorporating this shortcut into your workflow improves your overall productivity and enables you to efficiently manage your workbook.
Remember to keep track of any hidden worksheets by using the Ctrl + Shift + U shortcut to unhide them when needed. This ensures that you have all your data accessible and allows for seamless collaboration and analysis within your Excel workbook.
Shortcut for Unhiding a Worksheet
Unhiding a worksheet in Microsoft Excel is a necessary action when you want to bring back a hidden sheet for editing, analysis, or collaboration. Excel provides a convenient keyboard shortcut to quickly unhide a worksheet. The shortcut for unhiding a worksheet is Ctrl + Shift + U.
To unhide a worksheet, start by selecting any visible worksheet within your Excel workbook. Next, press the Ctrl + Shift + U keys simultaneously. Excel will instantly reveal any hidden worksheets in your workbook, making them accessible for further editing or analysis.
The Ctrl + Shift + U shortcut offers a fast and efficient way to unhide hidden worksheets without the need to navigate through menus or perform additional clicks. It simplifies the process and allows you to retrieve the hidden data swiftly.
Unhiding a worksheet can be useful when working with a complex workbook that contains multiple sheets. By unhiding specific worksheets, you can regain access to hidden data, resume collaboration, or review important information that was previously concealed.
It’s worth noting that if you have multiple hidden worksheets, pressing Ctrl + Shift + U will unhide all of them simultaneously. This can be beneficial when you need to unhide multiple sheets at once. However, if you only want to unhide a specific worksheet, you will need to access the “Unhide” option in the Excel interface.
To access the “Unhide” option manually, right-click on any visible worksheet tab, select “Unhide,” and choose the worksheet you want to reveal. This approach can be useful when you only need to unhide a particular sheet among multiple hidden sheets.
By utilizing the Ctrl + Shift + U shortcut, you can quickly unhide hidden worksheets in Excel, allowing for seamless data retrieval and continued work on your workbook. Incorporating this shortcut into your workflow improves your productivity and ensures smooth collaboration and analysis within your Excel worksheets.
Remember to use the Ctrl + Shift + U shortcut whenever you need to unhide hidden worksheets efficiently. By doing so, you can regain access to previously hidden data and seamlessly continue working with your Excel workbook.