
Zoom in Excel: Change Your Worksheet Magnification
Zooming in Excel allows you to change the magnification level of your worksheet, making it easier to view and work with your data. Whether you need to zoom in to examine small details or zoom out to get a broader view of your spreadsheet, Excel offers several methods to help you adjust the zoom level. In this article, we will explore various ways to zoom in Excel and enhance your worksheet magnification.
1. Using the Zoom Slider
One of the simplest ways to zoom in Excel is by using the zoom slider. Located in the bottom-right corner of the Excel window, the zoom slider allows you to smoothly adjust the magnification level. To zoom in, drag the slider to the right, and to zoom out, drag it to the left. The current zoom level is displayed next to the slider, making it easy to keep track of the magnification.
2. Using the Zoom Controls in the Status Bar
Excel also provides zoom controls in the status bar at the bottom of the window. Clicking on the percentage value in the bottom-right corner of the status bar opens a drop-down menu with predefined zoom options. You can choose from common values such as 100%, 200%, or use the custom option to specify a specific zoom level.
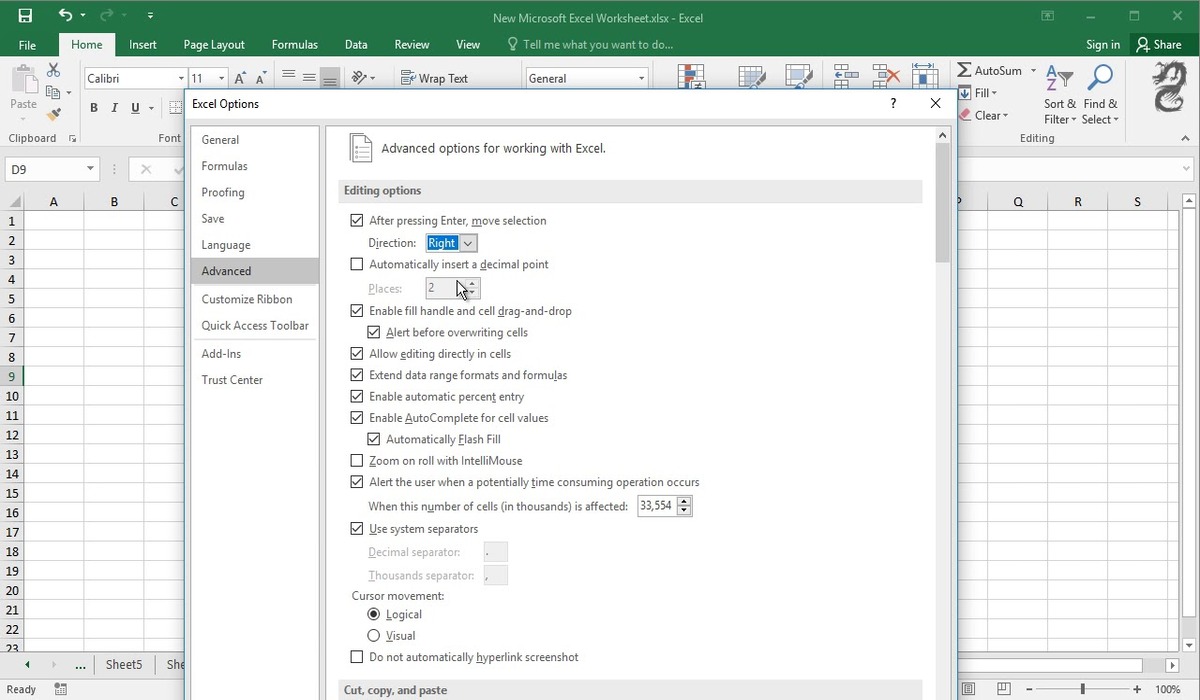
3. Setting a Specific Zoom Level
If you need to set a specific zoom level, go to the View tab in the Excel ribbon and click on the Zoom button. This opens the Zoom dialog box, where you can enter the desired percentage or use the up and down arrows to adjust the zoom level. Press Enter or click OK to apply the changes.
4. Zooming In and Out using Keyboard Shortcuts
Excel also provides keyboard shortcuts for zooming in and out. To zoom in, use the shortcut Ctrl + Plus (+) on the numeric keypad, and to zoom out, use Ctrl + Minus (-) on the numeric keypad. If your keyboard does not have a numeric keypad, use Ctrl + Shift + Plus/Minus sign on the main keyboard.
5. Using the Zoom Dialog Box
The Zoom dialog box offers more options for adjusting the magnification. You can access it by right-clicking on the zoom slider or going to the View tab and clicking on the Zoom button. In the dialog box, you can select various options, such as adjusting the page width, displaying multiple pages, or choosing the fit selection option.
6. Zooming to Fit the Window
If you want to fit your worksheet to the Excel window, double-click on the zoom slider. Excel automatically adjusts the zoom level to display the entire worksheet within the available window space.
7. Adjusting the Zoom on Multiple Worksheets
If you have multiple worksheets in your Excel file, you can adjust the zoom level for each worksheet individually. Simply select the desired worksheet tab by clicking on it, and then use any of the aforementioned methods to adjust the zoom level.
8. Using the Zoom Feature in Page Layout View
In the Page Layout view, Excel allows you to preview how your worksheet will look when printed. You can adjust the zoom level in this view to get a better understanding of the layout and formatting of your printed document.
9. Tips and Tricks for Effective Zooming in Excel
– Use zooming shortcuts for a quicker way to adjust magnification.
– Experiment with different zoom levels to find the one that suits your needs best.
– Consider using the Fit to Window option to ensure optimal viewing of your worksheet.
– Utilize the zoom feature in conjunction with other Excel functions and tools to enhance your productivity.
By mastering the art of zooming in Excel, you can effortlessly navigate and analyze your data, improving your workflow and productivity. Whether you are working with large datasets or need to examine intricate details, Excel’s zooming capabilities provide the flexibility to adapt to your specific needs.
Understanding Zoom in Excel
Zooming in Excel refers to adjusting the magnification level of your worksheet. By changing the zoom level, you can effectively control the size of the content displayed on your screen. Understanding how to zoom in Excel is crucial for improving visibility, working with complex data, and enhancing your overall user experience.
Excel offers a variety of zooming options that allow you to customize the magnification level to suit your needs. Whether you need to focus on specific details or get a broad overview of your spreadsheet, Excel’s zoom feature can accommodate your preference.
When you zoom in, the size of the cells, text, and graphics on your worksheet enlarges, making it easier to read and analyze the information. Conversely, when you zoom out, the content shrinks, allowing you to see more data on the screen without scrolling.
In Excel, the default zoom level is typically set to 100%, which means that one unit on the screen equals one unit in the printed output. However, this default setting may not always be suitable for your needs, especially if you are working with large spreadsheets or have to examine small details.
By adjusting the zoom level, you can customize the visual display of your worksheet. Excel provides various methods to change the magnification, including the zoom slider, zoom controls in the status bar, keyboard shortcuts, and the zoom dialog box.
The zoom slider, located in the bottom-right corner of the Excel window, allows you to manually drag the slider to the right to zoom in or to the left to zoom out. This method provides a quick and intuitive way to adjust the zoom level.
The status bar in Excel also provides zoom controls, where you can click on the percentage value to access a drop-down menu with predefined zoom options. This allows for easy adjustments without the need to manually drag the zoom slider.
Additionally, Excel offers keyboard shortcuts for zooming in and out, allowing for a more efficient workflow. By using these shortcuts, you can quickly change the zoom level without interrupting your regular keyboard typing.
For more precise adjustments, Excel’s zoom dialog box provides the flexibility to enter a specific percentage or choose from various predefined options. This dialog box also offers additional settings to customize the display and layout of your worksheet.
Understanding how to zoom in Excel and effectively adjust the magnification level is essential for optimizing your experience with the software. By utilizing the various zooming options available, you can improve readability, navigate large datasets, and enhance your overall productivity within Excel.
Using the Zoom Slider
The zoom slider in Excel is a handy tool that allows you to easily adjust the magnification level of your worksheet. Located in the bottom-right corner of the Excel window, the zoom slider provides a convenient way to zoom in and out, making it simpler to view and work with your data.
To use the zoom slider, follow these steps:
1. Locate the zoom slider:
The zoom slider is positioned at the right end of the status bar, in the bottom-right corner of the Excel window. It is represented by a horizontal line with plus and minus signs on either end.
2. Drag the slider to zoom in or out:
To zoom in, click on the plus sign side of the slider and drag it towards the right. As you drag, you will notice that the percentage value next to the slider increases, indicating an increase in magnification.
To zoom out, click on the minus sign side of the slider and drag it towards the left. The percentage value will decrease, indicating a decrease in magnification.
3. Release the mouse button to set the desired zoom level:
Once you have adjusted the zoom slider to the desired position, release the mouse button. The worksheet will automatically update to display the new magnification level.
The zoom slider provides a smooth and continuous adjustment of the zoom level, allowing you to find the perfect balance between readability and visibility. It is particularly useful when you need to quickly zoom in to examine intricate details or zoom out to get a broader view of your spreadsheet.
Furthermore, the current zoom level is displayed next to the slider, making it easy to keep track of the magnification. This allows for quick reference and ensures consistency across different worksheets within your Excel file.
In addition to manually dragging the zoom slider, you can also access additional options related to zooming by right-clicking on the slider. This opens a context menu that provides options like Zoom to Selection, Fit Selection, and Zoom to Page.
By utilizing the zoom slider, you can have better control over the magnification of your Excel worksheet. It offers a straightforward and intuitive method to adjust the zoom level, allowing you to enhance readability, examine details, and ultimately improve your overall productivity when working with Excel.
Using the Zoom Controls in the Status Bar
Excel provides convenient zoom controls in the status bar, located at the bottom of the Excel window. These controls offer a quick and easy way to adjust the magnification level of your worksheet, allowing you to zoom in or out with just a few clicks.
To use the zoom controls in the status bar, follow these steps:
1. Locate the percentage value in the bottom-right corner:
In the status bar, towards the bottom-right corner of the Excel window, you will find a percentage value. This value indicates the current zoom level of your worksheet.
2. Click on the percentage value to open the zoom options:
By clicking on the percentage value, a drop-down menu will appear with various predefined zoom options.
3. Select a predefined zoom option:
From the drop-down menu, you can choose a preset zoom option that best suits your needs. Excel provides options such as 100%, 200%, and Fit Selection, among others.
4. Click on Custom to set a specific zoom level:
If the predefined zoom options do not meet your requirements, you can click on the “Custom” option at the bottom of the drop-down menu. This opens the Zoom dialog box, where you can enter a specific percentage to set a custom zoom level.
The zoom controls in the status bar offer a simple and intuitive way to adjust the magnification level of your worksheet without the need for complex settings or menus. It provides quick access to commonly used zoom options, allowing you to switch between different magnifications effortlessly.
The ability to easily toggle between predefined zoom levels is particularly useful when you need to quickly zoom in to examine details or zoom out to get a broader overview of your spreadsheet. This flexibility allows you to adapt the view according to your specific needs and improve your data analysis workflow.
In addition to the predefined options, the “Custom” option in the drop-down menu opens the Zoom dialog box, where you can set a specific zoom level. This flexibility allows for fine-tuning of the magnification, ensuring that you have complete control over the display of your worksheet.
By utilizing the zoom controls in the status bar, you can efficiently adjust the magnification level of your Excel worksheet. It provides a user-friendly interface, allowing you to customize the zoom to suit your preferences, enhance the visibility of your data, and ultimately improve your productivity when working with Excel.
Setting a Specific Zoom Level
In Excel, you have the flexibility to set a specific zoom level to meet your exact requirements. This allows you to customize the magnification of your worksheet, ensuring optimal visibility and usability for your specific needs.
To set a specific zoom level in Excel, follow these steps:
1. Go to the View tab in the Excel ribbon:
At the top of the Excel window, locate the View tab in the ribbon. Click on it to access the various view-related options available.
2. Click on the “Zoom” button:
In the View tab, you will find the “Zoom” button in the “Workbook Views” section. Click on this button to open the Zoom dialog box.
3. Enter a specific percentage:
In the Zoom dialog box, you can enter a specific percentage in the “Percent” input box. Alternatively, you can use the up and down arrows next to the input box to increment or decrement the percentage.
4. Press Enter or click OK to apply the changes:
Once you have entered the desired zoom level, press Enter or click the OK button in the Zoom dialog box to apply the changes. The worksheet will update immediately to reflect the new magnification.
Setting a specific zoom level gives you precise control over how your worksheet is displayed. This can be particularly helpful when you need to ensure the visibility of small details or when you’re working with a large dataset that requires closer examination.
The ability to specify a zoom level also allows for consistency across multiple worksheets within the same Excel file. By setting the same magnification for all sheets, you can navigate between them seamlessly and maintain a standardized viewing experience.
The Zoom dialog box provides additional options for customization beyond setting a specific percentage. You can choose to adjust the page width, display multiple pages at once, or select the “Fit selection” option to zoom in on a specific range of cells.
By setting a specific zoom level in Excel, you have the power to tailor the magnification to your exact needs. This level of customization improves visibility, enhances data analysis, and ultimately allows you to work more efficiently and effectively within Excel.
Zooming In and Out using Keyboard Shortcuts
To provide a quick and efficient way to adjust the zoom level in Excel, keyboard shortcuts are available for zooming in and out. Using these shortcuts allows you to change the magnification level with just a few keystrokes, saving you time and effort while working on your worksheets.
Here are the keyboard shortcuts for zooming in and out in Excel:
Zoom In Shortcut:
– For Windows users, press Ctrl (+) Plus sign on the numeric keypad.
– For Mac users, press Command (+) Plus sign on the main keyboard.
Zoom Out Shortcut:
– For Windows users, press Ctrl (-) Minus sign on the numeric keypad.
– For Mac users, press Command (-) Minus sign on the main keyboard.
If your keyboard does not have a numeric keypad, you can use the following alternative shortcuts:
– For Windows users, press Ctrl + Shift + Plus sign/Minus sign on the main keyboard.
– For Mac users, press Command + Shift + Plus sign/Minus sign on the main keyboard.
These shortcuts provide a quick and seamless way to adjust the zoom level without the need to navigate through menus or dialogs.
Zooming in using the keyboard shortcuts is particularly useful when you want to focus on specific details of your worksheet. It allows you to enlarge the content, making it easier to read and analyze, especially when working with complex data or small text.
On the other hand, zooming out with the keyboard shortcuts enables you to fit more content on your screen. This is beneficial when you need a broader view of your spreadsheet or when you want to compare different sections of your worksheet side by side.
By incorporating keyboard shortcuts into your Excel workflow, you can efficiently adjust the zoom level without interrupting your typing or navigation. These shortcuts provide a seamless way to increase or decrease the magnification, improving your overall productivity and enhancing the accessibility of your worksheet.
Take some time to familiarize yourself with these keyboard shortcuts, and incorporate them into your Excel usage. You’ll find that they greatly simplify the process of zooming in and out, allowing you to focus more on your data and less on navigating through menus and dialog boxes.
Using the Zoom Dialog Box
The Zoom dialog box in Excel provides a more advanced and extensive set of options for adjusting the magnification level of your worksheet. It allows you to finely control the zoom level, customize the display settings, and choose from a range of viewing options.
To access the Zoom dialog box in Excel, follow these steps:
1. Go to the View tab in the Excel ribbon:
At the top of the Excel window, locate the View tab in the ribbon. Click on it to access the various view-related options available.
2. Click on the “Zoom” button:
In the View tab, you will find the “Zoom” button in the “Workbook Views” section. Click on this button to open the Zoom dialog box.
Inside the Zoom dialog box, you will find several options to customize your zoom settings:
– The “Percent” input box allows you to enter a specific percentage to set the zoom level. Additionally, you can use the up and down arrows adjacent to the input box to increment or decrement the percentage.
– The “Page width” option adjusts the zoom level to fit the width of the pages to the window. This can be helpful when working with larger worksheets that span multiple pages.
– The “Fit selection” option allows you to zoom in on a specific range of cells that you have selected. This can be useful when you want to focus on specific data without distractions from the rest of the worksheet.
– The “Fit all columns on one page” and “Fit all rows on one page” options adjust the zoom level to display the entire worksheet on a single printed page. This can be beneficial when preparing the worksheet for printing or to get a comprehensive overview of the content.
– The “Multiple pages” option allows you to view and navigate through multiple pages of your worksheet simultaneously. This is especially useful for larger datasets where the information is spread across several pages.
By utilizing the Zoom dialog box, you have finer control over the magnification level and advanced settings to optimize the display of your worksheet. This level of customization provides a tailored viewing experience, improving clarity and enhancing your ability to work with your data.
Remember that the Zoom dialog box can be accessed not only through the View tab but also by right-clicking on the zoom slider. This provides quick access to the additional options and allows for seamless adjustment of the zoom level without interrupting your workflow.
Experiment with the different options available in the Zoom dialog box to find the settings that best suit your needs. Fine-tuning the magnification level and exploring the various display options will enhance your productivity and make your Excel experience more efficient and enjoyable.
Zooming to Fit the Window
In Excel, the “Zoom to Fit” feature allows you to automatically adjust the zoom level to fit the entire worksheet within the available window space. This feature comes in handy when you want to have a comprehensive view of your worksheet without having to manually adjust the zoom level.
To zoom to fit the window in Excel, follow these steps:
1. Double-click on the zoom slider:
Located in the bottom-right corner of the Excel window, the zoom slider is a horizontal line with plus and minus signs on either end. Simply double-clicking on the slider will automatically adjust the zoom level to fit the entire worksheet in the available window space.
By zooming to fit the window, Excel dynamically adjusts the magnification of the worksheet to make sure that all the content fits within the visible area without the need for horizontal or vertical scrolling.
This feature is particularly helpful when you have a large worksheet that extends beyond the visible window or when you want to get an overview of the entire worksheet’s layout and structure. It allows you to see the entire content at once, providing an efficient way to navigate and analyze your data.
In addition to the double-click method on the zoom slider, you can also achieve the same effect by using the keyboard shortcut “Ctrl + 0” (zero).
Remember that zooming to fit the window adjusts the magnification level based on the available window space. If you resize the Excel window or change the screen resolution, the zoom level may automatically adapt to fit the new dimensions.
Zooming to fit the window is a convenient way to get a comprehensive view of your worksheet without the hassle of manual adjustment. It allows you to work with your data more efficiently, reduces the need for scrolling, and enhances your overall experience when working with Excel.
Keep in mind that zooming to fit the window may sacrifice some details due to the reduced magnification. If you need to focus on specific details or want a closer view of the content, you can always adjust the zoom level manually using other zooming methods like the zoom slider or the zoom dialog box.
Experiment with the zoom to fit feature in Excel to find the balance between overall visibility and the level of detail you need for your specific tasks. By utilizing this feature, you can ensure that your worksheet is easily viewable within the available window space, making it easier to navigate through your data and efficiently work with Excel.
Adjusting the Zoom on Multiple Worksheets
In Excel, you often work with multiple worksheets within a single file. Each worksheet may have a different amount of data or require a specific zoom level for optimal viewing. Excel allows you to adjust the zoom level independently for each worksheet, enabling you to customize the magnification according to the content of each sheet.
To adjust the zoom level on multiple worksheets in Excel, follow these steps:
1. Click on the desired worksheet tab:
At the bottom of the Excel window, locate the worksheet tabs and click on the tab of the worksheet you want to adjust the zoom level for.
2. Use any of the zooming methods:
Once you have selected the desired worksheet, you can use any of the previously mentioned zooming methods, such as the zoom slider, zoom controls in the status bar, keyboard shortcuts, or the zoom dialog box to adjust the magnification level specifically for that worksheet.
3. Repeat for each worksheet:
Repeat the process for each worksheet you want to adjust the zoom level for. Click on the respective worksheet tab and apply the desired zoom settings using the available zooming methods.
By adjusting the zoom level independently for each worksheet, you can ensure that the content of each sheet is displayed at the optimal magnification. This allows you to focus on different data sets, compare and contrast information across sheets, and navigate through your workbook more efficiently.
For example, you may have one worksheet with detailed financial data that requires a zoom level of 150% for better visibility, while another worksheet with a chart or graph may benefit from a zoom level of 75% to have a broader view of the visual representation.
Adjusting the zoom level on multiple worksheets also helps maintain consistency when working with different data sets. Each worksheet can have its own zoom level that suits the data and allows for easier analysis and understanding of the information.
Keep in mind that when you switch between worksheets, Excel retains the zoom level settings for each sheet. This means that the magnification will automatically adjust to the previously set value when you move from one worksheet to another.
By adjusting the zoom level independently on each worksheet, you can tailor the viewing experience to the specific needs of each sheet and maximize your productivity when working with multiple worksheets in Excel.
Using the Zoom Feature in Page Layout View
In Excel, the Page Layout view provides a preview of how your worksheet will appear when printed. This view allows you to adjust margins, page breaks, and other layout elements to ensure your printed document looks exactly as intended. Within this view, Excel also offers a dedicated zoom feature that allows you to customize the magnification level for a clearer understanding of your worksheet’s print layout.
To use the zoom feature in Page Layout view, follow these steps:
1. Switch to Page Layout view:
At the bottom-right corner of the Excel window, find the View icons. Click on the “Page Layout View” icon, which resembles an icon of a printed sheet of paper.
2. Locate the zoom slider in the status bar:
Once in Page Layout view, navigate to the status bar at the bottom of the Excel window. You will find the zoom slider in the right corner, similar to other views.
3. Drag the zoom slider to adjust the magnification level:
Drag the zoom slider to the left to decrease the zoom level or to the right to increase it. As you adjust the slider, the percentage value next to it will update accordingly, helping you track the current magnification.
The zoom feature in Page Layout view is beneficial when you want to preview the layout and formatting of your worksheet before printing. By adjusting the zoom level, you can ensure that the content fits appropriately within the designated page boundaries and check for any potential formatting issues.
In Page Layout view, you can easily see how text, images, and other elements will be distributed across different pages. The zoom feature provides a more accurate representation of the printed output, reducing the chances of unexpected formatting or layout problems.
This view and the zoom feature are particularly helpful when working on reports, financial statements, invoices, or any other document that requires precise formatting and professional presentation.
While the primary purpose of the zoom feature in Page Layout view is to preview the printed layout, it can also assist in working with complex worksheets that span multiple pages. Adjusting the zoom level allows you to examine how data flows across pages and can help in refining page breaks or adjusting margins to ensure a coherent visual presentation.
By utilizing the zoom feature in Page Layout view, you can fine-tune the presentation of your worksheet for printing purposes and get a better understanding of how your document will look when physically produced.
Tips and Tricks for Effective Zooming in Excel
When working with Excel, effectively utilizing the zooming feature can greatly enhance your experience and productivity. Here are some helpful tips and tricks to optimize your zooming in Excel:
1. Use Zooming Shortcuts:
Take advantage of keyboard shortcuts for zooming in and out. Press Ctrl (+) Plus sign on the numeric keypad to zoom in and Ctrl (-) Minus sign on the numeric keypad to zoom out. If you don’t have a numeric keypad, use Ctrl + Shift + Plus/Minus sign on the main keyboard.
2. Experiment with Different Zoom Levels:
Try different zoom levels to find the one that suits your needs best. Depending on your screen size and the complexity of your data, you may find that certain zoom levels provide better readability and usability.
3. Consider Fit to Window Option:
Double-click on the zoom slider to automatically adjust the zoom level to fit the entire worksheet within the available window space. This ensures you can view the entire content without the need for scrolling.
4. Combine Zooming with Other Excel Features:
Zooming can work hand in hand with other Excel features. For example, by combining zooming with freezing panes or splitting windows, you can keep specific rows or columns visible as you navigate through different parts of your worksheet.
5. Utilize Zooming in Page Layout View:
Switch to Page Layout view to preview how your worksheet will appear when printed. Adjust the zoom level in this view to get a clearer understanding of the layout and formatting of your document.
6. Zoom In on Selected Cells:
Use the “Fit Selection” option in the Zoom dialog box to zoom in on a specific range of cells. This allows you to focus on specific details without distractions from the rest of the worksheet.
7. Optimize Excel for High-Resolution Screens:
If you’re working on a high-resolution screen, you may find that Excel appears smaller. In such cases, increasing the zoom level can improve readability and ease of use.
8. Customize Zoom Settings for Each Worksheet:
Adjust the zoom level independently for each worksheet to ensure the optimal view for each set of data. This allows you to maintain consistency within individual worksheets while accommodating varying data complexities.
9. Use Zooming in Conjunction with Print Settings:
When preparing worksheets for printing, adjust the zoom level to ensure your content fits appropriately within the designated print area. This helps avoid unexpected formatting issues on the final printed document.
10. Find a Balance Between Usability and Visibility:
Experiment and find the right balance between a zoom level that provides clear visibility of your data and a level that allows you to fit the desired amount of content on the screen. This balance will vary depending on the nature of your data and your personal preference.
By following these tips and tricks, you can effectively utilize the zooming feature in Excel to enhance readability, improve workflow, and optimize your overall experience with the software.