
Adjusting Display Settings in Windows
Windows offers a range of display settings that allow you to customize your screen to fit your preferences. Whether you need to make the screen larger on your laptop for better visibility or adjust the resolution for a clearer image, Windows provides several options to help you achieve the desired display setup.
To start, you can access the display settings by right-clicking on your desktop and selecting “Display settings” from the context menu. This will open the display settings window, where you can make various adjustments.
Changing the Screen Resolution
One of the primary ways to make the screen larger on your laptop is by adjusting the screen resolution. Higher resolutions generally result in sharper images and more content displayed on the screen. To change the resolution, navigate to the “Resolution” section in the display settings window and select a different resolution from the drop-down menu. Keep in mind that choosing a resolution that is too high for your screen size may cause elements to appear smaller and potentially harder to read.
Scaling the Display
If increasing the screen resolution is not sufficient, you can take advantage of the scaling options. Scaling allows you to adjust the size of the text, apps, and other items on your screen. To access the scaling options, navigate to the “Scale and layout” section in the display settings window. You can choose from various scaling percentages to make the content larger and easier to see.
Changing Text Size
In addition to adjusting the overall display size, Windows also allows you to change the size of specific text elements. You can increase the text size for menus, title bars, icons, and other elements by going to the “Advanced display settings” section and selecting “Advanced sizing of text and other items.” From there, you can customize the text size to better suit your preferences.
Switching to High Contrast Mode
For individuals with visual impairments, Windows provides a High Contrast mode that enhances the visibility of text and other interface elements. To enable this mode, navigate to the “Colours” section in the display settings window and select the “High contrast settings” link. From there, you can choose from various high contrast themes to make the screen easier to read.
By making adjustments to the display settings in Windows, you can effectively make the screen larger on your laptop and improve readability. Experiment with different resolutions, scaling options, and text sizes to find the optimal setup that meets your needs.
Changing Display Settings in macOS
Just like Windows, macOS offers a range of display settings that allow you to customize the screen on your laptop. Whether you want to make the screen bigger for better visibility or adjust the resolution for sharper images, macOS provides several options to help you achieve your desired display setup.
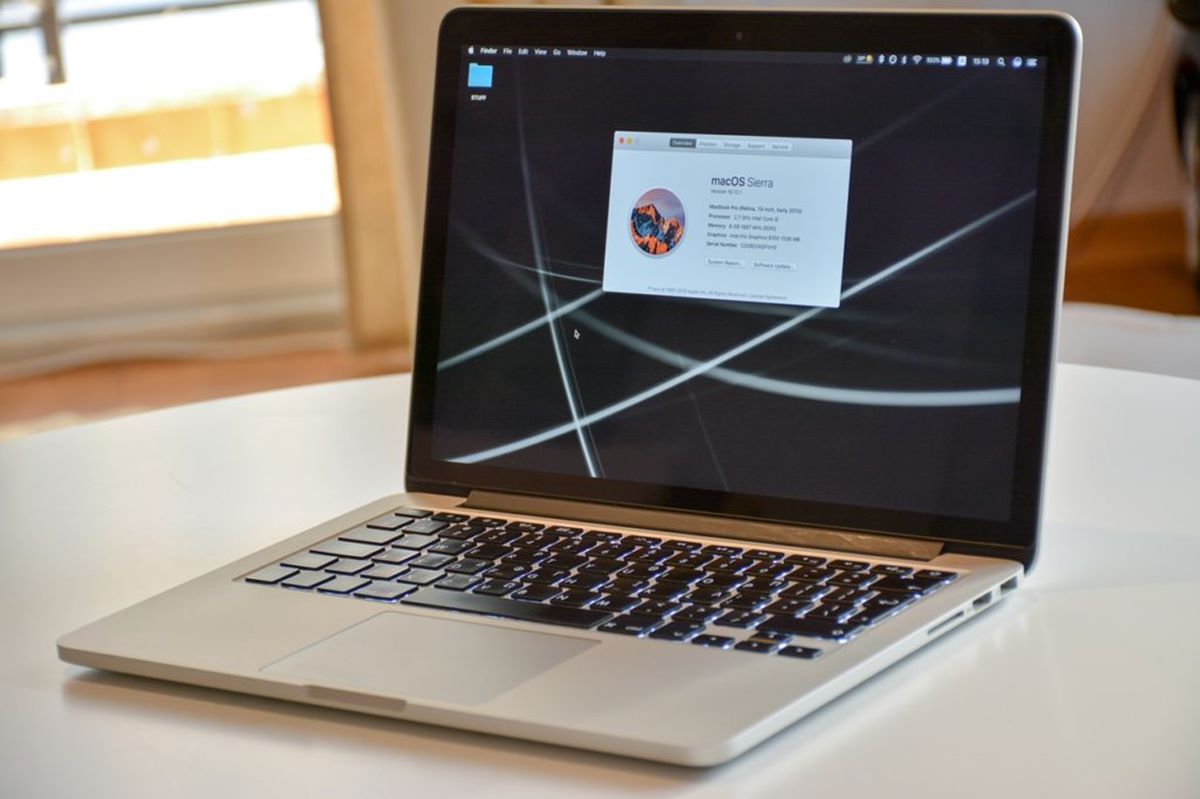
To access the display settings in macOS, click on the Apple menu in the top left corner of your screen, then select “System Preferences” and click on “Displays.”
Adjusting the Display Resolution
One way to make the screen larger on your Mac is by adjusting the display resolution. Higher resolutions typically offer a more detailed view with smaller text and more screen real estate. To change the resolution, go to the “Display” tab in the “Displays” settings and select a different resolution from the available options. Keep in mind that choosing a resolution that is too high for your screen may cause elements to appear smaller and potentially more challenging to read.
Scaling the Display
If adjusting the resolution is not sufficient, macOS provides a feature called “Scaled” that allows you to increase the size of the screen elements. In the “Display” tab, you will find a list of scaling options. Selecting a higher scaling option essentially enlarges the content on your screen, making it easier to see. Experiment with different scaling settings to find the one that suits your preferences.
Enabling Zoom and Zoom Gestures
In macOS, you can enable the zoom feature to quickly magnify the screen and make everything larger. To enable zoom, go to the “Accessibility” settings in the System Preferences and click on “Zoom” in the sidebar. Check the box next to “Use keyboard shortcuts to zoom,” and you can then hold down the designated keys to zoom in and out. Additionally, if your Mac has a trackpad, you can enable zoom gestures to quickly zoom in and out by using specific finger gestures.
Changing Text Size
macOS allows you to change the text size for menus, title bars, and other interface elements. To adjust the text size, go to the “System Preferences” and click on “General.” From there, you can select a different text size in the “Appearance” section. Increasing the text size can make it easier to read and navigate through your Mac’s interface.
By utilizing the available display settings in macOS, you can effectively make the screen larger on your laptop and enhance visibility. Experiment with different resolutions, scaling options, and text sizes to find the optimal display setup that suits your preferences and improves readability.
Zooming In on Web Browsers
Zooming in on web browsers is a helpful feature that allows you to increase the size of web page content, making it easier to read and view. Whether you’re using Chrome, Firefox, Safari, or Edge, most web browsers offer built-in zoom functionality to accommodate different users’ preferences and improve accessibility. Here’s how you can zoom in on popular web browsers:
Google Chrome
To zoom in on Google Chrome, you have a couple of options. You can press the Ctrl key (or Cmd key on Mac) and the plus (+) key to zoom in, or you can press the Ctrl key (or Cmd key on Mac) and the minus (-) key to zoom out. Alternatively, you can click on the three-dot menu icon in the top-right corner, go to “Zoom,” and select the desired zoom level from the options provided.
Mozilla Firefox
In Mozilla Firefox, you can zoom in by pressing the Ctrl key (or Cmd key on Mac) and the plus (+) key. To zoom out, use the Ctrl key (or Cmd key on Mac) and the minus (-) key. Another way to zoom in or out is by holding down the Ctrl key (or Cmd key on Mac) and scrolling your mouse wheel. If you prefer using the menu, click on the three-line menu icon in the top-right corner, go to “Zoom,” and select the desired zoom level.
Apple Safari
In Apple Safari, you can zoom in by pressing the Cmd key and the plus (+) key. To zoom out, use the Cmd key and the minus (-) key. Alternatively, you can hold down the Cmd key and scroll your mouse wheel to zoom in or out. If you prefer using the menu, click on “View” in the Safari menu bar and select “Make Text Bigger” or “Make Text Smaller” to adjust the zoom level.
Microsoft Edge
In Microsoft Edge, you can zoom in by pressing the Ctrl key and the plus (+) key. To zoom out, use the Ctrl key and the minus (-) key. Alternatively, you can hold down the Ctrl key and scroll your mouse wheel to zoom in or out. If you prefer using the menu, click on the three-dot menu icon in the top-right corner, go to “Zoom,” and select the desired zoom level.
By utilizing the zoom functionality in web browsers, you can easily adjust the display of web page content to suit your preferences. Whether you need to zoom in for better readability or zoom out to fit more content on screen, these browser features make it convenient to customize the appearance of websites and improve your browsing experience.
Resizing Text and Images in Microsoft Office
Microsoft Office applications, such as Word, PowerPoint, and Excel, offer various tools and options to resize text and images to enhance the overall appearance and readability of your documents and presentations. Whether you need to make the text larger for better visibility or adjust the size of images to fit your layout, Office provides flexible resizing capabilities. Here’s how you can resize text and images in Microsoft Office:
Microsoft Word
In Microsoft Word, you can easily resize text by selecting it and adjusting the font size in the formatting toolbar at the top. You can either choose a specific font size from the drop-down menu or use the increase/decrease font size buttons to make incremental changes. Additionally, you can manually resize text boxes by clicking and dragging the handles that appear around the box when selected.
When it comes to images, you can resize them by clicking on the image and dragging the corner handles while holding down the Shift key to maintain the proper proportions. Alternatively, you can use the “Size” options in the “Format” tab. Here, you can specify the exact dimensions or choose a percentage to resize the image proportionally.
Microsoft PowerPoint
In Microsoft PowerPoint, resizing text is similar to Word. You can highlight the desired text, go to the “Home” tab, and adjust the font size using the formatting options in the toolbar. Additionally, you can resize text boxes by clicking and dragging the handles that appear around the box.
To resize images in PowerPoint, click on the image and drag the corner handles while holding down the Shift key to maintain the aspect ratio. Alternatively, you can use the “Size” options in the “Format” tab. Specify the exact dimensions or select a percentage to resize the image proportionally.
Microsoft Excel
In Microsoft Excel, resizing text involves adjusting the cell size. You can resize individual cells or entire rows/columns by clicking and dragging the borders of the cells or rows/columns. To resize images, you can insert an image into a cell and resize the cell to fit the desired image size. Right-click on the cell, go to “Format Cells,” and adjust the cell width and height, as well as the image alignment settings.
By utilizing the resizing options in Microsoft Office, you can easily customize the appearance and layout of your text and images. Whether you’re working on a Word document, PowerPoint presentation, or Excel spreadsheet, these tools allow you to optimize the content size to ensure readability and visual appeal.
Using Screen Magnification Software
For individuals with visual impairments or those who require enhanced screen visibility, screen magnification software can be a valuable tool. Screen magnifiers allow you to enlarge the content on your screen, making it easier to see and read. These software programs provide various customization options to accommodate different needs and preferences. Here’s how you can effectively use screen magnification software:
Choosing a Screen Magnifier
There are several screen magnification software options available, both free and paid. Popular choices include ZoomText, MAGic, and Windows Magnifier (built-in in Windows operating systems), among others. Before selecting a screen magnifier, consider the features, compatibility with your operating system, and user reviews to find one that best suits your needs.
Setting Up the Magnification Software
Once you have chosen a screen magnification software, follow the instructions provided for installation. After installation, you may need to configure the settings, such as magnification level, color schemes, cursor size, and tracking options, to match your preferences. The software typically provides a control panel or settings window where you can customize these options.
Using the Magnification Features
After setting up the screen magnifier software, you can start using its features. Typically, you can activate the magnification by pressing a specific keyboard shortcut or accessing the software interface. Once enabled, the software will display a portion of your screen at a larger scale.
You can usually control the magnification level, either through keyboard shortcuts or using on-screen controls. These controls allow you to zoom in and out, adjust the magnification level, or focus on specific areas of the screen. Experiment with different magnification settings to find the optimal level that provides the best visibility without overwhelming the screen with overly large content.
Exploring Additional Features
Screen magnifiers often offer additional features to further enhance accessibility and customize the viewing experience. These may include color enhancement options, cursor enhancements, text-to-speech capabilities, and more. Take the time to explore these features and utilize them to make your screen easier to see and interact with.
Considerations and Compatibility
It’s important to note that screen magnification software may have certain compatibility requirements and limitations. Ensure that the software is compatible with your operating system and other applications you frequently use. Additionally, keep in mind that while screen magnifiers can be incredibly helpful, they do not replace professional eye care or medical advice. Regular eye exams and consultations with experts are essential for maintaining your visual health.
By using screen magnification software, you can adjust the size of the content on your screen to better suit your visual needs. These tools offer customizable features and options to enhance visibility and improve your overall computing experience.
Connecting an External Monitor
Connecting an external monitor to your laptop can be a great way to expand your screen real estate and improve productivity. Whether you need to view more content simultaneously or want a larger display for better visibility, adding an external monitor can enhance your computing experience. Here’s how you can connect an external monitor to your laptop:
Check the Ports
Firstly, identify the available ports on your laptop and the corresponding ports on the external monitor. Common ports used for external displays include HDMI, VGA, DisplayPort, and USB-C. Ensure that your laptop has a compatible port and that the external monitor has the necessary input port.
Gather the Cables or Adapters
Depending on the ports available on your laptop and the external monitor, you may need specific cables or adapters to establish a connection. For example, if your laptop has an HDMI port and the monitor only supports DisplayPort, you will need an HDMI to DisplayPort adapter or cable. Make sure to have the appropriate cables or adapters ready before proceeding.
Power Off Both Devices
Before making any physical connections, power off both your laptop and the external monitor. This is important to prevent any damage to the devices and ensure a safe connection.
Connect the Cables
Connect one end of the cable or adapter to the appropriate port on your laptop and the other end to the corresponding port on the external monitor. Ensure that the connections are secure and tight to avoid any loose connections or intermittent display issues.
Power On the Devices
Once the cables are securely connected, power on both your laptop and the external monitor. Your laptop should automatically recognize the external display, and the monitor should display the laptop’s screen. If the display does not appear on the external monitor, you may need to adjust the display settings on your laptop to enable the external monitor as the primary display or extend the desktop to the external monitor.
Adjust Display Settings
Once the external monitor is connected and recognized by your laptop, you can adjust the display settings to optimize the viewing experience. Depending on your operating system, you can access the display settings and configure options such as screen resolution, orientation, and extended display settings to arrange and customize how content is shown on the external monitor.
By successfully connecting an external monitor to your laptop, you can expand your screen space and enjoy a larger display for improved productivity and visibility. Experiment with display settings and monitor positioning to find the setup that works best for your needs.
Adjusting Screen Resolution
Screen resolution refers to the number of pixels displayed on your screen, determining the clarity and sharpness of the images and text. Adjusting the screen resolution can help improve screen visibility and readability. Here’s how you can adjust the screen resolution on your laptop:
Windows
To adjust the screen resolution in Windows, right-click on the desktop and select “Display settings” from the context menu. In the display settings window, scroll down to the “Resolution” section. Here, you will find a list of available resolutions for your display. Select a higher resolution to display more content on the screen and improve sharpness, or choose a lower resolution to make content appear larger. After selecting the desired resolution, click “Apply” to make the changes. Keep in mind that choosing a resolution that is too high for your screen’s capabilities may result in elements appearing too small.
macOS
In macOS, click the Apple menu in the top-left corner and select “System Preferences.” Then, choose “Displays.” In the display settings window, you will see a list of resolutions supported by your monitor. Select a higher resolution to increase screen real estate and enhance clarity, or choose a lower resolution if you prefer larger items on the screen. After selecting the desired resolution, close the window, and macOS will automatically apply the changes.
Adjusting Screen Orientation in Windows and macOS
In addition to screen resolution, you may also have the option to adjust the screen orientation. This can be useful if you prefer a portrait mode for reading documents or a landscape mode for multimedia content. In Windows, you can access the display settings and navigate to the “Orientation” drop-down menu to choose the desired orientation. In macOS, you can go to the “Displays” settings and select the “Rotation” drop-down menu to adjust the screen orientation.
Keep in mind that changing the screen resolution and orientation may require you to readjust certain aspects of your display, such as text size, icon spacing, or window sizes. Experiment with different resolutions and orientations to find the optimal setup that improves readability and enhances your overall visual experience.
Changing DPI Scaling
DPI (dots per inch) scaling refers to the adjustment of the display’s pixel density, which affects the size of text, icons, and other graphical elements on your screen. Changing the DPI scaling can be beneficial for users who require larger or smaller elements to improve visibility and readability. Here’s how you can change the DPI scaling on your laptop:
Windows
In Windows, you can adjust the DPI scaling by accessing the display settings. Right-click on the desktop and select “Display settings” from the context menu. In the display settings window, scroll down to the “Scale and layout” section. Here, you will find a slider labeled “Change the size of text, apps, and other items.” Drag the slider to the left to decrease the scale and make items appear smaller, or drag it to the right to increase the scale and make items larger. Windows offers preset scaling options or lets you set a custom scaling percentage for more precise adjustments. After selecting the desired scaling, click “Apply” to save the changes. Note that some applications may require a restart to apply the new scaling settings properly.
macOS
In macOS, you can adjust the DPI scaling through the display settings as well. Click the Apple menu in the top-left corner and select “System Preferences.” Then, choose “Displays.” In the display settings window, you will see the “Scaled” option. Here, you can select different scaling options to adjust the size of text and other elements. macOS provides predefined scaling options, such as Default, More Space, or Larger Text. Select a scaling option that suits your needs, and macOS will automatically adjust the DPI scaling.
Considerations
When changing the DPI scaling, it’s essential to consider the impact on the overall user interface and application compatibility. Increasing the DPI scaling may cause some applications to display incorrectly or have content cutoff on the screen. In such cases, you may need to adjust individual application settings or consider using alternate software that supports high-DPI displays. Additionally, decreasing the DPI scaling significantly may result in certain elements appearing too small and potentially harder to read or interact with.
Experimentation and Optimization
Adjusting the DPI scaling allows you to optimize the display to suit your visual preferences and improve readability. It’s recommended to experiment with different scaling options and observe how they affect the appearance of text and graphics on your screen. Find the right balance of DPI scaling that offers clear, legible content without sacrificing usability or causing compatibility issues with applications.
By fine-tuning the DPI scaling, you can make text, icons, and other graphical elements more comfortable to see and interact with on your laptop’s display, ensuring a visually pleasing and user-friendly experience.
Checking Graphics Card Settings
Graphics card settings play a crucial role in determining the display quality and performance on your laptop. Checking and adjusting these settings can help optimize your screen’s visuals and ensure smooth graphics rendering. Here’s how you can check and modify graphics card settings:
Accessing Graphics Card Settings
The process of accessing graphics card settings may vary depending on the make and model of your graphics card. In Windows, you can often access the graphics card settings through the dedicated control panel provided by the graphics card manufacturer. Common graphics card manufacturers include NVIDIA, AMD, and Intel. Look for their respective control panel applications, such as NVIDIA Control Panel or AMD Radeon Software, in your system tray or search for them in the Start menu.
Adjusting Display Settings
Once you access the graphics card control panel, you can explore various display settings that can enhance your visual experience. These settings often include options for adjusting screen resolution, color calibration, brightness, contrast, and gamma levels. Experiment with different configurations to find the display settings that provide the most accurate and appealing visuals for your specific laptop and personal preferences.
Optimizing Performance Settings
In addition to display settings, graphics card control panels typically offer performance settings that can have an impact on graphics rendering and overall system performance. These settings may include options for antialiasing, anisotropic filtering, and vertical sync. Adjusting these settings can help enhance image quality and reduce visual artifacts or screen tearing. However, keep in mind that increasing certain performance settings may also put more strain on your graphics card, potentially affecting overall system performance and power consumption.
Updating Graphics Card Drivers
Regularly updating your graphics card drivers is essential to ensure optimal performance and compatibility. Graphics card manufacturers release driver updates periodically to address bugs, improve stability, and enhance performance. Visit the manufacturer’s website or use their software to check for driver updates. Download and install the latest drivers for your graphics card to ensure you have access to the most up-to-date features and optimizations.
Considerations and Compatibility
When adjusting graphics card settings, it’s important to consider compatibility with your laptop’s hardware and software. Some settings may not be available or yield significant improvements depending on your graphics card model or the applications you use. It’s always a good idea to research and understand the impact of different settings before making changes. If you are unsure about a specific setting, consult the documentation provided by the graphics card manufacturer or seek assistance from their support forums or customer service.
By checking and optimizing your graphics card settings, you can fine-tune your laptop’s display quality and performance. Experiment with different display and performance settings to find the configuration that provides the best visuals and overall user experience for your specific laptop and usage requirements.
Installing Display Drivers
Display drivers, also known as graphics drivers, are essential software components that enable your laptop’s operating system to communicate with the graphics card and ensure proper display functionality. Regularly updating and installing the latest display drivers can help improve display quality, performance, and compatibility. Here’s how you can install display drivers on your laptop:
Identify Your Graphics Card
The first step in installing display drivers is identifying the graphics card model installed on your laptop. Different laptops come equipped with various graphics card brands, such as NVIDIA, AMD, or Intel. You can easily identify your graphics card model through the device manager in Windows or the system information panel on macOS. Note the exact model number or name of your graphics card for the next steps.
Visit the Manufacturer’s Website
Once you have identified the graphics card model, visit the website of the respective graphics card manufacturer. Common manufacturers include NVIDIA, AMD, and Intel. Navigate to their support or downloads section and locate the drivers for your specific graphics card model. Ensure that you download drivers that are compatible with your operating system (e.g., Windows 10, macOS Catalina, etc.).
Download and Install the Drivers
Download the latest version of the display drivers for your graphics card from the manufacturer’s website. The drivers are usually available in an executable (.exe) or installer file format. Double-click the downloaded file to launch the driver installation wizard. Follow the on-screen instructions to install the drivers. During the installation process, you may be prompted to agree to the terms and conditions and choose specific installation options. It’s advisable to select the recommended installation options for the most stable and compatible setup.
Restart Your Laptop
After the driver installation is complete, it’s essential to restart your laptop to allow the changes to take effect. Restarting ensures that the new drivers are fully integrated with the operating system and the graphics card is properly initialized with the updated settings and features.
Verify the Installation
Once your laptop has restarted, you can verify whether the display drivers were installed successfully. Check the device manager in Windows or the system information panel on macOS to confirm that the graphics card is recognized and functioning correctly. You may also use the graphics card control panel provided by the manufacturer to further customize and adjust display settings.
By regularly updating and installing the latest display drivers, you can ensure optimal display performance, improved compatibility, and access to the latest features provided by the graphics card manufacturer. Keeping your drivers up to date is especially important when encountering display issues or when using graphics-intensive applications.
Using Keyboard Shortcuts for Zooming
Keyboard shortcuts provide a quick and convenient way to zoom in and out on your laptop’s screen without the need to navigate through menus or settings. Whether you want to make text larger for improved readability or need to zoom out to fit more content on the screen, using keyboard shortcuts can save you time and effort. Here’s how you can use keyboard shortcuts for zooming on your laptop:
Windows
In Windows, you can use the following keyboard shortcuts for zooming:
- Windows key + Plus (+): Pressing the Windows key and the plus (+) key simultaneously zooms in to enlarge the screen content.
- Windows key + Minus (-): Pressing the Windows key and the minus (-) key simultaneously zooms out to shrink the screen content.
- Windows key + Esc: Pressing the Windows key and the Esc key simultaneously exits the zoom mode and returns the screen to its normal display.
These keyboard shortcuts work in various applications and on the desktop, providing a quick way to adjust the zoom level without using the mouse or touchpad.
macOS
On macOS, you can use the following keyboard shortcuts for zooming:
- Command (⌘) key + Option (⌥) key + Plus (+): Pressing the Command, Option, and plus (+) keys simultaneously zooms in to enlarge the screen content.
- Command (⌘) key + Option (⌥) key + Minus (-): Pressing the Command, Option, and minus (-) keys simultaneously zooms out to shrink the screen content.
- Command (⌘) key + Option (⌥) key + 8: Pressing the Command, Option, and the number 8 key simultaneously toggles the zoom feature on and off.
These keyboard shortcuts work system-wide in macOS, allowing you to zoom in and out on various applications and the desktop.
Browser-Specific Keyboard Shortcuts
In addition to the system-wide keyboard shortcuts, web browsers often provide their own keyboard shortcuts for zooming in and out. Here are some commonly used browser-specific keyboard shortcuts for zooming:
- Ctrl (or Command on macOS) + Plus (+): Pressing the Ctrl (or Command) key and the plus (+) key simultaneously zooms in.
- Ctrl (or Command on macOS) + Minus (-): Pressing the Ctrl (or Command) key and the minus (-) key simultaneously zooms out.
- Ctrl (or Command on macOS) + 0: Pressing the Ctrl (or Command) key and the number 0 key simultaneously resets the zoom level to its default.
These browser-specific shortcuts are handy when you want to quickly adjust the zoom level for better readability on web pages or to display more content on the screen.
By utilizing keyboard shortcuts for zooming, you can easily adjust the zoom level on your laptop’s screen without the need to navigate through settings or menus. These shortcuts offer a convenient way to enhance readability, view more content, and optimize your browsing and computing experience with just a few key presses.