
Choosing the Right Phone to TV Projection Method
When it comes to projecting your phone's screen onto a TV, there are several methods to consider. Each method offers its own set of advantages and considerations, so it's important to choose the one that best suits your needs. Here are the most common phone to TV projection methods:
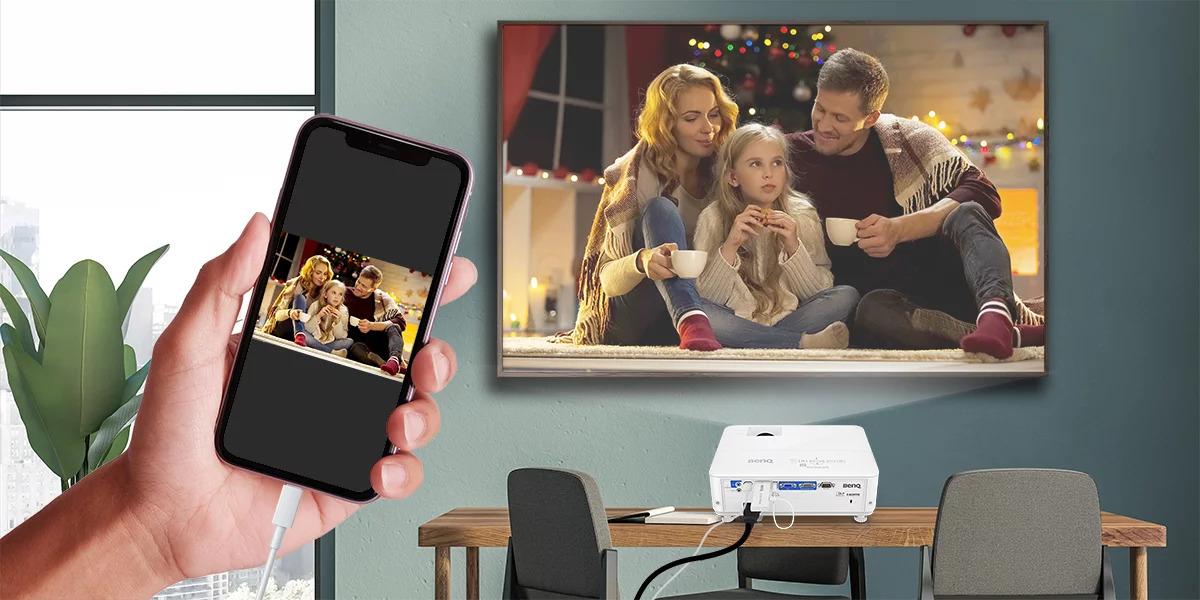
1. Wired Connection
Using a wired connection to project your phone's screen onto the TV is a reliable and straightforward method. This typically involves connecting your phone to the TV using an HDMI cable or an adapter, depending on your phone's port. This method ensures minimal latency and high-quality display, making it ideal for streaming videos, playing games, or giving presentations.
2. Wireless Connection
Wireless projection methods, such as screen mirroring or casting, have gained popularity due to their convenience and flexibility. With options like Miracast, Chromecast, or Apple AirPlay, you can wirelessly mirror your phone's screen onto the TV. This method eliminates the need for cables and allows for seamless integration with various devices, making it suitable for sharing photos, videos, and apps.
3. Smart TV Features
Many modern smart TVs come equipped with built-in features that enable direct screen mirroring from compatible smartphones. This eliminates the need for additional hardware or apps, streamlining the process of projecting your phone's screen onto the TV. If you have a smart TV, exploring its native screen mirroring capabilities can be a convenient and efficient choice.
4. Mobile Apps and Streaming Devices
Certain mobile apps and streaming devices, such as Roku, Amazon Fire Stick, or Apple TV, offer dedicated screen mirroring or casting functionalities. By installing the corresponding app on your phone and connecting to the streaming device, you can effortlessly project your phone's content onto the TV. This method provides additional features and compatibility options, catering to diverse user preferences.
When selecting the right projection method, consider factors such as the compatibility of your phone and TV, the desired level of convenience, the type of content you intend to share, and any specific features or limitations associated with each method. By evaluating these aspects, you can make an informed decision that aligns with your preferences and enhances your overall viewing experience.
Setting Up Your Phone for Projection
Before initiating the process of projecting your phone’s screen onto a TV, it’s essential to ensure that your phone is properly configured for seamless connectivity. Follow these steps to set up your phone for projection:
1. Enable Screen Mirroring or Casting
First, check if your phone supports screen mirroring or casting. This feature may be labeled differently based on the phone’s brand and model, such as “Smart View,” “Cast,” or “Screen Mirroring.” Navigate to your phone’s settings or quick access menu to enable this function.
2. Update System Software
It’s advisable to keep your phone’s operating system and relevant apps up to date to ensure compatibility and optimal performance during projection. Check for any available system updates and install them before proceeding with the projection process.
3. Verify Network Connectivity
For wireless projection methods, such as screen mirroring or casting, ensure that both your phone and the TV are connected to the same Wi-Fi network. A stable and reliable network connection is crucial for seamless projection without interruptions or delays.
4. Adjust Display Settings
Review your phone’s display settings to customize the screen resolution, orientation, and aspect ratio based on your preferences and the TV’s specifications. This step can help optimize the projected content for the best viewing experience on the TV screen.
5. Install Relevant Apps or Firmware
If you plan to use specific mobile apps or streaming devices for projection, ensure that the required apps are installed on your phone, and any necessary firmware updates for the streaming devices are completed. This preparation ensures smooth compatibility and functionality.
By following these steps, you can effectively prepare your phone for projection onto a TV, laying the groundwork for a seamless and enjoyable viewing experience. Proper setup and configuration contribute to the overall success of phone to TV projection, allowing you to effortlessly share content from your phone on a larger screen.
Connecting Your Phone to the TV
Once your phone is prepared for projection, the next step involves establishing a connection between your phone and the TV. Depending on the chosen projection method, the connection process may vary. Here’s a guide to connecting your phone to the TV using different methods:
Wired Connection
If you opt for a wired connection, such as using an HDMI cable or adapter, follow these steps:
- Connect one end of the HDMI cable to the HDMI port on the TV and the other end to the corresponding port on your phone (e.g., USB-C or Lightning port).
- Switch the TV input source to the HDMI port used for the connection.
- Your phone’s screen should now be mirrored on the TV, displaying the same content in real-time.
Wireless Connection
For wireless projection methods, such as screen mirroring or casting, the steps may involve the following:
- Access the screen mirroring or casting function on your phone through the settings or quick access menu.
- Select your TV from the list of available devices to initiate the connection.
- Once connected, your phone’s screen will be mirrored on the TV, allowing you to share content wirelessly.
Smart TV Features
If your TV supports native screen mirroring, the process typically involves these steps:
- Access the screen mirroring or casting feature on your smart TV through the settings or input selection menu.
- On your phone, enable the screen mirroring or casting function and select your TV from the available devices.
- Upon successful connection, your phone’s screen will be projected onto the TV without the need for additional hardware.
Mobile Apps and Streaming Devices
When using dedicated mobile apps or streaming devices for projection, the connection process may include the following steps:
- Ensure that both your phone and the streaming device are connected to the same Wi-Fi network.
- Open the relevant app on your phone and select the option to connect to the streaming device or TV.
- Follow the on-screen prompts to establish the connection and begin projecting your phone’s content onto the TV.
By following these guidelines, you can successfully connect your phone to the TV using the preferred projection method, enabling you to enjoy a larger display for your phone’s content.
Adjusting Settings for the Best Projection
Once your phone is connected to the TV, it’s essential to fine-tune the settings to optimize the projection for the best viewing experience. By adjusting various settings, you can enhance the visual quality and ensure smooth performance during the projection. Here are the key settings to consider:
1. Display Resolution and Orientation
Check the display resolution settings on your phone to align with the TV’s native resolution. Select the appropriate resolution to ensure that the projected content appears crisp and clear on the TV screen. Additionally, adjust the screen orientation to landscape mode for most types of content, providing a widescreen view that maximizes the display area.
2. Audio Output and Volume Control
Determine the audio output settings to ensure that the sound is transmitted to the TV’s speakers or audio system. Verify that the audio is synchronized with the projected video and adjust the volume levels as needed for an immersive audio-visual experience. Consider using external speakers or a soundbar for enhanced audio quality, especially when streaming multimedia content.
3. Screen Mirroring Preferences
If your phone offers screen mirroring preferences, explore additional settings such as picture mode, color temperature, and screen mirroring quality. These settings can fine-tune the visual output, allowing you to adjust color saturation, contrast, and other display parameters to suit your preferences and the characteristics of the TV screen.
4. Gaming and Performance Modes
For gaming enthusiasts, enable gaming or performance modes on your phone to optimize the projection for gaming sessions. These modes can prioritize frame rate, reduce input lag, and enhance visual performance, delivering a smoother and more responsive gaming experience when playing mobile games on the TV.
5. Network and Connectivity Settings
Ensure that your phone’s network and connectivity settings are optimized for stable performance during projection. If using a wireless connection, minimize network congestion and interference by selecting the appropriate Wi-Fi channel and ensuring a strong signal strength to prevent interruptions or latency issues during projection.
By adjusting these settings, you can tailor the projection to suit your preferences and the capabilities of your TV, resulting in an optimized viewing experience that showcases your phone’s content in the best possible light on the larger TV screen.
Troubleshooting Common Issues
While projecting your phone’s screen onto a TV can be a seamless experience, occasional challenges may arise that require troubleshooting to ensure smooth connectivity and optimal performance. Here are some common issues and their troubleshooting steps:
1. Connectivity Problems
If you encounter difficulties establishing a connection between your phone and the TV, try the following troubleshooting steps:
- Verify that both devices are connected to the same Wi-Fi network (for wireless methods) or that the cable connections are secure (for wired methods).
- Restart both the phone and the TV, as well as the Wi-Fi router or modem, to refresh the network connections.
- Ensure that the TV’s firmware and the relevant apps on your phone are updated to the latest versions to address compatibility issues.
2. Audio or Video Lag
If you experience delays or synchronization issues between the audio and video during projection, consider these troubleshooting steps:
- Reduce network congestion and interference by minimizing the number of connected devices on the Wi-Fi network and moving closer to the router for a stronger signal.
- Adjust the display settings on your phone to optimize the resolution and frame rate for smoother projection, especially when streaming high-definition content.
- Check for any background apps or processes on your phone that may be consuming resources and affecting the projection performance, and close or disable them if necessary.
3. Unsupported Content or Apps
If certain content or apps do not display or function as expected during projection, consider the following troubleshooting steps:
- Ensure that the content or app is compatible with the chosen projection method and that any necessary permissions for screen mirroring or casting are granted on your phone.
- Explore alternative apps or platforms that offer native support for projection, such as dedicated streaming apps or media players that seamlessly integrate with the TV.
- Check for any restrictions or settings on the TV that may affect the display of specific types of content, and adjust the TV’s settings accordingly.
By addressing these common issues through effective troubleshooting, you can overcome connectivity challenges and optimize the projection of your phone’s content onto the TV, ensuring a seamless and enjoyable viewing experience.