
Checking Battery Level
Before proceeding with changing the battery on your Apple mouse, it’s essential to verify the current battery level to ensure that a replacement is necessary. The following steps will guide you through the process of checking the battery level on your Apple mouse:
- Access System Preferences: Begin by clicking on the Apple logo in the top-left corner of your screen and selecting “System Preferences” from the dropdown menu. Alternatively, you can access System Preferences from the Dock or the Applications folder.
- Open Bluetooth Preferences: Within the System Preferences window, locate and click on the “Bluetooth” icon. This will open the Bluetooth preferences panel, displaying a list of connected devices.
- Select the Mouse: In the Bluetooth preferences panel, identify your Apple mouse from the list of connected devices and click on it to reveal detailed information about the device, including the current battery level.
- Check Battery Percentage: Once you have selected your Apple mouse, the Bluetooth preferences panel will display the battery percentage, indicating the remaining charge. If the battery level is critically low or if the mouse is not functioning optimally, it may be time to replace the battery.
By following these steps, you can accurately assess the battery level of your Apple mouse and determine whether a battery replacement is necessary. This proactive approach ensures that your mouse remains fully functional, allowing for uninterrupted productivity and seamless navigation on your Mac.
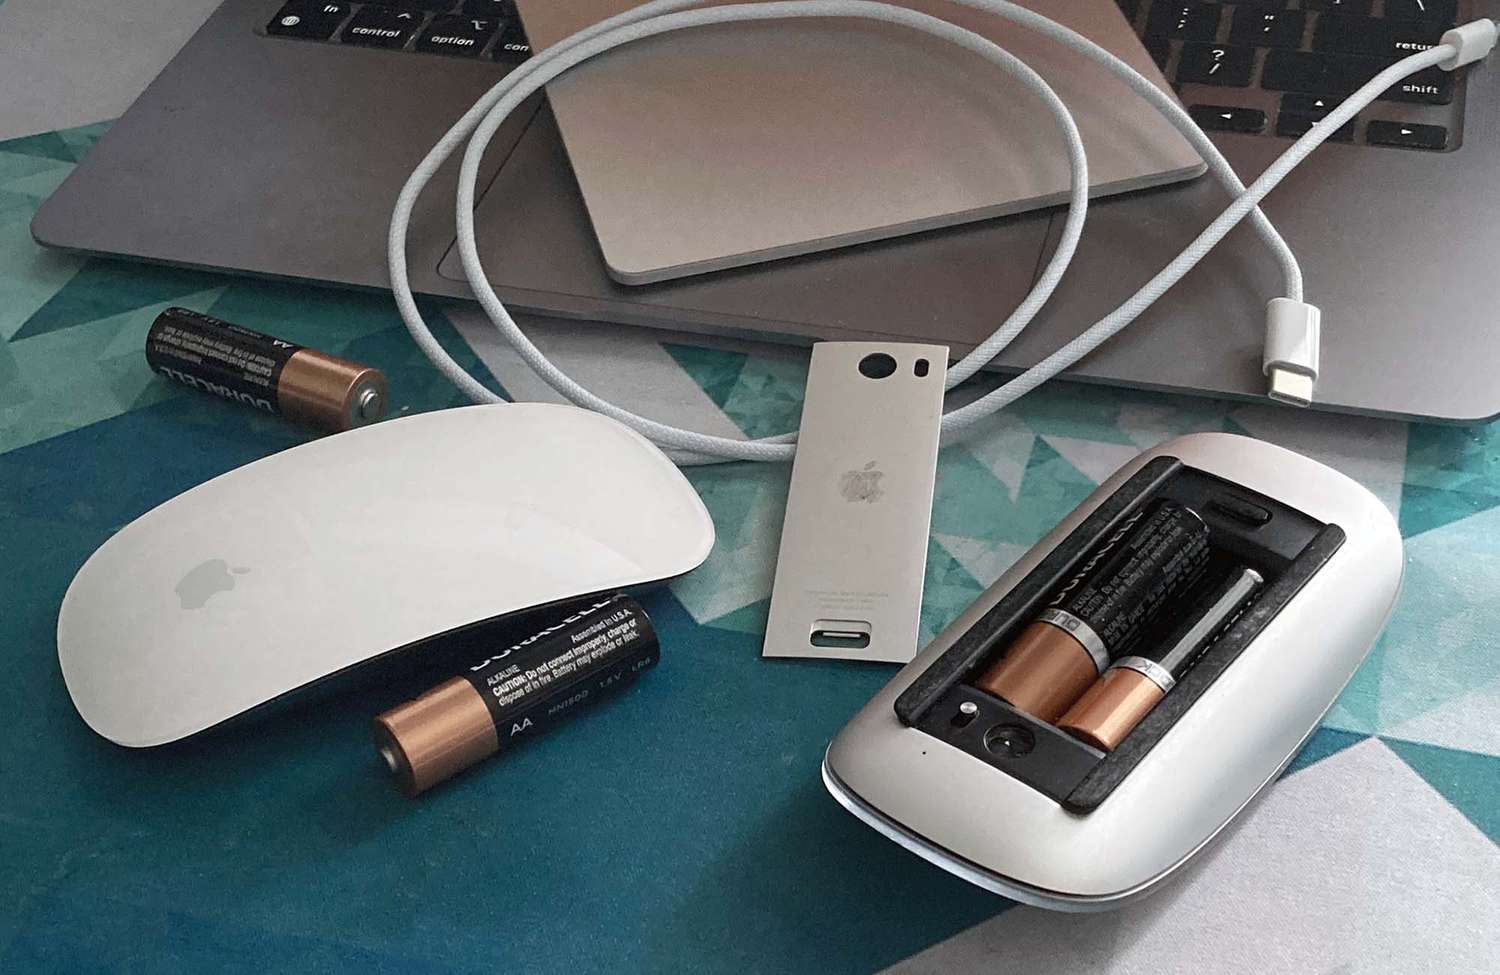
Removing the Old Battery
Once you have confirmed that the battery of your Apple mouse needs replacement, the next step is to remove the old battery. Follow these straightforward instructions to safely remove the old battery from your Apple mouse:
- Turn the Mouse Upside Down: Begin by turning the mouse upside down to access the underside where the battery compartment is located.
- Locate the Battery Compartment: On the underside of the mouse, identify the battery compartment cover. It is usually situated near the front end of the mouse.
- Slide the Cover: Use your fingertip or a small tool to slide the battery compartment cover in the direction indicated by the engraved arrow or other markings. This action will reveal the old battery inside the compartment.
- Remove the Old Battery: Gently tip the mouse to allow the old battery to slide out of the compartment. Be cautious and avoid using excessive force to prevent any damage to the mouse or the battery.
- Dispose of the Old Battery Responsibly: Once the old battery is removed, it is important to dispose of it in an environmentally friendly manner. Consider recycling the old battery at designated collection points to minimize its impact on the environment.
By carefully following these steps, you can safely remove the old battery from your Apple mouse, paving the way for the installation of a new battery. This process ensures that the mouse continues to function optimally, providing you with a seamless and efficient user experience.
Inserting the New Battery
Now that you have successfully removed the old battery from your Apple mouse, it’s time to insert a new battery to restore its functionality. Follow these simple steps to seamlessly install the new battery:
- Choose the Correct Battery: Ensure that you have the appropriate replacement battery for your Apple mouse. Refer to the mouse’s manual or the official Apple website to identify the compatible battery type.
- Position the New Battery: Orient the new battery correctly, aligning it with the markings inside the battery compartment to ensure a proper fit. The positive and negative terminals of the battery should align with the corresponding markings within the compartment.
- Slide the Battery into Place: Gently slide the new battery into the compartment, ensuring that it is inserted in the correct orientation. Apply a slight amount of pressure, if necessary, to secure the battery in its designated position.
- Replace the Battery Compartment Cover: Once the new battery is securely in place, carefully slide the battery compartment cover back into its original position until it clicks or locks into place. This ensures that the battery remains firmly seated within the compartment.
- Verify the Secure Installation: After inserting the new battery and replacing the compartment cover, gently shake the mouse to confirm that the battery is firmly seated and does not rattle within the compartment. This step ensures that the battery is securely installed and ready for use.
By following these steps, you can effortlessly insert a new battery into your Apple mouse, restoring its power source and preparing it for seamless operation. This simple yet crucial process ensures that your mouse remains functional and reliable, allowing you to continue navigating your digital workspace with ease.
Reassembling the Mouse
After successfully inserting the new battery into your Apple mouse, the next step is to reassemble the device to ensure that it is fully operational. Follow these steps to reassemble your mouse with precision and care:
- Secure the Battery Compartment Cover: Ensure that the battery compartment cover is securely in place by sliding it back to its original position until it clicks or locks into place. This step is crucial to prevent the new battery from dislodging during use.
- Inspect the Mouse Exterior: Before proceeding, take a moment to inspect the exterior of the mouse, ensuring that all components, including the battery compartment cover, are properly aligned and secured. This visual check ensures that the mouse is ready for use.
- Position the Mouse Correctly: Place the mouse on a smooth and level surface, ensuring that it is positioned correctly with the battery compartment facing downward. This positioning allows for seamless functionality and comfortable usage.
- Check for Any Loose Parts: Gently shake the mouse and listen for any rattling or loose components. If you detect any unusual sounds, carefully inspect the mouse to identify and address any loose parts that may affect its performance.
- Prepare for Testing: With the battery securely in place and the mouse reassembled, prepare to test the device to ensure that it is functioning optimally. This step marks the final stage of the reassembly process.
By meticulously following these steps, you can effectively reassemble your Apple mouse, ensuring that all components are securely in place and ready for use. This careful reassembly process sets the stage for the final step—testing the mouse to confirm its restored functionality.
Testing the Mouse
After completing the battery replacement and reassembly process for your Apple mouse, it’s essential to conduct a thorough test to ensure that the device is functioning as expected. Follow these steps to effectively test the mouse and confirm its restored functionality:
- Power On the Mouse: Press the power button on the mouse, if applicable, to activate the device. If your Apple mouse does not have a dedicated power button, simply move the mouse to initiate its activation.
- Observe Cursor Movement: Pay close attention to the movement of the cursor on your computer screen as you navigate the mouse on a suitable surface. Verify that the cursor responds accurately to the movements of the mouse, indicating that the device is functioning properly.
- Test Additional Features: If your Apple mouse includes additional features such as touch-sensitive surfaces or customizable buttons, test these functionalities to ensure that they are responsive and fully operational.
- Check Battery Status: Return to the Bluetooth preferences panel on your computer to verify the updated battery status of the mouse. Confirm that the new battery is recognized and that the battery level is displayed accurately.
- Ensure Seamless Connectivity: Pay attention to the connectivity of the mouse with your computer. Verify that the mouse maintains a stable connection without any disruptions or delays in its responsiveness.
By meticulously testing the mouse after the battery replacement and reassembly, you can confirm that the device is fully operational and ready for use. This comprehensive testing process ensures that your Apple mouse delivers consistent performance and reliability, empowering you to navigate your digital environment with ease and precision.