
Understanding Frames in InDesign
In Adobe InDesign, frames play a crucial role in organizing and displaying content. Frames act as containers that hold various elements such as text, images, and shapes. Understanding how to work with frames is essential for creating professional and visually appealing layouts.
Frames in InDesign can be created using different tools, such as the Rectangle Frame Tool, Ellipse Frame Tool, Polygon Frame Tool, Frame Grid Tool, and Text Frame Tool. Each tool has its own unique purpose and functionality, allowing you to create and customize frames according to your specific design requirements.
When creating a frame, it’s important to consider its size, position, and properties. You can adjust the dimensions of a frame by dragging its handles or by entering specific values in the control panel.
Frames can also be filled with content, such as text or images. To add text inside a frame, you can use the Text Frame Tool and simply start typing. For images, you can either place them inside a frame using the Place command or by dragging and dropping them directly onto the frame.
Additionally, frames can be positioned and aligned using InDesign’s layout features. You can align frames relative to other elements on the page or use guides and grids to ensure precise placement.
Frames in InDesign are also flexible, allowing you to adjust their properties and transformation options. You can rotate, scale, skew, and apply various effects to frames to achieve different design effects.
Understanding how frames work in InDesign is crucial for efficient and organized layout design. Mastering the different frame tools and their features will give you greater control over your design elements and enable you to create visually stunning documents.
Using the Rectangle Frame Tool
The Rectangle Frame Tool is a versatile tool in Adobe InDesign that allows you to create rectangular frames for placing images or other content within your layout. By mastering this tool, you can effectively control the placement and layout of your visual elements.
To use the Rectangle Frame Tool, select it from the toolbar or press the F key on your keyboard. Click and drag on the canvas to create a rectangular frame. You can adjust the size and proportions of the frame by dragging its handles or by entering precise dimensions in the control panel.
Once the frame is created, you can easily add content to it. To add an image, simply right-click on the frame and choose “Place” from the context menu. Select the desired image from your files and click “Open.” The image will be automatically loaded into the frame, fitting proportionally or filling it entirely based on the frame’s dimensions.
In addition to images, you can also place other objects within the rectangular frame. This can include text, shapes, or even other frames, allowing you to create complex compositions within a single frame. Simply select the desired tool, such as the Type Tool or the Rectangle Tool, and click inside the frame to add the respective content.
The Rectangle Frame Tool also offers additional customization options. You can apply stroke and fill colors to the frame to enhance its visual appearance. In the control panel, you can adjust the stroke weight, color, and alignment to create different visual effects.
Moreover, you have the ability to transform the frame by rotating, scaling, or skewing it. Simply select the frame and use the transform handles to make adjustments. This flexibility allows you to create dynamic layouts and visually engaging compositions.
The Rectangle Frame Tool is a fundamental tool in InDesign that allows you to create and manage rectangular frames with ease. By understanding its features and functionalities, you can effectively arrange and showcase your content within your layout.
Working with the Ellipse Frame Tool
The Ellipse Frame Tool is a valuable tool in Adobe InDesign that enables you to create circular or elliptical frames for displaying content within your layout. It provides you with the flexibility to incorporate rounded shapes and add visual interest to your designs.
To use the Ellipse Frame Tool, select it from the toolbar or press the F key on your keyboard. Click and drag on the canvas to create an elliptical frame. You can adjust the size and proportions of the frame by dragging its handles or by entering precise dimensions in the control panel.
Once the frame is created, you can easily add content to it. Similar to the Rectangle Frame Tool, you can right-click on the frame and choose “Place” from the context menu to add an image. Alternatively, you can also use other tools, such as the Type Tool or the Shape Tool, to add text or shapes within the frame.
The Ellipse Frame Tool offers various customization options to enhance the appearance of the frame. You can apply stroke and fill colors to the frame, similar to the Rectangle Frame Tool. Adjusting the stroke weight, color, and alignment can help you achieve different visual effects and make your design more impactful.
In addition to basic transformations, such as scaling and rotating, you can also adjust the shape of the ellipse by using the Direct Selection Tool. This allows you to modify the shape of the frame and create unique and dynamic compositions. By manipulating the anchor points and Bezier handles, you can create custom elliptical shapes that fit your design needs.
Furthermore, the Ellipse Frame Tool is not limited to perfect circles or simple ellipses. By holding down the Shift key while dragging, you can create perfect circles. However, by dragging without holding the Shift key, you can create more eccentric and elongated shapes, allowing you to explore different design possibilities.
The Ellipse Frame Tool is a powerful tool in InDesign that grants you the ability to create circular and elliptical frames effortlessly. By utilizing its features effectively, you can incorporate rounded shapes into your layouts and enhance the visual impact of your design.
Exploring the Polygon Frame Tool
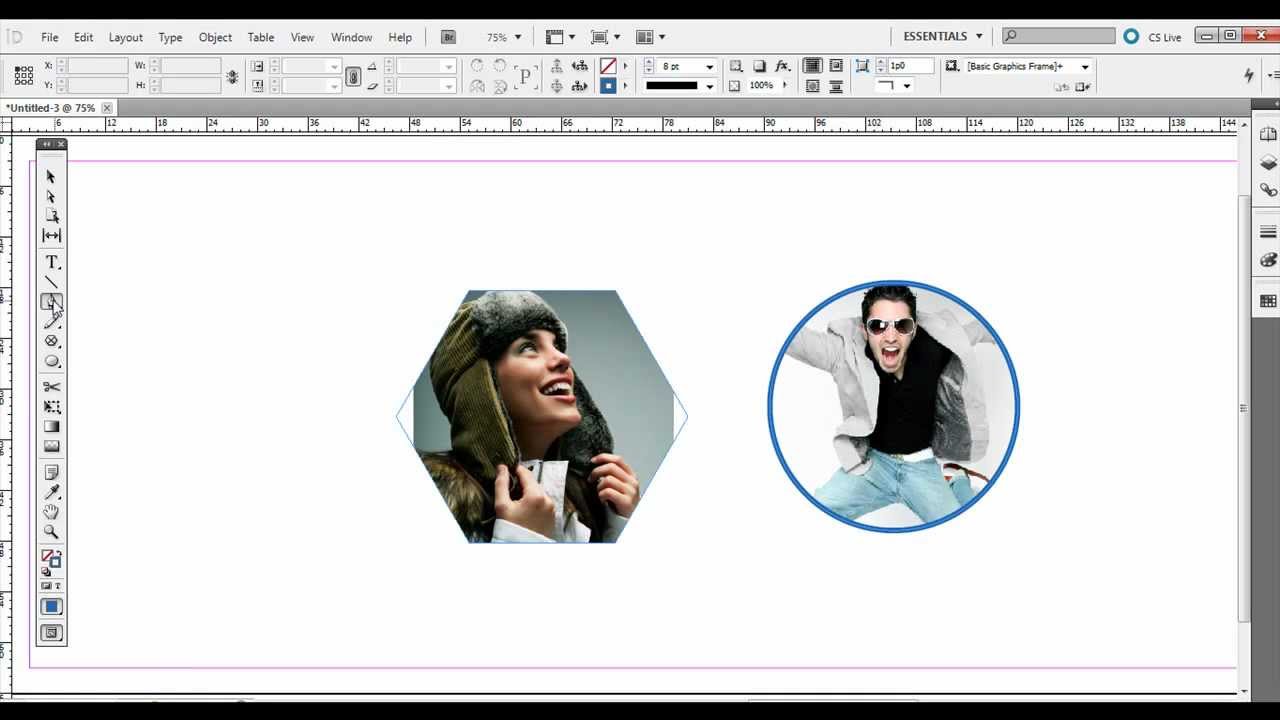
The Polygon Frame Tool is a versatile feature in Adobe InDesign that allows you to create frames of various polygonal shapes, such as triangles, pentagons, hexagons, and more. By utilizing this tool, you can add a unique geometric twist to your designs and create visually captivating compositions.
To access the Polygon Frame Tool, select it from the toolbar or press the F key on your keyboard. Click and drag on the canvas to create a polygonal frame. By default, InDesign creates a hexagonal frame, but you can easily modify the number of sides in the control panel once the frame is created.
The Polygon Frame Tool offers several customization options to tailor the look and feel of the frame. You can change the number of sides by entering a specific value or by using the arrow buttons in the control panel. Additionally, you can adjust the size and proportions of the frame by dragging its handles or by entering precise dimensions.
Just like with the Rectangle and Ellipse Frame Tools, you can add content to the polygonal frame. Right-click on the frame and choose “Place” from the context menu to add an image. Alternatively, you can use other tools, such as the Type Tool or the Shape Tool, to add text or other shapes within the frame.
The Polygon Frame Tool also allows for further customization through stroke and fill options. You can apply stroke color, weight, and alignment to enhance the frame’s appearance. Additionally, you can experiment with different fill colors or patterns to make the frame stand out in your design.
Similar to other frame tools, you can perform transformations on the polygonal frame. You can rotate, scale, or skew it to create unique and dynamic compositions. Utilizing the Direct Selection Tool, you can also modify individual anchor points and Bezier handles to further refine the shape of the polygon.
By exploring the Polygon Frame Tool, you can embrace the world of geometric designs and create visually striking layouts. Its customization options and flexible transformation capabilities provide endless possibilities to bring your creative vision to life.
Creating Frames with the Frame Grid Tool
The Frame Grid Tool in Adobe InDesign is a powerful tool that allows you to quickly and efficiently create multiple frames in a grid-like pattern. It’s a convenient feature for laying out images, text, or any other content that needs to be organized in a structured manner.
To access the Frame Grid Tool, select it from the toolbar or use the Shift + F key combination. Click and drag on the canvas to create the initial frame of the grid. In the control panel, you can specify the number of rows and columns to define the grid’s size and structure.
Once you’ve created the initial frame, InDesign generates additional frames based on the parameters you’ve set. The frames are evenly distributed within the defined grid, making it easy to place and organize content.
You can adjust the size and proportions of the generated frames by dragging their handles or by entering precise dimensions in the control panel. Additionally, you have the option to adjust the gutter, which is the spacing between the frames, to achieve the desired visual balance.
The Frame Grid Tool provides efficient methods for populating the frames with content. You can use the Place command to add images or text to the frames individually, or you can use the Auto-Fit feature to automatically resize and fit content within the frames. This saves time and streamlines the layout process when working with a large number of frames.
Furthermore, the Frame Grid Tool allows for easy adjustments and modifications. You can resize the entire grid by selecting the frame’s handle and dragging it. Additionally, you can customize the appearance of the frames by applying stroke and fill options, just like with other frame tools.
The Frame Grid Tool is a valuable feature in InDesign, especially when designing layouts that require organized and repetitive placement of content. It simplifies the process of creating grids and efficiently populating them with images, text, or other elements, ultimately saving you time and helping you maintain a consistent design structure.
Using the Text Frame Tool
The Text Frame Tool in Adobe InDesign is a fundamental tool for handling text and creating text-based layouts. It allows you to create frames specifically designed for adding and formatting text within your documents.
To access the Text Frame Tool, select it from the toolbar or use the Shift + T key combination. Click and drag on the canvas to create a text frame of the desired size and shape. InDesign automatically flows the text within the frame, ensuring a seamless reading experience.
Once you’ve created a text frame, you can easily add text by clicking inside the frame and typing. The text automatically adjusts to fit within the frame, both vertically and horizontally. If the text overflows, an overflow indicator appears, indicating that additional frames or text adjustments may be necessary.
The Text Frame Tool offers various formatting options to enhance the appearance of your text. You can change the font, size, line spacing, alignment, and other typographic attributes from the control panel or the Character and Paragraph panels. This allows you to design text layouts that match your desired style and aesthetic.
In addition to standalone text frames, InDesign also allows for threaded text frames. This means you can link multiple text frames together, allowing the text to flow from one frame to another. This feature is especially useful for longer articles or multi-page documents.
The Text Frame Tool also provides advanced features, such as the ability to apply and manage text styles. Text styles allow you to create consistent formatting across your entire document, making it easier to maintain a cohesive design.
Moreover, the Text Frame Tool supports text wrap options, enabling you to wrap the text around other objects or shapes within your layout. This capability adds visual interest and helps to create visually pleasing compositions.
By mastering the Text Frame Tool in InDesign, you gain valuable control over text layout and formatting in your designs. Whether it’s for magazine layouts, brochures, or books, utilizing the Text Frame Tool will enable you to create visually appealing and professional-looking text-based layouts.
Getting Started with InDesign Shape Tools
In Adobe InDesign, the Shape Tools are powerful features that allow you to create and manipulate various shapes within your layouts. These tools provide a versatile way to incorporate visually appealing designs and graphic elements into your projects.
To start using the Shape Tools, select the desired tool from the toolbar. InDesign offers several shape options, including rectangles, ellipses, polygons, lines, and custom shapes created with the Pen Tool or Pencil Tool.
Once you’ve selected a Shape Tool, click and drag on the canvas to create the shape. You can adjust the size and proportions of the shape by dragging its handles or by entering precise dimensions in the control panel.
Shapes created with the Rectangle Tool can be customized further by rounding the corners or applying corner effects. This can help give your layouts a more polished and unique look. Similarly, shapes created with the Ellipse Tool can be transformed into perfect circles or modified into elliptical shapes using the Direct Selection Tool.
The Polygon Tool allows you to create polygons with a specific number of sides. By adjusting the number of sides and other properties, you can create triangles, pentagons, hexagons, and more. This gives you the flexibility to incorporate different geometric shapes into your designs.
The Line Tool enables you to draw straight lines of different lengths and thicknesses. You can adjust the stroke weight, color, and style to suit your design needs. Additionally, the Pen Tool and Pencil Tool allow for creating custom shapes that can be further edited and refined using the direct selection and anchor point tools.
Shapes in InDesign can be enhanced with fill and stroke options. You can apply solid colors, gradients, or even place images as the fill of shapes. The stroke options allow you to adjust the weight, color, and style of the shape’s outline, providing further customization possibilities.
Furthermore, InDesign offers a range of tools, such as the Pathfinder Tool and Shape Builder Tool, which allow you to combine, subtract, and modify shapes to create more complex and intricate designs. These tools empower you to unleash your creativity and achieve desired shapes and compositions.
The Shape Tools in InDesign open up a world of possibilities for graphic and layout design. By experimenting with different shapes, styles, and customization options, you can add visual interest and depth to your projects, enhancing their overall impact and professional appearance.
Adding Basic Shapes with the Rectangle Tool
The Rectangle Tool in Adobe InDesign is a versatile feature that allows you to add basic rectangular shapes to your layout designs. Whether you need to create boxes, backgrounds, or placeholders for images and text, the Rectangle Tool provides a simple and efficient way to incorporate shapes into your projects.
To add a basic shape with the Rectangle Tool, select it from the toolbar or press the M key on your keyboard. Click and drag on the canvas to create a rectangular shape. The dimensions of the shape can be adjusted by dragging its handles or by specifying precise values in the control panel.
Once the shape is created, you can easily customize its appearance. In the control panel, you can adjust properties such as stroke color, stroke width, and fill color to enhance the shape’s visual impact. You can choose from solid colors, gradients, or even apply patterns or images as the fill.
The Rectangle Tool also offers options to round the corners of the shape. By adjusting the corner radius in the control panel, you can create shapes with softer edges or create complex rounded shapes that fit your design aesthetics.
Additionally, the Rectangle Tool provides the ability to resize and transform the shape as needed. You can select the shape and use the transform handles to scale or rotate it. This allows you to create dynamic layouts and adjust the positioning of the shapes within your design.
Moreover, InDesign allows you to duplicate and arrange multiple rectangles in your layout. You can copy and paste the shape or use the “Duplicate” command to create multiple instances of the shape with consistent dimensions and styles.
The Rectangle Tool is a fundamental feature in InDesign that provides a straightforward method for adding basic rectangular shapes to your layouts. Whether you need to create boxes, frames, or decorative elements, the Rectangle Tool allows you to incorporate visually appealing shapes that enhance the overall aesthetics of your design.
Creating Circles and Ellipses with the Ellipse Tool
The Ellipse Tool in Adobe InDesign is a powerful feature that allows you to create circles and ellipses effortlessly. Whether you need to design logos, icons, or decorative elements, the Ellipse Tool provides a simple and efficient way to incorporate these shapes into your projects.
To create a circle or ellipse with the Ellipse Tool, select it from the toolbar or press the L key on your keyboard. Click and drag on the canvas while holding the Shift key to create a perfect circle. If you want to create an ellipse with a specific width and height, you can hold the Shift key while dragging to constrain the proportions.
Once the shape is created, you can easily customize its appearance. In the control panel, you can modify the stroke color, stroke width, and fill color to enhance the shape’s visual impact. You can choose from solid colors, gradients, or even apply patterns or images as the fill for more creative designs.
The Ellipse Tool also allows you to adjust the roundness of the shape by modifying its anchor points. You can select the shape and use the direct selection tool to manipulate individual anchor points or adjust the curvature using the control handles. This grants you the flexibility to create unique shapes and achieve specific design effects.
In addition to circles and ellipses, the Ellipse Tool can be used to create arcs and pie shapes. By combining the Ellipse Tool with the Direct Selection Tool, you can manipulate the anchor points and handles to create custom curved shapes that suit your design needs.
Moreover, like other shape tools in InDesign, you can easily resize, rotate, and transform the circle or ellipse as required. This allows you to achieve dynamic layouts and adjust the positioning of the shapes within your design.
The Ellipse Tool in InDesign provides a seamless method for creating circles and ellipses in your projects. Its customization options, combined with the ability to transform and adjust its shape, make it a versatile tool for incorporating these shapes into various design elements.
Drawing Custom Shapes with the Polygon Tool
The Polygon Tool in Adobe InDesign allows you to create custom shapes with multiple sides, such as triangles, pentagons, hexagons, and more. This powerful feature enables you to design unique and intricate shapes that add visual interest and creativity to your projects.
To start drawing custom shapes with the Polygon Tool, select it from the toolbar or press the Y key on your keyboard. Click and drag on the canvas to create an initial polygon shape. By default, InDesign creates a hexagonal shape, but you can adjust the number of sides and modify other properties in the control panel.
When creating a polygon, the number of sides determines the basic shape, ranging from a triangle with three sides to a hexagon with six sides or even more complex shapes. Additionally, you can modify the size and proportions of the shape by dragging its handles or entering precise values in the control panel.
Once the initial polygon shape is created, you can easily customize its appearance. In the control panel, you can adjust properties such as stroke color, stroke width, and fill color to enhance the shape’s visual impact. You have the flexibility to choose from solid colors, gradients, or even place patterns or images as the fill.
The Polygon Tool also allows for further customization by using the direct selection tool. You can select the shape, adjust individual anchor points, and manipulate the control handles to modify the shape of the polygon. This grants you the ability to create unique and intricate shapes that fit your design requirements.
In addition to customization, the Polygon Tool offers flexibility in transforming and arranging the shapes within your layout. You can easily resize, rotate, and align the polygons to achieve dynamic compositions and precise positioning. Combining various polygons allows for the creation of complex geometric patterns and designs.
The Polygon Tool in InDesign provides a versatile approach to drawing custom shapes with multiple sides. By leveraging its customization options, versatility, and transformation capabilities, you can design visually captivating layouts that incorporate unique and eye-catching polygonal shapes.
Working with Lines and Paths
In Adobe InDesign, working with lines and paths allows you to add dynamic elements and create intricate shapes in your designs. Lines can be utilized for separators, borders, or decorative elements, while paths provide a means to create custom shapes and paths for text or objects to follow.
To create a straight line in InDesign, select the Line Tool from the toolbar or press the \ key on your keyboard. Click and drag on the canvas to draw the line. You can customize its appearance by adjusting properties such as stroke color, weight, and style in the control panel. InDesign also offers the option to create dashed or dotted lines for more creative possibilities.
For more complex shapes and paths, the Pen Tool and Pencil Tool are invaluable. The Pen Tool allows you to create smooth and precise paths by placing anchor points and manipulating the control handles. You can adjust the position and curvature of the lines to create custom shapes, such as curves, angles, or intricate illustrations.
The Pencil Tool, on the other hand, is great for freehand drawing. It allows you to create more organic and fluid shapes. You can simply click and drag to draw freeform lines and shapes directly on the canvas. Using the Pencil Tool, you can achieve a more hand-drawn and spontaneous look in your designs.
InDesign also provides the flexibility to edit and refine lines and paths. You can select the Direct Selection Tool to modify individual anchor points or control handles of a path. This allows you to fine-tune the shape and achieve precise adjustments in your design.
Lines and paths in InDesign also support stroke and fill options, similar to other shapes. By applying stroke options, you can control the weight, color, and style of the lines and paths. Additionally, you can use fill options to add color or gradients to closed paths, creating vibrant and visually appealing designs.
Working with lines and paths in InDesign offers vast creative possibilities. Whether you need simple lines for separation or intricate paths for custom shapes, these tools enable you to add depth and complexity to your designs, allowing for more engaging and visually captivating layouts.
Creating and Modifying Shapes with the Pen Tool
The Pen Tool in Adobe InDesign is a powerful feature that allows you to create and modify custom shapes with precision and control. It provides you with the flexibility to design intricate illustrations, logos, or any other complex shapes that your projects require.
To create a shape with the Pen Tool, select it from the toolbar or press the P key on your keyboard. Click on the canvas to create the first anchor point, then click and drag to create additional anchor points, adjusting the direction and curvature of the lines as needed. Once you finish the shape, you can complete it by clicking on the initial anchor point or by pressing the Command/Ctrl key.
The Pen Tool allows you to create both straight lines and curved lines by manipulating the control handles of the anchor points. By adjusting the length and angle of the handles, you can create smooth curves, sharp angles, or complex intersections, giving you full control over the shape’s design.
In addition to creating shapes, the Pen Tool is also used for modifying existing shapes. Using the Direct Selection Tool (A), you can select individual anchor points or segments of a shape and make adjustments, such as moving anchor points, changing curvature, or adding new anchor points. This versatility gives you the freedom to refine and reshape your designs until they meet your exact specifications.
The Pen Tool also offers the ability to create open or closed shapes. By closing a shape, you create a fully enclosed object that can be filled with color or used as a mask. Open shapes, on the other hand, can be used to create paths for text to follow, or as outlines for cutting or cropping images.
The Pen Tool in InDesign provides you with endless possibilities for customizing and creating shapes with precision. By mastering this tool and experimenting with its control handles, you can design intricate illustrations, logos, and unique shapes that add depth and sophistication to your projects.
Using the Pencil Tool for Freehand Drawing and Editing
The Pencil Tool in Adobe InDesign is a valuable feature that allows for freehand drawing and editing within your projects. It offers a more organic and spontaneous way to create illustrations, sketches, or annotate designs directly on the canvas.
To access the Pencil Tool, select it from the toolbar or press the N key on your keyboard. You can simply click and drag on the canvas to start drawing freehand lines or shapes. The Pencil Tool interprets your mouse or stylus movements and converts them into smooth paths.
The Pencil Tool is particularly useful for creating hand-drawn elements or adding a personal touch to your designs. It offers a more natural and fluid feel compared to the precision of other drawing tools, such as the Pen Tool. This makes it a great tool for creating illustrations with a more organic and artistic style.
When using the Pencil Tool, you can adjust the smoothness of the line by changing the Fidelity setting in the control panel. A higher fidelity value generates smoother paths, while a lower value creates more jagged and rough lines. This allows you to have more control over the look and feel of your freehand drawings.
In addition to freehand drawing, the Pencil Tool can also be used for editing existing paths. You can select the tool and click and drag over an existing path to modify and reshape it. This can be useful for refining the shape, adjusting curves, or adding extra details to your designs.
When working with the Pencil Tool, keep in mind that it’s a more freeform and forgiving tool, so the lines and shapes you create may not be as precise as with other drawing tools. However, this is often the desired effect when seeking a more hand-drawn or casual aesthetic.
The Pencil Tool in InDesign adds a personal and artistic touch to your designs. It allows for freehand drawing and editing, giving you the freedom to create unique illustrations or add hand-drawn elements to your projects. By embracing the organic nature of this tool, you can inject personality and creativity into your designs.
Enhancing Shapes with the Anchor Point and Direct Selection Tools
The Anchor Point and Direct Selection Tools in Adobe InDesign are powerful tools that allow you to enhance and refine shapes with precision. By manipulating individual anchor points and control handles, you can fine-tune the shape, adjust curves, and create intricate designs that perfectly match your vision.
The Anchor Point Tool, also known as the Direct Selection Tool, is used to select and manipulate individual anchor points of a shape. By selecting an anchor point with this tool, you can adjust its position, convert it from a smooth to a corner point, or vice versa, and modify its control handles to change the curvature of the adjoining curves.
The Direct Selection Tool provides even more flexibility in shaping your designs. It allows you to select and manipulate not only individual anchor points, but also line segments and whole paths. By selecting a line segment, you can adjust its length or curvature, seamlessly modifying the overall shape and flow of the object.
When using the Anchor Point and Direct Selection Tools, you have full control over the accuracy and precision of your designs. Whether you need to fine-tune the curve of a shape, realign anchor points, or reshape individual segments, these tools enable you to make precise adjustments to achieve your desired result.
By carefully manipulating anchor points and control handles, you can create custom shapes and designs that go beyond the limitations of basic geometric forms. This level of control allows you to add intricate details, refine curves, and create visually captivating illustrations or logos.
Furthermore, the Anchor Point and Direct Selection Tools work seamlessly with other shape-editing and drawing tools in InDesign. You can use them in combination with the Pen Tool or Pencil Tool to refine or modify existing paths, streamline the flow of lines, and achieve the desired level of precision in your designs.
Mastering the Anchor Point and Direct Selection Tools unlocks a world of endless possibilities for customizing and enhancing shapes in InDesign. These tools give you the freedom to create and manipulate designs with unparalleled precision, ensuring that your shapes are perfectly tailored to meet your design goals.
Applying Fill and Stroke to Shapes
Applying fill and stroke options to shapes in Adobe InDesign is a key aspect of enhancing their visual appeal and creating impactful designs. By customizing the fill and stroke properties, you can add depth, contrast, and style to your shapes, ensuring they stand out and make a lasting impression.
To apply a fill or stroke to a shape, start by selecting the desired shape using the Selection Tool in InDesign. Then, navigate to the Swatches panel or the Control panel to access the fill and stroke options.
When it comes to the fill, you have various options to choose from. You can apply a solid color, gradient, or even a pattern to the shape. By experimenting with different fill options, you can achieve different effects and match the overall visual theme of your design. Additionally, you can use images as a fill, allowing you to incorporate textures or photographs into your shapes.
The stroke, on the other hand, refers to the outline or border of the shape. You can choose the stroke color, adjust its weight, and even change the stroke style, such as dashed or dotted lines. Modifying the stroke properties can significantly impact the overall appearance of the shape, accentuating its edges and adding emphasis.
In the Swatches panel, you can access a range of preset colors and gradients, or you can create your own custom swatches to maintain consistency throughout your design. The Control panel also provides quick access to various stroke options, including color, weight, and style.
Furthermore, InDesign allows you to control how the fill and stroke interact with each other. You can choose to have the stroke aligned to the inside, outside, or centered on the shape. This feature is particularly useful when applying strokes to shapes with irregular or complex outlines.
By combining different fill and stroke options, you can create compelling visual effects. For example, contrasting a brightly colored fill with a thick white stroke can make the shape stand out and draw attention. Experimenting with different combinations will help you achieve the desired impact and reinforce the overall design aesthetic.
Applying fill and stroke options to shapes in InDesign helps you add depth, contrast, and personality to your designs. By utilizing the extensive range of customizable settings and experimenting with different combinations, you can create visually striking layouts that leave a lasting impression.
Adjusting Stroke Weight and Alignment
Adjusting stroke weight and alignment in Adobe InDesign is a crucial aspect of refining the appearance of shapes and lines in your design. By fine-tuning these properties, you can control the visual impact, emphasize or de-emphasize certain elements, and achieve the desired balance and style within your composition.
In InDesign, stroke weight refers to the thickness or width of the stroke applied to a shape or line. To adjust the stroke weight, select the desired object using the Selection Tool and navigate to the Stroke panel or the Control panel. Here, you can modify the stroke weight by entering a specific value or using the arrow buttons.
Alterations to the stroke weight directly affect the visual prominence of the shape or line. A heavier stroke weight can make the object more visible and impactful, while a lighter weight can create a subtler and delicate appearance. Experimenting with different stroke weights allows you to find the balance that best complements your design.
In addition to stroke weight, InDesign offers options to adjust the alignment of the stroke. This determines how the stroke is positioned relative to the edge of the shape or line. The three primary alignment options are inside, centered, and outside.
The inside alignment places the stroke within the boundaries of the shape or line, so it does not extend beyond the edges. This alignment is commonly used for creating crisp and clean outlines or borders.
The centered alignment splits the stroke evenly on both sides of the shape or line, resulting in an equal distribution of the stroke on either side. This alignment is often used for decorative elements or to maintain symmetry in the design.
The outside alignment positions the stroke outside the boundaries of the shape or line, so it extends beyond the edges. This alignment is frequently employed to make the shape or line stand out and create a bolder visual impact.
By adjusting stroke weight and alignment, you can fine-tune the appearance and emphasis of shapes and lines within your design. The perfect stroke weight and alignment choice will depend on the overall style, purpose, and context of your composition, so feel free to experiment and iterate until you achieve the desired effect.
In Adobe InDesign, stroke weight and alignment options are powerful tools that allow you to control the visual impact and refine the appearance of shapes and lines. Understanding how to adjust these properties enables you to create compelling designs that effectively communicate your intended message and evoke the desired emotional response.
Using the Pathfinder Tool for Shape Operations
The Pathfinder Tool in Adobe InDesign is a powerful feature that allows you to perform advanced shape operations, such as combining, subtracting, intersecting, and dividing shapes. This tool provides you with the ability to create complex and custom shapes by combining or modifying existing ones.
To access the Pathfinder Tool, select it from the Pathfinder panel or go to Window > Object & Layout > Pathfinder. The Pathfinder panel offers a range of options, including Unite, Minus Back, Intersect, Exclude Overlapping Shape Areas, and Divide.
The Unite option merges multiple selected shapes into a single shape, excluding any overlapping areas. This operation is useful for creating compound shapes or combining separate elements into a cohesive whole.
The Minus Back option subtracts the backmost selected shape(s) from the frontmost shape, merging them into a single shape. This operation is particularly handy for creating cutouts or removing certain areas from shapes.
The Intersect option creates a new shape that retains only the overlapping area between the selected shapes. This operation is beneficial when you want to create complex intersection shapes or precise masks.
The Exclude Overlapping Shape Areas option removes the overlapping areas of the selected shapes, leaving only the non-overlapping parts. This operation is ideal for creating unique and custom shapes by combining elements with intricate paths.
The Divide option divides the selected shapes into separate areas according to their overlapping points. This operation is useful for precise splitting or separating elements in your design.
By using the Pathfinder Tool, you can achieve complex and professional-looking designs without having to manually manipulate individual anchor points or paths. It streamlines the process of creating custom shapes and allows you to experiment with different combinations and arrangements to achieve your desired result.
It’s worth noting that the Pathfinder Tool operates on the selected objects permanently, meaning the original shapes will be modified or replaced. Therefore, it’s recommended to duplicate your shapes or work on a copy before applying the Pathfinder operations, preserving the original shapes for future adjustments.
The Pathfinder Tool in InDesign provides a range of shape operations to help you create intricate designs and custom shapes effortlessly. By combining and modifying existing shapes, you have the flexibility to create visually striking layouts that go beyond the limitations of basic shapes and achieve unique and complex compositions.
Combining and Subtracting Shapes with the Shape Builder Tool
The Shape Builder Tool in Adobe InDesign is a versatile feature that allows you to combine and subtract shapes, providing you with greater control over your design elements. This tool enables you to create complex shapes by merging multiple shapes together or subtracting portions of one shape from another.
To access the Shape Builder Tool, select it from the Tools panel or use the Shift + M key combination. With the tool active, click and drag across the shapes you want to combine or subtract in your layout. The areas that intersect are automatically merged or subtracted based on your actions.
When combining shapes with the Shape Builder Tool, the selected areas are united into a single, cohesive shape. This is particularly useful when you want to create custom composite shapes or merge several elements together, such as combining individual circles to create a larger cohesive shape.
Alternatively, the Shape Builder Tool allows you to subtract one shape from another. By dragging across the areas where the shapes overlap, the overlapping portions are removed, leaving a resulting shape with the subtracted section removed. This is ideal for creating cutouts, creating unique shapes, or carving out specific areas within your design.
The Shape Builder Tool offers flexibility and speed as it enables you to combine and subtract shapes with a simple click and drag motion. It saves you time and effort compared to manually drawing complex paths or using other tools to achieve similar effects.
In addition to combining and subtracting shapes, the Shape Builder Tool also allows you to divide shapes into separate areas. By clicking on specific sections of a shape, you can create divisions and split it into multiple individual shapes. This operation is useful for creating intricate designs and intricate layouts.
When using the Shape Builder Tool, keep in mind that it modifies the original shapes permanently. It’s advisable to work on copies of your shapes or keep backups of the original elements, ensuring you have the ability to make changes or modifications later if needed.
The Shape Builder Tool in InDesign serves as a powerful and intuitive tool for combining and subtracting shapes, providing you with endless possibilities for creating unique and intricate designs. By experimenting with its capabilities, you can take your compositions to the next level and achieve visually stunning results.
Integrating Images and Shapes with InDesign
Integrating images and shapes in Adobe InDesign allows you to create visually appealing layouts that combine graphic elements seamlessly. By strategically placing images within shapes or incorporating shapes around images, you can add depth, context, and visual interest to your designs.
In InDesign, you have several methods to integrate images and shapes. One common approach is to use shapes as containers for images. You can create a shape using tools like the Rectangle Tool, Ellipse Tool, or Polygon Tool, and then place an image within that shape. This technique allows you to control the positioning, size, and scaling of the image while maintaining a cohesive design.
Another method is to incorporate shapes around images. You can add shapes as overlays, borders, or frames around an image to create emphasis or to give it a distinct visual style. Applying stroke and fill options to these shapes enhances their appearance and can help tie them into the overall design theme.
Shapes can also be used to create masks for images in InDesign. By placing an image beneath a shape filled with solid color or a gradient, you can create a masked effect. The shape acts as a frame, allowing only the portion of the image within the boundaries of the shape to be visible.
In addition to static shapes, InDesign also allows you to create interactive or dynamic integration of images and shapes. With interactive features, you can create clickable buttons, rollover effects, or slideshows that incorporate images and shapes, making your designs more engaging and interactive for users.
Furthermore, InDesign offers extensive control over how images and shapes interact with text. You can wrap text around shapes or images, allowing them to flow together harmoniously. This technique is particularly useful when combining images and shapes with text-heavy content, such as magazines or brochures.
When integrating images and shapes, it’s crucial to consider the overall composition and visual harmony of your design. Use contrasting or complementary colors, consider the placement and alignment of the elements, and ensure that the integration enhances the intended message or theme of your project.
Integrating images and shapes in Adobe InDesign opens up endless possibilities for creating visually stunning and engaging layouts. By combining these elements thoughtfully, you can create designs that captivate viewers and effectively communicate your ideas or brand message.