
Check for Software Update
If you want to ensure your HomePod Mini is running smoothly and taking advantage of the latest features and improvements, it’s essential to regularly check for software updates. Apple frequently releases updates that address bugs, enhance functionality, and introduce new capabilities to your smart speaker. Here’s a step-by-step guide on how to check for software updates on your HomePod Mini:
- Make sure your iOS device is connected to the same Wi-Fi network as your HomePod Mini.
- Open the Home app on your iOS device.
- In the Home tab, locate and long-press on your HomePod Mini icon. It should be listed under “Favorite Accessories” or “Recently Added.”
- A pop-up menu will appear with various options. Tap on “Settings.”
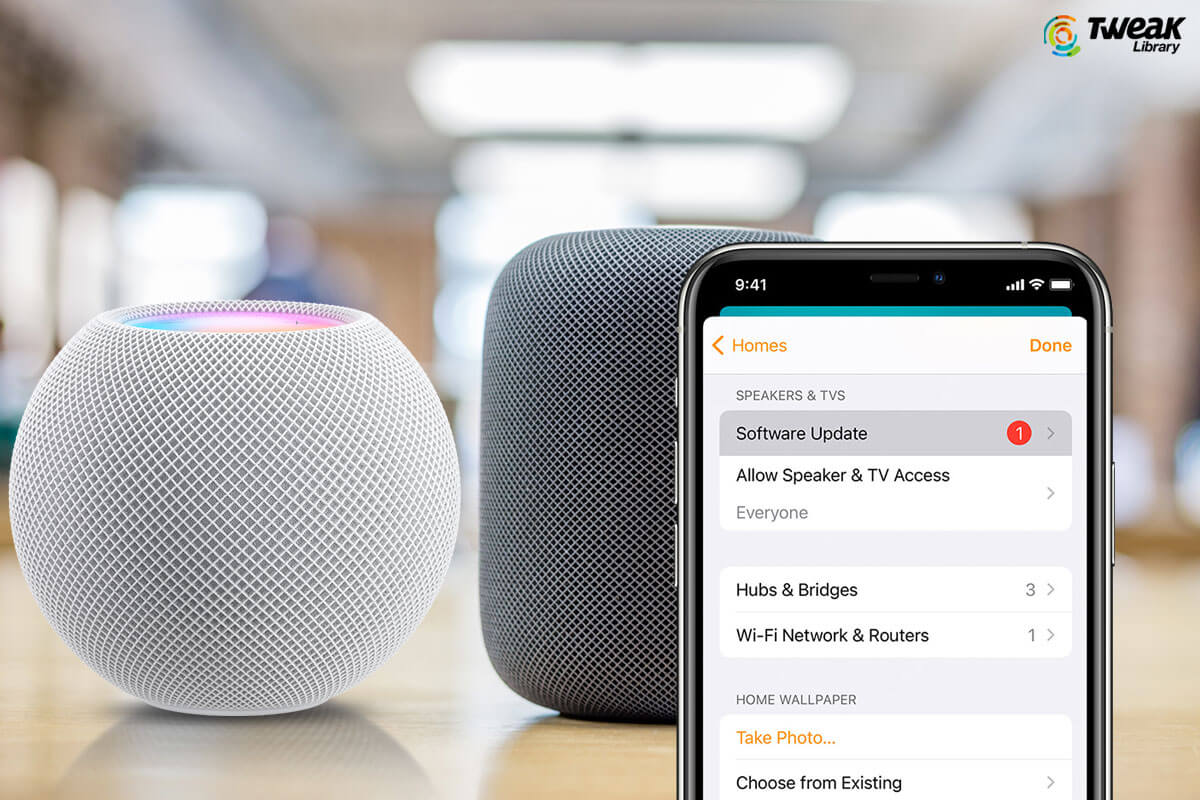
- Scroll down to the “Software Update” section and tap on it.
- If an update is available, you will see the option to “Install” the update. Tap on it to proceed.
- Follow the on-screen instructions to complete the update process. Ensure that your HomePod Mini remains connected to a power source throughout the update.
- Once the update is installed, your HomePod Mini will automatically restart and be ready to use with the latest software version.
It’s worth noting that the HomePod Mini requires an iOS device with the latest software version to perform software updates. Therefore, ensure that your iPhone, iPad, or iPod Touch is also updated to the latest iOS version before attempting to update your HomePod Mini.
By regularly checking for software updates, you can keep your HomePod Mini running smoothly and take advantage of the latest features and enhancements. It’s a simple process that ensures you’re getting the best out of your smart speaker.
Connect HomePod Mini to a Power Source
Before you can start enjoying the functionality and convenience of your HomePod Mini, it’s important to connect it to a power source. Here’s a step-by-step guide on how to properly connect your HomePod Mini:
- Ensure that you have the power cable that came with your HomePod Mini.
- Identify a suitable location for your HomePod Mini near an electrical outlet.
- Insert the power cable into the power port located at the back of the HomePod Mini.
- Plug the other end of the power cable into the electrical outlet.
- Ensure a secure connection by checking that the power cable is firmly inserted into both the HomePod Mini and the electrical outlet.
- Once connected, the HomePod Mini will automatically power on and emit a chime to indicate it’s ready for setup.
It’s important to use the power cable provided by Apple for your HomePod Mini to ensure compatibility and proper functioning. Using third-party cables may cause compatibility issues or even damage your device.
Additionally, make sure to place your HomePod Mini on a stable surface to prevent it from falling or being knocked over. Avoid placing it near liquids or in direct sunlight to protect it from potential damage.
By following these simple steps, you’ll have your HomePod Mini connected to a power source and ready to integrate seamlessly into your smart home setup.
Update HomePod Mini Using the Home App
The Home app is your gateway to managing and updating your HomePod Mini. Apple regularly releases software updates that bring new features, improve performance, and enhance the overall user experience of your smart speaker. Updating your HomePod Mini is a straightforward process using the Home app. Here’s how:
- Open the Home app on your iOS device.
- In the Home tab, locate and tap on the HomePod Mini icon that you want to update. It should be listed under “Favorite Accessories” or “Recently Added.”
- Once you open the settings for your HomePod Mini, scroll down and tap on the “Software Update” option.
- If a software update is available for your HomePod Mini, you will see the option to “Install” the update. Tap on it.
- Follow the on-screen instructions and ensure that your HomePod Mini remains connected to a power source throughout the update process.
- When the update is successfully installed, your HomePod Mini will automatically restart and be ready to use with the latest software version.
It’s important to note that the update process may take some time, so be patient and ensure that your iOS device remains connected to the same Wi-Fi network as your HomePod Mini during the update. Also, make sure that your iOS device is running on the latest software version to ensure compatibility.
By regularly updating your HomePod Mini using the Home app, you’ll be able to enjoy the latest features, improvements, and bug fixes that Apple releases, ensuring that your smart speaker is always up to date.
Automatic Updates with HomePod Mini
Apple understands the importance of keeping your HomePod Mini up to date with the latest software. To make the updating process more seamless and convenient, Apple introduced automatic software updates for HomePod Mini. With this feature enabled, your smart speaker will automatically download and install software updates in the background. Here’s how to enable automatic updates for your HomePod Mini:
- Open the Home app on your iOS device.
- In the Home tab, locate and long-press on your HomePod Mini icon. It should be listed under “Favorite Accessories” or “Recently Added.”
- A pop-up menu will appear with various options. Tap on “Settings.”
- Scroll down to the “Software Update” section and ensure that the “Install Updates Automatically” toggle is enabled.
By enabling automatic updates, your HomePod Mini will regularly check for new software updates and download them in the background. Once downloaded, the update will be automatically installed, ensuring that your device stays up to date without any extra effort required from you.
It’s important to note that the automatic update process may take some time, depending on the size of the update and your internet connection speed. During the update, ensure that your HomePod Mini remains connected to a power source to prevent any interruption.
By utilizing the automatic updates feature, you can have peace of mind, knowing that your HomePod Mini will always be running on the latest software version, with all the benefits of bug fixes, performance improvements, and new features.
Reset HomePod Mini to Update
If you’re experiencing issues with updating your HomePod Mini or if the update fails to install, you may need to consider resetting your device. Resetting your HomePod Mini can help resolve software-related issues and provide a fresh start for the update process. Here’s how to reset your HomePod Mini:
- Unplug your HomePod Mini from the power source and wait for at least 10 seconds.
- Plug the power cable back into the HomePod Mini.
- Wait for the white light on the top of the device to start flashing.
- Once the light turns red and you hear a chime, hold your finger on the top of the HomePod Mini.
- Keep your finger pressed on the top of the device until you hear a second chime, which indicates that the reset process has begun.
- Release your finger and wait for the HomePod Mini to reset.
- The reset process may take a couple of minutes. Once the HomePod Mini has been reset, it will emit a chime and the white light will turn on again.
- Set up your HomePod Mini again using the Home app on your iOS device and follow the on-screen instructions.
Resetting your HomePod Mini erases all your settings and personal data associated with the device, so it’s important to back up any important data before proceeding.
After resetting your HomePod Mini, you should be able to attempt the software update again. Ensure that your iOS device is running on the latest software version and connected to the same Wi-Fi network as your HomePod Mini.
If you continue to experience issues with updating your HomePod Mini after resetting, it’s recommended to contact Apple Support for further assistance.
Check Software Version of HomePod Mini
Keeping track of the software version installed on your HomePod Mini is essential to ensure that you have the latest features, bug fixes, and security patches. Checking the software version is a straightforward process and can be done through the Home app on your iOS device. Here’s how:
- Open the Home app on your iOS device.
- In the Home tab, locate and tap on the HomePod Mini icon that you want to check the software version for. It should be listed under “Favorite Accessories” or “Recently Added.”
- Once you open the settings for your HomePod Mini, scroll down and tap on the “Software Update” option.
- On the software update screen, you’ll find the current software version listed under the “Software Version” section.
The software version generally follows a numerical format, such as 14.5 or 15.1, indicating the major and minor updates that have been released for your HomePod Mini.
If your HomePod Mini is running on the latest software version available, you’ll see a message stating that your software is up to date. However, if there is a newer version available, you’ll have the option to install the update to ensure you have the latest features and improvements.
It’s important to note that it may take some time for your HomePod Mini to receive the latest software update after it has been released by Apple. Software updates are typically rolled out gradually, so don’t be alarmed if you don’t see the update immediately. Keep checking periodically to ensure you’re aware of any available updates for your HomePod Mini.
By regularly checking the software version of your HomePod Mini, you can stay up to date with the latest software releases and ensure a smooth and secure user experience.
Troubleshoot Update Issues
While updating your HomePod Mini is typically a smooth process, you may encounter certain issues that prevent the successful installation of updates. If you’re experiencing problems with updating your device, here are some troubleshooting steps you can take:
- Check your internet connection: Ensure that your HomePod Mini and the device you’re using to control it are connected to a stable Wi-Fi network. A weak or unstable internet connection may hinder the update process.
- Restart your HomePod Mini: Try unplugging your HomePod Mini from the power source, waiting for 10 seconds, and then plugging it back in. This simple restart can help resolve minor software glitches that may be causing issues with the update.
- Update your iOS device: Ensure that your iPhone, iPad, or iPod Touch is running on the latest version of iOS. Sometimes, compatibility issues between your iOS device and the HomePod Mini can affect the update process.
- Check for Apple server status: Occasionally, Apple’s servers may experience temporary outages or issues, which can affect the update process. Check Apple’s System Status page or their official support channels to see if there are any reported issues that could be impacting your HomePod Mini update.
- Reset network settings: If you’re still encountering difficulties, resetting the network settings on your iOS device might help. Keep in mind that this action will remove saved Wi-Fi passwords and other network-related settings, so make sure you have the necessary information to reconnect to your Wi-Fi network.
- Contact Apple Support: If none of the above steps resolve your update issues, it’s advisable to reach out to Apple Support for further assistance. They have dedicated support channels to help you troubleshoot and resolve any software-related issues with your HomePod Mini.
Keep in mind that updating your HomePod Mini is important for security, bug fixes, and accessing the latest features. Therefore, it’s worth investing some time to troubleshoot any issues and ensure your device is up to date.
By following these troubleshooting steps, you can increase the chances of resolving update issues and ensure that your HomePod Mini stays updated with the latest software for an optimal user experience.