
What is Apple Intercom?
Apple Intercom is a new feature introduced by Apple that allows seamless communication between Apple devices within the same ecosystem. It enables you to send and receive audio messages, announcements, and voice memos, making it easier to stay connected with your family members or colleagues at home or in the office.
With Apple Intercom, you can send messages to specific individuals or broadcast them to multiple devices simultaneously. This feature is especially useful in households or workplaces where multiple Apple devices are being used.
Apple Intercom is compatible with a range of devices, including iPhone, iPad, Apple Watch, and MacBook. It works through the built-in messaging app or smart home devices like HomePod and HomePod mini.
What sets Apple Intercom apart is its ability to integrate with Siri, Apple’s virtual assistant. This means that you can use voice commands to initiate Intercom messages. Simply say, “Hey Siri, Intercom” followed by your message, and it will be delivered to the designated devices instantaneously.
Additionally, Apple Intercom is designed to respect your privacy and offers advanced settings to customize your notifications. You can choose to receive notifications silently or have them announced aloud, depending on your preferences or the urgency of the message.
Whether you need to remind your family to gather for dinner or notify your colleagues about an impromptu meeting, Apple Intercom simplifies the process and creates a truly connected environment across your Apple devices.
Why use Apple Intercom?
Apple Intercom offers a range of benefits that make it a valuable tool for communication within the Apple ecosystem. Here are some reasons why you should consider using Apple Intercom:
- Effortless communication: Apple Intercom provides an easy and convenient way to communicate with family members or colleagues. With just a few taps or voice commands, you can send messages across multiple Apple devices, ensuring everyone stays in the loop.
- Seamless integration: Since Apple Intercom is built into various Apple devices, it seamlessly integrates with your existing ecosystem. You can use it on your iPhone, iPad, Apple Watch, or even your MacBook, allowing you to stay connected no matter which device you are using.
- Instant notifications: With Apple Intercom, you can send time-sensitive messages and announcements that are instantly delivered to the recipients. This is particularly useful for urgent matters or when you need to coordinate activities with others quickly.
- Hands-free communication: The integration with Siri enables hands-free communication with Apple Intercom. By simply using voice commands, you can send messages without having to type or navigate through your devices, making it convenient when your hands are occupied or you’re on the go.
- Customizable settings: Apple Intercom offers customizable settings to suit your preferences. You can choose to receive notifications silently or have them announced aloud, ensuring that you’re alerted in a way that best fits your needs.
Whether you want to inform your family about dinner plans, coordinate with your team at work, or simply stay connected with loved ones, Apple Intercom simplifies communication and enhances the overall user experience within the Apple ecosystem. Its seamless integration and user-friendly features make it a valuable tool for efficient and effective communication.
How to set up Apple Intercom?
Setting up Apple Intercom is relatively simple and can be done in just a few steps. Here’s a guide on how to set up Apple Intercom:
- Ensure that all your devices are updated to the latest version of iOS, macOS, or watchOS that supports Apple Intercom.
- Make sure that all your Apple devices are connected to the same iCloud account and are on the same Wi-Fi network.
- On your device, go to the Settings app and tap on your Apple ID at the top. Then, select “Family Sharing.”
- Tap on “Add Family Member” and follow the on-screen instructions to add the members with whom you want to communicate using Apple Intercom.
- Once the members have been added, go to the Home app on your iPhone or iPad.
- If you haven’t set up your home in the Home app, follow the prompts to set it up. Otherwise, skip this step.
- Tap on the “+” button to add an accessory and select your HomePod or HomePod mini.
- Follow the on-screen instructions to set up your HomePod or HomePod mini and assign it to a room in your home.
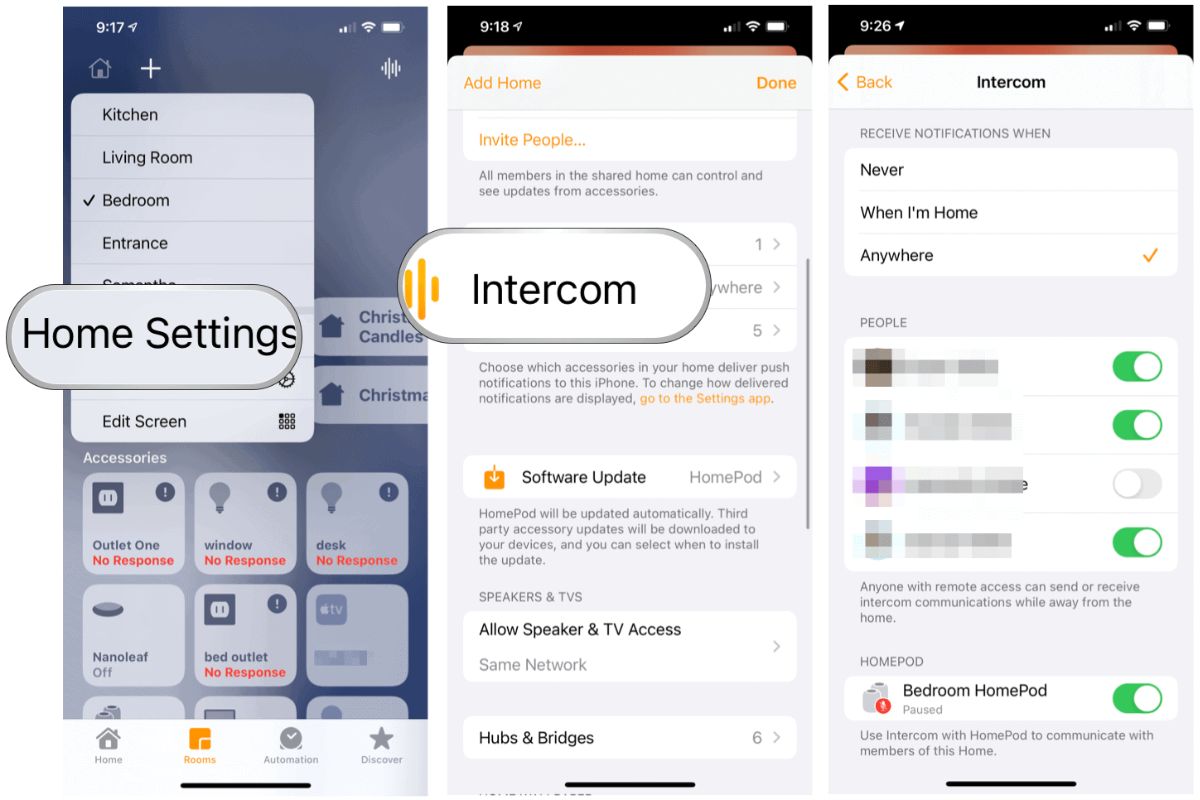
- After setting up the HomePod or HomePod mini, go to the Intercom section in the Home app.
- Toggle on the switch to enable Intercom, and select the devices that you want to receive messages on.
- Repeat the process on each of your Apple devices, including your iPhone, iPad, Apple Watch, and MacBook, to enable Intercom on all your devices.
Once you have completed these steps, you will be ready to use Apple Intercom for seamless communication across your Apple devices. Remember to grant the necessary permissions for the Home app and Intercom feature to function properly.
Note that the setup process may vary slightly depending on the software version and device you are using. It is always recommended to refer to Apple’s official documentation or support resources for detailed instructions specific to your device.
Using Apple Intercom on your iPhone
Once you have set up Apple Intercom, you can use it on your iPhone to send and receive messages with ease. Here’s how to use Apple Intercom on your iPhone:
- Unlock your iPhone and go to the Home screen.
- Open the Messages app, or you can also use Siri by saying, “Hey Siri, send an Intercom message.”
- Tap on the new message icon (the pencil and paper icon) to start a new message.
- At the top of the “To” field, you will see an Intercom button (a microphone icon). Tap on it.
- Select the room or specific individuals from the list that you want to send the Intercom message to.
- Compose your message by either typing it or using the microphone icon to dictate your message.
- Once you have composed your message, tap on the send button to deliver the Intercom message.
Your message will now be broadcasted to the selected devices or individuals. If you have set up HomePod or HomePod mini in your home, the message will be announced on those devices as well.
You can also receive Intercom messages on your iPhone. When an Intercom message is received, it will appear as a notification that you can tap on to listen to the message or reply if needed.
It’s worth noting that you can also initiate an Intercom message using Siri. Simply activate Siri by saying, “Hey Siri, send an Intercom message,” followed by your message content.
With Apple Intercom on your iPhone, you can easily communicate with other members in your household or colleagues, ensuring everyone stays informed and connected.
Using Apple Intercom on your iPad
If you have an iPad, you can utilize Apple Intercom to communicate seamlessly with other Apple devices. Here’s how to use Apple Intercom on your iPad:
- Unlock your iPad and navigate to the Home screen.
- Open the Messages app, or you can activate Siri and say, “Hey Siri, send an Intercom message.”
- Tap on the new message icon (the pencil and paper icon) to compose a new message.
- In the “To” field, you will find an Intercom button (a microphone icon). Click on it.
- Select the room or individuals you wish to send the Intercom message to from the provided list.
- Now you can type your message or use the microphone icon to dictate your message.
- After composing your message, tap the send button to deliver the Intercom message.
Your Intercom message will be transmitted to the chosen devices or recipients. If you have set up HomePod or HomePod mini, these devices will also announce the message within your household.
If you receive an Intercom message on your iPad, it will appear as a notification that you can tap on to listen to the message or respond if necessary.
Using Siri is another option to send Intercom messages on your iPad. Trigger Siri by saying, “Hey Siri, send an Intercom message,” followed by the content of your message.
Apple Intercom on your iPad enables effortless communication with family members or colleagues, ensuring everyone is informed and connected across different Apple devices.
Using Apple Intercom on your Apple Watch
With Apple Intercom, you can communicate easily using your Apple Watch. Here’s how to use Apple Intercom on your Apple Watch:
- Activate your Apple Watch by raising your wrist or tapping on the screen.
- Tap on the Digital Crown to go to the Home screen, and then tap on the Messages app icon.
- Once inside the Messages app, tap on the new message icon (the square icon with a pencil).
- Scroll down and tap on the Intercom button (the microphone icon) located at the top.
- Choose the room or individuals from the list to whom you want to send the Intercom message.
- Compose your message by either dictating through the microphone icon or using the Scribble feature to write the message on the screen.
- When you’re done composing, tap on the send button to transmit the Intercom message.
Your Intercom message will now be sent out to the selected devices or individuals. If you have HomePod or HomePod mini set up, those devices will also deliver the message audibly within your household.
On your Apple Watch, you can receive Intercom messages as notifications. You can tap on the notification to listen to the message or reply if necessary.
In addition to using the Messages app, you can also employ the power of Siri to send an Intercom message on your Apple Watch. Just raise your wrist and say, “Hey Siri, send an Intercom message,” followed by the content of your message.
By utilizing Apple Intercom on your Apple Watch, you can effortlessly communicate with other members of your household or team, ensuring effective and efficient communication across all your Apple devices.
Using Apple Intercom on your MacBook
If you own a MacBook, you can leverage Apple Intercom to communicate seamlessly with other Apple devices. Here’s how to use Apple Intercom on your MacBook:
- Open the Messages app on your MacBook. If you can’t find it, use Spotlight (Command + Space) to search for it.
- Click on the new message icon (the square icon with a pencil) to start a new message.
- In the “To” field, you will see an Intercom button (a microphone icon) next to it. Click on it.
- Select the room or individuals you wish to send the Intercom message to from the provided list.
- Type your message in the text field or use the microphone icon to dictate your message.
- Once you have composed your message, press the Return key or click on the send button to deliver the Intercom message.
Your Intercom message will be sent to the selected devices or recipients. If you have HomePod or HomePod mini set up, those devices will also announce the message in your household.
On your MacBook, if you receive an Intercom message, it will appear as a notification. You can click on the notification to listen to the message or respond if needed.
Using Siri is another option to send Intercom messages on your MacBook. Click on the Siri icon in the menu bar or use the keyboard shortcut (Command + Space) to activate Siri. Then, say “Send an Intercom message” followed by the content of your message.
With Apple Intercom on your MacBook, you can communicate effortlessly with family members or colleagues, ensuring everyone is connected and informed across various Apple devices.
Tips and tricks for using Apple Intercom
To make the most out of Apple Intercom and enhance your communication experience, consider these helpful tips and tricks:
- Create custom room names: Instead of using default room names, customize them to match the specific locations in your home or office. This will make it easier to select the right recipients when sending an Intercom message.
- Use individual messaging: While Intercom is great for broadcasting messages, you can also use it for individual messaging. Instead of selecting a room, choose individual devices or contacts when composing your message.
- Utilize Siri shortcuts: Take advantage of Siri shortcuts to create personalized commands for frequently used Intercom messages. For example, set up a shortcut like “I’m home” to quickly notify your family members.
- Send urgent or priority messages: When composing an Intercom message, emphasize its urgency or priority in the content. This will prompt recipients to pay attention to the message and respond promptly.
- Include relevant details: When sending Intercom messages, include key details like time, location, or any specific instructions to provide context and avoid confusion.
- Assign HomePods to different rooms: If you have multiple HomePods in different rooms, be sure to assign them to their respective rooms in the Home app. This ensures accurate delivery of Intercom messages to the intended location.
- Set notification preferences: Customize your notification preferences for Intercom messages to suit your needs. You can choose to receive notifications silently or have them announced aloud depending on your preference and the importance of the message.
- Reply hands-free: When receiving an Intercom message, utilize Siri to reply hands-free. Simply activate Siri and say “Reply” followed by your response to send a message without using your hands.
- Check device compatibility: While Apple Intercom is compatible with several Apple devices, double-check device compatibility to ensure that all your devices are up-to-date and support the Intercom feature.
By implementing these tips and tricks, you can optimize your usage of Apple Intercom and make communication more efficient and enjoyable within your Apple ecosystem.