
What is the Ledger Nano S?
The Ledger Nano S is a hardware wallet designed to securely store cryptocurrencies. It is a compact and portable device that offers offline storage for your digital assets, providing an additional layer of security compared to online wallets or software wallets. As a hardware wallet, the Ledger Nano S ensures that your private keys are stored offline, making it less susceptible to hacking or malware attacks.
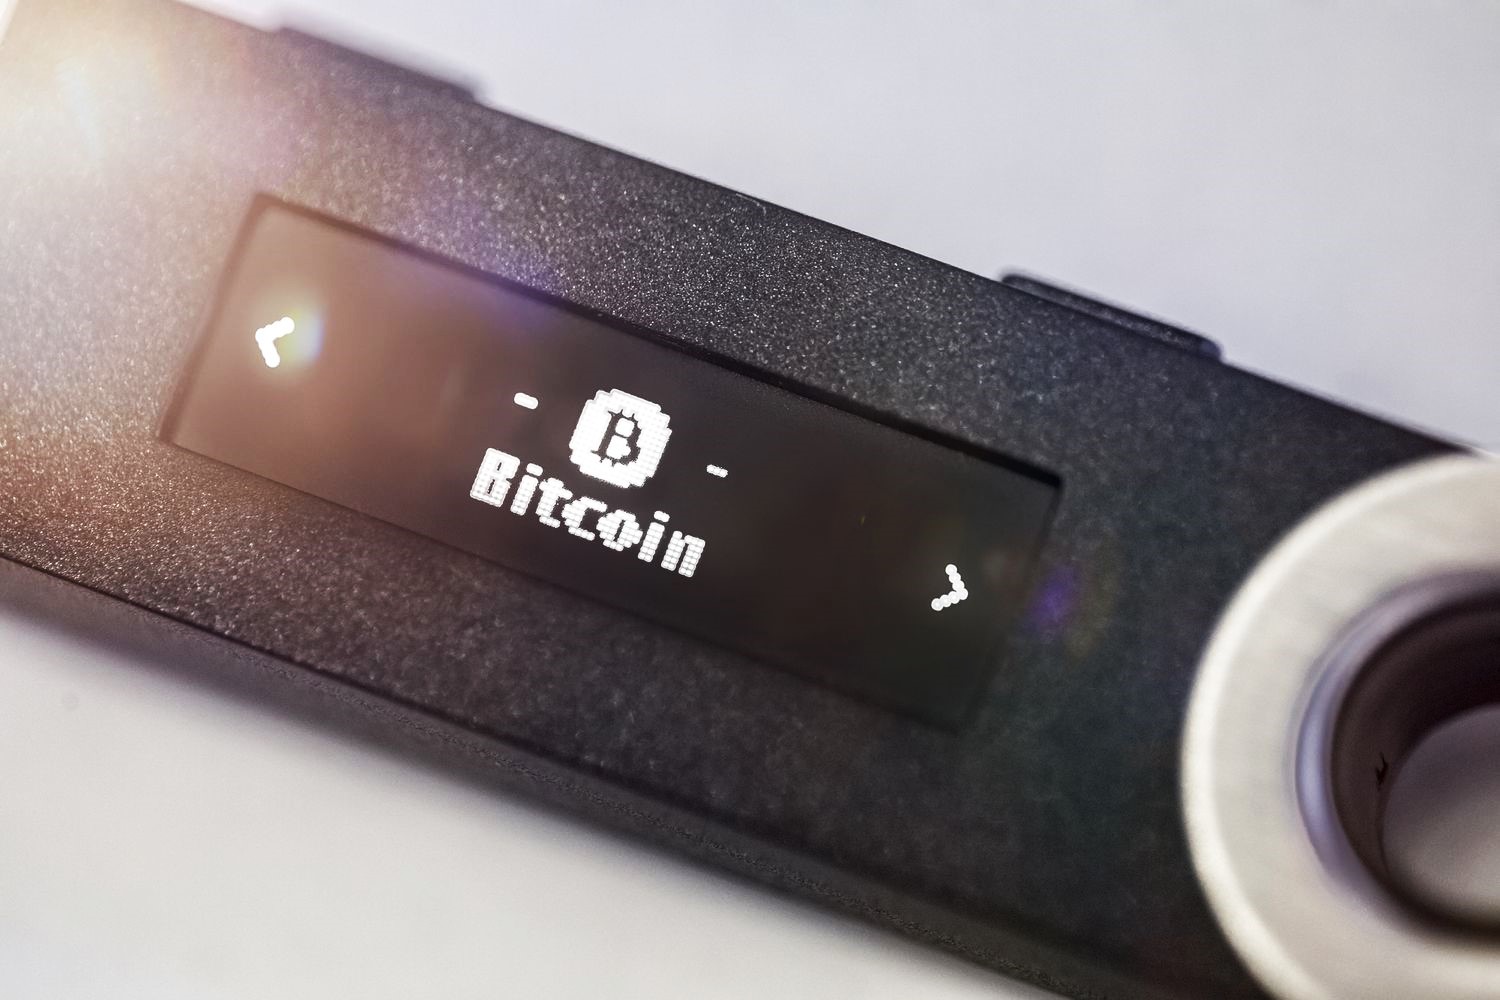
The Ledger Nano S features a built-in screen and physical buttons, allowing you to easily navigate and confirm transactions directly on the device. It supports a wide range of cryptocurrencies, including Bitcoin, Ethereum, Ripple, and many more, making it a versatile solution for cryptocurrency enthusiasts.
One of the key features of the Ledger Nano S is its secure element chip, which is designed to protect your private keys and sensitive information. This chip is tamper-resistant and provides a secure environment for cryptographic operations, ensuring that your transactions remain safe and private.
Additionally, the Ledger Nano S utilizes a hierarchical deterministic (HD) wallet structure, which means that you can generate an unlimited number of unique addresses from a single seed phrase. This allows for easy management of multiple cryptocurrencies without the need for multiple wallets.
Overall, the Ledger Nano S offers a secure and user-friendly solution for storing your cryptocurrencies. Whether you are a long-term investor or an active trader, having a hardware wallet like the Ledger Nano S gives you peace of mind knowing that your digital assets are protected from online threats.
Why Use a Hardware Wallet?
In the world of cryptocurrencies, security is paramount. As the popularity of digital assets continues to grow, so does the need for reliable and secure storage solutions. This is where hardware wallets, like the Ledger Nano S, come into play. Here are several reasons why using a hardware wallet is a wise decision:
- Enhanced Security: Hardware wallets provide an extra layer of security by keeping your private keys offline. By storing your keys on a separate device that is not connected to the internet, you significantly reduce the risk of being hacked or having your funds stolen.
- Protection against Malware: Software wallets run the risk of being compromised by malware or keyloggers. Since hardware wallets store your private keys offline, they provide immunity against such attacks. Even if your computer is infected, hackers won’t be able to access your funds.
- User-Friendly Interface: Hardware wallets are designed with user-friendly interfaces that make it easy to manage your cryptocurrencies. With features like built-in screens and physical buttons, you can easily view and verify transaction details directly on the device without relying on potentially insecure computer screens.
- Wide Range of Supported Cryptocurrencies: The Ledger Nano S supports a vast array of cryptocurrencies, ensuring that you can store and manage all of your digital assets in one place. From mainstream coins like Bitcoin and Ethereum to lesser-known altcoins, you can have peace of mind knowing that your entire portfolio is secure.
- Backup and Recovery Options: Hardware wallets often come with built-in backup and recovery options. By following the recommended backup process, you can ensure that you can easily recover your funds if your device is lost, damaged, or stolen.
Overall, using a hardware wallet like the Ledger Nano S provides a reliable and secure way to store and manage your cryptocurrencies. Whether you are a casual investor or a seasoned trader, protecting your digital assets is essential, and a hardware wallet offers peace of mind in an increasingly risky landscape.
Setting Up Your Ledger Nano S
Setting up your Ledger Nano S is a straightforward process that ensures the security and functionality of your hardware wallet. Follow these steps to get started:
- Unboxing: Start by unboxing your Ledger Nano S and inspecting its contents. You should find the hardware wallet device, a USB cable, a recovery sheet, and a set of instructions.
- Connecting to your Computer: Use the provided USB cable to connect your Ledger Nano S to your computer. The device will power on automatically once it is connected.
- Setting Up a New Device: If you’re using your Ledger Nano S for the first time, you’ll need to navigate through the device’s setup process. This typically involves choosing a PIN code, confirming it on the device, and noting down the recovery phrase. Be sure to keep your recovery phrase in a safe place, as it is essential for recovering your wallet if your device is lost or damaged.
- Installing Ledger Live: Ledger Live is the companion application for managing your Ledger Nano S. Visit the Ledger website and download the appropriate version of Ledger Live for your operating system. Install it on your computer.
- Initializing Ledger Live: Launch Ledger Live on your computer and follow the on-screen instructions to initialize the application. Make sure your Ledger Nano S is connected to your computer during this process.
- Adding Accounts: Once Ledger Live is set up, you can begin adding cryptocurrency accounts to your Ledger Nano S. Select the desired cryptocurrencies from the available list and follow the prompts to add the accounts.
- Updating Firmware: Regularly updating the firmware on your Ledger Nano S is essential for ensuring the latest security features and bug fixes. With the device connected to your computer, open Ledger Live, navigate to the Manager section, and follow the instructions to update your firmware.
By following these steps, you can confidently set up your Ledger Nano S and begin securely storing and managing your cryptocurrencies. Remember to always keep your device and recovery phrase in a safe place to prevent unauthorized access to your digital assets.
Creating Wallet Accounts
Once you have set up your Ledger Nano S and have it connected to your computer, you can proceed to create wallet accounts for different cryptocurrencies. Here’s how you can create wallet accounts on your Ledger Nano S:
- Launch Ledger Live: Open the Ledger Live application on your computer and make sure that your Ledger Nano S is connected.
- Navigate to Accounts: Within Ledger Live, locate the “Accounts” tab or section. This is where you can add and manage your cryptocurrency wallet accounts.
- Add New Account: Click on the option to “Add Account” or a similar button to begin adding a new wallet account.
- Select Cryptocurrency: From the list of supported cryptocurrencies, choose the one for which you want to create a new wallet account. Ledger Live supports a wide range of cryptocurrencies, including popular options like Bitcoin, Ethereum, and Litecoin.
- Confirm on your Ledger Nano S: After selecting the cryptocurrency, you will be prompted to confirm the account creation process on your Ledger Nano S. Follow the instructions on the device’s screen, making sure to review and validate the information.
- Account Created: Once confirmed, your new wallet account will be created, and you will be able to see it listed within the Ledger Live application. You can repeat these steps to create multiple accounts for different cryptocurrencies.
- Naming and Managing Accounts: It is a good practice to give each account a meaningful name for easier identification. You can rename your accounts within Ledger Live and manage them accordingly.
- Viewing Account Balance and Transactions: Ledger Live allows you to view the balance and transaction history of each of your wallet accounts. You can access these details by selecting the specific account within the application.
By following these steps, you can create wallet accounts for various cryptocurrencies on your Ledger Nano S. Having separate accounts provides organization and convenience for managing different digital assets securely. Remember to always verify the information displayed on your Ledger Nano S screen during the account creation process to ensure the utmost security.
Sending and Receiving Crypto
One of the primary functions of the Ledger Nano S is to send and receive cryptocurrencies securely. Whether you want to transfer funds to someone else or receive payments from others, here’s how you can perform these actions using your Ledger Nano S:
- Launch Ledger Live: Open the Ledger Live application on your computer and make sure your Ledger Nano S is connected.
- Unlock your Ledger Nano S: Enter your PIN code on the Ledger Nano S device to unlock it.
- Select Account: Within Ledger Live, navigate to the “Accounts” tab or section and select the account from which you want to send or receive cryptocurrency.
- Sending Crypto: To send cryptocurrency to someone else, click on the “Send” button within Ledger Live. Enter the recipient’s wallet address and the desired amount of cryptocurrency to send. Verify the transaction details on both the Ledger Live application and the Ledger Nano S device, and confirm the transaction.
- Receiving Crypto: To receive cryptocurrency, share your wallet address with the sender. You can find your wallet address within Ledger Live by clicking on the “Receive” button. Make sure to double-check the address displayed on your Ledger Nano S screen to ensure accuracy. Provide the sender with this address, and they can initiate the transfer of funds to your account.
- Transaction Confirmation: For both sending and receiving transactions, it is crucial to verify the information displayed on your Ledger Nano S screen. Confirm that the wallet addresses and transaction amounts match the intended transaction to prevent any errors or potential fraud.
- Transaction History: Ledger Live keeps a record of all your transactions, allowing you to view the transaction history of each account. You can access this information within the Ledger Live application, providing transparency and accountability for your cryptocurrency transactions.
By following these steps, you can confidently send and receive cryptocurrencies using your Ledger Nano S. Always double-check the details of each transaction to prevent any errors or potential risks. The Ledger Nano S provides a secure and user-friendly way to manage your digital assets and engage in cryptocurrency transactions with peace of mind.
Installing and Managing Apps
The Ledger Nano S allows you to install and manage apps for different cryptocurrencies directly on the device. Here’s how you can install and manage apps on your Ledger Nano S:
- Launch Ledger Live: Open the Ledger Live application on your computer and ensure that your Ledger Nano S is connected.
- Unlock your Ledger Nano S: Enter your PIN code on the Ledger Nano S device to unlock it.
- Navigate to Manager: Within Ledger Live, locate the “Manager” tab or section. This is where you can find and install apps for different cryptocurrencies.
- Select App: From the available list of supported cryptocurrencies, choose the app that you want to install on your Ledger Nano S. Click on the “Install” button next to the respective app.
- Follow Device Instructions: Confirm the installation on your Ledger Nano S when prompted. The device will display instructions and ask for your confirmation to proceed with the installation.
- App Installation Progress: Ledger Live will provide a progress bar indicating the status of the app installation. It may take a few moments to complete the installation process, depending on the size of the app.
- Managing Apps: Once an app is installed, it will appear in the “Apps” tab or section within Ledger Live. You can manage your apps by uninstalling them from your Ledger Nano S when they are no longer needed, creating space for new apps.
- Updating Apps: Periodically, developers release updates to improve the functionality and security of cryptocurrency apps. To ensure that you have the latest version of an app, you can navigate to the Manager tab in Ledger Live, locate the app, and click on the “Update” button when available.
By following these steps, you can easily install and manage apps for different cryptocurrencies on your Ledger Nano S. The device allows you to have multiple apps installed simultaneously, providing you with the ability to securely store and manage various digital assets in one place. Keep your apps up to date to benefit from the latest features and security enhancements.
Updating Firmware on the Ledger Nano S
Regularly updating the firmware on your Ledger Nano S is crucial for maintaining the security and functionality of your hardware wallet. Firmware updates often include bug fixes, performance enhancements, and new features. To update the firmware on your Ledger Nano S, follow these steps:
- Launch Ledger Live: Open the Ledger Live application on your computer and ensure that your Ledger Nano S is connected.
- Unlock your Ledger Nano S: Enter your PIN code on the Ledger Nano S device to unlock it.
- Navigate to Manager: Within Ledger Live, locate the “Manager” tab or section. This is where you can manage the firmware and apps on your Ledger Nano S.
- Check for Firmware Update: Ledger Live will automatically check for firmware updates when you access the Manager section. If a firmware update is available, it will be displayed on the screen.
- Follow On-Screen Instructions: If a firmware update is available, follow the on-screen instructions to initiate the update process. Make sure to carefully read and follow each step to ensure a successful update.
- Wait for Firmware Update to Complete: During the firmware update process, your Ledger Nano S will display progress indicators. Do not disconnect the device or interrupt the update until it is fully completed.
- Verify Firmware Update: After the firmware update is finished, Ledger Live will confirm the successful update on your computer screen. You can also check the firmware version displayed on your Ledger Nano S to ensure it matches the latest version.
- Enjoy the Updated Firmware: With the latest firmware installed, you can benefit from enhanced security measures, improved performance, and new features for your Ledger Nano S.
By regularly updating the firmware on your Ledger Nano S, you ensure that your hardware wallet remains secure and up to date. Firmware updates are essential for keeping your digital assets safe and preventing vulnerabilities. Stay vigilant and always keep your Ledger Nano S firmware up to date to take advantage of the latest advancements in security and functionality.
Importing and Exporting Your Wallet
Importing and exporting your wallet is a crucial process that allows you to access your cryptocurrency funds on different devices or recovery phrases. Whether you want to transfer your wallet to a new Ledger device or import it into a compatible software wallet, here’s what you need to know:
- Exporting Your Wallet: To export your wallet, you will need to retrieve your recovery phrase. This phrase is a series of 24 words that serves as a backup of your wallet. From the Ledger Live application, navigate to the “Settings” tab and select “Security.” Choose “Export” or “Reveal” to view or copy your recovery phrase. Make sure to securely store this phrase offline, as it grants access to your cryptocurrency funds.
- Importing Your Wallet: To import your wallet into a new device or compatible software wallet, you will need your recovery phrase. During the setup process, choose the option to restore or import an existing wallet. Enter your recovery phrase and follow the instructions provided by the device or software wallet. Once completed, your wallet will be imported, and you can access your cryptocurrency funds.
- Transferring Between Ledger Devices: If you want to move your wallet from one Ledger device to another, the process is relatively simple. Use the “Export” function on your current device to obtain your recovery phrase. Then, follow the setup process on your new Ledger device and select the option to restore or import your wallet using the recovery phrase. Ensure that both devices are securely stored and that you follow best practices in handling sensitive information during the transfer.
- Compatibility with Software Wallets: While the Ledger Nano S primarily functions as a hardware wallet, it is also compatible with some software wallets. To import your Ledger wallet into a software wallet, check if the software wallet supports the BIP39 standard and allows the import of wallets using recovery phrases. Each software wallet may have its own specific instructions for importing wallets, so consult the wallet provider’s documentation for the exact steps.
- Security Considerations: When importing and exporting your wallet, it is crucial to prioritize security. Always ensure that you are using trusted and verified software wallets. Only import your wallet into devices or software wallets that you trust. Keep your recovery phrase private and secure, avoiding any online platforms or storage methods that may expose it to potential security risks.
By understanding the process of importing and exporting your wallet, you can confidently manage your cryptocurrency funds across different devices and recovery phrases. Remember to follow best security practices and exercise caution to protect your assets at all times.
Backup and Recovery Options
Ensuring that you have proper backup and recovery options for your Ledger Nano S is essential to protect your cryptocurrency funds and safeguard against the loss or theft of your hardware wallet. Here are some backup and recovery options you should consider:
- Recovery Phrase: The recovery phrase, also known as the seed phrase or mnemonic phrase, is a sequence of 24 words generated when you set up your Ledger Nano S. It is vital to securely store this recovery phrase offline in multiple physical locations. In case your Ledger Nano S is lost, damaged, or stolen, you can use the recovery phrase to restore your wallet and access your funds on a new device.
- Backup Card or Sheet: Ledger provides a backup card or sheet as part of the package when you purchase a Ledger Nano S. This backup card contains spaces to write down your recovery phrase. Fill out the backup card with your recovery phrase and keep it in a secure location separate from your device.
- Passphrase: In addition to the recovery phrase, you can set up an optional passphrase for added security. This additional layer of protection requires you to input a unique phrase whenever you unlock your Ledger Nano S. Make sure to remember this passphrase as it is not recoverable. Consider writing it down securely and keeping it separate from your recovery phrase.
- Using a Secondary Ledger Device: Having a secondary Ledger device serves as a backup option. By setting up and syncing an additional device, you can easily access your funds if one of the devices becomes unavailable. Remember to securely store the recovery phrase for the secondary device as well.
- Third-Party Backup Solutions: Aside from the backup options provided by Ledger, you can also explore third-party backup solutions. These solutions allow you to securely store your recovery phrase or backup your wallet data in encrypted digital formats. However, exercise caution and ensure that the third-party solution is reputable and trustworthy.
- Regularly Testing Your Backup and Recovery: It is crucial to periodically test your backup and recovery options to ensure they are functional. By simulating the recovery process on a separate device, you can verify that your recovery phrase and backup methods are accurate and accessible.
By implementing proper backup and recovery options, you can protect your cryptocurrency funds against unforeseen circumstances and ensure that you have the means to recover your wallet and access your assets. Remember to keep your backup information secure, and regularly review and update your backup methods to maintain the highest level of protection for your Ledger Nano S and your digital assets.
Keeping Your Ledger Nano S Secure
As a hardware wallet designed to secure your cryptocurrency funds, it is important to take additional steps to keep your Ledger Nano S secure. Here are some important measures to consider:
- Keep Your Firmware Updated: Regularly update the firmware of your Ledger Nano S. Firmware updates often include vital security patches and bug fixes that enhance the device’s resistance to potential vulnerabilities.
- Use a Strong PIN Code: Set a strong PIN code for your Ledger Nano S. Avoid using easily guessable PIN combinations and use a combination of numbers that are meaningful to you but difficult for others to determine.
- Enable Auto-Lock Feature: Enable the auto-lock feature on your Ledger Nano S so that it automatically locks after a period of inactivity. This adds an additional layer of protection against unauthorized access.
- Verify Transactions on the Device: Always verify the transaction details displayed on the device’s screen before confirming any transactions. Ensure that the wallet addresses and transaction amounts match the intended transaction to prevent any errors or potential fraud.
- Beware of Phishing Attempts: Be cautious of phishing attempts that may try to trick you into revealing your recovery phrase or other sensitive information. Always double-check the source of any messages or emails that request your personal information or ask you to take certain actions.
- Use Official Channels: Only download software or apps for your Ledger Nano S from the official Ledger website or verified sources. Avoid downloading or installing software from untrusted or unknown sources, as they may contain malware or compromise the security of your device.
- Secure Your Recovery Phrase: Keep your recovery phrase offline and in a secure location. Do not store it digitally or share it with anyone. Additionally, consider using a secure backup solution, such as a hardware wallet or encrypted storage, to protect your recovery phrase from physical damage or loss.
- Avoid Public Wi-Fi Networks: When connecting your Ledger Nano S to your computer, avoid using public Wi-Fi networks, as they can be susceptible to hacking and surveillance. Opt for secure and trusted internet connections to ensure the confidentiality of your transactions and data.
- Periodically Review Your Accounts: Regularly review your wallet accounts and transaction history. If you notice any suspicious activity or unknown transactions, take immediate action to secure your funds and report any potential security breaches to Ledger.
- Store Your Ledger Nano S Securely: When not in use, keep your Ledger Nano S in a secure location, such as a safe deposit box or a locked drawer. Avoid leaving it in plain sight or carrying it with you unnecessarily.
By following these security practices, you can significantly reduce the risk of unauthorized access to your Ledger Nano S and protect your cryptocurrency funds. Stay vigilant and exercise caution when interacting with your device and managing your digital assets to ensure the highest level of security for your Ledger Nano S.
Frequently Asked Questions
Here are some frequently asked questions about the Ledger Nano S and its usage:
- Can I store multiple cryptocurrencies on the Ledger Nano S?
Yes, the Ledger Nano S supports a wide range of cryptocurrencies. You can store multiple cryptocurrencies simultaneously on your device, including popular options like Bitcoin, Ethereum, Litecoin, and more. - Can I add new cryptocurrencies to my Ledger Nano S?
Yes, Ledger frequently adds support for new cryptocurrencies through firmware updates. Make sure to keep your Ledger Nano S firmware up to date to benefit from the latest cryptocurrency offerings. - Is the Ledger Nano S compatible with mobile devices?
Yes, the Ledger Nano S can be used with mobile devices. Simply connect it to your mobile device using an OTG cable or use the Ledger Live mobile app, available for Android and iOS platforms. - What happens if I lose my Ledger Nano S?
If you lose your Ledger Nano S, you can restore your wallet and access your funds using the recovery phrase. It is crucial to have your recovery phrase stored securely in a separate location, as it is the key to recovering your wallet. - Can I use my Ledger Nano S on multiple computers?
Yes, you can use your Ledger Nano S on multiple computers. Simply connect it using the USB cable and launch the Ledger Live application on each computer. Your wallet accounts and transaction history will be accessible from any computer. - Is the Ledger Nano S hack-proof?
While no device is completely hack-proof, the Ledger Nano S offers advanced security features that significantly reduce the risk of hacking or unauthorized access. By keeping your firmware up to date and following security best practices, you can maximize the security of your device. - Can I use the Ledger Nano S with third-party wallets?
Yes, the Ledger Nano S can be used with compatible third-party wallets that support the Ledger hardware wallet integration. Make sure to verify the compatibility and security of the third-party wallets before using them with your Ledger Nano S. - How do I update the firmware on my Ledger Nano S?
To update the firmware on your Ledger Nano S, open the Ledger Live application, navigate to the Manager section, and follow the instructions to update your firmware. Make sure to have your device connected during the update process. - Can I recover my wallet if I forget my PIN code?
If you forget your PIN code, you will need to reset your Ledger Nano S and restore your wallet using the recovery phrase. This is why it is vital to keep your recovery phrase secure and accessible in case of emergencies. - What if my Ledger Nano S is damaged or stops working?
If your Ledger Nano S is damaged or stops working, you can still access your funds by connecting your recovery phrase to a compatible wallet. Always ensure that your recovery phrase is securely backed up to protect against device failures.
These frequently asked questions cover some of the key aspects of using the Ledger Nano S. If you have more specific questions or concerns, it is recommended to refer to the official Ledger documentation or reach out to their support for further assistance.