
Unboxing Your Xbox Series X or S
So, you’ve gotten your hands on the latest Xbox Series X or S console. Congratulations! The first step on your gaming journey begins with unboxing your new device. Here’s a step-by-step guide to help you unbox and set up your Xbox Series X or S:
1. Carefully remove the packaging: Start by removing the outer protective box and any plastic wrap or tape that is securing the console. Take your time and be gentle to avoid any accidental damage.
2. Open the box: Lift the lid of the box to reveal the contents inside. You will find your Xbox Series X or S console, a power cord, an HDMI cable, and a controller. Additionally, there may be some informational pamphlets and product documentation.
3. Take out the console: Lift the console out of the box and place it on a flat and stable surface near your TV or entertainment center. Make sure there is enough ventilation around the console to prevent it from overheating.
4. Connect the power cord: Take the power cord provided and connect one end to the power input port on the back of the console. Plug the other end into a power outlet. Ensure that the power outlet is easily accessible and within reach.
5. Connect to the TV: Take the HDMI cable and insert one end into the HDMI output port on the back of the console. Connect the other end to an available HDMI input port on your TV. Make sure to remember the HDMI input you used for future reference.
6. Power on the console: Press the power button on the front of the console to turn it on. You’ll see the Xbox logo appear on your screen, indicating that the console is booting up.
7. Follow on-screen instructions: Once the console is turned on, follow the on-screen prompts to complete the initial setup. This includes selecting your preferred language, connecting to a network, and signing in with your Xbox account.
8. Sync your controller: Press the sync button on your Xbox controller and then press the sync button on the front of the console. This will pair the controller with your console, allowing you to use it for gaming.
9. Update your console: After syncing your controller, the console may prompt you to update its software. It’s essential to have the latest updates to ensure optimal performance and access to all features and functionalities.
10. Enjoy your Xbox experience: Once the setup process is complete, you’re ready to dive into the exciting world of gaming on your Xbox Series X or S. Install your favorite games, explore the Xbox Store, and connect with friends for online multiplayer adventures.
Setting up your Xbox Series X or S is an exciting and straightforward process. By following these steps, you’ll be ready to embark on immersive gaming experiences and enjoy all the features that the Xbox platform has to offer.
Connecting Your Xbox to the TV
One of the crucial steps in setting up your Xbox Series X or S console is connecting it to your TV. Without a proper connection, you won’t be able to enjoy your favorite games in all their high-definition glory. Let’s walk through the process of connecting your Xbox to your TV:
1. Check the available ports: Take a look at the back of your TV and identify the available input ports. Most modern TVs will have at least one HDMI port, which is the preferred method of connecting your Xbox.
2. Plug in the HDMI cable: Grab the HDMI cable that came with your Xbox Series X or S and connect one end to the HDMI output port on the back of the console. Plug the other end into an available HDMI input port on your TV. Note the number or label of the HDMI input you used for future reference.
3. Power on your Xbox and TV: Turn on both your Xbox console and your TV. Use the TV’s remote or buttons to switch the input source to the HDMI input you connected your Xbox to. You should now see the Xbox screen displayed on your TV.
4. Set the display settings: Once your Xbox is connected to the TV, navigate to the “Settings” menu on your Xbox dashboard. Select “Display & Sound” and then “Video Output.” Here you can adjust the resolution, refresh rate, and other display settings based on your TV’s capabilities.
5. Enable HDR and/or Dolby Vision: If your TV supports High Dynamic Range (HDR) or Dolby Vision, you can enable these features to enhance the visual experience of supported games and content. Go to the “Display & Sound” settings and toggle the HDR and Dolby Vision options accordingly.
6. Adjust audio settings: To get the best audio experience, navigate to the “Display & Sound” settings menu and select “Audio Output.” Here, you can adjust settings like audio format, audio output, and spatial sound. Select the options that best suit your audio setup and preferences.
7. Test the connection: After making the necessary adjustments, test the connection by launching a game or playing a video on your Xbox. Ensure that the visuals are sharp and that the audio is coming through the correct speakers or audio system.
Remember, different TVs and Xbox models may have slightly different instructions for connecting. If you encounter any issues or have a different setup, refer to the user manual that came with your TV or consult the Xbox support website for further guidance.
Connecting your Xbox Series X or S console to your TV is a vital step in the setup process. By following these steps and making the necessary adjustments, you’ll be able to enjoy your Xbox gaming experience on the big screen with stunning visuals and immersive audio.
Setting up the Power Cord and Turning on the Console
Now that you have unboxed your Xbox Series X or S console and made the necessary connections, it’s time to set up the power cord and turn on your console. Follow these steps to ensure a smooth and hassle-free setup:
1. Locate the power input port: On the back of your Xbox console, you’ll find the power input port. It’s usually located near the bottom and labeled accordingly. Take a moment to identify this port.
2. Connect the power cord: Grab the power cord that came with your Xbox Series X or S and insert one end into the power input port on the back of the console. Make sure it is securely inserted.
3. Plug in the power cord: Once you have connected the power cord to the console, plug the other end into a power outlet. Ensure that the power outlet is easily accessible and within reach.
4. Power on the console: After plugging in the power cord, press the power button on the front of the console. The power button is typically located near the center of the console’s front panel. When you press the button, the console will boot up, and you will see the Xbox logo appear on your screen.
5. Follow the on-screen instructions: Once your Xbox is turned on, you will be guided through the initial setup process. Follow the on-screen instructions to choose your preferred language, connect to a network, and sign in with your Xbox account.
6. Set up your power settings: During the initial setup or later in the system settings, you can customize your power settings to suit your preferences. These settings include options like instant-on mode, which allows for faster boot times, and power-saving mode, which conserves energy.
7. Check the power supply’s LED indicator: The power supply on the Xbox Series X or S console has a built-in LED indicator. This indicator will light up in different colors to indicate different power supply states. A solid white light means the power supply is receiving power correctly.
By carefully following these steps, you will have successfully set up the power cord and turned on your Xbox Series X or S console. Enjoy the excitement of exploring the world of gaming and entertainment that awaits you!
Connecting to the Internet
To unlock the full potential of your Xbox Series X or S console and access online features, multiplayer gaming, and downloadable content, it’s essential to connect your console to the internet. Follow these steps to ensure a seamless connection:
1. Wired connection: If you have a wired internet connection available, connect one end of an Ethernet cable to the Ethernet port on the back of your console and the other end to your router or modem. The console will automatically detect the connection and establish a wired internet connection.
2. Wireless connection: If you prefer a wireless connection, you’ll need to connect your Xbox to your home Wi-Fi network. Here’s how:
- On your Xbox controller, press the Xbox button to open the guide.
- Go to the “Profile & System” tab and select “Settings.”
- In the settings menu, choose “Network.”
- Select “Set up wireless network” and choose your Wi-Fi network from the available list.
- Enter your Wi-Fi network password when prompted.
3. Test the internet connection: Once you have connected to your Wi-Fi network, select the “Test network connection” option to ensure that your Xbox console is connected to the internet. The console will check the network connection and display the results, including your download and upload speeds.
4. Advanced network settings: If you encounter any connectivity issues or want to fine-tune your network settings, you can access the advanced network settings. In the network settings menu, you can configure network settings like IP address, DNS, and proxy settings as per your network requirements.
5. Connect to Xbox Live: After successfully connecting to the internet, sign in to your Xbox account to access Xbox Live. Xbox Live offers a wide range of online features, including multiplayer gaming, access to the Xbox Store, and monthly free games through Xbox Live Gold subscription.
It’s important to ensure a stable internet connection while gaming on your Xbox Series X or S for a smooth and lag-free experience. If you face any connectivity issues, try restarting your router, positioning your console closer to your Wi-Fi router, or contacting your internet service provider for assistance.
By following these steps, you can connect your Xbox Series X or S console to the internet and unlock a world of online gaming and entertainment. Enjoy the online multiplayer battles, streaming your favorite shows, and staying updated with the latest content in the Xbox ecosystem.
Updating Your Console
Keeping your Xbox Series X or S console up to date is crucial to ensure optimal performance, access new features, and enjoy the latest games without any compatibility issues. Microsoft regularly releases updates for the console’s software and firmware. Here’s how you can update your console:
1. Automatic updates: By default, your Xbox console is set to receive automatic updates. When the console is connected to the internet, it will automatically check for updates and download them in the background. It will also install the updates when the console is in standby mode, allowing for a hassle-free update experience.
2. Manual updates: If you prefer to check for updates manually or want to ensure that you are running the latest software version, you can manually initiate an update. Here’s how:
- On your Xbox controller, press the Xbox button to open the guide.
- Navigate to the “Profile & System” tab and select “Settings.”
- In the settings menu, choose “System” and then “Updates.”
- Here, you can check for updates by selecting the “Check for updates” option.
- If an update is available, follow the on-screen instructions to download and install it.
3. Firmware updates: In addition to software updates, Microsoft also releases firmware updates for the Xbox Series X or S consoles. Firmware updates are specific to the console’s hardware and can improve performance, fix bugs, or enable new features. These updates are typically included in the automatic updates or manual updates mentioned above.
4. Offline updates: In rare cases, you may need to perform an offline update if your console is having trouble connecting to the internet or experiencing severe software issues. Microsoft provides detailed instructions and downloadable files on their official support website for performing offline updates. Follow the instructions carefully to ensure a successful offline update.
It’s essential to keep your Xbox console up to date to benefit from the latest enhancements and improvements. With regular updates, Microsoft ensures that your console remains secure, stable, and compatible with the latest games and features.
During the update process, it’s important not to turn off your console or disconnect it from the power source as it may cause the update to fail or potentially damage the system. Allow the console sufficient time to complete the update, and follow any on-screen instructions if prompted.
By regularly updating your Xbox Series X or S console, you can ensure a smooth gaming experience, access new features, and stay up to date with the ever-evolving Xbox ecosystem.
Creating or Signing in with Your Xbox Account
To fully enjoy the features and benefits of your Xbox Series X or S console, you’ll need to create or sign in with your Xbox account. Your Xbox account gives you access to Xbox Live, multiplayer gaming, digital purchases, and personalized settings. Here’s how you can create or sign in with your Xbox account:
1. Creating a new account:
– On your Xbox console, press the Xbox button to open the guide.
– Navigate to the “Profile & System” tab and select “Add or Switch”
– Select “Add new.”
– Follow the on-screen prompts to enter your email address, create a password, and set up your profile details.
– You may be required to verify your email address before fully activating your account.
2. Signing in with an existing account:
– On your Xbox console, press the Xbox button to open the guide.
– Navigate to the “Profile & System” tab and select “Add or Switch”
– Choose “Sign in.”
– Enter the email address associated with your Xbox account and your password.
– If your account has two-factor authentication enabled, follow the additional steps to verify your identity.
3. Family accounts:
If you want to manage and control the content and access for family members, you can set up a family account. Family accounts allow you to create child accounts, set spending limits, and monitor activity. To set up a family account, sign in to your Xbox account on the Xbox website or console, navigate to the “Family” section in your account settings, and follow the instructions provided.
Having an Xbox account is essential to access online multiplayer, download games and updates, and take advantage of the full range of Xbox services. Your Xbox account also allows you to personalize your profile, track achievements, communicate with friends, and join gaming communities.
Remember to keep your account information secure by choosing a strong password and enabling two-factor authentication for an added layer of security. Also, ensure that you periodically review your account privacy settings to control the visibility of your information and manage who can interact with you on Xbox Live.
By creating or signing in with your Xbox account, you unlock a world of gaming and entertainment possibilities on your Xbox Series X or S console. Enjoy the benefits of online play, access to exclusive content, and a seamless gaming experience tailored to your preferences.
Syncing Your Xbox Controller
Syncing your Xbox controller with your Xbox Series X or S console is a crucial step to ensure seamless gameplay and optimal performance. Follow these simple steps to sync your Xbox controller:
1. Power on your Xbox controller: Press and hold the Xbox button on the top center of the controller until it turns on. The Xbox button will start flashing, indicating that the controller is ready to be paired.
2. Locate the sync button on your console: On the front of your Xbox Series X or S console, locate the small circular sync button. It is usually located near the USB ports or on the front panel of the console.
3. Press the sync button on your console: Press the sync button on your console and hold it down for a few seconds until the light around the power button begins to flash.
4. Press the sync button on the controller: On the top edge of the controller, near the USB-C port, you will find a small sync button. Press and hold this button until the Xbox button on the controller starts flashing rapidly.
5. Wait for the sync to complete: After pressing the sync button on the controller, it will automatically start searching for the console. Wait for a few seconds until the Xbox button on the controller stops flashing and remains lit, indicating that the controller has successfully synced with the console.
6. Test the controller: Once the sync is complete, test the functionality of your controller by navigating through the Xbox dashboard or launching a game. Ensure that all the buttons, triggers, and thumbsticks are responsive and working properly.
7. Additional controllers: If you have multiple Xbox controllers, follow the same steps to sync each additional controller with your console. Each controller will have a unique connection to the console, allowing multiple players to enjoy multiplayer games simultaneously.
Synching your Xbox controller is a quick and straightforward process. If you experience any issues with syncing, try turning off both the console and the controller and repeat the steps. Also, ensure that your controller has sufficient battery power or is connected to the console with a USB-C cable during the sync process.
By successfully syncing your Xbox controller with your Xbox Series X or S console, you’ll be ready to immerse yourself in exciting games, enjoy seamless control, and experience the immersive gameplay that the Xbox ecosystem has to offer.
Setting up and Logging into Xbox Live
Xbox Live is an essential component of the Xbox gaming experience, providing access to online multiplayer, digital purchases, and a variety of entertainment options. Here’s how you can set up and log into Xbox Live on your Xbox Series X or S console:
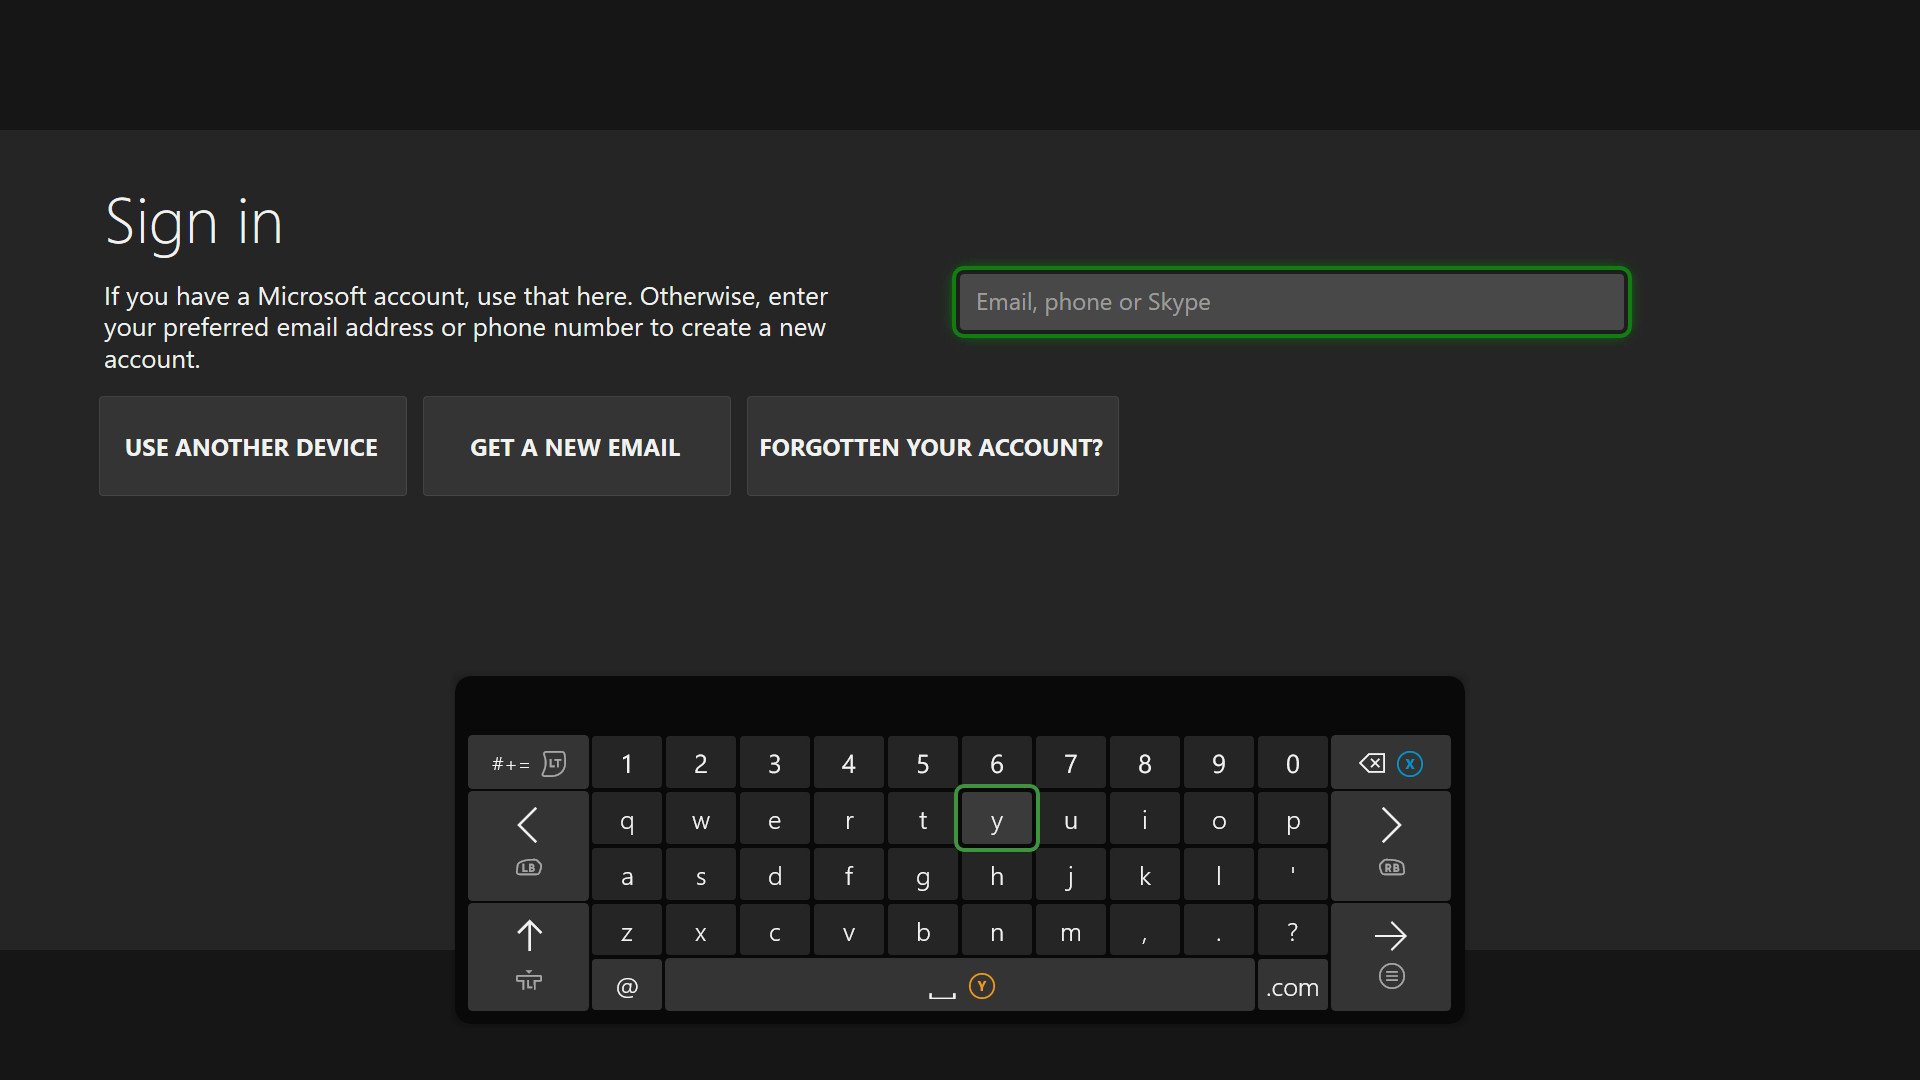
1. Create a Microsoft account: To access Xbox Live, you’ll need a Microsoft account. If you don’t have one, you can create a new account directly from your console by following the on-screen prompts. Alternatively, you can create an account on the Microsoft website and use those credentials to sign in on your console.
2. Sign in with your Microsoft account: Once you have a Microsoft account, you can sign in to Xbox Live on your Xbox Series X or S console.
– On your Xbox controller, press the Xbox button to open the guide.
– Navigate to the “Profile & System” tab, select “Add or Switch.”
– Choose “Account”
– Select “Sign in.”
– Enter the email address and password associated with your Microsoft account.
3. Set up your Xbox Live profile: After signing in, you can customize your Xbox Live profile. Choose a gamertag, which is your unique online gaming identity, and add a profile picture or avatar that represents you. You can also personalize your profile settings, privacy options, and communication preferences.
4. Xbox Live Gold and Game Pass:
– Xbox Live Gold: Xbox Live Gold is a subscription service that offers additional benefits such as free monthly games, exclusive discounts, and access to online multiplayer. To set up an Xbox Live Gold subscription, navigate to the Xbox Store on your console and select “Memberships” to purchase and activate your subscription.
– Xbox Game Pass: Xbox Game Pass is a subscription service that provides a vast library of games, including new releases, for a monthly fee. With Xbox Game Pass, you’ll have access to a wide range of games that you can download and play as long as your subscription is active. Navigate to the Xbox Store on your console, select “Memberships,” and follow the prompts to set up and start enjoying Xbox Game Pass.
By logging into Xbox Live, you gain access to a vibrant online gaming community, where you can connect with friends, join parties, and participate in multiplayer battles. Additionally, Xbox Live offers achievements, leaderboards, and social features that enhance your overall gaming experience.
Remember to keep your Xbox Live account credentials secure and periodically review your account settings to manage privacy, communication, and online safety preferences. Xbox Live provides robust options to control and protect your gaming experience.
Setting up and logging into Xbox Live on your Xbox Series X or S console is a straightforward process. With your Microsoft account and a subscription to Xbox Live Gold or Game Pass, you’ll be able to fully experience the interactive and social aspects of gaming on your Xbox console.
Configuring System Settings
Configuring the system settings on your Xbox Series X or S console allows you to personalize your gaming experience, adjust audio and video settings, manage storage, and customize various aspects of the console. Here’s how you can configure the system settings:
1. Accessing the settings menu: On your Xbox controller, press the Xbox button to open the guide. Navigate to the “Profile & System” tab and select “Settings.”
2. Personalization and account settings:
– Profile: In the Personalization section, you can customize your profile, including your gamertag, profile picture, and background. Adjust the privacy settings, manage communication, and control who can see your online activity and achievements.
– Account: The Account section allows you to manage your Microsoft account settings, including security, privacy, and billing. You can also add or switch accounts, manage saved passwords, and link external accounts like Twitch, Spotify, or Discord.
3. Display and sound settings:
– Video and audio output: In the Display & Sound settings, you can adjust video and audio output options. Set the resolution, refresh rate, and HDR settings based on your TV’s capabilities. Configure audio format, volume levels, and spatial sound options for an immersive audio experience.
– Accessibility: The Accessibility settings provide options to customize your gaming experience to meet specific needs. Adjust subtitles, closed captions, visual enhancements, and controller settings for improved accessibility.
4. Network settings:
– Network settings: Manage your network settings, including connection status, troubleshooting, and advanced network configurations. Set up network preferences, such as DNS settings or a manual IP address, if required.
– Network transfer: If you are upgrading from an older Xbox console, you can use the Network Transfer option to transfer games, apps, and settings from your old console to the new Xbox Series X or S over your home network.
5. System updates:
– System update: In the System settings, you can check for system updates, view the current software version, and manage system updates. Keep your console up to date to ensure you have the latest features, enhancements, and security patches.
6. Storage management:
– Storage: The Storage settings provide an overview of your console’s storage and allow you to manage and optimize it. View available storage space, transfer games or apps to an external drive, and clear cache if necessary. You can also view and manage your game installs and downloadable content.
7. Power and startup:
– Power mode: Customize your console’s power settings, including the instant-on mode, which allows for faster boot times, and the power-saving mode, which conserves energy.
– Startup options: Set your preferred startup option, such as starting directly on the dashboard or launching into a specific game or app.
Configuring the system settings on your Xbox Series X or S console allows you to personalize your gaming experience, manage your accounts, optimize audio and video settings, and fine-tune various aspects of the console. Take some time to explore the different settings and customize them to your preferences for an enhanced gaming journey.
Installing and Managing Games
One of the most exciting aspects of owning an Xbox Series X or S console is the ability to play a vast library of games. Whether you have physical discs or digital downloads, installing and managing games is a straightforward process. Here’s how you can install and manage your games:
1. Installing games from a disc:
– Physical discs: Insert the game disc into the disc drive on your console. The installation process will begin automatically. Follow the on-screen prompts to complete the installation. Once installed, you will need to keep the disc inserted to play the game.
2. Installing digital games:
– Xbox Store: To install a digital game purchased from the Xbox Store, navigate to the Store on your console. Search for the game or browse the available titles. Once you have selected the game, choose “Install” to start the download and installation process. The game will be added to your library and can be accessed from the My Games & Apps section on your console.
– Game Pass: If you have an Xbox Game Pass subscription, you can browse through the available games in the Game Pass library. Select a game you want to play, choose “Install,” and the game will be downloaded and installed on your console.
3. Managing your games:
– My Games & Apps: To manage your games, go to the My Games & Apps section on your console’s home screen. Here, you can see all your installed games, recently played games, and updates available for your games. Navigate through your library, organize your games in folders, and access additional options for each game.
– Game updates: Regularly check for game updates in the Updates section of My Games & Apps. Keeping your games up to date ensures you have the latest patches, bug fixes, and enhancements for the best gaming experience.
– Game installations: In My Games & Apps, you can view and manage your game installations. Uninstall games you no longer play or move them to an external storage device if you’re running low on the console’s internal storage.
– Game library: Your game library displays all the games you own, including both physical and digital copies. You can sort, filter, and search your library to find specific titles easily.
4. Game sharing and remote installation:
– Home Xbox: If you have multiple Xbox consoles or you share your console with family or friends, designating your console as your “Home Xbox” allows other profiles on the same console to access your digital game library and Xbox Live subscription benefits.
– Remote installation: With the Xbox mobile app or the Xbox website, you can remotely install games on your console. Browse the digital store and initiate downloads on your console even when you’re not at home.
Installing and managing games on your Xbox Series X or S console is a user-friendly process. Whether you prefer physical discs or digital downloads, you can easily build a collection of games that cater to your gaming preferences. Take advantage of the features and options available to organize your library and keep your games updated for maximum enjoyment.
Setting up Game Pass and Xbox Live Gold
Game Pass and Xbox Live Gold are two popular subscription services that offer a plethora of benefits and access to a vast library of games on your Xbox Series X or S console. Here’s how you can set up and make the most of Game Pass and Xbox Live Gold:
1. Game Pass subscription:
– Accessing Game Pass: To set up Game Pass, navigate to the Xbox Store on your console and select “Memberships.” Choose the Game Pass subscription that best suits your needs, whether it’s the standard Game Pass or the ultimate Game Pass that includes Xbox Live Gold.
– Joining Game Pass: Select the Game Pass subscription and follow the prompts to join. You may be prompted to enter payment information and agree to the terms of service for the subscription. Once subscribed, you’ll gain immediate access to a vast library of games that you can download and play as long as your subscription remains active.
– Game Pass perks: Keep an eye out for Game Pass perks that provide additional benefits such as in-game content, exclusive discounts on games and DLC, and early access to certain titles. These perks are periodically updated and can enhance your gaming experience.
2. Xbox Live Gold subscription:
– Accessing Xbox Live Gold: Xbox Live Gold is a subscription service that provides multiplayer functionality, free monthly games, exclusive discounts, and access to special events. To set up Xbox Live Gold, navigate to the Xbox Store on your console and select “Memberships.”
– Joining Xbox Live Gold: Choose the Xbox Live Gold subscription and follow the prompts to join. Similarly to Game Pass, you may need to provide payment information and agree to the terms of service. Once subscribed, you’ll be able to play multiplayer games online, enjoy free monthly games, and receive exclusive discounts on selected titles.
– Games with Gold: As an Xbox Live Gold subscriber, you’ll have access to the Games with Gold program. Each month, Microsoft offers a selection of free games for Xbox Live Gold members to download and keep as long as their membership is active.
3. Maximizing benefits:
– Combining subscriptions: If you want to gain access to an extensive library of games and multiplayer features, you can combine Game Pass and Xbox Live Gold into one subscription known as Xbox Game Pass Ultimate. This subscription offers the benefits of both services in a single package.
– Xbox Cloud Gaming: With an Xbox Game Pass Ultimate subscription, you can access Xbox Cloud Gaming (formerly known as Project xCloud). This feature allows you to stream compatible Xbox games to supported devices, including smartphones, tablets, and web browsers, for gaming on the go.
– Exclusive discounts: Take advantage of the exclusive discounts available to Game Pass and Xbox Live Gold subscribers when purchasing digital games, add-ons, and DLC. These discounts can save you money on popular titles and expand your gaming library.
Setting up Game Pass and Xbox Live Gold subscriptions on your Xbox Series X or S console opens the door to a vast range of gaming experiences. Explore and discover new games, play online with friends, and take advantage of the various perks and benefits offered by these subscriptions. Customize your gaming journey based on your preferences and enjoy the ever-growing library of games and gaming community that Xbox has to offer.
Customizing Your Xbox Home Screen
The home screen of your Xbox Series X or S console serves as the hub of your gaming experience. It’s where you’ll find your games, apps, and other content. Customizing your home screen allows you to personalize your Xbox console and make it feel uniquely yours. Here are some ways you can customize your Xbox home screen:
1. Pins and groups:
– Pins: Pins are shortcuts to your favorite games, apps, and content. You can pin games, specific levels, apps, or even specific shows or movies. To add a pin, highlight the item you want to pin, press the Menu button on your controller (the one with three lines), and select “Pin to Home.”
– Groups: Groups allow you to create custom categories or collections of games and apps. For example, you can create a group for your favorite multiplayer games or a group for games of a specific genre. To create a group, go to “My Games & Apps,” select “Groups,” and choose “Create a group.” Name the group and add the desired games or apps to it.
2. Backgrounds and themes:
– Backgrounds: Customize your home screen background with a variety of themes and backgrounds. You can choose from pre-installed options or use your custom background by selecting a favorite screenshot or image from your personal collection. To change your background, go to “Settings,” select “Personalization,” and choose “My background.”
– Themes: Select themes that change the overall look and feel of your home screen. Themes include custom backgrounds, custom tile designs, and sounds. To select a theme, go to “Settings,” select “Personalization,” and choose “Themes.”
3. Mixer and capture settings:
– Mixer: If you enjoy streaming your gameplay or watching others’ streams, you can customize your home screen to showcase your Mixer feeds and streamers you follow. You can also adjust the stream quality and notifications in the Mixer settings.
– Capture settings: Customize how you capture and share your gaming moments by accessing capture settings. Adjust the settings for game clips, screenshots, and broadcasting, including quality, length, and accessibility.
4. App and content order:
– Arrange apps: Arrange your apps and content in the order you prefer. To do this, navigate to “My Games & Apps,” highlight the app or content you wish to move, press the Menu button, and select “Move.” Then, place it in the desired position on your home screen.
– Hidden apps: If you have apps or content that you don’t use frequently, you can hide them from your home screen. This reduces clutter and allows you to focus on what’s most important to you. To do this, navigate to “Settings,” select “Personalization,” and choose “My home Xbox.” Then, select and hide the apps you want.
5. Customize notifications:
– Notifications: Customize which notifications appear on your home screen. You can prioritize certain notifications, adjust the level of detail, and even choose the transparency for notifications. To customize notifications, go to “Settings,” select “Preferences,” and choose “Notifications.”
By customizing your Xbox home screen, you can create an interface that reflects your preferences and gaming style. Personalizing your home screen not only enhances the visual appeal but also makes navigation quicker and more intuitive. Experiment with different themes, organize your content with pins and groups, and make your Xbox Series X or S console truly yours.
Managing Storage and External Hard Drives
One of the considerations when gaming on your Xbox Series X or S console is managing storage space. With the growing size of games, it’s essential to effectively manage your storage to ensure you have enough space for new games and updates. Here’s how you can manage storage and utilize external hard drives:
1. Checking storage:
– Storage overview: To check the available storage on your console, go to “Settings,” select “System,” and choose “Storage.” This section will provide an overview of the console’s internal storage and any external storage devices connected.
– Game storage: In the “Storage” section, you can view a breakdown of how much storage each game is occupying. This allows you to identify games that are taking up the most space and decide whether to keep or uninstall them.
2. Uninstalling games:
– Game management: To uninstall games or apps you no longer play, go to “My Games & Apps.” Find the game you want to uninstall, press the Menu button on your controller, and select “Uninstall.” Alternatively, you can manage your storage directly in the “Storage” section of the settings.
– Reinstalling games: If you want to reinstall a game you’ve previously uninstalled, you can do so from your “Ready to Install” list. This list can be found in the “My Games & Apps” section under “Games.” Locate the game, select it, and choose “Install” to reinstall it on your console.
3. Expanding storage with external hard drives:
– Compatible drives: Xbox Series X and S consoles support USB 3.1 external hard drives for expanded storage. Ensure your external hard drive meets the specifications and is USB 3.1 compatible. Portable SSDs and USB flash drives are also compatible, but they may not offer the same level of performance as dedicated external hard drives.
– Connecting external drives: Connect your external hard drive to one of the available USB ports on your console. Your Xbox Series X or S console will automatically detect the external hard drive and prompt you to set it up for use.
– Format and manage: When prompted, format the external hard drive to work with your Xbox console. This process will erase any existing data on the drive, so make sure to back up any important files before formatting. Once formatted, you can choose to install new games directly to the external hard drive or move existing games to it to free up space on the console’s internal storage.
– Managing storage with external drives: In the storage settings, you can view and manage both the internal and external storage devices connected to your console. You can choose the default installation location for games and manage which games are stored on internal or external storage.
4. Optimizing storage through game options:
– Game enhancements: Some games offer specific options to optimize storage usage. For example, you may be able to choose which game components to install (such as single-player or multiplayer modes) to save space on your console.
– Updates and patches: Enable automatic updates for your games in the system settings. This way, your console will automatically download and install updates, reducing the need for additional storage space for patch files.
Effective management of storage is vital to ensure a smooth gaming experience on your Xbox Series X or S console. By regularly uninstalling games you no longer play and utilizing external hard drives for expanded storage, you can maintain an organized library and have enough space for new games, updates, and downloadable content.
Connecting and Configuring Accessories
Adding accessories to your Xbox Series X or S console can enhance your gaming experience and provide additional functionality. Whether it’s controllers, headsets, or other peripherals, connecting and configuring accessories is a simple process. Here’s how you can connect and configure accessories for your Xbox console:
1. Connecting controllers:
– Wired controllers: If you have a wired controller, simply connect it to one of the USB ports on your console using the USB cable provided. The console will automatically detect the controller, and you’ll be ready to use it for gaming.
– Wireless controllers: To connect a wireless controller, press and hold the Xbox button on the controller until it turns on. Then, press the small sync button on the front of the console and the sync button on the top of the controller simultaneously. The controller will sync with the console, and you can start using it wirelessly.
2. Configuring controllers:
– Customizing controller settings: To customize your controller settings, go to “Settings,” select “Devices & Connections,” and choose “Controller.” Here, you can adjust controller options such as button mapping, thumbstick sensitivity, and vibration settings to suit your preferences.
– Assigning controllers to profiles: If you have multiple controllers and players, you can assign each controller to a specific profile. This allows each player to have personalized settings, achievements, and game saves. To do this, go to “Settings,” select “Devices & Connections,” choose “Controller,” and select “Assign to someone.”
3. Connecting audio headsets:
– Wired headsets: If you have a wired headset, plug it into the 3.5mm audio jack on your controller. The audio will automatically route through the headset, and you can adjust the volume using the audio controls on the headset or the console. Ensure your headset is compatible with the Xbox controller and offers audio and chat capabilities.
– Wireless headsets: For wireless headsets, follow the manufacturer’s instructions to connect them to your console. This usually involves a wireless USB dongle or adapter that allows the headset to communicate with the console. Once connected, the audio will transmit wirelessly to your headset, and you can adjust settings in the “Audio” section of the “Settings” menu.
4. Connecting other accessories:
– Kinect sensor: If you have a Kinect sensor, connect it to the dedicated Kinect port on the back of the console. The Kinect sensor allows for motion tracking, voice commands, and facial recognition capabilities. Note that the Xbox Series X does not have a built-in Kinect port, but you can use a USB adapter to connect the Kinect sensor.
– Racing wheels, arcade sticks, and other peripherals: Follow the manufacturer’s instructions to connect and configure other accessories, such as racing wheels or arcade sticks. Typically, these accessories connect via USB or wireless adapters, and you may need to adjust the settings within the game or accessory software to optimize their functionality.
Ensure your accessories are compatible with the Xbox Series X or S console by checking the official Xbox website or referring to the manufacturer’s specifications. Keep your accessories updated by periodically checking for firmware or software updates provided by the manufacturer.
Connecting and configuring accessories for your Xbox Series X or S console opens up a world of possibilities for enhanced gaming and entertainment. Whether it’s controllers, headsets, or other peripherals, follow the simple steps provided to seamlessly integrate and personalize your gaming experience.
Exploring the Xbox Store and Xbox Game Pass
The Xbox Store and Xbox Game Pass offer a treasure trove of gaming experiences, from the latest releases to classic favorites. Navigating through the Xbox Store and utilizing Xbox Game Pass allow you to discover, purchase, and play an extensive library of games. Here’s how you can explore these platforms:
1. Xbox Store:
– Accessing the Xbox Store: On your Xbox Series X or S console, select the Microsoft Store icon on the home screen, or navigate to “My Games & Apps” and select “Store.” This will take you to the Xbox Store, where you can explore a vast collection of games, downloadable content, apps, and movies.
– Browsing games: Navigate through the different sections of the Xbox Store to find games of interest. The store has sections for new releases, top games, genres, deals, and more. You can also use the search bar to look for specific games or browse by game title, developer, or category.
– Game details and reviews: When you find a game you’re interested in, select it to view more details, including screenshots, videos, description, and user reviews. Take your time to read reviews and watch gameplay videos to make informed decisions about which games to purchase or try.
– Purchasing and downloading games: To purchase a game from the Xbox Store, select the “Buy” or “Pre-Order” button on the game’s page. Confirm the purchase and follow the prompts to complete the transaction. The game will then download and install on your console. If you have automatic downloads enabled, purchased games will download automatically.
2. Xbox Game Pass:
– Accessing Xbox Game Pass: Xbox Game Pass is a subscription service that offers a library of games for a monthly fee. On your console, go to the Xbox Store and select the “Memberships” tab. Choose the Game Pass subscription that suits your needs, whether it’s Xbox Game Pass or Xbox Game Pass Ultimate.
– Browsing Game Pass library: After subscribing to Game Pass, you can access the Game Pass library within the store or go to “My Games & Apps” and select “Game Pass.” Here, you’ll find a vast collection of games that you can download and play as long as your subscription remains active.
– Downloading and playing Game Pass games: To download a Game Pass game, locate it in the Game Pass library and select the “Install” button. The game will then download and install on your console, just like any other game. Once downloaded, you can access and play these games directly from your console’s library.
– Game Pass perks and benefits: Game Pass offers additional benefits, such as exclusive discounts on Game Pass games and DLC, access to Game Pass quests and rewards, and inclusion of Xbox Live Gold for multiplayer gaming.
Both the Xbox Store and Xbox Game Pass provide an incredible opportunity to explore and access a wide range of games on your Xbox Series X or S console. Take advantage of these platforms to discover new titles, enjoy exciting deals, and dive into an ever-growing gaming library that caters to all kinds of gaming preferences.
Troubleshooting Common Issues
While the Xbox Series X or S consoles are designed to provide a seamless gaming experience, it’s not uncommon to encounter occasional issues. Here are some common problems that may arise and troubleshooting steps to resolve them:
1. Console not turning on:
– Check the power connection: Ensure that the power cord is securely connected to both the console and the power outlet. Try plugging the power cord into a different outlet to eliminate the possibility of a faulty power source.
– Power cycling the console: Press and hold the power button on the console for 10 seconds until it powers off completely. Unplug the power cord from the console, wait for a few minutes, then plug it back in and power on the console.
2. Connectivity issues:
– Check network connection: Verify that your console is connected to the internet by going to “Settings,” selecting “Network,” and ensuring that it is connected to your Wi-Fi network or a wired connection. If using Wi-Fi, try moving the console closer to the router to improve signal strength.
– Restarting the router: Turn off your router, wait for about 30 seconds, and then turn it back on. Allow the router to fully reboot and establish a stable connection before attempting to connect your console again.
3. Game installation or download problems:
– Check storage space: Ensure that you have sufficient storage space on your console for the game you are trying to install or download. Uninstall any unused games or apps to free up space if necessary.
– Clearing the cache: Press and hold the power button on the front of the console until it powers off completely. Unplug the power cord from the console, wait for a few minutes, then plug it back in and power on the console. This clears the cache and can resolve installation or download issues.
4. Controller connectivity problems:
– Re-syncing the controller: Press and hold the sync button on the console until the light around the power button starts flashing. Then, on the controller, press and hold the sync button until the Xbox button starts flashing rapidly. The controller should sync with the console.
– Resetting the controller: If re-syncing doesn’t work, try resetting the controller. Use a small pin or paperclip to press and hold the small sync button on the back of the controller for a few seconds. Then, re-sync the controller with the console.
5. System software issues:
– Updating the console: Ensure that your console is running the latest system software by going to “Settings,” selecting “System,” and choosing “Updates.” If an update is available, download and install it to resolve any known software issues.
– Factory reset: If all else fails, you can perform a factory reset on your console. Keep in mind that this will erase all data and settings, so back up your important files before proceeding. To factory reset the console, go to “Settings,” select “System,” choose “Console Info,” and then select “Reset console.”
If you continue to experience issues even after troubleshooting, consider contacting Xbox Support for further assistance. They can provide specific guidance based on your situation and help resolve any persistent problems you may encounter.
By following these troubleshooting steps, you can resolve common issues with your Xbox Series X or S console and continue to enjoy a seamless gaming experience.