
Checking Xbox Series X and S Compatibility with External Hard Drives
Before you go ahead and purchase an external hard drive for your Xbox Series X or S, it’s crucial to ensure compatibility between the console and the device. Xbox consoles have specific requirements for external storage, and not all drives will work seamlessly with them. Taking a few moments to check compatibility can save you from headaches down the line.
To determine if an external hard drive is compatible with the Xbox Series X or S, you need to consider two key factors:
- Storage Capacity: The Xbox Series X and S support USB 3.1 external hard drives with a minimum storage capacity of 128 GB and a maximum capacity of 16 TB. Make sure the drive you choose falls within this range to ensure optimal performance.
- Drive Format: The Xbox consoles require external hard drives to be formatted in a specific way in order to be recognized and used. The supported file system for Xbox Series X and S is the NTFS file system. If the drive is formatted in a different file system like FAT32 or exFAT, you will need to reformat it before using it with your Xbox console.
Additionally, it’s important to note that the Xbox Series X and S do not support internal hard drive upgrades. This means that if you’re looking to expand the storage on your console, an external hard drive is the way to go.
Once you have verified that the external hard drive meets the storage capacity requirement and is formatted correctly, you can proceed to connect it to your Xbox console and make the necessary settings adjustments.
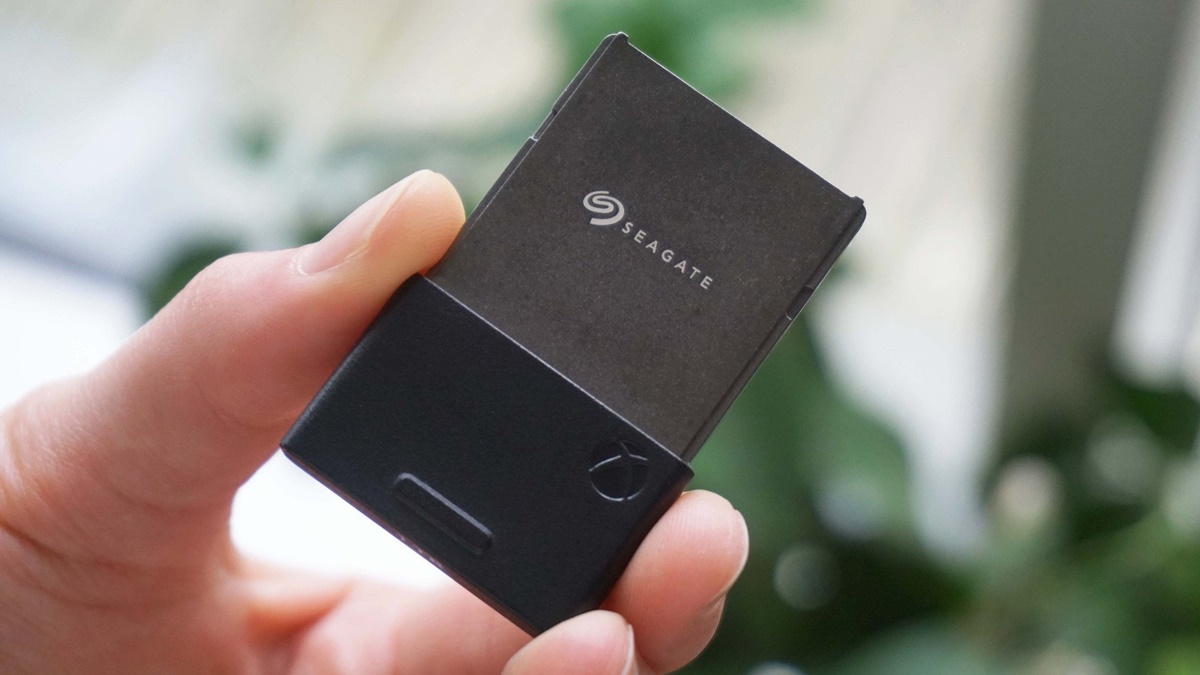
Choosing the Right External Hard Drive for Xbox Series X or S
When it comes to selecting an external hard drive for your Xbox Series X or S, there are a few factors to consider to ensure optimal performance and storage capacity. Here are some key points to keep in mind while choosing the right external hard drive:
- Storage Capacity: Determine how much additional storage you need for your Xbox Series X or S. Consider the size of the games and apps you plan to install, as well as any future updates or downloadable content. It’s always better to go for more storage capacity to cater to your future needs.
- Performance and Speed: Look for external hard drives with high read and write speeds to minimize loading times and ensure smooth gameplay. Drives and SSDs (Solid-State Drives) with USB 3.1 or higher connections offer faster data transfer rates and reduce game loading times significantly.
- Reliability and Durability: Opt for a reputable brand and model known for its reliability and durability. Gaming sessions can be long and intense, so you want a drive that can withstand continuous usage without any issues.
- Portability: If you plan to take your Xbox console to different locations, consider a compact and portable external hard drive. This way, you can easily carry your games and apps without much hassle.
- Price: Set a budget that works for you and compare prices of different external hard drives. Look for sales or discounts to get the best value for your money.
Keep in mind that while SSDs are generally faster than traditional hard drives, they can be more expensive. If speed is a top priority for you, investing in an SSD might be worth considering.
By considering these factors and taking the time to research and read reviews, you can select the right external hard drive that meets your storage needs and enhances your gaming experience on the Xbox Series X or S.
Formatting the External Hard Drive for Xbox Console
Before you can start using your external hard drive with the Xbox Series X or S, you need to format it in the correct file system. The Xbox consoles require the external drive to be formatted in NTFS, so it can be recognized and utilized properly. Here are the steps to format the external hard drive for your Xbox console:
- Connect the Drive: Plug the external hard drive into one of the USB ports on your Xbox Series X or S console.
- Access the Settings: Turn on your Xbox and navigate to the Home screen. Press the Xbox button on your controller to open the guide, and then select “Settings”.
- Select System: In the Settings menu, scroll down and choose “System”.
- Choose Storage: Under the System menu, select “Storage” to manage your storage devices.
- Select the External Hard Drive: From the list of storage devices, select the external hard drive you just connected.
- Format the Drive: Once you have selected the external hard drive, choose the “Format” option. A warning message will appear, informing you that formatting will erase all data on the drive. Make sure you have backed up any important data from the drive before proceeding.
- Confirm the Format: After reading the warning message, confirm that you want to format the drive by following the prompts on the screen.
- Wait for Formatting to Complete: The Xbox console will begin formatting the external hard drive. Be patient and wait for the process to complete. The duration of the formatting process will depend on the size of the drive.
Once the formatting is complete, the external hard drive will be ready to use with your Xbox Series X or S. It will be recognized as a valid storage device, and you can start transferring games and apps to it to free up space on your internal storage.
Keep in mind that formatting the drive will erase all existing data, so make sure to back up anything important before proceeding with the formatting process.
Connecting the External Hard Drive to Xbox Series X or S
Connecting an external hard drive to your Xbox Series X or S is a straightforward process. By following these simple steps, you can have your external storage up and running in no time:
- Choose a USB Port: Identify an available USB port on your Xbox console where you will connect the external hard drive. Both the Xbox Series X and S have multiple USB ports located on the back of the console.
- Plug in the Hard Drive: Take the USB cable provided with your external hard drive and connect one end to the USB port on your Xbox console, and the other end to the external hard drive itself. Ensure a secure and snug connection.
- Power On the Console: Turn on your Xbox Series X or S console using the power button on the front. Wait for the console to boot up fully.
- Recognition Process: Upon properly connecting the external hard drive, the Xbox console will automatically detect and recognize the drive. It may take a few moments for the console to identify and configure the storage device.
- Notification: Once the external hard drive is recognized, a notification will appear on the screen, indicating that a new storage device has been connected.
- Confirmation: To ensure that the external hard drive is successfully connected, you can navigate to the “Storage” section in the Xbox console’s settings. Here, you will see the external drive listed as an available storage device.
That’s it! Your external hard drive is now connected to your Xbox Series X or S console. You can now proceed to configure the settings and transfer games and applications to the external storage to free up space on your internal drive.
Remember, it’s recommended to use a USB 3.1 external hard drive for optimal performance and faster data transfer speeds. Also, make sure to choose a drive with sufficient storage capacity to accommodate your gaming needs.
Configuring Xbox Series X or S Settings for External Storage
Once you have connected your external hard drive to your Xbox Series X or S console, you need to configure the settings to optimize the usage of the external storage. Here’s how you can set up your Xbox console to make the most of your external storage:
- Access the Settings: Turn on your Xbox console and go to the Home screen. Press the Xbox button on your controller to open the guide, and then select “Settings”.
- Select System: In the Settings menu, scroll down and choose “System”.
- Choose Storage: Under the System menu, select “Storage” to manage storage devices and settings.
- Select the External Hard Drive: From the list of storage devices, locate and select the external hard drive you connected to the Xbox console.
- Designate Storage Location: Choose the “Set as default location” option to set the external hard drive as the default storage location for new installations. This will ensure that games and apps are automatically installed on the external drive instead of the internal storage.
- Move Existing Content: To free up space on the internal storage, select “Move” and choose the games or apps you want to transfer to the external hard drive. Follow the prompts to initiate the transfer process.
- Game and App Settings: In the storage settings, you can also manage game and app settings. For example, you can choose to keep games and apps up to date on the external storage or move them back to the internal drive if needed.
Once you have configured the settings, your Xbox Series X or S console will prioritize the external hard drive for new installations and start utilizing it for storing games and apps. This helps you free up space on the internal drive and optimize storage capacity.
Keep in mind that game saves and certain system files will continue to be stored on the internal drive, even if you set the external drive as the default installation location. Consequently, it is crucial to regularly back up your game saves to the cloud or an external storage device to prevent data loss.
By properly configuring the settings for external storage, you can maximize the benefits of your external hard drive and enjoy a seamless gaming experience on your Xbox Series X or S console.
Transferring Games and Apps to the External Hard Drive
One of the main advantages of using an external hard drive with your Xbox Series X or S console is the ability to offload games and apps from the internal storage to free up space. Transferring games and apps to the external hard drive is a simple process. Here’s how you can do it:
- Access the Settings: Turn on your Xbox console and go to the Home screen. Press the Xbox button on your controller to open the guide, and then select “Settings”.
- Select System: In the Settings menu, scroll down and choose “System”.
- Choose Storage: Under the System menu, select “Storage” to manage storage devices and settings.
- Select Internal Storage: From the list of storage devices, locate and select the internal storage option. This will display a list of games and apps installed on the internal drive.
- Choose Games and Apps to Transfer: Select the games and apps you want to transfer to the external hard drive. You can choose individual items or select “Move all” to transfer everything from the internal storage.
- Initiate the Transfer: Once you have made your selection, choose the “Move” option to begin the transfer process. Follow the prompts and wait for the transfer to complete.
During the transfer, the progress will be displayed on-screen, and you can monitor the status of each game or app being moved. The duration of the transfer will depend on the size of the files and the speed of your external hard drive.
It is important to note that you can still play games and use apps while they are being transferred to the external hard drive. However, it may affect the performance slightly until the transfer is complete.
Once the transfer is finished, the games and apps will now be stored and accessible from the external hard drive. You can launch them directly from the external storage, freeing up space on your internal drive for new installations.
Remember to regularly manage your storage and transfer games and apps as needed to maintain an optimal balance between the internal and external storage on your Xbox Series X or S console.
Launching Games and Apps from the External Hard Drive
Now that you have transferred games and apps to your external hard drive on your Xbox Series X or S console, you can easily launch and play them directly from the external storage. Here’s how you can do it:
- Connect the External Hard Drive: Ensure that your external hard drive is connected to the Xbox console and powered on.
- Access the Home Screen: Turn on your Xbox console and navigate to the Home screen.
- Navigate to “My games & apps”: From the Home screen, use the controller to highlight and select the “My games & apps” tile towards the top left of the screen.
- Open Games or Apps: In the “My games & apps” section, you will see a list of all your installed games and apps. Use the controller to scroll through the list and locate the game or app you want to play.
- Select the Game or App: Highlight the desired game or app and press the A button on the controller to launch it. The game or app will start loading from the external hard drive.
Once launched, the game or app will run from the external storage, and you can play or use it just as you would if it were stored on the internal drive. The performance and loading times will depend on the speed of your external hard drive.
It’s worth noting that if you have set the external hard drive as the default storage location, any new installations or updates will automatically be saved on the external drive. This helps you maintain a balanced storage setup and optimize the performance of your console.
By launching games and apps from the external hard drive, you can enjoy a larger library of games while keeping your internal storage free for other uses. It provides a convenient and efficient way to manage your gaming content on the Xbox Series X or S console.
Managing Storage and Moving Games and Apps Between Internal and External Drives
As you accumulate more games and apps on your Xbox Series X or S console, managing storage becomes essential. Fortunately, the Xbox console provides features that allow you to easily move games and apps between the internal and external drives. Here’s how you can effectively manage your storage:
Moving Games and Apps to External Drive:
- Access the Settings: Turn on your Xbox console and go to the Home screen. Press the Xbox button on your controller to open the guide, and then select “Settings”.
- Select System: In the Settings menu, scroll down and choose “System”.
- Choose Storage: Under the System menu, select “Storage” to manage storage devices and settings.
- Select Internal Storage: From the list of storage devices, locate and select the internal storage option.
- Choose Games and Apps to Move: Select the games or apps you want to move from the internal storage to the external drive. You can select individual items or choose “Move all” to transfer everything.
- Initiate the Transfer: Select the “Move” option and follow the prompts to confirm the move. The console will start transferring the selected games and apps to the external drive. The duration will depend on the size of the files and the transfer speed.
Moving Games and Apps to Internal Drive:
- Follow the same steps: Access the Settings, select System, and choose Storage.
- Select the External Drive: From the list of storage devices, locate and select the external hard drive where your games and apps are stored.
- Choose Games and Apps to Move: Select the specific games or apps you want to transfer back to the internal storage.
- Initiate the Transfer: Select the “Move” option and follow the prompts to confirm the move. The console will start transferring the selected games and apps from the external drive to the internal storage.
By utilizing these features, you can easily manage your storage and optimize the use of both your internal and external drives. This flexibility allows you to install your preferred games on the drive of your choice, ensuring you have enough space for new titles while keeping your favorites easily accessible.
It’s important to note that during the transfer process, games and apps may not be playable. However, once the transfer is complete, you can play them directly from the new storage location without any issues.
Regularly assess your storage needs, considering the number and size of games and apps you wish to keep. This will help you efficiently manage your storage capacity and maintain a smooth gaming experience on your Xbox Series X or S console.
Safely Disconnecting the External Hard Drive from Xbox Series X or S
When you no longer need to use the external hard drive with your Xbox Series X or S console, it is important to safely disconnect it to avoid any data corruption or damage. Here’s the proper procedure to follow to safely disconnect your external hard drive:
- Closing Games and Apps: Before disconnecting the external hard drive, make sure to close any games or apps that may be running from the drive. This ensures that all data is properly saved and prevents potential issues.
- Navigating to Settings: Turn on your Xbox console and go to the Home screen. Press the Xbox button on your controller to open the guide, and then select “Settings”.
- Select System: In the Settings menu, scroll down and choose “System”.
- Choose Storage: Under the System menu, select “Storage” to manage storage devices and settings.
- Select the External Hard Drive: From the list of storage devices, locate and select the external hard drive.
- Select the Eject Option: A context menu will appear with options for the selected external drive. Choose the “Eject” option to initiate the safe disconnect process.
- Wait for Confirmation: Once you select the eject option, the console will safely unmount the external hard drive. Wait for the confirmation message on the screen before physically disconnecting the drive.
- Physically Disconnect the Drive: After receiving the confirmation, you can safely disconnect the external hard drive from the USB port on your Xbox console.
It is important to avoid disconnecting the external hard drive while games or apps are still accessing it. Abruptly removing the drive without following the proper procedure can lead to data corruption or loss.
By adhering to these steps and safely disconnecting the external hard drive, you can ensure the integrity of your data and prolong the lifespan of both the console and the hard drive.
Remember that if you plan to use the external hard drive again with your Xbox Series X or S console, you will need to reconnect it and allow the console to recognize and configure the drive before using it.
Troubleshooting Common Issues with External Hard Drive Usage on Xbox Series X or S
While using an external hard drive with your Xbox Series X or S console is generally a straightforward process, there may be times when you encounter issues. Here are some common problems that you may come across and troubleshooting steps to help resolve them:
1. External Hard Drive Not Recognized:
- Ensure that the external hard drive is properly connected to the USB port on your Xbox console.
- Try connecting the drive to a different USB port on the console to see if it is recognized.
- Verify that the hard drive is formatted in the NTFS file system, as Xbox consoles only support this format.
- Restart your Xbox console and check if the external hard drive is detected after the restart.
- If the issue persists, try connecting the hard drive to another device to check if it is functioning properly.
2. Slow Loading Times or Performance:
- Ensure that you are using a high-quality and high-speed external hard drive that meets the specifications recommended for Xbox Series X or S.
- Make sure that the external hard drive is not nearly full, as this can reduce performance. Leave some free space on the drive.
- Check for any firmware updates for the external hard drive and install them if available.
- Try transferring the game or app from the external drive back to the internal storage and check if performance improves. If it does, the issue may be related to the external hard drive.
3. Error Messages:
- If you encounter specific error messages, note them down and search online for solutions. Xbox support forums and websites often provide troubleshooting steps for common error codes.
- Perform a hard reset of your Xbox console by holding down the power button for 10 seconds until it shuts off completely. Then, turn it back on and check if the error persists.
- If the error is specific to the external hard drive, try connecting it to another device to see if the issue persists. This will help determine if the problem lies with the Xbox or the hard drive itself.
If you continue to experience difficulties with your external hard drive, it may be helpful to reach out to Xbox support or the manufacturer of the hard drive for further assistance. They can provide specific troubleshooting steps or determine if there is a hardware issue with either the console or the hard drive.
By following these troubleshooting steps, you can address common issues and ensure a smooth experience when using an external hard drive with your Xbox Series X or S console.