
What is a Trezor One?
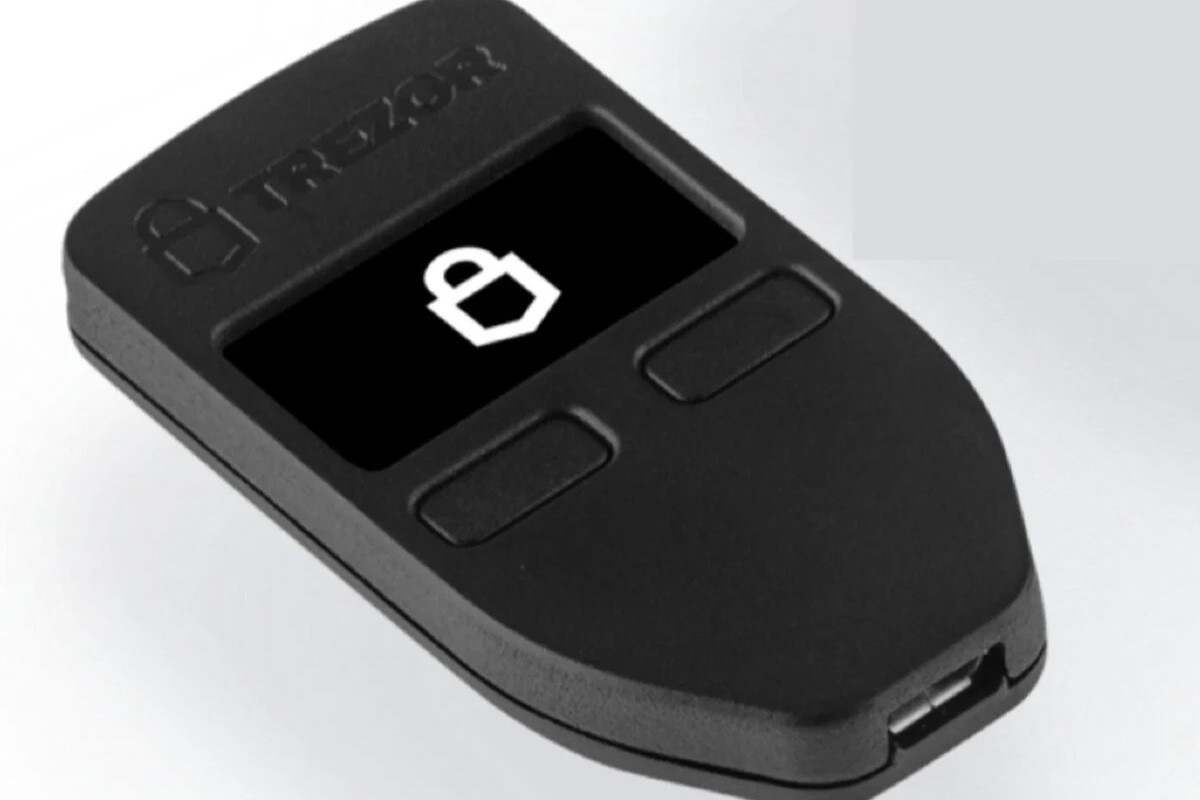
The Trezor One is a hardware wallet that provides secure storage and management of cryptocurrencies. It is a compact and portable device designed to keep your digital assets safe from online threats such as hacking and malware. Developed by the Czech company SatoshiLabs, the Trezor One offers a user-friendly interface and robust security features.
Unlike traditional software wallets, a hardware wallet like the Trezor One stores your private keys offline, inaccessible to potential hackers. This extra layer of security significantly reduces the risk of your funds being compromised. The Trezor One supports a wide range of cryptocurrencies, including Bitcoin, Ethereum, Litecoin, and many more, making it a versatile solution for cryptocurrency enthusiasts.
With the Trezor One, you can securely manage your digital currencies without relying on third-party exchanges or online wallets. It enables you to send and receive cryptocurrencies, check your account balance, and view transaction history, all from a single device. The device is equipped with a small screen and buttons, allowing you to interact directly with the wallet and confirm transactions securely.
Beyond its security features, the Trezor One also offers convenience and peace of mind. Losing or forgetting your private keys can result in permanent loss of access to your funds. However, the Trezor One incorporates a backup and recovery system known as the recovery seed. This unique set of randomly generated words can be used to restore your wallet and access your funds in case the device is lost or damaged.
Things to Know Before Setting Up
Before diving into the setup process for your Trezor One, there are a few important points to keep in mind:
- Understanding the basics: Familiarize yourself with how hardware wallets work and the importance of securing your private keys. This will ensure you have a clear understanding of why using a device like the Trezor One is crucial for safeguarding your cryptocurrencies.
- Choosing the right device: Ensure that your computer or mobile device meets the requirements for connecting and using the Trezor One. Make sure you have a compatible operating system such as Windows, Mac, Linux, Android, or iOS.
- Researching supported cryptocurrencies: Verify that the cryptocurrencies you own or plan to own are supported by the Trezor One. While it supports a wide range of popular cryptocurrencies, it’s always a good idea to double-check to avoid any disappointment later on.
- Downloading the necessary software: Prior to setting up your Trezor One, ensure that you have the latest version of the Trezor Bridge software installed on your computer. This software allows your device to communicate securely with the wallet interface.
- Securing your environment: Choose a private and secure location to set up your Trezor One. Ensure that you are connected to a secure and trusted internet connection, preferably using a wired connection instead of public Wi-Fi.
- Having a backup plan: It’s vital to have a backup plan in case your Trezor One device is lost or damaged. Create a backup of your recovery seed and store it in a safe place that is separate from your device.
By understanding these key points, you can proceed with confidence to set up your Trezor One and begin securely managing your cryptocurrencies.
Step 1: Unboxing the Trezor One
When you receive your Trezor One, follow these steps to unbox it:
- Inspect the packaging: Carefully examine the packaging for any signs of tampering or damage. Ensure that the package is sealed and in good condition.
- Open the box: Gently open the box and remove the contents. You should find the Trezor One device, a USB cable, and a set of instructions.
- Verify the authenticity: Check the holographic seal on the Trezor One device to ensure its authenticity. This is an important security measure to guarantee that the device has not been tampered with.
- Connect the USB cable: Take the USB cable and connect one end to the Trezor One device and the other end to your computer or mobile device. This will establish the connection needed to set up the wallet.
- Note the device screen: As you connect the cable, you will notice the Trezor One screen turning on. It may display a logo or firmware version information, indicating that the device is functioning properly.
- Keep the box and accessories: Safely store the box and accessories in a secure place. These items may come in handy if you need to troubleshoot or reset your Trezor One in the future.
By carefully unboxing your Trezor One and connecting it to your device, you are ready to move on to the next step of setting up this secure hardware wallet.
Step 2: Choosing a Compatible Device
Before proceeding with the setup of your Trezor One, it’s important to ensure that you have a compatible device to connect it to. The Trezor One can be used with various operating systems including Windows, Mac, Linux, Android, and iOS. Here’s what you need to consider:
- Computer: If you plan to use a computer, make sure it meets the minimum system requirements for the Trezor One. Check that it has a USB port and is running a compatible operating system. It’s recommended to have the latest version of your operating system installed for optimal compatibility.
- Mobile Device: If you prefer using a mobile device, ensure that you have a compatible smartphone or tablet. Download the Trezor app from the iOS App Store or Google Play Store and make sure your device is running the latest version of the operating system.
- Trezor Model T: If you own a Trezor Model T, keep in mind that it has a touchscreen interface and can be used independently without the need for a computer or mobile device. However, for the Trezor One, you will need to connect it to a device to access its features and perform transactions.
Compatibility with different devices provides flexibility and convenience in managing your cryptocurrencies. Whether you prefer using a computer or a mobile device, the Trezor One offers support for a wide range of platforms, ensuring a seamless user experience.
Step 3: Installing the Trezor Bridge
Before you can start using your Trezor One, you need to install the Trezor Bridge software on your computer. The Trezor Bridge acts as a secure communication channel between your device and the wallet interface. Follow these steps to install the Trezor Bridge:
- Visit the Trezor website: Go to the official Trezor website and navigate to the “Downloads” section. Here, you will find the Trezor Bridge software available for different operating systems.
- Select the relevant version: Choose the version of the Trezor Bridge that corresponds to your operating system (Windows, Mac, Linux). Ensure that you download the latest version available to benefit from any security updates and improvements.
- Download and run the installer: Once the installer file is downloaded, open it and follow the on-screen prompts to install the Trezor Bridge on your computer. The installation process is generally straightforward and doesn’t require any complex configurations.
- Complete the installation: After the installation is complete, restart your computer to ensure that any necessary changes take effect. This step is vital to ensure smooth communication between your Trezor One device and the wallet interface.
By installing the Trezor Bridge software, you establish a secure connection between your Trezor One device and the wallet interface, enabling you to manage your cryptocurrencies with ease and enhanced security.
Step 4: Connecting the Trezor One to the Computer
Now that you have successfully installed the Trezor Bridge software, you can proceed to connect your Trezor One device to your computer. Follow these steps to establish the connection:
- Ensure Trezor Bridge is running: Make sure that the Trezor Bridge software is running on your computer. The software should automatically start when your computer boots up. If it’s not running, locate the Trezor Bridge application and launch it manually.
- Connect the Trezor One: Take the USB cable that came with your Trezor One and connect one end to the device and the other end to an available USB port on your computer. Avoid using USB hubs or extensions, as they may interfere with the connection process.
- Choose communication option: After connecting your Trezor One, the device screen will display two options: “Use Trezor with Trezor Wallet” or “Use Trezor with third-party wallets.” Select the option that best suits your needs. If you’re unsure, choose the first option, as you can always explore third-party wallet options later.
- Unlock your Trezor One: On the device’s screen, you will be prompted to enter your PIN code. Use the device’s buttons to enter the PIN code you set during the initial setup. Ensure that you enter the correct code to unlock your Trezor One.
- Authorize the computer: For security purposes, your Trezor One will prompt you to authorize the computer you are connecting it to. Verify that the computer’s name or identification matches what is displayed on the device’s screen, then select “Confirm” on the device.
Once you’ve completed these steps, your Trezor One will be successfully connected to your computer, and you can proceed with the further setup process, including selecting a wallet and managing your cryptocurrencies securely.
Step 5: Setting Up a Wallet on the Trezor One
With your Trezor One successfully connected to your computer, it’s time to set up a wallet on the device. Here’s how you can do it:
- Choose a compatible wallet: There are several wallets that are compatible with the Trezor One. Visit the Trezor website to explore the available options. Some popular choices include Trezor Wallet, Electrum, and Mycelium. Select the wallet that best suits your needs.
- Install the wallet software: Download and install the wallet software on your computer. Follow the instructions provided by the specific wallet to complete the installation process. Ensure that you download the compatible version of the wallet software for your operating system.
- Launch the wallet software: Open the wallet software on your computer. Once launched, the software will detect your connected Trezor One device and prompt you to set up a new wallet. Follow the on-screen instructions to proceed.
- Label your device: As part of the setup process, you will be asked to label your Trezor One device. Choose a unique name or label that easily identifies the device. This step helps differentiate your Trezor One from any other devices you may own or plan to use.
- Create a new wallet: In the wallet software, select the option to create a new wallet. You may be guided through additional steps such as accepting terms and conditions or creating a unique PIN code for accessing the wallet interface.
- Complete the setup: Once all the necessary steps are completed, you will have successfully set up a wallet on your Trezor One. You can now start managing your cryptocurrencies securely using the wallet software and your Trezor One device.
Setting up a wallet on your Trezor One is an essential step in securely managing your cryptocurrencies. By following these instructions and choosing a compatible wallet, you can confidently proceed to the next steps of securing your funds and performing transactions.
Step 6: Creating a Strong Passphrase
When using the Trezor One, it’s essential to add an extra layer of security to your wallet by creating a strong passphrase. This step is optional but highly recommended. Here’s how you can create a strong passphrase:
- Understand the significance: A passphrase is an additional phrase or set of words that acts as a second factor of authentication. It adds an extra layer of security to your wallet, protecting it from unauthorized access.
- Access the passphrase feature: Open the wallet software that you installed on your computer and navigate to the settings or security section. Look for the option related to the passphrase feature.
- Choose a strong passphrase: When creating a passphrase, aim for a combination of random words, numbers, and special characters. Avoid common phrases or easily guessable information. The longer and more complex your passphrase, the more secure it will be.
- Remember your passphrase: It’s crucial to remember your chosen passphrase. Since it’s not stored anywhere, forgetting it could result in permanent loss of access to your funds. Consider using a password manager or writing it down and storing it in a secure, offline location.
- Enable the passphrase: Once you’ve created a strong passphrase and double-checked its accuracy, enable the passphrase feature in the wallet software. Confirm your decision, and the passphrase will become an integral part of accessing your Trezor One wallet.
By creating a strong and unique passphrase, you significantly enhance the security of your Trezor One wallet. This additional layer of protection adds peace of mind, particularly if your device is lost, stolen, or falls into the wrong hands.
Step 7: Backing Up the Recovery Seed
One of the most critical steps in setting up your Trezor One is backing up the recovery seed. The recovery seed is a unique set of words generated by your device and serves as a backup in case your Trezor One is lost, damaged, or needs to be restored. Follow these steps to back up your recovery seed:
- Confirm the recovery seed: On the Trezor One device screen, you will be prompted to generate a recovery seed. Read the instructions and carefully confirm that you understand the importance of the recovery seed.
- Write down the seed words: During the setup process, the device will display a set of 12 or 24 seed words. Write down these words on a piece of paper or use the provided recovery seed card. Make sure to write them in the correct order and double-check for any mistakes.
- Store it securely: Once you have written down the recovery seed, store it in a secure location such as a safe or a lockbox. Ensure that it is protected from fire, water damage, and unauthorized access. Consider creating multiple copies and storing them in separate places for additional security.
- Avoid digital storage: It is crucial to avoid digitally storing the recovery seed, as it increases the risk of unauthorized access or loss. Keep it offline and away from any devices connected to the internet.
- Keep it private: Do not share your recovery seed with anyone. Treat it as your private key to your funds and keep it confidential. Sharing your recovery seed can compromise the security of your wallet and result in the loss of your cryptocurrencies.
Backing up the recovery seed is vital because it ensures that you can recover your wallet and access your funds in case of any unforeseen circumstances. By securely storing the recovery seed, you have a failsafe method to restore your Trezor One and continue managing your cryptocurrencies securely.
Step 8: Updating the Firmware
Keeping the firmware of your Trezor One up to date is crucial to ensure the latest security features and bug fixes are implemented. To update the firmware, follow these simple steps:
- Check for firmware updates: Open the Trezor Wallet software on your computer and connect your Trezor One device. In the wallet interface, navigate to the settings or device management section. Look for the option to check for firmware updates.
- Download the latest firmware: If a new firmware update is available, the wallet software will prompt you to download it. Click on the download button and wait for the process to complete. Make sure you have a stable internet connection to avoid any interruptions.
- Install the firmware update: Once the firmware update is downloaded, the wallet software will guide you through the installation process. Follow the on-screen instructions carefully. During the process, ensure that your Trezor One remains connected to your computer.
- Verify the firmware version: After the installation is complete, disconnect and reconnect your Trezor One device. In the wallet software, go to the device management section again and verify that the new firmware version is displayed.
By regularly updating the firmware, you can ensure that your Trezor One is equipped with the latest security enhancements and performance improvements. This helps protect your cryptocurrencies from potential vulnerabilities and ensures a reliable user experience.
Step 9: Setting a PIN code
Setting a PIN code on your Trezor One is an essential security measure to protect your device and funds from unauthorized access. Follow these steps to set a PIN code:
- Access the PIN settings: Open the wallet software on your computer and connect your Trezor One device. In the wallet interface, navigate to the settings or security section. Look for the option to set or change your PIN code.
- Choose a strong PIN code: Select a PIN code that is easy for you to remember but difficult for others to guess. Avoid using common combinations like birth dates or sequential numbers. Opt for a unique and random combination of digits.
- Enter the PIN code: Following the on-screen prompts, enter the chosen PIN code using the device’s buttons. Take your time and ensure that you input the correct digits as the PIN code is permanent and cannot be changed without resetting the device.
- Confirm the PIN code: After entering the PIN code, you will be asked to confirm it. Double-check that the digits on the device’s screen match the ones you entered. If they match, confirm the PIN code to save it as your device’s security access.
- Memorize your PIN code: It is crucial to memorize your PIN code and never share it with anyone. It acts as the first line of defense for protecting your funds. Avoid writing it down or storing it in digital format to minimize the risk of unauthorized access.
By setting a PIN code, you add an extra layer of security to your Trezor One device. This ensures that even if someone gains physical access to your device, they won’t be able to use it without knowing the unique PIN code you’ve set.
Step 10: Sending and Receiving Cryptocurrencies
Now that you have set up your Trezor One and taken the necessary security measures, you can start sending and receiving cryptocurrencies. Here’s how you can do it:
- Access your wallet: Open the wallet software on your computer and connect your Trezor One device. Enter your PIN code when prompted to unlock the device and access your wallet interface.
- Choose the cryptocurrency: In the wallet interface, select the cryptocurrency you want to send or receive. The Trezor One supports a wide range of cryptocurrencies, so make sure you choose the correct one from the list.
- Receiving cryptocurrencies: To receive cryptocurrencies, click on the “Receive” button in the wallet interface. Your Trezor One will generate a unique public address for that particular cryptocurrency. Copy the address or scan the QR code and provide it to the person or platform sending you the funds.
- Sending cryptocurrencies: To send cryptocurrencies, click on the “Send” button in the wallet interface. Enter the recipient’s wallet address and the amount you want to send. Review the transaction details carefully before confirming the transaction on your Trezor One device.
- Confirm the transaction: On the Trezor One device’s screen, verify the transaction details displayed and confirm by pressing the appropriate button on your device.
- Transaction confirmation: Once the transaction is confirmed, the wallet software will display a transaction confirmation message. Depending on the cryptocurrency, it may take some time for the transaction to be processed and confirmed on the blockchain.
It’s important to double-check the recipient’s address when sending cryptocurrencies to avoid any potential mistakes or loss of funds. Always review the transaction details and confirm them on your Trezor One device to ensure the security and accuracy of the transaction.
Extra Tips and Troubleshooting
Setting up and using your Trezor One can be a smooth and secure experience. Here are some extra tips and troubleshooting strategies to help you along the way:
Tips:
- Regularly update your Trezor One: Stay up to date with the latest firmware and wallet software updates to benefit from improved security features and bug fixes.
- Enable passphrase feature: Consider adding a passphrase to your device for an additional layer of security. This feature ensures that even if someone gains unauthorized access to your device, they would still need the passphrase to access your funds.
- Keep your recovery seed safe: Store your recovery seed in a secure location, separate from your device. Consider using a fireproof and waterproof safe or a safety deposit box.
- Double-check addresses: When sending or receiving cryptocurrencies, always verify the wallet addresses you are using. Mistakes in entering an address can result in irreversible loss of funds.
- Start small: When sending larger amounts of cryptocurrency, it’s a good practice to start with a small test transaction to confirm that everything works as expected before proceeding with larger amounts.
Troubleshooting:
- Connection issues: If you encounter connectivity issues between your Trezor One and the wallet software, try using a different USB cable or port. Restarting both your device and computer can also help resolve connection problems.
- Forgotten PIN code: If you forget your PIN code, don’t panic. You can use your recovery seed to reset your device and set up a new PIN code. Make sure you have your recovery seed written down and accessible.
- Incorrect balance: If you experience discrepancies or incorrect balance displayed in the wallet software, try refreshing the wallet or performing a resynchronization to update the information from the blockchain.
- Long transaction time: Some cryptocurrencies might have longer transaction confirmation times due to network congestion. Be patient and allow sufficient time for the transaction to be processed and confirmed on the blockchain.
- Reach out to support: If you encounter any technical or operational difficulties, refer to the Trezor website’s support section or reach out to their customer support for assistance.
By following these extra tips and employing troubleshooting strategies, you can ensure a smooth and secure experience while using your Trezor One to manage your cryptocurrencies.
Frequently Asked Questions (FAQs)
Here are answers to some commonly asked questions about setting up and using the Trezor One:
Q: Can I use the Trezor One with multiple cryptocurrencies?
A: Yes, the Trezor One supports a wide range of cryptocurrencies, including Bitcoin, Ethereum, Litecoin, and many more. You can manage multiple cryptocurrencies using a single Trezor One device.
Q: How often should I update the firmware?
A: It is recommended to update the firmware of your Trezor One whenever a new version is available. Regular firmware updates ensure that your device remains secure and up to date with the latest features and enhancements.
Q: What happens if I lose my Trezor One device?
A: If you lose your Trezor One device, you can use your recovery seed to restore your wallet access on a new device. It is essential to keep your recovery seed safe and accessible, as it serves as a backup in case of loss or damage to your device.
Q: Can I use my Trezor One with multiple devices?
A: Yes, you can connect your Trezor One to multiple devices. However, it is important to ensure that these devices are secure and trusted. Avoid using public or unfamiliar computers or mobile devices to protect the security of your funds.
Q: Can I reset my Trezor One if I forget my PIN code?
A: Yes, if you forget your PIN code, you can use your recovery seed to reset your Trezor One device and set up a new PIN code. It is crucial to have your recovery seed written down and stored in a secure place for this purpose.
Q: Is it possible to recover my wallet without the recovery seed?
A: No, the recovery seed is the only way to recover your wallet and access your funds in case of device loss or damage. It is essential to keep your recovery seed safe and avoid sharing it with anyone.
Q: Can I use the Trezor One with third-party wallets?
A: Yes, the Trezor One supports integration with various third-party wallets, providing you with flexibility in managing your cryptocurrencies. Ensure that the third-party wallet is compatible and supports the Trezor One.
Q: Is it possible to have multiple Trezor One devices?
A: Yes, you can own and use multiple Trezor One devices. Each device will have its own unique recovery seed, PIN code, and wallet configuration for managing your cryptocurrencies.
If you have further questions or need additional information, refer to the Trezor website’s support section or reach out to their customer support for assistance.