
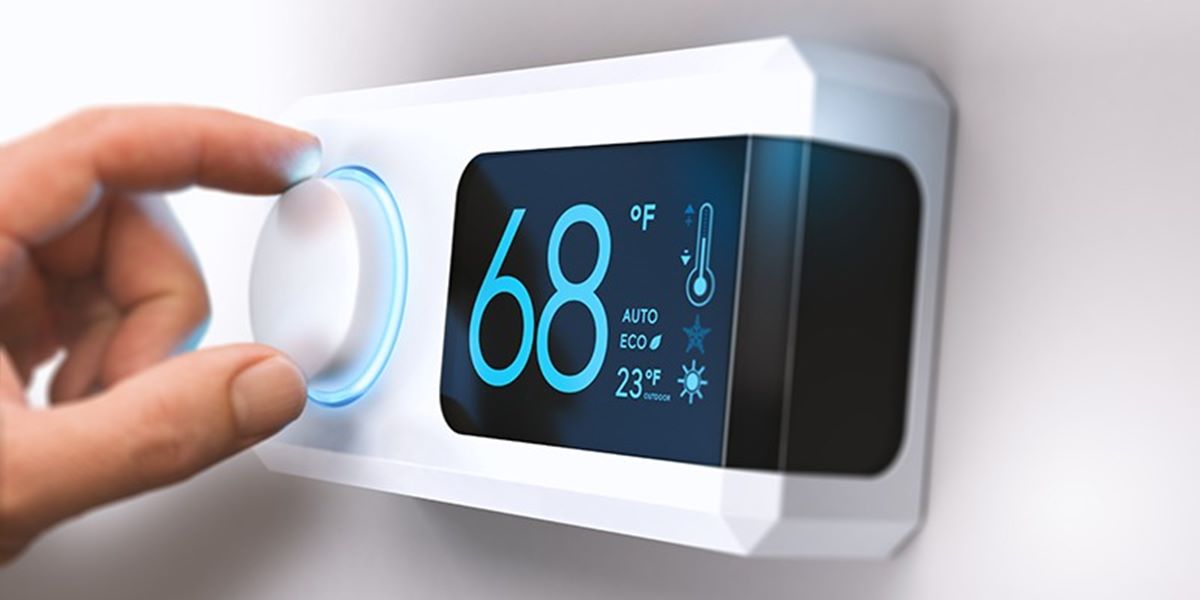
What is a Digital Thermostat?
A digital thermostat is an advanced temperature control device that allows you to manage and adjust the heating and cooling settings in your home. Unlike traditional thermostats that use manual dials or switches, digital thermostats feature a digital display and offer more precise temperature control options.
These thermostats are designed with user-friendly interfaces that make it easy to program and customize temperature settings according to your preferences and schedule. Many digital thermostats also come with additional features like programmable timers, energy-saving modes, and Wi-Fi connectivity, allowing you to remotely control your thermostat from your smartphone or computer.
With the ability to accurately monitor and regulate your home’s temperature, digital thermostats offer several benefits. They can help you reduce energy consumption and lower utility bills by optimizing heating and cooling cycles. They also provide convenience and comfort, allowing you to maintain a consistent temperature throughout the day without the need for manual adjustments.
Furthermore, some digital thermostats offer advanced features such as learning capabilities, where the thermostat can intelligently adapt to your temperature preferences over time. This not only saves energy but also ensures a comfortable living environment.
Overall, digital thermostats are a modern and efficient solution for controlling the temperature in your home. With their user-friendly interfaces, energy-saving features, and customizable settings, they provide a convenient and cost-effective way to optimize your indoor climate.
Why Would You Need to Reset a Digital Thermostat?
There are several reasons why you might need to reset a digital thermostat. While these devices are generally reliable and easy to use, occasional issues can arise that require a reset to restore proper functionality. Here are some common scenarios where resetting a digital thermostat may be necessary:
1. Power Outage: If your home experiences a power outage, the digital thermostat may lose power and revert to default settings or display incorrect information. Resetting the thermostat can help it reestablish a connection and resume normal operation once power is restored.
2. Programming Errors: Sometimes, you may accidentally program incorrect temperature settings or schedule timings, leading to heating or cooling issues. Resetting the thermostat clears any incorrect data and allows you to reprogram it correctly, ensuring your desired temperature settings are met.
3. Sensor Malfunction: Occasionally, the sensors in a digital thermostat can encounter errors or become unresponsive, leading to inaccurate temperature readings or improper functioning of the heating or cooling system. A reset can help recalibrate the sensors and restore their proper operation.
4. Connectivity Issues: If your digital thermostat has Wi-Fi connectivity and you’re experiencing difficulties connecting it to your home network or accessing it remotely from your smartphone, a reset can help fix connectivity issues and establish a stable connection.
5. Software Glitches: Just like any electronic device, digital thermostats can experience software glitches or bugs that result in unexpected behavior or errors. Resetting the thermostat can resolve such software issues and restore normal operation.
6. Battery Replacement: Some digital thermostats operate on batteries as a backup power source. If the batteries are low or need replacement, resetting the thermostat after inserting fresh batteries ensures proper functioning and avoids any errors caused by depleted power.
In these situations, performing a reset on your digital thermostat can often resolve the issues and restore it back to its default settings. Remember, before resetting, consult the manufacturer’s instructions or website for specific guidelines on how to reset your particular model of digital thermostat.
How to Reset a Digital Thermostat
Resetting a digital thermostat is a straightforward process that can help resolve various issues and restore it to its default settings. Here are several methods you can try to reset your digital thermostat:
Option 1: Soft Reset:
If your digital thermostat has a touch screen or buttons, a soft reset can often resolve minor issues. Follow these steps:
- Locate the reset button on your thermostat.
- Press and hold the reset button for about 5 to 10 seconds.
- Release the reset button.
- Wait for the thermostat to reset. This may take a few seconds.
- Once the reset is complete, the thermostat will return to its default settings.
- Set up the thermostat again according to your preferences and schedule.
Option 2: Hard Reset:
If a soft reset doesn’t work, you can try a hard reset. This method involves cutting off power to the thermostat. Here’s how to do it:
- Locate the circuit breaker that controls the power to your thermostat.
- Switch off the circuit breaker to cut off the power supply.
- Wait for a few minutes to allow the thermostat to completely power down.
- Switch on the circuit breaker to restore power to the thermostat.
- Once the power is back on, the thermostat will reset to its default settings.
- Set up the thermostat again as per your preferences and schedule.
Option 3: Check the Batteries:
If your digital thermostat operates on batteries, a simple reset may be as easy as replacing them. Follow these steps:
- Locate the battery cover on the back or bottom of your thermostat.
- Remove the battery cover to access the batteries.
- Replace the old batteries with fresh ones.
- Put the battery cover back on.
- Set up the thermostat again according to your preferences and schedule.
Common Troubleshooting Tips for Digital Thermostats:
If you are still experiencing issues after resetting your digital thermostat, here are some additional troubleshooting tips:
- Check the user manual or manufacturer’s website for specific troubleshooting guidelines for your thermostat model.
- Ensure the thermostat is properly connected to your HVAC system.
- Verify that the Wi-Fi connectivity is functioning correctly, if applicable.
- Double-check that the temperature settings and scheduling are configured correctly.
- If all else fails, consider contacting the manufacturer’s customer support for further assistance.
Option 1: Soft Reset
A soft reset is a simple and quick method to reset a digital thermostat that has touch screen or button controls. This option is often effective for resolving minor issues and restoring the thermostat to its default settings. Here’s how you can perform a soft reset on your digital thermostat:
- Step 1: Locate the Reset Button
- Step 2: Press and Hold the Reset Button
- Step 3: Release the Reset Button
- Step 4: Wait for the Thermostat to Reset
- Step 5: Set Up the Thermostat Again
Take a close look at your thermostat’s control panel to find the reset button. The location of the reset button can vary depending on the make and model of your digital thermostat. It is typically a small button labeled “reset” or indicated by a circular arrow icon.
Once you have located the reset button, press and hold it for about 5 to 10 seconds. This duration may vary depending on the specific thermostat model. By pressing and holding the reset button, you initiate the soft reset process.
After holding the reset button for the designated time, release it. This signals the thermostat to proceed with the reset process.
Now, give your digital thermostat a few moments to complete the reset process. The time required for the reset can vary depending on factors like the thermostat model and any additional features it may have. It is normal for the thermostat screen to go blank during this period.
Once the reset process is complete, you will need to set up your digital thermostat again to customize your temperature preferences and scheduling. Follow the instructions provided by your thermostat’s manufacturer to input the desired settings.
Performing a soft reset on your digital thermostat can often resolve minor software glitches, restore proper functionality, and provide a fresh start for effective temperature control. However, if the issue persists or if you need to address more significant problems with your thermostat, you may need to explore alternative reset methods or seek professional assistance.
Option 2: Hard Reset
If a soft reset does not resolve the issues with your digital thermostat, you can try a hard reset. A hard reset involves temporarily cutting off power to the thermostat, which can help clear any persistent errors or restore malfunctioning settings. Here’s how you can perform a hard reset on your digital thermostat:
- Step 1: Locate the Circuit Breaker
- Step 2: Turn Off the Power to the Thermostat
- Step 3: Wait for a Few Minutes
- Step 4: Turn On the Power to the Thermostat
- Step 5: Set Up the Thermostat Again
Locate the circuit breaker panel in your home. It is typically situated in a utility room, basement, or garage. If you are unsure about its location, consult the user manual or contact a professional electrician for guidance.
Find the circuit breaker that controls the power supply to your thermostat. Usually, it is labeled “HVAC” or “Air Conditioning/Heating.” Flip the corresponding switch to the “Off” position to cut off the power.
Wait for at least 5 to 10 minutes to ensure that the power to the thermostat is completely cut off. This waiting period allows the internal components of the thermostat to fully power down.
After the waiting period, return to the circuit breaker panel and switch the breaker back to the “On” position, restoring power to the thermostat.
Once the thermostat has power again, it will reset to its default settings. Follow the manufacturer’s instructions to set up the thermostat according to your preferences and scheduling needs.
A hard reset can be useful for resolving more complex issues with your digital thermostat, such as software glitches or persistent errors. By cutting off power and restoring it, you give the thermostat a fresh start, allowing it to recalibrate and regain proper functionality. If a hard reset does not solve the problems, it may be necessary to contact a professional HVAC technician for further assistance or consider replacing the thermostat altogether.
Step 1: Locate the Reset Button
The first step in performing a soft reset on your digital thermostat is to locate the reset button. While the location of the reset button can vary depending on the make and model of your thermostat, it is generally positioned on the control panel. Locating the reset button is essential before proceeding with the reset process. Here’s how you can find the reset button on your digital thermostat:
1. Examine the Control Panel:
Inspect the control panel of your digital thermostat carefully. Look for any buttons or a small, labeled reset button. The reset button is often identifiable by its distinct appearance or may be indicated by a circular arrow icon.
2. Refer to the User Manual:
If you’re having trouble locating the reset button, consult the user manual that came with your thermostat. The manual usually contains detailed instructions and illustrations to help you identify the precise location of the reset button for your specific thermostat model.
3. Online Resources:
If you don’t have access to the user manual, you can also search online for the specific make and model of your digital thermostat. Many manufacturers provide user manuals and resources on their websites, often including diagrams or videos that show the location of the reset button.
4. Contact the Manufacturer:
If you’re still unable to find the reset button, consider reaching out to the manufacturer’s customer support. They can provide you with specific instructions or guidance on locating the reset button based on your thermostat model.
Remember that the location of the reset button may vary depending on the design of your digital thermostat. Once you have located the reset button, you will be ready to proceed with the soft reset process to resolve any issues with your digital thermostat.
Step 2: Press and Hold the Reset Button
After locating the reset button on your digital thermostat, the next step is to press and hold the reset button. This step initiates the soft reset process, allowing you to resolve minor issues and restore the thermostat to its default settings. Here’s a detailed guide on how to press and hold the reset button:
- Prepare for the Reset:
- Locate the Reset Button:
- Press and Hold the Reset Button:
- Ensure Proper Contact:
- Observe the Thermostat:
Make sure you are in a comfortable position near your thermostat’s control panel. Take a moment to review the manufacturer’s instructions or any specific guidelines provided in the user manual.
Using the instructions from the previous step, find the reset button on your digital thermostat’s control panel. It typically appears as a small button labeled “reset” or may be indicated by a circular arrow icon.
With your finger or a small pointed object, press and hold the reset button firmly. Apply gentle pressure and maintain the hold for about 5 to 10 seconds. This duration may vary depending on your thermostat model, so refer to the manufacturer’s instructions if necessary.
While holding the reset button, make sure your finger or the object you’re using is firmly pressing down on the button. This ensures proper contact and ensures that the reset process is initiated correctly.
As you continue to hold the reset button, observe the display screen of your digital thermostat. It may briefly go blank or show some indicators that the reset process has begun. Some thermostats may emit a beep or display a message during this step, confirming that the reset is in progress.
By pressing and holding the reset button, you are activating the soft reset feature of your digital thermostat. This step allows the thermostat to clear any minor issues and return to its default settings. Once you have completed this step, you can proceed to the next one to continue the reset process.
Step 3: Release the Reset Button
Once you have pressed and held the reset button on your digital thermostat for the designated duration, the next step is to release the button. Releasing the reset button allows the thermostat to proceed with the soft reset process and initiate the restoration of default settings. Here’s how you can successfully release the reset button:
- Maintain the Duration:
- Observe the Thermostat Display:
- Release the Button:
- Allow the Reset to Proceed:
- Post-Reset Display:
Ensure that you have held the reset button for the recommended duration, typically around 5 to 10 seconds. Verify the specific time frame in the manufacturer’s instructions or the user manual for your thermostat model.
While continuing to hold the reset button, keep an eye on the display screen of your digital thermostat. As you release the reset button, you may notice changes on the screen or certain indicators that signify the reset process is in motion.
Once you are confident that you have maintained the recommended duration, carefully release the reset button. Ensure that you do not press the button again or accidentally activate any other controls on the thermostat.
After releasing the reset button, give your digital thermostat a moment to proceed with the soft reset process. The thermostat may take a few seconds to restore default settings, clear any issues, and recalibrate its internal components.
Observe the thermostat display screen after releasing the reset button. It should show the default settings or the initial interface, indicating that the soft reset has been successful.
By releasing the reset button, you are allowing your digital thermostat to accomplish the soft reset, which is crucial for resolving minor issues and reverting to default settings. After this step, the thermostat is ready for the next stage of reconfiguration and setup according to your preferences and scheduling requirements.
Step 4: Wait for the Thermostat to Reset
After releasing the reset button on your digital thermostat, it’s important to wait for a brief period to allow the thermostat to complete the reset process. This step ensures that the thermostat has enough time to clear any issues, restore default settings, and recalibrate its internal components. Here’s what you need to do during this waiting period:
- Be Patient:
- Observe the Display:
- Avoid Interfering:
- Ensure Power Supply:
- Restarting and Restoring:
Take a moment to be patient and allow the thermostat to complete the reset process. The duration of the waiting period may vary depending on the thermostat model, but it often takes just a few seconds.
During the reset process, you may notice changes on the display screen of your digital thermostat. It may temporarily go blank, show indicators, or display a loading animation, indicating that the reset is in progress.
While waiting for the thermostat to reset, it’s important not to interfere with the process. Avoid pressing any buttons or making adjustments on the thermostat during this time to allow it to complete the reset uninterrupted.
Confirm that your digital thermostat has a stable power supply during the reset period. If the thermostat is operating on batteries, ensure they are properly inserted and have sufficient charge.
As the thermostat resets, it restarts and restores its default settings. This process helps to clear any minor issues and re-establish proper functionality.
By waiting for the thermostat to reset, you allow it enough time to complete the necessary steps to restore default settings and resolve any minor issues. Once the reset process is complete, your digital thermostat will be ready for the next steps of reconfiguration, such as inputting your preferred temperature settings and scheduling.
Step 5: Set Up the Thermostat Again
Once the reset process of your digital thermostat is complete, it is time to set up the thermostat again according to your preferences and schedule. This step allows you to customize temperature settings, program schedules, and make any other adjustments needed to meet your comfort needs. Follow these instructions to set up your thermostat:
- Refer to the User Manual:
- Navigate the Menu:
- Input Temperature Preferences:
- Program Schedules:
- Configure Additional Features:
If you are unsure about how to set up your specific thermostat model, consult the user manual provided by the manufacturer. The user manual contains detailed instructions and guidelines on configuring the thermostat’s settings.
Use the buttons or touch screen on your digital thermostat to navigate through the menu options. Each thermostat model may have a slightly different interface, so refer to the user manual for specific instructions on accessing and adjusting the settings.
Enter your preferred temperature settings for different times of the day. You may have options to set a comfortable temperature for periods when you are awake, asleep, or away from home. Follow the instructions in the user manual to save these temperature settings.
Set up a schedule for your thermostat to automatically adjust temperature settings throughout the day. This feature can help optimize energy efficiency and ensure comfort at different times. Consult the user manual for instructions on programming schedules based on your daily routine.
Explore any additional features your digital thermostat offers, such as energy-saving modes, vacation settings, or Wi-Fi connectivity. Set these features according to your preferences and needs. Ensure that you follow the instructions in the user manual to configure these features correctly.
By following these steps, you will be able to set up your digital thermostat again and tailor it precisely to your desired settings and schedule. Pay attention to the instructions provided by the manufacturer to ensure an accurate and efficient configuration process. Once you have completed the setup, your digital thermostat will be ready to maintain a comfortable and energy-efficient indoor environment in your home.
Option 3: Power Cycle the Thermostat
If a soft reset or hard reset does not resolve the issues with your digital thermostat, another option to consider is power cycling it. Power cycling involves completely turning off the power to the thermostat and then turning it back on again. This method can help troubleshoot connectivity or software-related problems. Here’s how you can power cycle your digital thermostat:
- Step 1: Turn Off the Power to the Thermostat
- Step 2: Wait for a Few Minutes
- Step 3: Turn On the Power to the Thermostat
- Step 4: Set Up the Thermostat Again
Locate the circuit breaker that controls the power supply to your thermostat. Switch off the circuit breaker to cut off the power. This step ensures that the thermostat is completely powered down.
Allow a few minutes for the thermostat to fully power down and clear any residual electric charge. This waiting period gives the internal components of the thermostat time to reset.
After the waiting period, switch on the circuit breaker to restore power to the thermostat. This action restarts the thermostat and allows it to boot up from a fresh start.
Once the thermostat has power again, it will go through the boot-up process and reset to its default settings. Follow the manufacturer’s instructions to set up the thermostat again according to your preferences and scheduling needs.
Power cycling your digital thermostat can help resolve issues related to connectivity, software glitches, or temporary memory errors. By cutting off power and rebooting the thermostat, you give it a fresh start and the opportunity to reestablish proper functionality. If the issue persists even after power cycling, you may need to explore other troubleshooting options or seek professional assistance.
Step 1: Turn Off the Power to the Thermostat
Turning off the power to your digital thermostat is the first step in power cycling it. This process involves cutting off the electrical supply to the thermostat, allowing it to completely power down. Here’s how you can safely turn off the power to your thermostat:
- Locate the Circuit Breaker:
- Identify the Correct Circuit Breaker:
- Switch Off the Circuit Breaker:
- Additional Precautions:
Find the circuit breaker panel in your home. Usually, it is located in an easily accessible area such as a utility room, basement, or garage. If you’re unsure about its exact location, refer to the home’s electrical diagram or consult a professional electrician.
Look for the circuit breaker that controls the power supply to your thermostat. It may be labeled “HVAC,” “Air Conditioning/Heating,” or something similar. Take note of the corresponding switch or fuse associated with the thermostat.
Once you have located the correct circuit breaker, flip the switch or remove the fuse to turn off the power. Make sure the switch or fuse is in the “Off” position and securely locked to prevent any accidental power restoration.
While turning off the power, it’s essential to exercise caution. Ensure that you are wearing appropriate protective gear, such as gloves, and use insulated tools if necessary. If you’re unsure about any aspect of the process, it’s always better to seek professional assistance.
By turning off the power to your digital thermostat, you are effectively cutting off the electrical supply and preventing it from receiving power. This step is crucial to ensure a complete power down of the thermostat, allowing it to reset and resolve any potential issues. Once you have completed this step, you can continue with the power cycling process to restore the functionality of your thermostat.
Step 2: Wait for a Few Minutes
After turning off the power to your digital thermostat, it’s important to wait for a few minutes before proceeding to the next step. This waiting period allows the thermostat to fully power down and ensures that any residual electric charge is cleared. Waiting for a few minutes also gives the internal components of the thermostat sufficient time to reset. Here’s what you need to do during this waiting period:
- Be Patient:
- Avoid Interference:
- Ensure Power Disconnection:
- Allow Reset Time:
Exercise patience and allow sufficient time for the thermostat to complete the power down process. The duration of the waiting period is typically around 5 to 10 minutes, but it can vary depending on the thermostat model.
During the waiting period, it is essential to avoid interfering with the thermostat. Refrain from pressing any buttons or making any adjustments to the thermostat’s controls. Allow the thermostat to remain undisturbed.
Verify that the power is indeed disconnected from the thermostat. Double-check the circuit breaker, switch, or fuse to ensure that it is in the “Off” position and no power is flowing to the thermostat. This adds an extra layer of safety during the waiting period.
The waiting period gives the internal components of the thermostat adequate time to reset. This reset process clears any temporary memory errors and prepares the thermostat for a fresh start when power is restored.
By waiting for a few minutes after turning off the power, you allow your digital thermostat to properly power down and reset. This waiting period ensures that any residual charge is discharged and provides the necessary time for the components to reset before proceeding with the power cycling process. Once the waiting period is over, you can move on to the next step with confidence, knowing that the thermostat has had sufficient time to reset.
Step 3: Turn On the Power to the Thermostat
Once you have waited for a few minutes after turning off the power to your digital thermostat, the next step is to turn the power back on. This step involves restoring the electrical supply to the thermostat, allowing it to boot up and regain functionality. Here’s how you can turn on the power to your thermostat:
- Locate the Circuit Breaker:
- Flip the Circuit Breaker Switch:
- Verify Power Restoration:
- Observe the Thermostat:
- Check for Normal Operation:
Return to the circuit breaker panel where you previously turned off the power to the thermostat. Familiarize yourself with the location of the circuit breaker associated with the thermostat.
Locate the switch or fuse associated with the thermostat’s circuit breaker. Flip the switch or reinsert the fuse to restore the flow of electrical power to the thermostat. Ensure that the switch is securely locked in the “On” position.
Confirm that the power has been successfully restored to the thermostat. You may see lights or indicators on the thermostat display, indicating that it has received power and is in the process of booting up.
As the power is restored, keep an eye on the thermostat display. It should begin to show signs of activity, such as a welcome message or the default interface. This indicates that the thermostat is starting up.
Once the thermostat has powered on, ensure that it is functioning normally. Check if all buttons and touch screen controls are responsive. You may need to wait for a few moments for the thermostat to fully initialize.
By turning the power back on to your digital thermostat, you allow it to restart and boot up. This step is essential as it reinstates the electrical supply, enabling the thermostat to regain functionality and prepare for the next steps of configuration and setup. Once you have completed this step, you can proceed with setting up the thermostat again according to your preferences and scheduling needs.
Step 4: Set Up the Thermostat Again
After turning on the power to your digital thermostat, the next step is to set it up again according to your preferences and needs. This step allows you to customize temperature settings, programming schedules, and any other adjustments relevant to your comfort and energy-saving goals. Follow these instructions to set up your thermostat:
- Refer to the User Manual:
- Navigate the Menu:
- Input Temperature Preferences:
- Program Schedules:
- Configure Additional Features:
If you are uncertain about how to set up your specific thermostat model, consult the user manual provided by the manufacturer. The manual contains detailed instructions and guidelines for configuring the thermostat’s settings.
Use the buttons or touch screen on your digital thermostat to navigate through the menu options. Each thermostat model may have a slightly different interface, so refer to the user manual for specific instructions on accessing and adjusting the settings.
Enter your preferred temperature settings for different times of the day. You may have options to set a comfortable temperature for periods when you are awake, asleep, or away from home. Follow the instructions in the user manual to save these temperature settings.
Create a schedule for your thermostat to automatically adjust temperature settings throughout the day. Programming schedules can help optimize energy efficiency and ensure comfort at different times. Refer to the user manual for instructions on programming schedules based on your daily routine.
Take advantage of any additional features your digital thermostat offers, such as energy-saving modes, vacation settings, or Wi-Fi connectivity. Customize these features according to your preferences and requirements. Make sure you follow the instructions in the user manual to configure these features correctly.
By following these steps, you will be able to set up your digital thermostat again and tailor it precisely to your preferred settings and schedule. It’s important to carefully read and understand the instructions provided by the manufacturer to ensure an accurate and efficient configuration process. Once you have completed the setup, your digital thermostat will be ready to maintain a comfortable and energy-efficient indoor environment in your home.
Option 4: Check the Batteries
If you are experiencing issues with your digital thermostat, it’s worth checking the batteries as they may play a crucial role in its operation. Some digital thermostats rely on batteries as a backup power source, and if the batteries are low or depleted, it can cause malfunctions or erratic behavior. By checking the batteries, you can ensure they are properly functioning and replace them if necessary. Here’s how you can check the batteries of your digital thermostat:
- Step 1: Remove the Battery Cover
- Step 2: Replace the Batteries
- Step 3: Set Up the Thermostat Again
Locate the battery cover on the back or bottom of your digital thermostat. The cover is usually secured with screws or a latch. Use a screwdriver or your fingers to remove the cover and access the batteries.
Inspect the current batteries for signs of damage or corrosion. If the batteries appear swollen or leaked, dispose of them properly and do not attempt to use them. Replace the old batteries with fresh ones of the same type, typically AA or AAA alkaline batteries. Follow the polarity indicators inside the battery compartment to ensure proper installation.
Once you have inserted fresh batteries, securely close the battery cover. The thermostat will now have a stable power source, allowing it to function properly. Proceed to set up the thermostat again according to your preferences and scheduling needs.
By checking the batteries of your digital thermostat, you can eliminate a common cause of issues and ensure reliable operation. Low or depleted batteries can lead to erratic behavior, loss of programming, or complete loss of power. By replacing them with fresh batteries, you can restore proper functionality and avoid further issues.
Note that not all digital thermostats rely on batteries, as some are powered solely through a wired connection. Therefore, if your thermostat does not have a battery cover or batteries, this option may not be applicable to your specific model.
Step 1: Remove the Battery Cover
If your digital thermostat operates on batteries, the first step in checking them is to remove the battery cover. This allows you to access the batteries and inspect them for any signs of damage or corrosion. Follow these steps to remove the battery cover of your digital thermostat:
- Locate the Battery Cover:
- Prepare Necessary Tools:
- Unscrew or Unlatch the Cover:
- Open the Battery Compartment:
Take a close look at the back or bottom of your digital thermostat to find the battery cover. The cover is usually secured with screws or a latch. Depending on the model, it may be prominently marked or indicated with an icon.
Ensure that you have the necessary tools for removing the battery cover. Most covers can be removed with a small screwdriver, but some may have latch mechanisms that can be opened by hand.
If your battery cover is secured with screws, use an appropriate screwdriver to loosen and remove the screws. For covers with latch mechanisms, locate the latch and lift or slide it to release the cover. Be careful not to apply excessive force to avoid damaging the cover or thermostat.
Once the battery cover is free, gently lift or slide it to open the battery compartment. Take care not to force or bend the cover or any surrounding parts.
By following these steps, you will successfully remove the battery cover of your digital thermostat, allowing you to proceed with inspecting and checking the batteries. Remember to handle the battery cover and thermostat with care to avoid any damage. Once you have removed the battery cover, you can proceed to the next step of checking the batteries for signs of damage or corrosion.
Step 2: Replace the Batteries
After removing the battery cover of your digital thermostat, the next step is to inspect the batteries and replace them if necessary. Checking and replacing the batteries is vital to ensure proper functionality and prevent any issues related to low or depleted power. Follow these steps to replace the batteries in your digital thermostat:
- Inspect the Batteries:
- Choose the Right Replacement Batteries:
- Replace the Batteries:
- Close the Battery Compartment:
Examine the current batteries for any signs of damage or corrosion. Look for bulging, leaking, or discolored batteries. If you notice any of these signs, do not attempt to use them, and ensure they are disposed of properly according to local regulations.
Determine the appropriate battery type for your digital thermostat. Most thermostats utilize AA or AAA alkaline batteries. Refer to the user manual or the label inside the battery compartment for the correct battery specifications.
Once you have the fresh batteries ready, remove the old batteries from the compartment. Pay attention to the polarity indicators (+ and -) within the battery compartment and insert the new batteries accordingly. Ensure that the batteries fit snugly and make proper contact.
Carefully close the battery compartment by repositioning the battery cover over it. Align the cover with the designated slots or tabs and gently press or slide it into place. Make sure the cover is securely closed for proper battery contact.
By following these steps, you will successfully replace the batteries in your digital thermostat. Fresh batteries provide a reliable power source, ensuring that the thermostat can operate effectively, maintain accurate temperature settings, and properly execute programmed schedules. Once you have completed this step, you can proceed to set up the thermostat again, configuring it to your preferred settings and scheduling needs.
Step 3: Set Up the Thermostat Again
After replacing the batteries in your digital thermostat, the next step is to set it up again according to your preferences and requirements. This step allows you to customize temperature settings, program schedules, and any other adjustments necessary for your comfort and energy-saving goals. Follow these instructions to set up your thermostat:
- Refer to the User Manual:
- Navigate the Menu:
- Input Temperature Preferences:
- Program Schedules:
- Configure Additional Features:
If you are unsure about how to set up your specific thermostat model, consult the user manual provided by the manufacturer. The manual contains detailed instructions and guidelines for configuring the thermostat’s settings.
Use the buttons or touch screen on your digital thermostat to navigate through the menu options. Each thermostat model may have a slightly different interface, so refer to the user manual for specific instructions on accessing and adjusting the settings.
Enter your desired temperature settings for different periods, such as when you are awake, asleep, or away from home. Follow the instructions in the user manual to save these temperature settings.
Create a schedule for your thermostat to automatically adjust temperature settings throughout the day. Programming schedules can help optimize energy efficiency and ensure comfort at different times. Consult the user manual for instructions on setting up schedules based on your daily routine.
Take advantage of any additional features your digital thermostat offers, such as energy-saving modes, vacation settings, or Wi-Fi connectivity. Customize these features according to your preferences and requirements. Follow the instructions in the user manual to configure these features correctly.
Following these steps will allow you to set up your digital thermostat again and tailor it to your specific settings and schedule. It’s important to carefully read and understand the instructions provided by the manufacturer to ensure an accurate and efficient configuration process. Once you have completed the setup, your digital thermostat will be ready to maintain a comfortable and energy-efficient indoor environment in your home.
Common Troubleshooting Tips for Digital Thermostats
While digital thermostats are generally reliable, occasional issues may arise that require troubleshooting. Here are some common troubleshooting tips to help you address and resolve potential problems with your digital thermostat:
- Check Power Supply: Ensure that your thermostat has a stable power supply. Verify that it is properly connected to the HVAC system and that the circuit breaker is not tripped. If the thermostat operates on batteries, make sure they are inserted correctly and have sufficient charge.
- Verify Temperature Settings: Double-check that the temperature settings are accurately configured. Ensure that the thermostat is set to the desired temperature and make adjustments if necessary. Confirm that the thermostat is not in “Hold” mode, which might prevent automatic temperature changes.
- Inspect Wiring Connections: Examine the wiring connections to ensure they are secure and properly connected. Loose or disconnected wires can lead to malfunctioning or erratic behavior. If you are not familiar with electrical work, consider seeking professional assistance for this step.
- Clean the Thermostat: Dust and debris can accumulate on the surface and inside the thermostat, hindering its functionality. Use a soft, dry cloth to clean the thermostat regularly. For stubborn dirt, lightly dampen the cloth with water or use a mild cleaning solution recommended by the manufacturer.
- Reset the Thermostat: Try performing a soft or hard reset as outlined in the manufacturer’s instructions. A reset can help clear temporary issues or restore the thermostat to its default settings. Remember to reconfigure the thermostat after resetting.
- Ensure Proper Location: Check if the thermostat is installed in an optimal location. Ensure it is away from direct heat sources, drafts, or other factors that can affect temperature readings. If needed, consider repositioning the thermostat in a more suitable spot.
- Update Firmware: If your digital thermostat has a Wi-Fi connection and supports firmware updates, ensure that it is using the latest firmware version. Check the manufacturer’s website or the instructions for information on how to update the firmware.
- Contact Manufacturer Support: If the above troubleshooting steps do not resolve the issue, reach out to the manufacturer’s customer support for further guidance. They can provide specific troubleshooting advice or assist with more complex problems.
Remember that troubleshooting techniques can vary depending on the make and model of your digital thermostat. Always consult the user manual and follow the manufacturer’s instructions for the best results. If you are unsure or uncomfortable taking any troubleshooting steps, it is advisable to seek professional assistance from an HVAC technician or the manufacturer’s authorized service center.