
Determine the Type and Capacity of Your Current RAM
In order to replace the memory (RAM) in your Windows computer, the first step is to determine the type and capacity of your current RAM modules. This information will be crucial in finding compatible replacements.
There are several ways to find out the details of your current RAM configuration. One simple method is to use the built-in Windows System Information tool.
To access System Information, press the Windows key + R to open the Run dialog box. Then, type “msinfo32” and hit Enter. The System Information window will open, displaying a comprehensive list of your computer’s specifications.
In the left-hand navigation pane, click on “Components”, then “Memory”. On the right-hand side, you will see the details of your current RAM modules, including the type (e.g. DDR3, DDR4) and capacity (e.g. 4GB, 8GB).
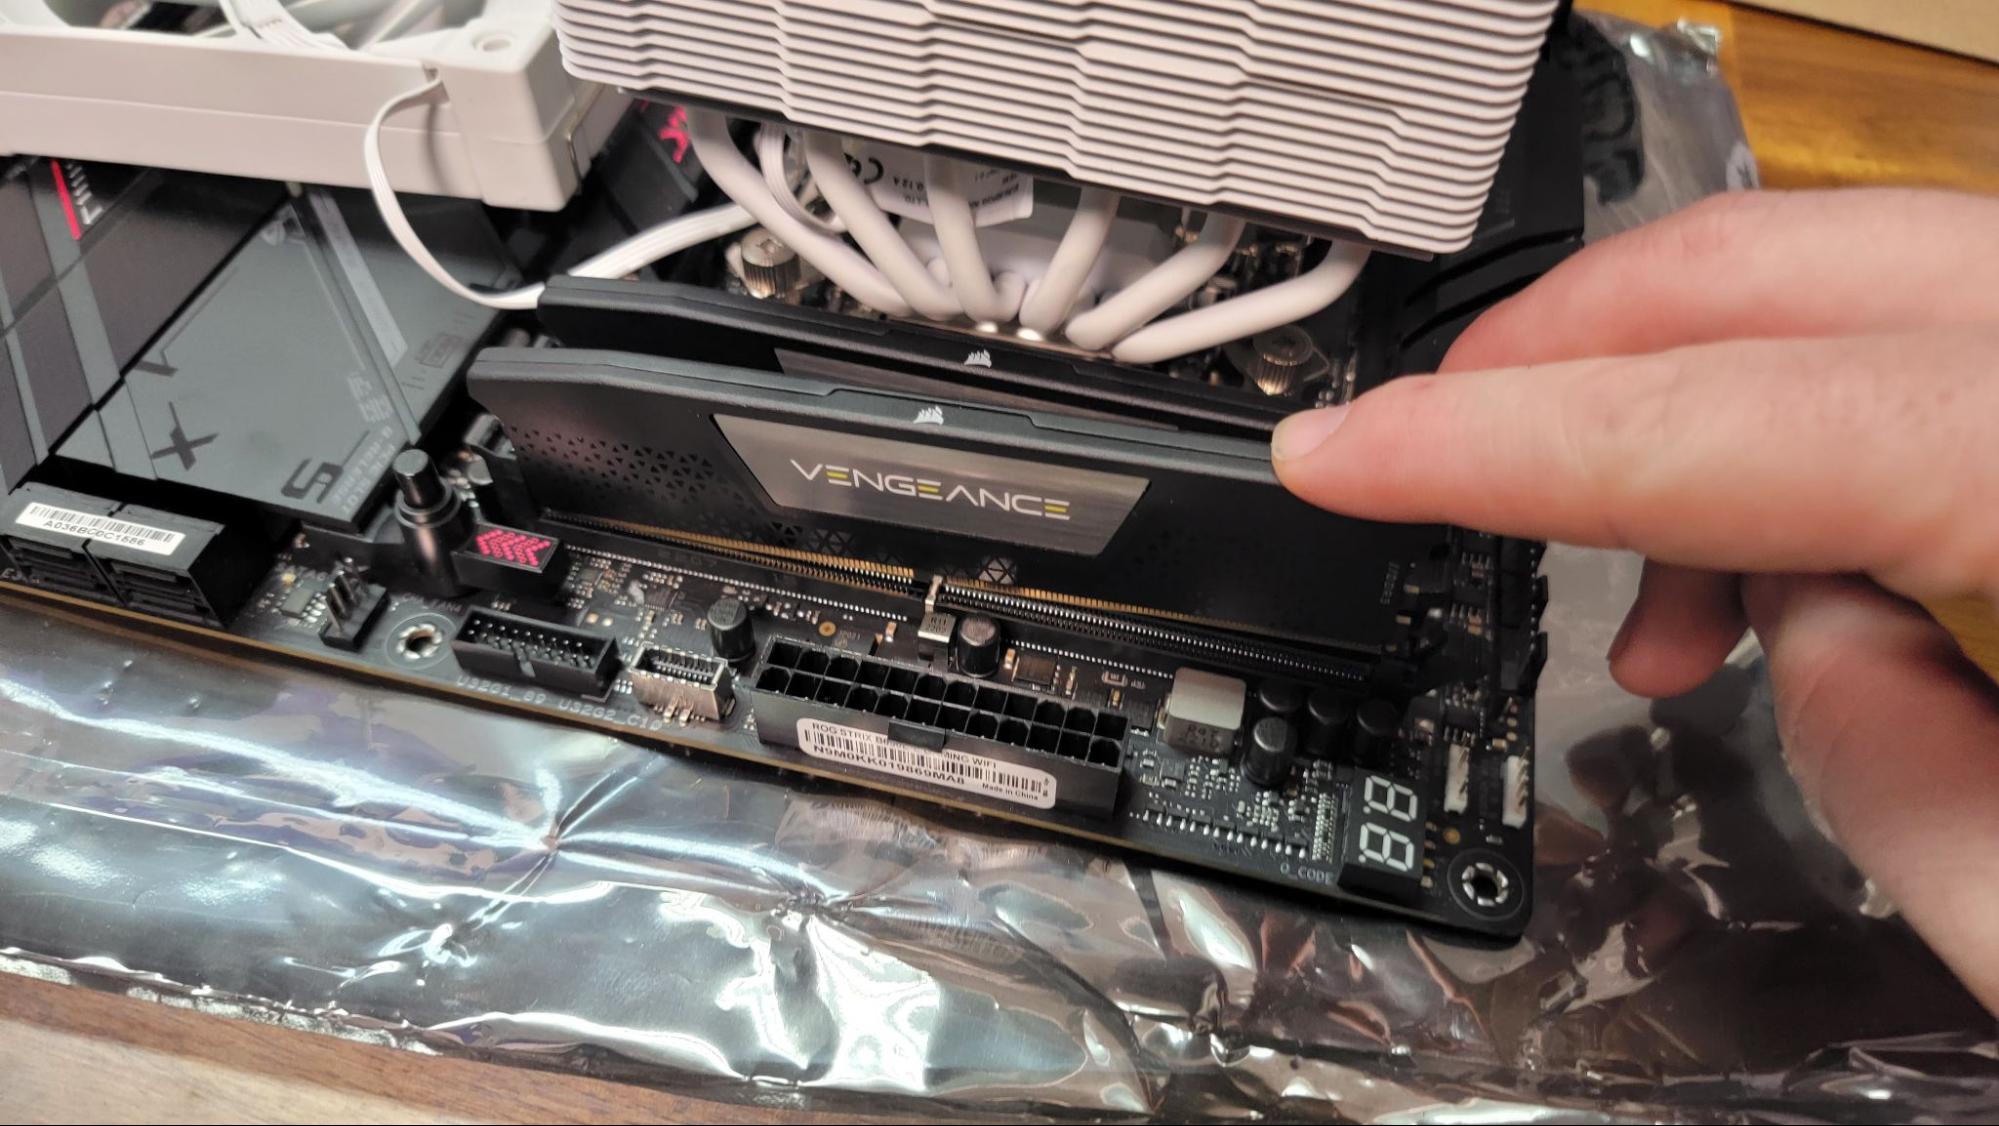
Alternatively, you can physically open your computer and inspect the RAM sticks. Most desktop computers have easily accessible RAM slots, while for some laptops, you might need to remove a panel on the bottom to reveal the RAM modules.
On each RAM stick, you will find information stickers or labels that specify the type and capacity. Take note of these details or, if possible, take a clear photo with your smartphone for reference.
Knowing the type and capacity of your current RAM is crucial for purchasing compatible replacements. RAM modules are not universally compatible, and using mismatched or incompatible RAM can lead to system instability or even failure to boot.
Now that you have determined the type and capacity of your current RAM modules, you are ready to move on to the next step: purchasing compatible RAM modules that meet your needs.
Purchase Compatible RAM
Once you have identified the type and capacity of your current RAM modules, it’s time to purchase compatible replacements. There are a few factors to consider when selecting new RAM modules for your Windows computer.
Type: Ensure that the new RAM modules you purchase are of the same type as your existing RAM. For example, if your current RAM is DDR4, make sure to buy DDR4 modules. Mixing different types of RAM can cause compatibility issues.
Capacity: Decide how much additional RAM you need based on your computer usage. If you’re a casual user who primarily does web browsing, emailing, and light multitasking, adding 4GB or 8GB of RAM should suffice. However, if you’re a power user who frequently runs resource-intensive tasks like video editing or gaming, consider adding 16GB or 32GB of RAM for smoother performance.
Speed: RAM speed, measured in megahertz (MHz), determines how fast data can be transferred to and from the memory. While higher RAM speeds can improve overall system performance, the benefits may be minimal depending on your specific usage. Check your computer’s motherboard specifications to ensure that it supports the desired RAM speed.
Brand and Quality: Stick to reputable brands when purchasing RAM to ensure reliability and compatibility. Popular brands like Corsair, Kingston, Crucial, and G.SKILL are known for producing high-quality RAM modules.
There are several options for purchasing RAM modules. You can buy them online from popular retailers such as Amazon, Newegg, or directly from the manufacturer’s website. Alternatively, you can visit a local computer hardware store to make your purchase.
Before making your final purchase, double-check the compatibility of the RAM modules with your computer’s specifications. Refer to the documentation provided by your computer manufacturer or consult online forums and community resources to ensure that the RAM modules you choose are fully compatible with your computer.
Once you have purchased the compatible RAM modules, you will be ready to proceed with the installation process. In the next section, we will discuss the tools you will need to replace the RAM in your Windows computer.
Gather Necessary Tools
Before you begin replacing the RAM in your Windows computer, it’s important to gather the necessary tools to ensure a smooth and successful installation. Having the right tools on hand will make the process easier and help prevent any accidental damage to your computer or its components.
1. Screwdriver: Depending on your computer model, you may need a Phillips or a Torx screwdriver to remove the case or access panel. Check the documentation provided by your computer manufacturer or do a quick online search to determine the type of screwdriver you will need.
2. Antistatic Wrist Strap: It’s highly recommended to wear an antistatic wrist strap while working inside your computer. This protects sensitive components from static electricity, which can be generated by your body and potentially damage the RAM or other parts of your computer. If you don’t have an antistatic wrist strap, make sure to ground yourself by touching a metal object before touching any computer components.
3. Cleaning Supplies: It’s a good idea to have some cleaning supplies handy to remove dust or debris from the RAM slots or any other components you encounter during the process. A can of compressed air and lint-free microfiber cloth are useful for this purpose.
4. Storage Container: Prepare a small container or a static-free bag to store the removed RAM modules. This will help prevent any damage or accidental discharge of static electricity during the process.
5. Manual or Online Resources: Have the manual or online resources for your specific computer model readily available. These resources often provide detailed instructions on how to access and replace the RAM in your computer. Review the instructions before you begin to familiarize yourself with the process.
6. Patience and Care: While not a physical tool, having patience and taking care during the process is crucial. Handle the RAM modules and other components gently to avoid bending the pins or causing any damage. Take your time and double-check your work along the way to ensure everything is properly installed.
By gathering these tools before you start, you’ll be fully prepared to replace the RAM in your Windows computer. In the next section, we’ll discuss how to power down and disconnect your computer safely.
Power Down and Disconnect Your Computer
Before you can begin replacing the RAM in your Windows computer, it’s important to power down and disconnect it from any power sources. This ensures your safety and prevents any potential damage to your computer components.
1. Save and Close All Applications: Start by saving any open files and closing all applications running on your computer. This will prevent any data loss or corruption and ensure a smooth shut down.
2. Shut Down Your Computer: Click on the Windows Start button and select “Shut Down” from the power options. Wait for your computer to completely shut down before proceeding to the next step.
3. Unplug the Power Cable: Locate the power cable connected to your computer and unplug it from the power outlet. This cuts off the power supply, eliminating the risk of electric shock while working on your computer.
4. Disconnect Peripherals: If you have any peripherals connected to your computer, such as a printer, external hard drive, or USB devices, unplug them from the computer. This ensures that no additional power is being supplied to the computer during the RAM replacement process.
5. Ground Yourself: To protect your computer from electrostatic discharge, it’s important to ground yourself. You can do this by touching a metal object like a doorknob or using an antistatic wrist strap. This prevents any static electricity from damaging sensitive components during the installation process.
6. Optional: Remove Case or Access Panel: Depending on your computer model, you may need to remove the case or access panel to access the RAM slots. Refer to the documentation for your specific computer or do a quick online search to find the instructions on how to remove the case or access panel, if needed.
By following these steps, you have successfully powered down and disconnected your computer, ensuring a safe environment for the RAM replacement process. In the next section, we will discuss how to locate the RAM slots in your computer.
Locate the RAM Slots
Once you have powered down and disconnected your computer, the next step in replacing the RAM is to locate the RAM slots. These slots are where the RAM modules are installed, and knowing their location is essential for a successful installation.
The location of the RAM slots varies depending on the type and form factor of your computer. Here are a few common locations to look for:
Desktop Computers:
- Open the case or access panel of your desktop computer. Refer to the documentation for your specific computer model or do a quick online search to find instructions on how to open the case.
- Look for a long, rectangular-shaped board called the motherboard. This is where the RAM slots are typically located.
- The RAM slots are usually aligned horizontally or vertically on the motherboard, often grouped together.
Laptop Computers:
- Turn your laptop upside down to access the bottom panel.
- Look for a removable panel or a series of screws that secure the panel in place.
- Remove the panel to reveal the internal components, including the RAM slots.
- In some laptops, the RAM slots may be easily accessible from the side or back of the laptop without removing any panels.
If you’re unsure about the exact location of the RAM slots in your computer, refer to the documentation provided by your computer manufacturer. You can also consult online resources or forums specific to your computer model for guidance.
Once you have located the RAM slots, it’s important to take note of the number of slots available and any restrictions or limitations regarding the maximum RAM capacity supported by your computer.
Now that you have successfully located the RAM slots in your computer, you’re ready to move on to the next step: removing the existing RAM modules. We’ll cover this in detail in the following section.
Remove Existing RAM Modules
With the RAM slots located, the next step in replacing the RAM in your Windows computer is to remove the existing RAM modules. By carefully removing the old modules, you can make way for the new ones that will enhance your computer’s performance.
Follow these steps to remove the existing RAM modules:
- Ensure that your computer is still powered down and disconnected from any power sources to avoid any risk of electric shock.
- If you haven’t already done so, open the case or access panel of your desktop computer or remove the bottom panel of your laptop to access the internal components.
- Locate the RAM modules, which are small, rectangular-shaped circuit boards inserted into the RAM slots on the motherboard.
- On either side of each RAM module, you will find small clips or levers that secure the module in place. Gently press these clips or levers outward to release the module.
- Once the clips or levers are released, carefully and evenly pull the module out of the slot. Use your fingers to grasp the module by its sides, making sure not to touch the metal contacts.
- Place the removed RAM module in a safe location, such as an antistatic bag or the storage container you prepared earlier.
- If your computer has multiple RAM modules, repeat these steps for each module, removing them one by one.
It’s important to handle the RAM modules with care and avoid touching the metal contacts as oils from your skin can create connectivity issues. If you accidentally touch the contacts, gently wipe them with a lint-free cloth before reinstalling the modules.
With the existing RAM modules removed, you have successfully cleared the way for the new modules. In the next section, we will discuss how to insert the new RAM modules into the RAM slots of your computer.
Insert New RAM Modules
Now that you have removed the existing RAM modules from your Windows computer, it’s time to insert the new RAM modules. By following the proper installation steps, you can ensure that the new modules are securely placed in the RAM slots.
Here’s how you can insert the new RAM modules:
- Retrieve the new RAM modules from their packaging and hold them by the sides, making sure to avoid touching the metal contacts.
- Align the notches or grooves on the bottom of the RAM module with the corresponding protrusions inside the RAM slot. This ensures that the module is inserted correctly and prevents any damage.
- Hold the RAM module at a slight angle and insert it into the slot gently but firmly, ensuring that the gold contacts are fully inserted and seated in the socket.
- Apply even pressure on both ends of the module, pushing it down until you hear a click or feel the clips or levers on the sides of the slot snapping into place. This indicates that the module is properly secured.
- If you have multiple RAM modules to install, repeat the previous steps for each module, inserting them one by one.
It’s important to note that RAM modules can only be inserted in one direction. If you encounter resistance or if the module does not fit, double-check the alignment and ensure that it is properly oriented before applying more force.
Once all the new RAM modules are inserted and securely in place, take a moment to visually inspect and make sure they are seated evenly and straight in the slots.
With the new RAM modules successfully inserted into the RAM slots, you are now ready to secure them in place. In the next section, we will discuss how to properly secure the RAM modules to avoid any movement or disconnection during use.
Secure the RAM Modules in Place
After inserting the new RAM modules into the RAM slots of your Windows computer, it’s important to secure them properly. This ensures that the modules remain firmly in place and prevents any movement or disconnection during use.
Follow these steps to secure the RAM modules:
- Inspect the clips or levers on the sides of the RAM slots. These are designed to hold the RAM modules firmly in place.
- Using your fingers or a small tool, carefully push the clips or levers back inward until they lock into position.
- Apply gentle pressure to ensure that the clips or levers are fully engaged and secure.
- Gently shake the computer or tap the RAM modules to check for any movement. If the modules are secure, they should not move or shift within the slots.
Securing the RAM modules is crucial to ensure a stable connection and prevent any intermittent issues or system instability. Loose modules can lead to poor performance or even system crashes.
If you encounter any difficulty securing the RAM modules or notice that they are not fitting properly, double-check the orientation and alignment of the modules. Make sure they are inserted correctly and try again to secure them in place.
Once the RAM modules are securely in place, close the case or access panel of your desktop computer or reattach the bottom panel of your laptop. Follow the reverse process of removing the case or panel to ensure it is properly closed and secured.
Now that the new RAM modules are secured in place, it’s time to reconnect and power on your computer. This will allow you to verify that the new RAM installation was successful, as we’ll discuss in the next section.
Reconnect and Power On Your Computer
With the new RAM modules securely in place, the next step in replacing the RAM in your Windows computer is to reconnect and power on your computer. This will allow you to verify that the new RAM installation was successful and ensure that your computer recognizes the upgraded memory.
Follow these steps to reconnect and power on your computer:
- If you haven’t already done so, close the case or access panel of your desktop computer or reattach the bottom panel of your laptop.
- Make sure that all peripheral devices, such as monitors, keyboards, and mice, are properly connected to your computer.
- Reconnect the power cable to your computer and plug it back into a power outlet.
- Double-check that all connections are secure and tight to avoid any power or data interruptions.
- Press the power button to turn on your computer.
- Wait for your computer to boot up, and once it has fully started, log in to your operating system.
During the startup process, your computer will run a memory check, also known as a POST (Power-On Self-Test), which detects and verifies the installed memory. This allows the computer to recognize the newly installed RAM modules.
Once logged in, open the Task Manager or System Information tool to verify that your computer recognizes the upgraded memory. It should reflect the increased capacity of the newly installed RAM modules.
If your computer does not recognize the new RAM or if you encounter any issues during startup or operation, double-check that the modules are inserted correctly and securely. You may need to repeat the installation process or consult the documentation provided by your computer manufacturer for troubleshooting guidance.
With your computer successfully powered on and recognizing the new RAM modules, you can now enjoy the improved performance and enhanced capabilities that the upgraded memory brings.
In the next section, we will provide some troubleshooting tips in case you encounter any issues or need further assistance with your newly installed RAM.
Verify the New RAM Installation
After reconnecting and powering on your computer, it’s important to verify the new RAM installation to ensure that the upgraded memory is functioning properly and recognized by your Windows computer.
Follow these steps to verify the new RAM installation:
- Open the Task Manager by right-clicking on the taskbar and selecting “Task Manager” from the context menu. Alternatively, you can press Ctrl+Shift+Esc to open the Task Manager directly.
- In the Task Manager, click on the “Performance” tab.
- In the left-hand navigation pane, click on “Memory”. This will display information about your computer’s memory usage.
- Check the “Total” section under “Physical Memory” to ensure that it reflects the increase in capacity from the newly installed RAM modules.
- Verify that the “Speed” and “Slots Used” sections also accurately represent the specifications of the new RAM.
Another way to verify the new RAM installation is by using the System Information tool:
- Press the Windows key + R to open the Run dialog box.
- Type “msinfo32” and hit Enter. This will open the System Information window.
- In the left-hand navigation pane, click on “Components”, then “Memory”.
- On the right-hand side, you will find detailed information about your computer’s installed memory, including the type, capacity, and speed of the RAM modules.
If the Task Manager or System Information displays the correct information about the new RAM modules, it means that the installation was successful, and your computer is recognizing the upgraded memory.
However, if you notice that the new RAM is not being recognized correctly, double-check the installation to ensure that the modules are securely inserted and properly aligned in the RAM slots. You may need to reseat the modules or consult the documentation provided by your computer manufacturer for further troubleshooting steps.
By verifying the new RAM installation, you can ensure that your computer is making full use of the upgraded memory, resulting in improved performance and smoother multitasking capabilities.
In the final section, we will provide some troubleshooting tips in case you encounter any issues or need further assistance with your newly installed RAM.
Troubleshooting Tips
If you encounter any issues or need further assistance with your newly installed RAM, here are some troubleshooting tips to help you resolve common problems:
- Check Compatibility: Ensure that the new RAM modules are compatible with your computer’s specifications, including the type, capacity, and speed. Refer to the documentation provided by your computer manufacturer or consult online resources to confirm compatibility.
- Recheck Installation: Double-check that the RAM modules are properly inserted in the RAM slots. Make sure they are securely seated, with the clips or levers fully engaged. Check that the modules are aligned correctly and that there are no visible signs of damage.
- Clean Contacts: If you’re experiencing issues with the new RAM, gently clean the metal contacts on the modules with a lint-free cloth. This helps remove any dirt or debris that might be affecting the connection.
- Reset CMOS: In some cases, resetting the computer’s CMOS (Complementary Metal-Oxide-Semiconductor) settings can resolve compatibility or configuration issues. Refer to your computer’s documentation or consult online resources for instructions on how to perform a CMOS reset.
- Update BIOS: Ensure that your computer’s BIOS (Basic Input/Output System) is up to date. Sometimes, a BIOS update may be required for proper recognition and compatibility with new RAM modules. Visit the computer manufacturer’s website for the latest BIOS updates and follow their instructions for updating.
- Test Modules Individually: If you’ve installed multiple RAM modules, try testing them individually. Remove all but one module and see if your computer recognizes it properly. Repeat the process for each module to identify if any specific module is causing the issue.
- Contact Manufacturer Support: If you’ve followed all the troubleshooting steps and are still experiencing issues, reach out to the manufacturer’s support team for assistance. They can provide specific guidance based on your computer model and help resolve any hardware or compatibility issues.
Remember, troubleshooting RAM-related issues may require advanced technical knowledge, so if you’re unsure or uncomfortable performing these steps yourself, it’s recommended to seek assistance from a professional technician to avoid any further complications.
By following these troubleshooting tips, you can address common issues and ensure that your newly installed RAM works seamlessly with your Windows computer, optimizing its performance and enhancing your overall computing experience.