
What is Windows Memory Diagnostic?
Windows Memory Diagnostic is a free tool provided by Microsoft that allows users to test the health and stability of their computer’s RAM (Random Access Memory). RAM is a crucial component of a computer system as it stores and provides quick access to data that is actively being used by the processor. Over time, RAM can experience errors or faults that can cause system crashes, freezes, or performance issues.
The Windows Memory Diagnostic tool helps identify these issues by performing a series of tests on your computer’s RAM. It scans for common memory problems such as bad bits, mismatched memory, and an overly aggressive memory caching setting. By running the diagnostic tool, you can pinpoint and address any underlying RAM issues that may be affecting your computer’s performance.
It is important to note that Windows Memory Diagnostic is not a repair tool but rather a diagnostic tool – it helps you identify problems, but it doesn’t fix them. Once you’ve identified the faulty RAM, you will need to replace it to resolve the issue. Additionally, it’s worth mentioning that while the tool can help detect RAM problems, it may not catch every issue, especially if they occur intermittently. In such cases, more advanced diagnostic tools may be necessary.
Windows Memory Diagnostic is suitable for both novice and advanced users. It offers a basic interface that allows you to choose between two test types: the Standard test, which is recommended for most users and thoroughly scans your RAM, and the Extended test, which performs a more extensive scan but takes considerably longer to complete.
Overall, Windows Memory Diagnostic is a valuable tool for diagnosing potential RAM issues. It’s freely available from Microsoft’s official website and can be easily downloaded and installed on your computer.
Why is RAM Testing Important?
RAM testing plays a crucial role in maintaining the overall health and performance of your computer. Here are some key reasons why it is important:
1. Identifying Hardware Issues: RAM is prone to errors and faults over time. Testing your computer’s RAM helps identify any issues or defects in its hardware. By detecting these problems early on, you can take appropriate measures to resolve them before they cause more severe system issues.
2. Preventing System Crashes: Faulty RAM can lead to random system crashes, blue screens, or unexpected reboots. Regularly testing your RAM allows you to identify any potential issues that may be causing these crashes. By addressing them promptly, you can prevent sudden system failures and data loss.
3. Improving System Performance: RAM-related problems can significantly impact your computer’s performance. When faulty RAM is present, it can slow down your system, cause programs to freeze or lag, and result in a generally sluggish experience. Testing your RAM helps ensure that your system operates at its optimal speed and efficiency.
4. Enhancing System Stability: A stable system is essential for productive and uninterrupted work. RAM testing helps identify any instability issues caused by faulty memory modules. By diagnosing and replacing these modules, you can achieve a more stable and reliable computing experience.
5. Effective Troubleshooting: When you encounter issues with your computer, it can be challenging to determine the root cause. Testing your RAM allows you to rule out faulty memory as a potential cause. This helps narrow down the troubleshooting process and saves time and effort in resolving the issue.
6. Optimal Gaming Performance: Gamers often require high-performance systems to run demanding games smoothly. Faulty RAM can result in game crashes, frame rate drops, and overall poor gaming performance. By testing your RAM, you can ensure that your computer meets the necessary requirements for an optimal gaming experience.
Overall, regularly testing your RAM is essential for maintaining a stable and reliable computer system. It helps identify potential hardware issues, prevent system crashes, improve performance, enhance stability, streamline troubleshooting, and ensure optimal gaming performance.
How to Download and Install Windows Memory Diagnostic?
Downloading and installing Windows Memory Diagnostic is a straightforward process. Here’s a step-by-step guide to help you get started:
- Visit the official Microsoft website: Open your preferred web browser and go to the official Microsoft website.
- Navigate to the Windows Memory Diagnostic page: Once on the Microsoft website, search for “Windows Memory Diagnostic” in the search bar or browse to the Windows Memory Diagnostic page.
- Choose the appropriate version: On the Windows Memory Diagnostic page, you will find different versions of the tool. Select the version that matches your operating system architecture (32-bit or 64-bit).
- Download the tool: Click on the download link to begin downloading the Windows Memory Diagnostic tool. The file will be saved to your computer’s default download location.
- Locate the downloaded file: Once the download is complete, navigate to the folder where the file was saved. The file will typically have a name like “memtest.exe” or “WindowsMemoryDiagnostic.exe”.
- Run the installer: Double-click on the downloaded file to run the installer. You may need to grant administrative permissions to proceed with the installation.
- Installation process: Follow the on-screen prompts to complete the installation. The installer will guide you through the necessary steps, such as accepting the license agreement and choosing the installation location.
- Launch Windows Memory Diagnostic: Once the installation is complete, you can launch the Windows Memory Diagnostic tool from the Start menu or desktop shortcut.
It is important to note that running Windows Memory Diagnostic requires restarting your computer, as it needs to access the RAM during the testing process. Make sure to close all open applications and save any important files before initiating the test.
By following these steps, you can easily download and install Windows Memory Diagnostic on your computer. Once installed, you can proceed to run the diagnostic tests to check the health of your computer’s RAM.
How to Run the Windows Memory Diagnostic Tool?
After installing Windows Memory Diagnostic on your computer, you can proceed to run the tool to test the health of your RAM. Follow these steps to run the Windows Memory Diagnostic tool:
- Launch Windows Memory Diagnostic: Open the Start menu or click on the desktop shortcut to launch the Windows Memory Diagnostic tool.
- Choose a testing option: The tool presents two testing options: “Restart now and check for problems (recommended)” or “Check for problems the next time I start my computer.” Select the option that suits your needs.
- Save your work and close applications: If you have selected the “Restart now” option, save any unsaved work and close all running applications. Ensure that you have backed up any important files before proceeding.
- Start the testing process: Once ready, click on the “Restart now and check for problems” button (or allow your computer to restart if you selected the second option). Your computer will restart and the Windows Memory Diagnostic test will begin.
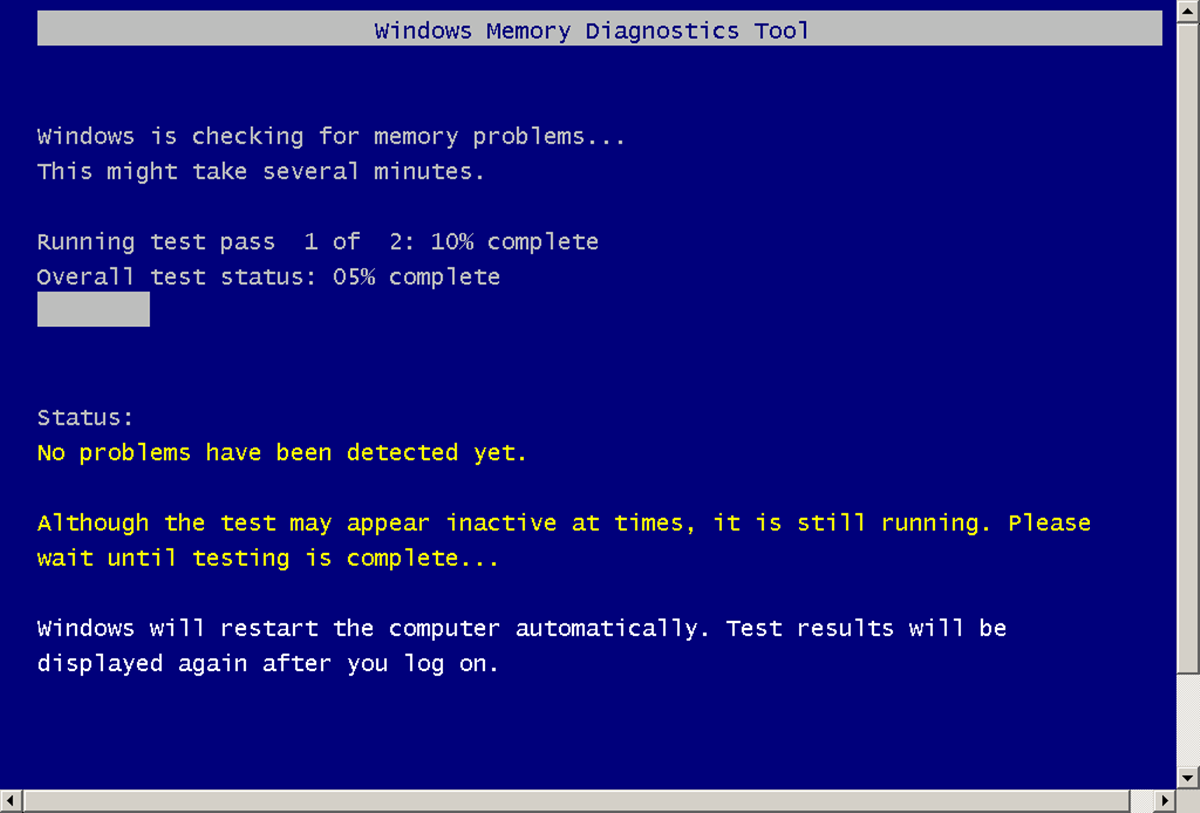
- Monitor the testing process: During the testing phase, the Windows Memory Diagnostic tool will run a series of tests on your computer’s RAM. You will be able to see a progress indicator and the number of passes completed. This process may take some time to complete, depending on your system’s specifications.
- Review the test results: Once the testing process is complete, your computer will restart again. After restarting, the Windows Memory Diagnostic tool will display the test results. It will indicate whether any memory problems were detected during the tests.
- Take necessary actions: Depending on the test results, you may need to take further action. If memory problems are detected, it is recommended to replace the faulty RAM modules to restore the stability and performance of your computer.
It is important to run the Windows Memory Diagnostic test when your computer is not in use, as it requires exclusive access to the RAM. Furthermore, it is crucial to follow any additional instructions provided by the Windows Memory Diagnostic tool during the testing process.
By following these steps and carefully reviewing the test results, you can effectively run the Windows Memory Diagnostic tool and identify any potential issues with your computer’s RAM.
Understanding the Test Results
After running the Windows Memory Diagnostic tool, it will provide you with test results that indicate the health and stability of your computer’s RAM. Understanding these test results is crucial in determining the next steps to take. Here’s a breakdown of what the test results mean:
No errors detected: If the test results show no errors detected, it means that your computer’s RAM has passed the tests without any issues. This indicates that your RAM is functioning properly and there are no immediate concerns regarding its health.
Errors detected: If the test results show errors detected, it means that the Windows Memory Diagnostic tool has identified potential issues with your computer’s RAM. The errors could range from minor issues like single-bit errors (which may indicate a temporary issue) to more severe issues like multiple errors or a large number of errors (which may indicate faulty or failing RAM).
Error codes: The Windows Memory Diagnostic tool may provide specific error codes along with the test results, which can help in diagnosing the nature of the RAM issues. These error codes can provide insight into the specific type of error encountered, further aiding in troubleshooting and resolving the problem.
Recommended actions: Based on the test results and error codes, the Windows Memory Diagnostic tool may recommend specific actions to take. These recommendations often include replacing faulty RAM modules or adjusting memory settings in the BIOS. Following the recommended actions is crucial to address the detected issues effectively.
Retesting: In some cases, the Windows Memory Diagnostic tool may suggest retesting the RAM after making changes or replacing faulty modules. Retesting helps ensure that the issues have been resolved and that the RAM is now functioning properly. It is important to follow the tool’s recommendations for retesting to ensure the stability and reliability of your computer’s memory.
Understanding the test results allows you to gauge the health of your computer’s RAM and take appropriate actions to resolve any detected issues. Consulting with a computer technician or referring to relevant resources can further assist in interpreting the test results and determining the most suitable course of action.
Tips for Using Windows Memory Diagnostic
When using the Windows Memory Diagnostic tool to test your computer’s RAM, the following tips can help ensure accurate results and enhance your testing experience:
1. Test under optimal conditions: To obtain the most accurate test results, it is recommended to run the Windows Memory Diagnostic tool when your computer is in a stable state. Close all unnecessary applications and avoid multitasking to minimize interference with the testing process.
2. Perform multiple passes: Running the diagnostic tool for multiple passes increases the chances of detecting intermittent or hard-to-detect errors. You can choose to run the Standard test for several passes or opt for the Extended test if you suspect more extensive issues with your RAM.
3. Run the test overnight: Since the Windows Memory Diagnostic tool may take a considerable amount of time to complete, it is advisable to run the test overnight or during a period when you won’t need immediate access to your computer. This allows for a thorough and uninterrupted testing process.
4. Keep your system cool: Overheating can affect the stability of your computer’s RAM. Ensure that your system is adequately cooled, especially when running memory-intensive tests. Clean dust from your computer’s fans and ensure proper ventilation to prevent overheating during the testing process.
5. Update your BIOS: Outdated or incompatible BIOS (Basic Input/Output System) settings can sometimes cause memory-related issues. It is recommended to keep your computer’s BIOS up to date to ensure optimal compatibility with the Windows Memory Diagnostic tool and minimize potential compatibility issues.
6. Document error codes and results: If the Windows Memory Diagnostic tool detects errors, make sure to document the error codes and the specific test results for reference. This information can be helpful when troubleshooting or seeking assistance from technical support or online forums.
7. Consider additional diagnostic tools: While the Windows Memory Diagnostic tool is a reliable option, it may not detect all memory-related issues. If you continue to experience problems or suspect more complex RAM issues, consider using additional diagnostic tools or consulting with a computer technician for a comprehensive analysis.
8. Regularly test your RAM: To maintain the health and stability of your computer, it is recommended to perform regular RAM tests. Set a schedule to test your RAM periodically, especially after significant hardware or software changes, to catch any potential issues early and prevent future problems.
By following these tips, you can optimize your experience with the Windows Memory Diagnostic tool and ensure accurate results when testing your computer’s RAM. Remember to exercise caution and seek professional assistance if you encounter persistent or complex issues.
Pros and Cons of Windows Memory Diagnostic
The Windows Memory Diagnostic tool offers several benefits for users looking to test the health of their computer’s RAM. However, it also has some limitations. Here are the pros and cons of using Windows Memory Diagnostic:
Pros:
- Free and official tool: Windows Memory Diagnostic is a free tool provided by Microsoft, ensuring its reliability and compatibility with Windows operating systems.
- User-friendly interface: The tool offers a user-friendly interface that makes it accessible to users, both novice and advanced.
- Thorough testing options: Windows Memory Diagnostic provides both Standard and Extended testing options, allowing users to choose the level of scrutiny that best suits their needs.
- Identifies RAM issues: The tool effectively detects and identifies potential issues with the computer’s RAM, such as bad bits or mismatched memory modules.
- Straightforward installation process: The installation process is straightforward, making it easy for users to download and install the tool on their computers.
Cons:
- No repair functionality: Windows Memory Diagnostic is a diagnostic tool and does not have the ability to repair any detected RAM issues. Users need to replace faulty RAM modules or perform necessary adjustments themselves.
- May not detect intermittent errors: While the tool is effective in identifying most RAM issues, it may not always detect intermittent errors that occur sporadically.
- Long testing times: Depending on the chosen testing option and the system specifications, running the diagnostic tool can be time-consuming, especially with multiple passes or extended tests.
- Limited advanced diagnostic features: Windows Memory Diagnostic is a basic tool and may not provide advanced diagnostic features that specialized third-party software offers.
- Requires system restart: The testing process requires a system restart, which means you need to save your work and close all applications before initiating the test.
Despite its limitations, Windows Memory Diagnostic remains a valuable tool for diagnosing RAM-related issues. It offers a user-friendly interface, thorough testing options, and reliable results to help users identify potential issues with their computer’s RAM. However, users should be aware of its limitations and consider more advanced diagnostic tools if they require additional features or if Windows Memory Diagnostic does not provide satisfactory results.
Alternatives to Windows Memory Diagnostic
While Windows Memory Diagnostic is a reliable tool for testing the health of your computer’s RAM, there are alternative options available that offer different features and functionalities. Here are some popular alternatives to consider:
MemTest86: MemTest86 is a widely used and highly regarded third-party RAM testing tool. It provides extensive testing options and is known for detecting a wide range of memory-related issues. MemTest86 is available as a bootable utility, which means it runs outside of the operating system, allowing for more thorough testing.
MemTest86+: MemTest86+ is another popular alternative that is considered a fork of the original MemTest86. It offers similar features, including comprehensive RAM testing and the ability to run as a bootable utility. MemTest86+ is actively maintained and receives regular updates to ensure compatibility with the latest hardware.
Prime95: Although primarily known as a tool for stress testing CPUs, Prime95 also includes a module for testing the computer’s RAM. It puts a significant load on the RAM to identify errors or instability. Prime95’s RAM testing feature is often used by advanced users and overclockers to ensure system stability under heavy loads.
PassMark MemTest86: PassMark MemTest86 is a commercial RAM testing tool that offers advanced features and a comprehensive range of tests. It provides extensive support for different memory types and is designed to work on a wide variety of computer systems. PassMark MemTest86 also includes features such as error logging and customizable testing parameters.
HCI MemTest: HCI MemTest is a tool known for its simplicity and ease of use. It performs a thorough test of your computer’s RAM while providing real-time feedback on any errors detected. HCI MemTest offers both free and paid versions, with the paid version unlocking additional features like extensive error reporting.
Operating System Memory Diagnostics: Some operating systems, such as Windows and macOS, have built-in memory diagnostic tools. For example, Windows 10 includes a Windows Memory Diagnostic utility that can be accessed through the Control Panel or by searching for “Windows Memory Diagnostic” in the start menu search bar. macOS has a built-in Apple Diagnostics tool that includes memory tests. These tools may not offer as many features as dedicated third-party tools, but they can still provide basic RAM testing capabilities.
When selecting an alternative to Windows Memory Diagnostic, consider your specific needs, technical expertise, and desired level of testing. While third-party tools may offer more advanced features, built-in operating system diagnostic utilities often provide a convenient and accessible solution for basic RAM testing.
Frequently Asked Questions (FAQs) about Windows Memory Diagnostic
Here are some common questions and answers about Windows Memory Diagnostic:
Q: What does Windows Memory Diagnostic test?
A: Windows Memory Diagnostic tests the health and stability of your computer’s RAM (Random Access Memory). It scans for common memory problems such as bad bits, mismatched memory, and aggressive memory caching settings.
Q: How long does the testing process take?
A: The duration of the testing process depends on several factors, including the test type, system specifications, and the amount of installed memory. Generally, it may take several minutes to a few hours to complete the testing process.
Q: Do I need to close all applications before running Windows Memory Diagnostic?
A: Yes, it is recommended to close all applications before initiating the testing process. Windows Memory Diagnostic requires exclusive access to your computer’s RAM, and leaving applications running could interfere with the accuracy of the test results.
Q: Can Windows Memory Diagnostic fix RAM issues?
A: No, Windows Memory Diagnostic is a diagnostic tool and does not have the ability to repair RAM issues. It helps identify potential problems, but users need to replace faulty RAM modules or make necessary adjustments to resolve the issues.
Q: Can I perform RAM tests without restarting my computer?
A: No, the testing process of Windows Memory Diagnostic requires a system restart. This is necessary as the tool needs exclusive access to the RAM during the testing process.
Q: Can Windows Memory Diagnostic detect all RAM issues?
A: While Windows Memory Diagnostic is effective in detecting most RAM issues, it may not be able to catch intermittent errors or very specific types of issues. For more complex or hard-to-detect problems, advanced diagnostic tools or consulting a professional may be necessary.
Q: Can I run the test on a remote computer?
A: No, Windows Memory Diagnostic needs to be run on the computer that you want to test. It cannot be directly executed on a remote computer.
Q: Does Windows Memory Diagnostic work with all versions of Windows?
A: Windows Memory Diagnostic is designed to work with Windows XP, Windows Vista, Windows 7, Windows 8, and Windows 10. It is compatible with both 32-bit and 64-bit versions of these operating systems.
Q: Should I replace RAM based on a single error?
A: It depends. A single error detected by Windows Memory Diagnostic may not necessarily indicate a serious issue. However, if you consistently experience system crashes, freezes, or other symptoms of RAM problems, it is advisable to investigate further or consult with a professional to determine the best course of action.
Q: Is it necessary to regularly test my computer’s RAM?
A: Regularly testing your computer’s RAM can help maintain system stability and prevent potential issues. It is especially recommended after hardware changes, software updates, or if you encounter recurring problems that may be related to RAM.
These FAQs address some common queries about Windows Memory Diagnostic. If you have additional questions or encounter specific issues, it may be helpful to refer to official documentation or seek assistance from technical support or online forums.