
Check the Power Supply
One of the most common reasons for a computer to turn on and then off suddenly is an issue with the power supply. The power supply is responsible for providing power to all the components of the computer, and if it is faulty or insufficient, it can cause the computer to shut down unexpectedly.
To check the power supply, start by ensuring that it is properly connected to the computer. Check the power cord for any signs of damage or loose connections. If everything appears to be fine, try using a different power outlet or power cord to rule out any issues with the power source.
If the power supply connections are secure and the issue persists, it may be necessary to test the power supply itself. To do this, you can use a power supply tester or a multimeter. These tools will help you determine if the power supply is delivering the correct voltage to the computer’s components. If the power supply is faulty, it will need to be replaced with a new one.
Another thing to consider is the power requirements of your computer components. If you have recently added or upgraded any hardware, it’s possible that your current power supply is not able to handle the increased power demands. In this case, you may need to upgrade to a higher wattage power supply to ensure stable power delivery to all components.
Checking the power supply is an essential step in troubleshooting a computer that turns on and then off. By ensuring that the power supply is functioning properly and providing sufficient power, you can eliminate one potential cause of the issue.
Inspect the Hardware Connections
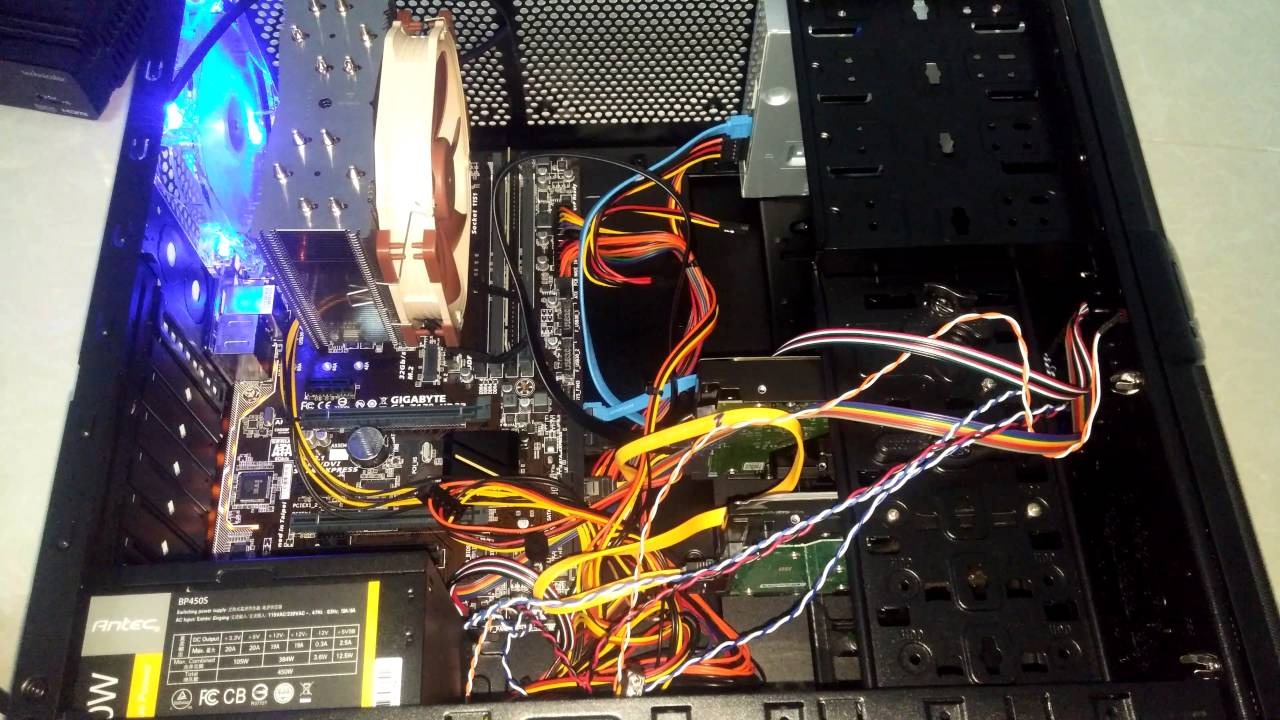
When a computer turns on and then off unexpectedly, it’s worth checking the hardware connections inside the computer case. Loose or improperly connected hardware can cause intermittent power issues, leading to the computer shutting down abruptly.
Start by turning off the computer and unplugging it from the power source. Then, open the computer case and visually inspect all the hardware connections. Ensure that the cables connecting the motherboard, CPU, RAM, and other components are securely attached. Check for any loose cables or connectors that may have become dislodged.
If you find any loose connections, gently reseat them, making sure they are firmly and properly connected. Be cautious when handling delicate components like the CPU and RAM, as they can be easily damaged if mishandled.
It’s also a good idea to check the cables from the power supply to the motherboard and other peripherals. Make sure they are securely plugged in and not damaged or frayed. If you notice any damaged cables, replace them with new ones.
In addition to checking the physical connections, it’s crucial to examine the hardware components themselves. Inspect the RAM modules and make sure they are properly seated in their slots. If you have multiple RAM modules, try using them one at a time to identify if any specific module is causing the issue.
Similarly, inspect the graphics card and ensure it is securely inserted in the appropriate slot. If you have an integrated graphics card, you can try removing it and switching to the integrated graphics to see if the issue resolves.
By thoroughly inspecting and reseating the hardware connections, you can eliminate any loose or faulty connections as a possible cause for the computer turning on and off unexpectedly.
Test the RAM
Random Access Memory (RAM) plays a vital role in the performance of a computer. Faulty or malfunctioning RAM can cause various issues, including a computer turning on and then off abruptly. Therefore, testing the RAM is an essential step in troubleshooting this issue.
To test the RAM, you can use the built-in Windows Memory Diagnostic tool or third-party software. In Windows 10, you can access the Windows Memory Diagnostic tool by searching for “Windows Memory Diagnostic” in the Start menu and selecting the appropriate option. Follow the on-screen instructions to initiate the memory test.
Alternatively, there are several third-party software options available that allow for more extensive testing of the RAM. Memtest86 and Memtest86+ are popular choices that can be downloaded and burned onto a USB drive or CD/DVD. Boot your computer from the USB drive or CD/DVD and let the software run through multiple passes to thoroughly test the RAM.
During the memory test, the software will identify any errors or issues with the RAM modules. If errors are found, it indicates that there is a problem with the RAM. In this case, you will need to replace the faulty RAM module with a new one to resolve the issue.
It’s also worth noting that the RAM slots on the motherboard can sometimes be the cause of the problem. Try reseating the RAM modules, swapping their positions, or using different RAM slots to see if the issue persists. This can help identify if a specific RAM slot is faulty.
Testing the RAM is a crucial step in diagnosing a computer that turns on and then off unexpectedly. By identifying and addressing any issues with the RAM, you can ensure stable and reliable performance of your computer.
Examine the CPU
The Central Processing Unit (CPU) is the brain of the computer and plays a vital role in its overall performance. If the CPU is experiencing issues, it can cause the computer to turn on and then off unexpectedly. Therefore, it’s crucial to examine the CPU when troubleshooting this problem.
Start by checking the CPU for signs of physical damage, such as bent pins or burn marks. Carefully remove the CPU cooler and inspect the CPU itself. If you notice any bent pins, try straightening them using a mechanical pencil or a credit card. However, be extremely cautious to avoid causing further damage.
Next, check the CPU cooler and ensure that it is securely attached to the CPU. Loose or improperly installed coolers can lead to overheating issues, causing the computer to shut down abruptly. Verify that the CPU cooler fan is spinning correctly and not obstructed by any debris.
If you suspect overheating may be the cause of the issue, it’s important to monitor the CPU temperature. You can do this using various software applications that provide real-time temperature readings, such as Core Temp or HWMonitor. If the CPU temperature exceeds safe levels (typically above 80-90 degrees Celsius), it may be necessary to clean the CPU cooler, reapply thermal paste, or replace the cooler altogether.
In some cases, the CPU may be faulty or not operating optimally. To determine if this is the cause of the problem, you can try using a spare CPU (if available) or borrowing one from a friend to test in your computer. If the issue resolves with a different CPU, it indicates that the original CPU is faulty and needs to be replaced.
Examine the CPU carefully, ensure proper cooling, and monitor its temperature to pinpoint any problems that may be causing your computer to turn on and off unexpectedly.
Verify the Graphics Card
A faulty or incompatible graphics card can also be a potential cause for a computer turning on and then off unexpectedly. The graphics card is responsible for rendering images and videos on your monitor, and any issues with it can lead to system instability.
Start by checking the physical connection of the graphics card. Ensure that it is properly seated in the appropriate PCIe slot on the motherboard. Sometimes, due to vibrations or movement, the graphics card may become loose, resulting in intermittent power issues. Remove and reinsert the graphics card, ensuring it is firmly seated and secured.
If you recently installed or updated the graphics card driver, it could be a driver-related issue. In such cases, it’s recommended to uninstall the current driver and install the latest version from the manufacturer’s website. This can help resolve any compatibility issues or software conflicts that could be causing the unexpected shutdowns.
Overheating can also affect the performance of the graphics card and cause the computer to shut down. Dust accumulation or a malfunctioning fan can lead to inadequate cooling. Inspect the graphics card fan for any obstructions or signs of damage. Clean out any dust or debris using compressed air or a soft brush. If the fan is not functioning properly, consider replacing it to ensure proper cooling.
In some cases, the graphics card itself may be faulty. If you have access to another compatible graphics card, try swapping it out and see if the issue persists. If the computer stops randomly turning off with a different graphics card, it indicates that the original card is likely the culprit and may need to be replaced.
Remember to check the power supply to ensure that it provides enough power to the graphics card. Inadequate power delivery can cause instability and unexpected shutdowns. Check the power supply specifications and compare them with the requirements of the graphics card to ensure compatibility.
By verifying the graphics card and ensuring its proper installation, cooling, and power supply, you can eliminate it as a potential cause for the computer turning on and off unexpectedly.
Investigate the Hard Drive
The hard drive is where all the data is stored on your computer, and if it is experiencing issues, it can lead to unexpected shutdowns. Investigating the hard drive should be a part of your troubleshooting process when your computer turns on and off abruptly.
Start by checking the hard drive connections. Ensure that the SATA or IDE cables are securely connected to both the motherboard and the hard drive itself. Sometimes, a loose or faulty cable can cause intermittent power loss, resulting in the computer shutting down unexpectedly.
If the connections are secure, it’s essential to test the hard drive for any errors or failures. You can use built-in tools like Windows Error Checking or Command Prompt’s CHKDSK command to scan the hard drive for any bad sectors or file system corruption. These tools can help identify and repair any issues that may be contributing to the unexpected shutdowns.
In addition to running diagnostic tools, it’s crucial to monitor the hard drive’s health. Several third-party software applications, such as CrystalDiskInfo or HD Tune, can provide detailed information about the hard drive’s health status, including temperature, reallocated sectors, and overall performance. If the hard drive shows signs of imminent failure, it is recommended to back up your data and replace the drive as soon as possible.
It’s also worth checking the hard drive for any excessive fragmentation. Fragmentation occurs when files are split into pieces across different sectors of the hard drive, leading to slower access times. The built-in Windows Disk Defragmenter tool can help reorganize the data on the hard drive, improving performance and potentially resolving any issues that may be causing the unexpected shutdowns.
If you suspect that a specific application or file is causing the issue, try uninstalling or removing it temporarily to see if the problem resolves. Sometimes, a corrupt or incompatible file can trigger system instability.
By investigating the hard drive and addressing any errors or issues, you can ensure the stability and reliability of your computer, reducing the likelihood of it turning on and off unexpectedly.
Look for Overheating Issues
Overheating is a common cause of unexpected shutdowns in computers. When the internal components of a computer get too hot, it triggers thermal protection mechanisms that shut down the system to prevent damage. Therefore, it’s important to look for overheating issues when troubleshooting a computer that turns on and off abruptly.
Start by checking the computer’s cooling system, particularly the fans. Ensure that all fans are spinning properly and not obstructed by dust or debris. Use compressed air or a soft brush to clean out any accumulated dust on the fans and heat sinks. Over time, dust can restrict airflow, leading to inadequate cooling.
If the fans are functioning properly, examine the heat sinks on the CPU and graphics card. Heat sinks are designed to dissipate heat away from the components. Make sure they are securely attached and free from any obstruction. If necessary, remove the heat sinks, clean them, and reapply thermal paste before reattaching them.
If your computer has a laptop-style cooling pad or stand, consider using it to provide additional airflow to the underside of the laptop. Elevating the laptop can help improve air circulation and reduce internal temperatures.
Monitoring the temperatures of the CPU and graphics card is crucial in identifying overheating issues. Several software applications, such as Core Temp or HWMonitor, provide real-time temperature readings. Ideally, the temperatures should remain within acceptable ranges (typically below 80-90 degrees Celsius) even under heavy usage. If the temperatures consistently exceed safe levels, it may be necessary to consider more efficient cooling solutions, such as aftermarket CPU coolers or additional case fans.
In some cases, the computer’s power settings may contribute to overheating. Check the power management settings in the operating system and ensure that the computer is not set to run at high performance constantly. Lowering the power settings can reduce heat generation and potentially alleviate overheating issues.
Lastly, make sure that the computer is not placed in an environment with poor ventilation or in direct sunlight. Keep it in a well-ventilated area with proper airflow to prevent heat buildup.
By actively looking for and addressing overheating issues, you can ensure that your computer operates within safe temperature limits and reduce the occurrence of unexpected shutdowns.
Update the BIOS
The BIOS (Basic Input/Output System) is firmware that controls the basic functions of a computer, including hardware initialization and system startup. Outdated or buggy BIOS versions can cause various issues, including unexpected shutdowns. Therefore, updating the BIOS is an important step in troubleshooting a computer that turns on and off abruptly.
Before updating the BIOS, it’s crucial to ensure that you have the correct BIOS update for your specific motherboard model. Visit the manufacturer’s website and locate the BIOS updates section for your motherboard. Download the latest available BIOS update and carefully read the instructions provided by the manufacturer.
Before proceeding with the BIOS update, it’s important to note that updating the BIOS carries some risks. If not done correctly, it can result in permanent damage to the motherboard. Ensure that your computer is connected to a reliable power source, and avoid interrupting the update process once it has started.
Once you are ready to update the BIOS, follow the manufacturer’s instructions precisely. This may involve creating a bootable USB drive, running a specific executable file, or using a BIOS flashing utility provided by the manufacturer. During the update process, it’s essential to refrain from using the computer or turning it off until the update is complete.
Updating the BIOS can bring improvements in system stability, compatibility, and performance, and may address issues that can cause a computer to turn on and off unexpectedly. However, it’s important to note that not all unexpected shutdown issues are related to the BIOS. It’s recommended to try other troubleshooting steps if the problem persists after updating the BIOS.
If you are uncomfortable updating the BIOS yourself, you can seek assistance from a professional or contact the manufacturer’s support for guidance.
Updating the BIOS can be a valuable step in resolving unexpected shutdown issues. However, it’s important to approach it with caution and ensure that you follow the proper procedures to minimize the risk of complications.