
Checking for Windows Updates
Keeping your Windows operating system up to date is crucial for the stability and security of your computer. Regularly checking for and installing Windows updates ensures that you have the latest bug fixes, patches, and performance improvements from Microsoft. Here’s how you can easily check for updates:
- Click on the Start button and select Settings.
- In the Settings window, click on Update & Security.
- In the left-hand menu, select Windows Update.
- Click on the Check for updates button.
Windows will then start searching for available updates. If any updates are found, they will be downloaded and installed automatically. Depending on the size and number of updates, this process might take some time, so it’s best to ensure that you have a stable internet connection before starting.
While Windows updates primarily focus on security and stability, they may also include new features and enhancements. It’s important to note that some updates require a system restart to take effect. If prompted, restart your computer to complete the installation process.
By regularly checking for updates, you can ensure that your Windows operating system is running smoothly and efficiently, with the latest security patches and bug fixes. Maintaining an up-to-date system reduces the risk of encountering issues, such as software conflicts or vulnerabilities that could compromise your computer’s security.
It’s also a good idea to enable automatic updates so that your computer can download and install updates in the background without interrupting your work. To enable automatic updates, simply go back to the Windows Update settings and enable the Automatic updates option.
Remember, keeping your Windows operating system up to date is an essential part of computer maintenance, and it’s worth taking a few minutes to check for updates regularly. This simple step can go a long way in ensuring the smooth operation of your computer and safeguarding your data from potential threats.
Running the Windows Troubleshooter
The Windows Troubleshooter is a built-in tool in the Windows operating system that can help you diagnose and fix various common issues. It is designed to automatically identify and resolve problems related to hardware, software, network connectivity, and system performance. Here’s how you can run the Windows Troubleshooter:
- Click on the Start button and select Settings.
- In the Settings window, click on Update & Security.
- In the left-hand menu, select Troubleshoot.
- Under the Get up and running section, select the specific troubleshooter related to the issue you’re facing. For example, if you’re experiencing network connectivity problems, choose the Internet Connections troubleshooter.
- Click on the Run the troubleshooter button.
The Windows Troubleshooter will then start scanning your system for the selected issue and attempt to fix it automatically. During the process, it may prompt you to provide additional information or perform certain actions to resolve the problem.
If the troubleshooter successfully fixes the issue, it will display a message indicating the resolution. However, if it cannot automatically resolve the problem, it may provide you with further instructions or recommend other steps to take.
The Windows Troubleshooter covers a wide range of common problems, including but not limited to printer issues, audio problems, blue screen errors, and performance slowdowns. It offers a quick and convenient way to diagnose and address these issues without requiring advanced technical knowledge.
In addition to the predefined troubleshooters, Windows also provides an Additional troubleshooters section where you can find more specialized troubleshooters for specific system components or features. These additional troubleshooters can help you deal with more complex or niche issues that the general troubleshooters may not cover.
By running the Windows Troubleshooter, you can save time and effort in troubleshooting common computer problems. It is a useful tool to have in your troubleshooting toolkit, and it can often resolve issues without the need for manual intervention or seeking external help.
Using the System File Checker
The System File Checker (SFC) is a built-in Windows utility that scans and repairs corrupt or missing system files. These files are essential for the proper functioning of your operating system, and any issues with them could lead to various problems, such as crashes, error messages, or performance issues. Here’s how you can use the System File Checker:
- Open the Command Prompt as an administrator. You can do this by right-clicking on the Start button and selecting Command Prompt (Admin) or Windows PowerShell (Admin).
- In the Command Prompt window, type the command:
sfc /scannow. - Press Enter to start the scan.
The System File Checker will then start scanning your system files for any integrity violations. If it finds any corrupt or missing files, it will attempt to repair them using cached copies stored on your computer or by retrieving the files from the Windows installation media.
During the scanning and repairing process, you may see a progress bar indicating the status. It’s important to note that the scan may take some time to complete, depending on the size of your system and the number of files being scanned.
Once the scan is finished, the System File Checker will provide a report on the actions taken and the results of the scan. If it was able to repair any files, it will indicate the success. However, if it couldn’t fix some files, it may recommend further steps or suggest using additional tools to address the issues.
Running the System File Checker regularly can help ensure that your system files are intact and functioning correctly. It can help resolve issues caused by corrupted files and improve the overall stability and performance of your computer.
If you encounter problems that cannot be fixed by the System File Checker, you may need to consider more advanced troubleshooting methods or seek assistance from a professional. Additionally, it’s always a good idea to maintain regular backups of your important files and create a system restore point before making any significant changes to your system.
By utilizing the System File Checker, you can maintain the integrity of your system files, resulting in a more stable and reliable operating environment.
Checking for Disk Errors
Disk errors can occur on your computer’s hard drive over time, leading to data corruption, system crashes, and performance issues. To maintain the health and reliability of your storage device, it’s important to regularly check for and fix any disk errors. Fortunately, Windows provides a built-in tool called “Check Disk” (chkdsk) that can scan for and repair these errors. Here’s how you can check for disk errors using Check Disk:
- Open File Explorer by pressing Windows Key + E or by clicking on the folder icon in the taskbar.
- In File Explorer, right-click on the drive you want to check for errors (usually the C: drive) and select Properties.
- In the Properties window, go to the Tools tab and under the “Error checking” section, click on the Check button.
- If prompted, select the option to “Scan drive” or “Scan and repair drive”. Depending on the size and condition of the drive, this process may take some time.
Windows will then scan the selected drive for any errors and attempt to fix them. During the scan, you may see a progress bar indicating the status of the check. If any errors are found, Windows will automatically repair them.
If you’re checking the drive that contains your operating system, you may be prompted to schedule the disk check to run the next time you restart your computer. In this case, close any open programs and restart your computer to allow the check to commence before the operating system fully loads.
It’s worth noting that the scan and repair process can take a significant amount of time, especially for large drives or drives with many errors. It’s recommended to perform this task during a time when you don’t need immediate access to your computer.
Regularly checking for disk errors can help prevent data loss and ensure the longevity and optimal performance of your hard drive. It’s a proactive measure that can uncover and resolve potential issues before they lead to more severe problems.
If Check Disk is unable to fix the disk errors or you suspect that your hard drive may have physical damage, it’s advisable to seek professional assistance from a data recovery service or a certified technician. They can assess the situation and provide appropriate solutions to recover your data or replace the faulty hardware.
By running periodic disk checks, you can mitigate the risk of disk errors and maintain the stability and reliability of your storage device for long-term usage.
Running a Virus Scan
With the increasing prevalence of online threats, it is crucial to regularly run virus scans on your computer to protect your data and ensure the security of your system. A virus scan helps detect and remove malicious software, including viruses, malware, and other potentially harmful threats. Here’s how you can run a virus scan on your Windows computer:
- Ensure that you have a reliable antivirus software installed on your computer. If you don’t have one, consider downloading and installing a reputable antivirus program from a trusted source.
- Open the antivirus software from your system tray or by locating it in your list of installed programs.
- Depending on the antivirus software you’re using, you may have different options for running a virus scan. Look for a button or tab labeled “Scan” or “Scan Now”.
- Choose the type of scan you want to perform. Most antivirus software offers different levels of scanning, such as quick scan, full scan, or custom scan. A quick scan focuses on the most common areas where malware is typically found, while a full scan thoroughly examines your entire system. You may also have the option to customize the scan by selecting specific files, folders, or drives to scan.
- Start the scan and allow the antivirus software to scan your computer for any potential threats.
The scanning process may take some time depending on the size of your system and the speed of your computer. While the scan is running, it’s important not to interrupt or close the antivirus software to ensure a thorough and accurate scan.
If the antivirus software detects any infected files or malware, it will provide options to quarantine or remove them. It’s advisable to follow the instructions provided by the software to handle any identified threats.
Regularly running virus scans is vital to protect your computer from malicious software and prevent potential damage to your files and sensitive information. It’s recommended to schedule automatic scans or perform manual scans at least once a week to ensure that your system remains secure.
While antivirus software can provide essential protection against known threats, it’s important to keep it up to date. Regularly update your antivirus software, along with its virus definitions, to ensure that it can effectively detect and defend against the latest threats.
Additionally, practicing safe browsing habits, avoiding suspicious downloads, and being cautious of email attachments can help minimize the risk of malware infections.
In case your computer becomes infected despite the preventive measures taken, it may be necessary to seek professional assistance from a cybersecurity expert or utilize advanced malware removal tools to thoroughly clean your system.
By regularly running virus scans, you can proactively safeguard your computer and mitigate the risk of cybersecurity threats.
Checking for Driver Issues
Drivers play a crucial role in enabling hardware devices to communicate correctly with your operating system. Outdated or incompatible drivers can lead to various issues, including poor performance, system crashes, and malfunctioning hardware. Checking for driver issues and keeping your drivers up to date is essential for a smooth and stable computing experience. Here’s how you can check for driver issues on your Windows computer:
- Press the Windows Key + X on your keyboard and select Device Manager from the menu that appears.
- In the Device Manager window, expand the different categories to view the devices installed on your computer.
- Look out for any devices with a yellow exclamation mark or a red “X” icon next to them. These symbols indicate that there is a driver issue or a problem with the respective hardware device.
- Right-click on the device with the driver issue and select Update Driver. Choose the option to search online for updated drivers.
Windows will then search for the latest driver updates for the selected device and install them if available. This process requires an active internet connection. If Windows cannot find updated drivers, you may need to visit the manufacturer’s website and manually download and install the appropriate drivers for your hardware device.
In addition to updating drivers, you may also want to consider uninstalling and reinstalling problematic drivers. To do this, right-click on the device with the driver issue and select Uninstall Device. After the driver is uninstalled, restart your computer and let Windows automatically reinstall the driver. This can sometimes solve driver-related problems caused by corrupted or conflicting drivers.
Another useful tool for checking and updating drivers is third-party driver management software. These programs can scan your system, identify outdated or missing drivers, and provide an easy way to update them. However, be cautious when using such software and only download them from reputable sources to avoid potential malware or unwanted programs.
Regularly checking for driver issues and keeping your drivers up to date can improve the performance, stability, and compatibility of your system. Updated drivers often include bug fixes, performance enhancements, and compatibility improvements with the latest operating system updates and software applications.
If you’re experiencing persistent driver-related problems or are unsure about updating drivers manually, it’s advisable to consult the device manufacturer’s support resources or seek assistance from a professional technician. They can provide guidance specific to your hardware and help resolve complex driver issues.
Remember, a well-maintained and updated driver ecosystem is crucial for optimal hardware functionality and a smooth computing experience.
Monitoring Performance with Task Manager
Task Manager is a powerful built-in tool in Windows that allows you to monitor and manage the processes and performance of your computer. It provides real-time information about system resources, such as CPU, memory, disk usage, and network activity. By using Task Manager, you can identify resource-hungry applications, troubleshoot performance issues, and improve the overall efficiency of your system. Here’s how you can effectively monitor performance using Task Manager:
- Press Ctrl + Shift + Esc on your keyboard to open Task Manager. Alternatively, you can right-click the taskbar at the bottom of your screen and select Task Manager from the context menu.
- Task Manager will open to the Processes tab, which displays a list of currently running processes and their resource usage. Here, you can see how much CPU, memory, disk, and network each process is consuming.
- To sort the processes by resource usage, click on the corresponding column header. For example, clicking on CPU sorts the processes in descending order based on CPU usage.
- If you notice a particular process using a significant amount of resources, you can right-click on it and select End Task to terminate it. Be cautious when ending processes, as terminating essential system processes can cause system instability.
- Switch to the Performance tab in Task Manager to get an overview of the system’s performance graphs, including CPU, memory, disk, and network utilization. These graphs provide a visual representation that helps you identify any abnormalities or bottlenecks.
- Further analyze specific resources by clicking on the corresponding category in the left-hand menu. For example, under the Memory category, you can see a detailed breakdown of how memory is being utilized by different processes.
- Utilize the App history and Startup tabs to identify resource-intensive applications and manage programs that launch at startup, respectively.
Task Manager also offers an advanced option, known as Resource Monitor, which provides even more detailed and real-time monitoring of system resources. To access it, open Task Manager, go to the Performance tab, and click on Open Resource Monitor at the bottom.
Monitoring performance with Task Manager allows you to identify processes or applications that may be using excessive resources and negatively impacting system performance. By terminating unnecessary processes or adjusting their priority, you can improve the responsiveness and overall speed of your computer.
Task Manager is also a valuable troubleshooting tool. If your computer is running slow or freezing, you can use Task Manager to identify the culprit and take appropriate action, such as closing resource-intensive applications or updating problematic drivers.
Remember to regularly monitor your system’s performance using Task Manager to ensure optimal performance and identify any underlying issues. By doing so, you can maintain a smoothly running system and make better-informed decisions about resource allocation and system management.
Checking for Hardware Problems
Hardware problems can cause various issues ranging from system crashes to device malfunctions. It’s crucial to diagnose and resolve hardware problems promptly to ensure the smooth operation of your computer. Here are some steps you can take to check for hardware problems:
- Visually inspect your hardware: Check for any visible signs of damage or loose connections. Look for frayed cables, bent pins, or components that are not seated properly.
- Perform a power cycle: Turn off your computer and disconnect it from the power source. Wait for a few minutes, then reconnect the power and start the computer. This can help resolve issues caused by power surges or static electricity.
- Check device manager: Open the Device Manager (press Windows Key + X and select Device Manager), and look for any devices with a yellow exclamation mark or a red “X” icon next to them. This indicates a hardware issue. Right-click on the problematic device and select Properties to get more information.
- Run hardware diagnostics: Many computer manufacturers provide diagnostic tools that can analyze the hardware components of your system for any problems. Check the manufacturer’s website or documentation to see if such tools are available for your specific hardware.
- Check for overheating: Overheating can cause system instability and hardware failures. Ensure that the cooling fans are functioning correctly and that there is no excessive dust accumulation on the vents. Use compressed air to clean out the dust if necessary.
- Test with alternate hardware: If possible, try swapping out suspect hardware components with known working ones. For example, if you suspect a faulty RAM module, try using a different module in its place to see if the problem persists.
- Update drivers and firmware: Ensure that you have the latest drivers and firmware for your hardware components. Visit the manufacturer’s website or use Windows Update to check for updates.
- Check for system logs: Examine the Windows Event Viewer for any error or warning messages related to hardware. This can provide valuable insights into the source of the problem.
If you have tried the above steps and are still experiencing hardware issues, it may be necessary to contact the manufacturer’s technical support or consult a professional technician for further assistance. They can provide specialized knowledge and expertise to diagnose and resolve complex hardware problems.
Regularly checking for hardware problems and addressing them promptly can help ensure the stability and longevity of your computer. Hardware issues, if left unresolved, can lead to more severe problems and potentially cause data loss or system failure.
Running Memory Diagnostics
Memory (RAM) problems can cause a range of issues, including system crashes, application errors, and overall sluggish performance. To check for memory-related problems and ensure the stability of your computer, Windows provides a built-in memory diagnostic tool. Here’s how to run memory diagnostics:
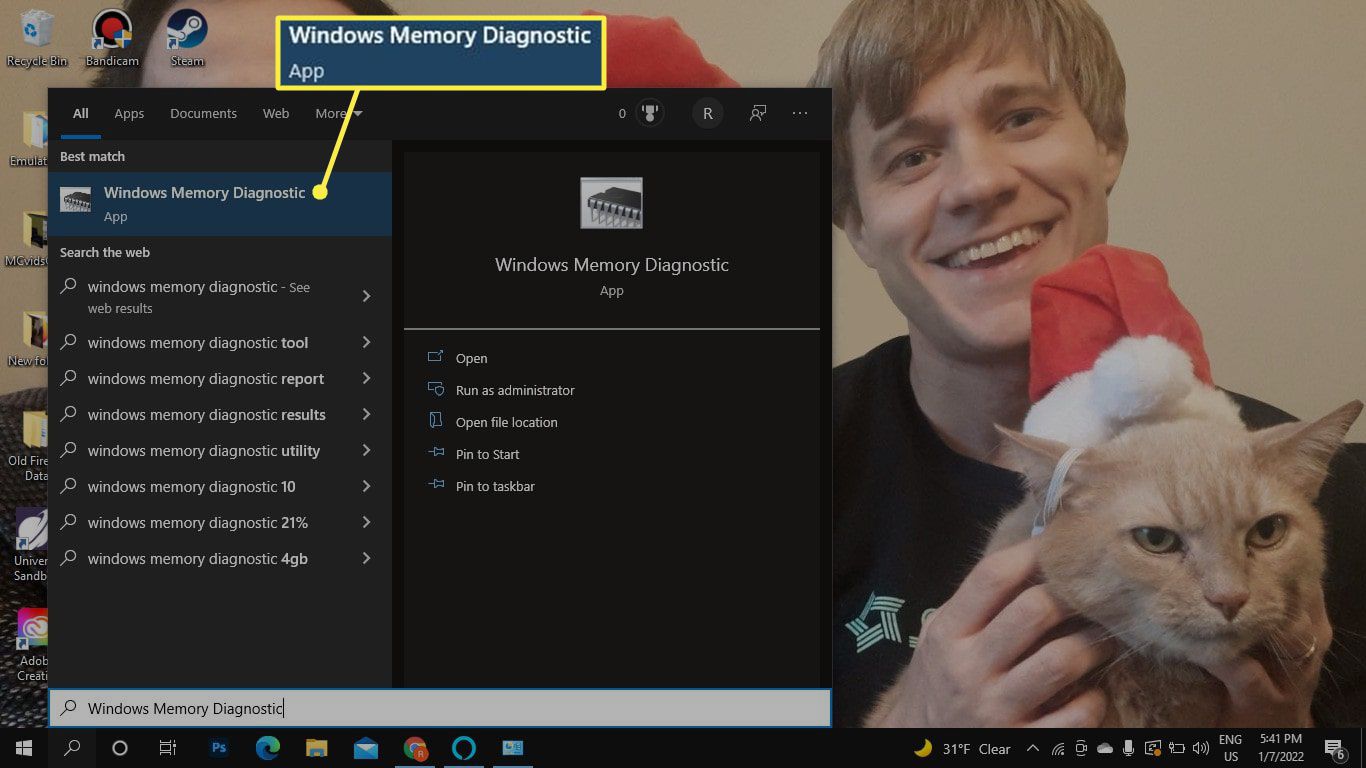
- Open the Start menu and type “Windows Memory Diagnostic“.
- Select the “Windows Memory Diagnostic” app from the search results.
- In the Windows Memory Diagnostic window, you can choose between two options: “Restart now and check for problems (recommended)” or “Check for problems the next time I start my computer“. Select the option that is convenient for you.
- If you choose to restart your computer, save any unsaved work, close all applications, and click “Restart now and check for problems“.
- Upon restarting, a memory diagnostic test will automatically run. During this process, the system will check for any issues with your RAM.
- Allow the memory diagnostic test to complete. It may take several minutes to run, depending on the size of your memory and the speed of your computer.
- After the test finishes, your computer will restart again, and the results will be displayed on the Windows Memory Diagnostic screen. The results will indicate whether any memory errors were detected during the test.
If the Windows Memory Diagnostic tool detects any memory errors, it indicates a problem with your RAM. In such cases, you may need to replace the faulty RAM module(s) to resolve the issue. If you are unsure about how to proceed, it’s recommended to seek assistance from a professional technician or the manufacturer’s support team.
It’s worth noting that the Windows Memory Diagnostic tool may not always detect every type of memory issue. If you continue to experience memory-related problems despite passing the diagnostic test, you might want to consider additional troubleshooting steps or consult an expert for further assistance.
Running memory diagnostics is an essential step in diagnosing potential memory problems. By regularly checking your RAM for issues, you can ensure the stability and optimal performance of your computer. It is particularly useful when encountering frequent crashes, memory-related error messages, or system instability.
Remember to save your work and close all applications before running memory diagnostics to avoid any data loss during the diagnostic process. Regularly checking for memory problems can help detect and resolve potential issues early on, ensuring a smooth computing experience.
Using Event Viewer to Identify Issues
Event Viewer is a powerful Windows tool that allows you to view and analyze system logs, providing valuable insights into various critical events, errors, warnings, and informational messages that occur on your computer. By utilizing Event Viewer, you can identify and troubleshoot issues related to applications, drivers, system services, and more. Here’s how you can use Event Viewer to identify issues:
- Press the Windows Key + X on your keyboard and select Event Viewer from the menu that appears.
- Event Viewer will open with a navigation pane on the left side and a list of event logs in the center. The three main event logs to focus on are:
- Windows Logs: Contains several event logs related to the operating system, including Application, Security, Setup, System, and Forwarded Events.
- Applications and Services Logs: Provides various logs specific to applications and services installed on your computer, such as Microsoft Office, Internet Explorer, and Windows Defender.
- Subscriptions: An advanced feature that allows you to collect events from remote computers.
- Select the appropriate event log based on the type of issue you’re experiencing. For example, if you’re troubleshooting an application-related problem, look for events in the Application log.
- Once you’ve selected the desired event log, you can view the events listed in the center pane. Each event entry includes detailed information, such as the date, time, event ID, source, and description.
- Navigate through the events to find any errors, warnings, or critical events that correspond to the issue you’re facing. These events often contain valuable information about the cause of the problem.
- Double-click on a specific event to view more details. The details tab provides additional information, including the event description, event category, and any associated data or error codes.
- Use the filter tool in the Actions pane on the right side to narrow down the events based on specific criteria, such as date, event level, or event source. This can help you find relevant events more efficiently.
- Take note of any recurring patterns, specific error codes, or relevant event details. This information can be helpful when seeking solutions or when contacting technical support.
Event Viewer is a powerful tool that can help you pinpoint the source of system issues, monitor application performance, track system changes, and diagnose errors. However, it’s important to note that not all events in Event Viewer indicate critical problems. Some events are normal and may not require immediate attention.
When using Event Viewer, it’s important to exercise caution and focus on the events that relate to the issue you’re troubleshooting. In some cases, you may need to research specific event codes or seek assistance from technical forums or the software/application manufacturer’s support resources.
By leveraging the information provided by Event Viewer, you can gain valuable insights into the underlying causes of issues and take appropriate actions to troubleshoot and resolve them effectively.
Analyzing BSOD (Blue Screen of Death) Error Messages
The Blue Screen of Death (BSOD) is a critical error screen that appears when a Windows system encounters a problem that it cannot recover from. When a BSOD occurs, it displays an error message along with a specific error code. Analyzing these error messages can provide valuable information about the underlying causes of the system crash. Here’s how you can make sense of BSOD error messages:
- When you encounter a BSOD, take note of the error message and any error codes displayed on the screen. They typically appear in all capital letters and may include phrases like “STOP” or “Fatal Error”.
- Reboot your computer to see if the BSOD error occurs again. Sometimes, it may just be a temporary glitch.
- Search for the error code and error message on Microsoft’s official documentation or other trusted sources. This can provide valuable information about the specific problem you’re facing and possible solutions.
- Note down any recently installed hardware or software. Sometimes, conflicts between hardware devices or incompatible software can trigger a BSOD. Try uninstalling or updating the troublesome hardware or software to see if it resolves the issue.
- Check for recently updated drivers. Outdated or incompatible drivers can also cause BSOD errors. Update the drivers for your hardware devices, such as graphics cards, network adapters, or storage controllers.
- Review any recent changes to your computer’s settings or configuration. This may include system updates, changes to BIOS settings, or modifications to system files. Undoing recent changes may resolve the issue.
- Inspect the contents of the BSOD error message for any specific file names or processes mentioned. These references can indicate the driver or software component that is causing the problem.
- If you are unable to resolve the issue on your own, consult technical forums or reach out to the manufacturer’s support team for further assistance. Provide them with the error code and detailed information about the problem.
- Consider utilizing Windows’ built-in troubleshooting tools, such as the Event Viewer (described earlier), to gather more information about the crash. Event logs can reveal patterns or additional error messages associated with the BSOD event.
- Keep in mind that some BSOD errors may require more advanced troubleshooting and diagnostic techniques. In such cases, it may be necessary to seek assistance from a professional technician.
BSOD errors can be intermittent or persistent, and their causes can range from hardware failures to software conflicts. By carefully examining the error messages and taking appropriate actions based on the information provided, you can often resolve or mitigate the underlying issues that trigger BSOD errors.
Remember that prevention is key. Regularly updating drivers, installing system updates, and maintaining a healthy system can reduce the likelihood of encountering BSOD errors. Additionally, creating backups of your important files can protect against data loss in the event of a system crash.
BSOD errors can be frustrating, but with patience and a methodical approach, you can often diagnose and fix the issues causing them, restoring stability to your Windows system.
Checking Network Connections and Troubleshooting Internet Issues
A stable and reliable network connection is essential for accessing the internet and ensuring smooth online experiences. If you’re experiencing network or internet connectivity problems, there are several troubleshooting steps you can take to identify and resolve the issues. Here’s how you can check network connections and troubleshoot internet problems:
- Verify physical connections: Ensure that all cables, such as Ethernet cables or modem cables, are securely plugged in. Also, check that your wireless router is powered on and functioning properly.
- Restart your network devices: Power off your modem, router, and any connected devices (e.g., computers, smartphones). Wait for a few seconds and then power them back on. This can help refresh the network connection.
- Check the router lights: Make sure that the lights on your router are indicating a stable connection. A blinking or amber light might indicate a problem with the internet connection.
- Try a different device: Test the internet connection on another device, such as a smartphone or a different computer. If the issue persists only on a specific device, it may indicate a problem with that device’s network adapter or settings.
- Check for software updates: Ensure that your router’s firmware is up to date. Visit the manufacturer’s website for any available firmware updates. Additionally, keep your computer’s network drivers updated.
- Scan for malware: Run a thorough scan using reliable antivirus software to detect and remove any malware that might be affecting your network connection.
- Disable security software temporarily: Some security software, such as firewalls or antivirus programs, might interfere with network connections. Temporarily disable them to see if they are causing the issue.
- Reset network settings: On Windows, open the Command Prompt as an administrator and execute the following commands: “netsh winsock reset” and “netsh int ip reset”. Restart your computer afterward. This resets the network stack and can resolve network-related issues.
- Check DNS settings: If you’re unable to access specific websites, try changing your Domain Name System (DNS) settings to use public DNS servers like Google DNS or OpenDNS.
- Contact your internet service provider (ISP): If the issue persists after performing the above steps, reach out to your ISP to report the problem and seek further assistance. They will be able to perform additional tests and check for any issues on their end.
It’s worth noting that network and internet connectivity issues can sometimes be caused by factors outside your control, such as service outages or infrastructure problems. In such cases, contacting your ISP or network administrator is crucial to resolve the issue.
By following these troubleshooting steps and ensuring proper network connections and settings, you can often diagnose and resolve network-related problems, improving your internet experience and minimizing interruptions in connectivity.
Remember to document any error messages or unusual behaviors you encounter during the troubleshooting process, as these details can provide valuable information to support technicians if further assistance is required.
Using Windows Reliability Monitor to Track System Stability
Windows Reliability Monitor is a built-in tool that allows you to track and analyze the stability of your system over time. It provides a visual representation of important events, such as software installations, system updates, application crashes, and hardware failures. By using Windows Reliability Monitor, you can gain insights into the overall health and reliability of your computer and troubleshoot any recurring issues. Here’s how to utilize Windows Reliability Monitor:
- Open the Start menu and search for “Reliability Monitor“.
- Click on the “View reliability history” option that appears in the search results.
- Windows Reliability Monitor will open, displaying a graph representing the system stability index. The stability index rating ranges from 1 to 10, with a higher score indicating a more stable system.
- Navigate through the timeline to identify specific events. Each event is marked with a symbol representing its severity and a corresponding date and time.
- Click on an event to view additional details about it. This will provide you with information such as the source of the event, any associated error codes, and a description of what occurred.
- Look for patterns or recurring events that coincide with problems you’ve experienced. This can help you identify the root cause of the issue and take appropriate action.
- Based on the information provided by Windows Reliability Monitor, you can troubleshoot specific events or seek solutions for recurring problems online. Use the event details and error codes to narrow down your search and find relevant solutions.
- Consider restoring your system to a previous, more stable state using a System Restore point. Windows creates restore points automatically when major system changes occur, such as software installations or system updates.
- If you need further assistance resolving specific issues, seek support from technical forums or contact the software or hardware manufacturer for guidance.
- Regularly monitor Windows Reliability Monitor to stay updated on the stability of your system. This can help you stay proactive in resolving any emerging problems and maintaining a reliable computing environment.
Windows Reliability Monitor is a valuable tool for tracking system stability and identifying potential problem areas. By using this tool, you can better understand the events and changes that impact your system’s performance, identify the root cause of issues, and take appropriate measures to ensure the stability and reliability of your computer.
Make it a habit to check Windows Reliability Monitor periodically, especially after major system changes or when troubleshooting recurring problems. This proactive approach will help you address potential issues promptly and maintain an optimal computing experience.
Running a Clean Boot to Determine Software Conflicts
If your Windows computer is experiencing performance issues, crashes, or software conflicts, it may be due to conflicting programs or services running in the background. To identify the root cause of these conflicts, you can perform a clean boot. This process allows your computer to start up with a minimal set of drivers and startup programs. By running a clean boot, you can determine if software conflicts are causing the problem. Here are the steps to perform a clean boot:
- Press Windows Key + R on your keyboard to open the Run dialog box.
- Type “msconfig” (without the quotation marks) in the Run dialog box and press Enter.
- In the System Configuration window that appears, go to the “Services” tab.
- Check the box that says “Hide all Microsoft services“. This will ensure that you only disable third-party services.
- Click on the “Disable all” button to disable all the selected services.
- Now, switch to the “Startup” tab in the System Configuration window.
- Click on the “Open Task Manager” link. This will open the Task Manager with the Startup tab selected.
- In the Task Manager, select each enabled startup item and click on the “Disable” button. This will prevent these programs from starting up during the clean boot.
- Close the Task Manager and go back to the System Configuration window.
- Click on the “OK” button to apply the changes and restart your computer.
After the computer restarts in the clean boot state, observe its performance and stability. If the issues are resolved, it indicates that there is a conflict with one or more of the disabled services or startup programs. To identify the specific conflict, you can enable the services and startup items one by one, and then restart the computer each time to determine which one is causing the problem. This process will help you pinpoint the conflicting software.
Once you have identified the problematic software, you can try updating or reinstalling it, or contact the software manufacturer for further assistance. In some cases, you may need to choose between using the conflicting software or finding an alternative that is compatible with your system.
Remember, performing a clean boot is a diagnostic step, and it is recommended to switch back to the normal startup mode after troubleshooting. To do this, follow the same steps listed above and enable all the previously disabled services and startup items.
Running a clean boot can help you diagnose and resolve software conflicts that may be causing performance issues or conflicts on your Windows computer. It is an effective troubleshooting technique that can lead to a more stable and reliable computing experience.
Verifying the Windows Registry
The Windows Registry is a vital component of the Windows operating system that stores important system configuration settings and options. Over time, the registry can accumulate errors or invalid entries, potentially leading to system instability, application crashes, and performance issues. Verifying the integrity of the Windows Registry is essential to ensure a healthy and smoothly running system. Here’s how you can verify the Windows Registry:
- Press Windows Key + R on your keyboard to open the Run dialog box.
- Type “regedit” (without the quotation marks) in the Run dialog box and press Enter to open the Windows Registry Editor.
- Before making any changes, back up the registry by going to File and selecting “Export“. Choose a location to save the backup file and provide a descriptive name.
- In the Registry Editor, navigate to the different registry hives, such as HKEY_CURRENT_USER and HKEY_LOCAL_MACHINE, to inspect their contents.
- Look for any suspicious or invalid entries within the registry hives. These may include missing file references, orphaned keys, or incorrect values.
- If you come across a suspicious entry, right-click on it and choose “Delete” to remove it. Exercise caution when deleting registry entries, as removing the wrong items can cause system issues.
- Continue inspecting and verifying the registry entries one by one. Take your time and be thorough in your examination.
- After reviewing the necessary sections of the Windows Registry, close the Registry Editor.
- Restart your computer to allow the changes to take effect.
It’s important to note that manually editing the Windows Registry can be risky if you’re not familiar with its structure and the potential consequences of modifying or deleting certain entries. Making incorrect changes can lead to system instability or even prevent your computer from booting up properly.
If you’re unsure about editing the registry, it’s advisable to seek assistance from a professional technician or use reputable third-party registry cleaner tools that can automatically scan for and fix registry errors. It’s also recommended to create a system restore point before making any modifications, as this allows you to revert to a previous working state if necessary.
Verifying the Windows Registry on a regular basis helps maintain a stable and optimized system. It can potentially resolve issues related to incompatible or corrupt registry entries and improve overall performance. However, exercising caution and backing up the registry are essential steps to ensure a safe and successful verification process.
Resetting Windows to its Default Options
Resetting Windows to its default options is a last-resort solution when you are experiencing persistent and deep-rooted issues with your operating system. It effectively restores Windows to its original state, removing all installed software, resetting settings, and erasing personal files. This process can help resolve complex problems, such as severe system crashes, malware infections, or persistent errors. Here’s how to reset Windows to its default options:
- Go to the Start menu and select Settings.
- In the Settings window, click on Update & Security.
- In the left-hand menu, select Recovery.
- Under the “Reset this PC” section, click on the “Get started” button.
- You will have two options: “Keep my files” or “Remove everything“. Choose the option that best suits your needs.
- If you select “Keep my files“, Windows will remove apps and settings but keep your personal files intact. If you choose “Remove everything“, Windows will remove all apps, settings, and personal files.
- Follow the on-screen instructions to proceed with the reset process. This may take some time, as Windows reinstalls itself.
- After the process is complete, Windows will restart, and you will be presented with the initial setup screen. Follow the instructions to set up Windows as if it were a new installation.
- Reinstall any necessary applications and restore files from your backup, if applicable.
It’s worth noting that resetting Windows to its default options removes all installed applications, so make sure to back up any important files and create a backup of the entire system before proceeding. Additionally, ensure that you have the necessary software installation media and product keys to reinstall any third-party applications.
Resetting Windows to its default options should be considered a last resort. It is a drastic step that effectively wipes your system clean and starts afresh. However, it can be an effective solution when you have exhausted all other troubleshooting methods and your system is plagued by persistent and unresolved issues.
Always exercise caution when performing a reset, and carefully weigh the potential consequences and benefits before proceeding. To ensure a smooth transition, it is advisable to seek professional assistance or guidance from the manufacturer’s support team if you are unsure about the process or its implications.