
Checking for Hardware Issues
When experiencing startup problems on your Windows Vista computer, it’s essential to ensure that there are no hardware issues causing the problem. Here are some steps you can take to check for hardware problems:
- Disconnect External Devices: Start by disconnecting any external devices such as printers, scanners, or USB drives. Sometimes, faulty external devices can interfere with the startup process.
- Check Power Connections: Ensure that all power cables are securely connected to your computer. Loose connections can cause power-related issues, resulting in startup problems.
- Inspect the RAM: Faulty RAM modules can cause startup issues. Carefully remove the RAM sticks from their slots and reinsert them firmly. If you have multiple RAM sticks, try booting the computer with only one stick at a time to identify any faulty modules.
- Check Internal Cables: Open your computer case (if you’re comfortable doing so) and check for any loose or disconnected internal cables, particularly the cables connecting the hard drive and the motherboard. Securely reattach any loose cables.
- Test the Power Supply: If you suspect a faulty power supply, you can test it using a multimeter or a power supply tester. If the power supply is faulty, it may need to be replaced.
By performing these hardware checks, you can rule out any potential issues that may be causing the startup problems. If the issue persists, it’s time to move on to other troubleshooting steps.
Booting into Safe Mode
If you’re experiencing startup issues in Windows Vista, booting your computer into Safe Mode can help identify and resolve the problem. Safe Mode allows your computer to start with only basic files and drivers, which can often bypass issues that occur during a regular startup. Here’s how you can boot into Safe Mode:
- Restart Your Computer: Begin by restarting your computer. You can click on the Start menu and then select the Restart option.
- Press F8 During Startup: As the computer starts up, rapidly press the F8 key on your keyboard. This will bring up the Advanced Boot Options menu.
- Select Safe Mode: Within the Advanced Boot Options menu, use the arrow keys on your keyboard to navigate to the “Safe Mode” option. Press Enter to select it.
- Wait for the Computer to Boot: Windows Vista will now start in Safe Mode. This process may take a bit longer than a regular startup, as the system is loading only essential files and drivers.
- Troubleshoot the Issue: Once you’re in Safe Mode, you can begin troubleshooting the startup problem. You can use Safe Mode to uninstall recently installed software or drivers, run antivirus scans, or perform system restore operations.
Safe Mode provides a limited but functional environment that can help you identify the cause of the startup problem. If you find that your computer starts up without any issues in Safe Mode, it may indicate that a recently installed software or driver is causing the problem. You can then take the necessary steps to resolve it.
Running System Restore
If you’re encountering startup issues on your Windows Vista computer, running a System Restore can potentially resolve the problem by reverting your system back to a previous state when it was functioning properly. Here’s how you can run a System Restore:
- Boot into Safe Mode: Start by booting your computer into Safe Mode. Refer to the previous section for instructions on how to do this.
- Open System Restore: Once you’re in Safe Mode, click on the Start menu, go to “All Programs,” then “Accessories,” “System Tools,” and finally click on “System Restore.”
- Select a Restore Point: In the System Restore window, you’ll see a list of available restore points. These are previous snapshots of your computer’s system files and settings. Choose a restore point that predates the onset of the startup issue.
- Follow the Prompts: After selecting a restore point, click “Next” and follow the prompts to initiate the System Restore process. Your computer will restart and the restoration will begin.
- Wait for the Process to Complete: The System Restore process may take some time to complete. It’s important to let it finish uninterrupted for the best results.
- Verify the Restoration: Once the System Restore process is complete, your computer will restart again. Check if the startup issue has been resolved. If the problem persists, you may need to try a different restore point or explore other troubleshooting options.
System Restore is a powerful tool that can undo changes that may be causing startup problems on your Windows Vista computer. By restoring your system to a previous state, you can revert any potentially problematic changes and get your computer back up and running.
Repairing Startup Files Using the Installation Disc
If your Windows Vista computer is experiencing startup issues, you can use the installation disc to repair or replace any corrupted or missing startup files. Here’s how you can do it:
- Insert the Installation Disc: Start by inserting your Windows Vista installation disc into the CD/DVD drive of your computer.
- Boot from the Installation Disc: Restart your computer and press any key when prompted to boot from the installation disc. This will load the Windows Vista installation environment.
- Select Language and Keyboard Layout: In the initial setup screen, choose your preferred language and keyboard layout and click “Next.”
- Click on “Repair Your Computer”: On the next screen, click on “Repair Your Computer” to access the system recovery options.
- Choose the Operating System: If prompted, select the Windows Vista operating system that you want to repair and click “Next.”
- Choose “Startup Repair”: In the system recovery options, select “Startup Repair” and wait for the tool to analyze and repair any issues with the startup files.
- Follow the On-Screen Instructions: The Startup Repair tool will guide you through the repair process. Follow the instructions on the screen and allow the tool to complete its repairs.
- Restart Your Computer: After the repair process is complete, restart your computer and see if the startup issue has been resolved. If not, you may need to try other troubleshooting methods or seek further assistance.
Repairing startup files using the installation disc can often fix issues that prevent your Windows Vista computer from starting up correctly. It’s a reliable method to restore the integrity of the startup files and get your computer back on track.
Using Command Prompt to Repair Startup Files
If you’re encountering startup problems on your Windows Vista computer, you can utilize the Command Prompt to repair and restore critical system files. Here’s how you can do it:
- Boot Using the Installation Disc: Start by booting your computer using the Windows Vista installation disc. Follow the same steps mentioned in the previous section to access the system recovery options.
- Select Command Prompt: In the system recovery options, choose the Command Prompt option. This will open a command-line interface where you can type commands to repair the startup files.
- Identify the System Drive: In the Command Prompt window, you’ll need to identify the drive letter of your Windows Vista installation. Type
diskpartand hit Enter. Then, typelist volumeand press Enter to view the available drives and partitions. Take note of the drive letter assigned to your Windows Vista installation. - Run System File Checker (SFC): Type
sfc /scannow /offbootdir=[drive letter]:\ /offwindir=[drive letter]:\windowsand replace[drive letter]with the actual drive letter of your Windows Vista installation. Press Enter to execute the command. This will scan and repair any corrupted system files. - Execute Bootrec: Type
bootrec /fixmbr,bootrec /fixboot, andbootrec /rebuildbcdone by one, pressing Enter after each command. These commands repair the Master Boot Record (MBR), boot sector, and Boot Configuration Data (BCD), respectively. - Restart Your Computer: After running the commands, close the Command Prompt and restart your computer. Check if the startup problem has been resolved.
Using the Command Prompt to repair startup files can help address issues that prevent Windows Vista from starting up properly. By executing the appropriate commands, you can restore the integrity of critical system files and potentially resolve the startup problem.
Rebuilding the BCD (Boot Configuration Data) File
If your Windows Vista computer is experiencing boot problems, it’s possible that the Boot Configuration Data (BCD) file has become corrupted or is missing crucial information. Rebuilding the BCD file can help fix this issue and restore the proper boot settings. Here’s how you can do it:
- Boot Using the Installation Disc: Start by booting your computer using the Windows Vista installation disc. Refer to the previous sections for instructions on how to access the system recovery options.
- Select Command Prompt: In the system recovery options, choose the Command Prompt option. This will open a command-line interface.
- Identify the System Drive: In the Command Prompt window, you’ll need to identify the drive letter of your Windows Vista installation. Type
diskpartand hit Enter. Then, typelist volumeand press Enter to view the available drives and partitions. Note down the drive letter assigned to your Windows Vista installation. - Rebuild the BCD: In the Command Prompt, type
bootrec /rebuildbcdand press Enter. It will scan for Windows installations on your computer. When prompted to add the installation to the boot list, typeYand press Enter. - Restart Your Computer: After the BCD rebuilding process is complete, close the Command Prompt window and restart your computer. Check if the boot problem has been resolved.
Rebuilding the BCD file can resolve boot-related issues by recreating the boot configuration and ensuring that all necessary information is present. This process helps restore the proper boot settings, allowing your Windows Vista computer to start up normally.
Repairing the Master Boot Record (MBR)
If your Windows Vista computer is unable to boot properly, it’s possible that the Master Boot Record (MBR) on your hard drive has become damaged or corrupted. Repairing the MBR can help fix this issue and restore the ability to boot into your operating system. Here’s how you can do it:
- Boot Using the Installation Disc: Start by booting your computer using the Windows Vista installation disc. Follow the same steps mentioned in the previous sections to access the system recovery options.
- Select Command Prompt: In the system recovery options, choose the Command Prompt option. This will open a command-line interface.
- Identify the System Drive: In the Command Prompt window, you’ll need to identify the drive letter of your Windows Vista installation. Type
diskpartand hit Enter. Then, typelist volumeand press Enter to view the available drives and partitions. Take note of the drive letter assigned to your Windows Vista installation. - Repair the MBR: In the Command Prompt, type
bootrec /fixmbrand press Enter. This command repairs the Master Boot Record on your hard drive. - Restart Your Computer: After the MBR repair process is complete, close the Command Prompt window and restart your computer. Check if the boot problem has been resolved.
Repairing the Master Boot Record (MBR) is an effective solution for fixing boot issues in Windows Vista. By restoring the MBR to its proper state, you can regain the ability to boot into your operating system and resolve any startup problems you were experiencing.
Checking for Disk Errors
If you’re facing startup issues on your Windows Vista computer, it’s essential to check for any disk errors that may be causing the problem. Disk errors can prevent your operating system from booting properly. Here are a few steps you can take to check for and fix disk errors:
- Boot Using the Installation Disc: Start by booting your computer using the Windows Vista installation disc. Follow the same steps mentioned in the previous sections to access the system recovery options.
- Select Command Prompt: In the system recovery options, choose the Command Prompt option. This will open a command-line interface.
- Identify the System Drive: In the Command Prompt window, type
diskpartand hit Enter. Then, typelist volumeand press Enter to view the available drives and partitions. Note down the drive letter assigned to your Windows Vista installation. - Run Disk Check (CHKDSK): In the Command Prompt, type
chkdsk [drive letter]: /fand press Enter. Replace[drive letter]with the actual letter assigned to your Windows Vista installation. The/fparameter instructs CHKDSK to fix any errors it encounters. - Wait for Disk Check to Complete: The disk check process may take some time, depending on the size and health of your hard drive. It will analyze the disk’s file system, locate any errors, and attempt to repair them.
- Restart Your Computer: After the disk check is complete, close the Command Prompt window and restart your computer. Check if the startup problem has been resolved.
Checking for disk errors and running the Disk Check utility is crucial for maintaining the health of your Windows Vista computer. By scanning and repairing disk errors, you can ensure that your operating system can boot smoothly without any hiccups caused by disk-related issues.
Resetting BIOS Settings
If you’re experiencing startup issues on your Windows Vista computer, it may be worth considering resetting the Basic Input/Output System (BIOS) settings. The BIOS contains configuration information for your computer’s hardware and plays a crucial role in the startup process. Resetting the BIOS settings can help resolve certain compatibility or configuration problems. Here’s how you can do it:
- Shut down your computer: Start by shutting down your computer completely, ensuring that it’s powered off.
- Access the BIOS setup: Restart your computer and look for the key to access the BIOS setup screen. Common keys include Esc, F2, F10, or Delete. The key to access the BIOS setup may vary depending on your computer’s manufacturer.
- Reset the BIOS settings: Once in the BIOS setup screen, navigate to the “Reset” or “Load Optimized Defaults” option. Select this option and confirm the reset when prompted. This will revert the BIOS settings to their default values.
- Save and exit BIOS: After resetting the BIOS settings, navigate to the “Save and Exit” option, usually located at the bottom of the BIOS screen. Select this option to save the changes and exit the BIOS setup.
- Restart your computer: Upon exiting the BIOS setup, your computer will restart. Check if the startup issue has been resolved.
Resetting the BIOS settings can help eliminate any misconfigurations or conflicts that may be causing startup problems on your Windows Vista computer. It’s important to note that resetting the BIOS will revert all settings to their default values, so make sure to take note of any important customization you have made before performing the reset.
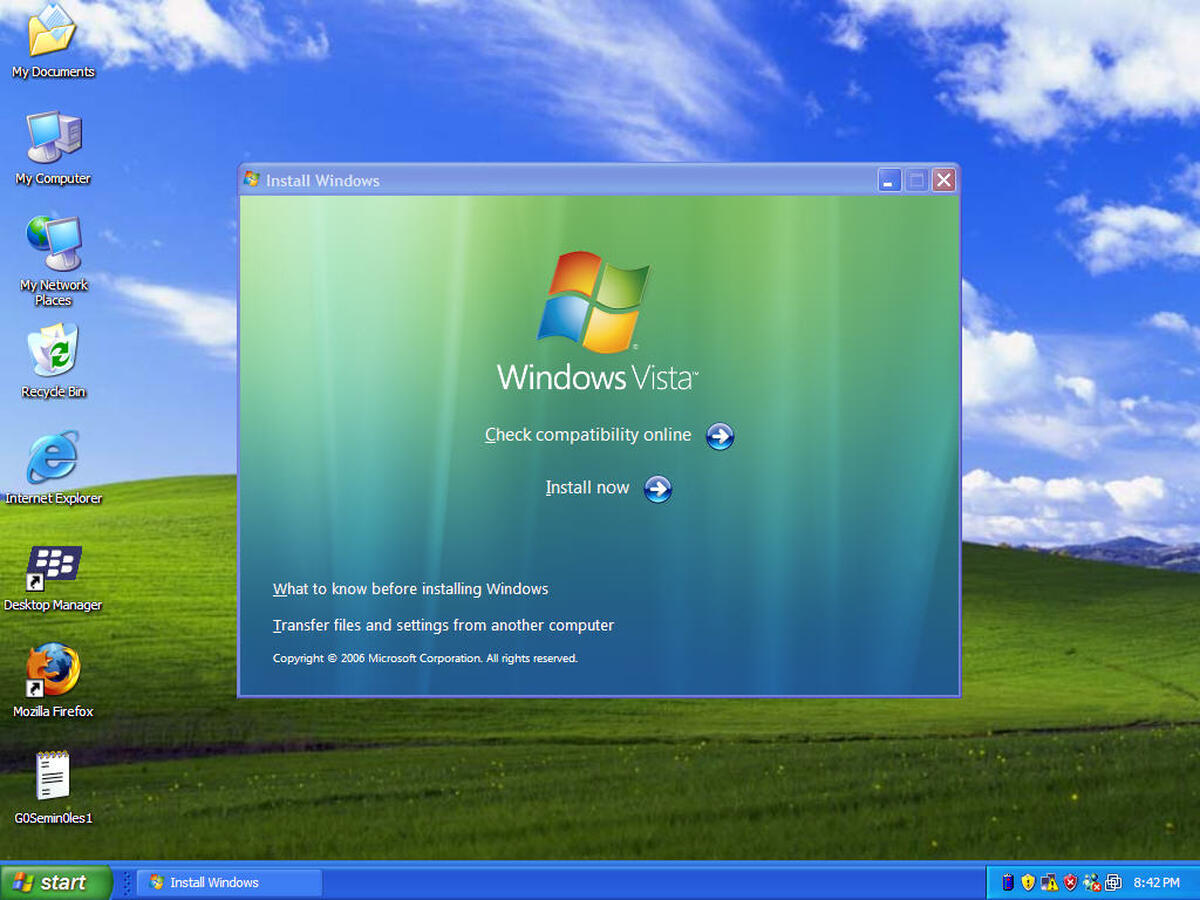
Reinstalling Windows Vista
If you’ve exhausted all troubleshooting options and still can’t resolve the startup issues on your Windows Vista computer, reinstalling the operating system might be the best course of action. Reinstalling Windows Vista will give you a fresh start and eliminate any software-related problems that may be causing the startup problem. Here’s how you can reinstall Windows Vista:
- Backup Your Data: Before reinstalling Windows Vista, it’s crucial to back up all your important files and data. This ensures that you don’t lose any valuable information during the reinstallation process.
- Insert the Installation Disc: Start by inserting your Windows Vista installation disc into the CD/DVD drive of your computer. Restart your computer and boot from the installation disc.
- Install Windows Vista: Follow the on-screen instructions to begin the installation process. Select your language, time and currency format, and keyboard layout when prompted.
- Enter Product Key: When prompted, enter the product key for your Windows Vista installation. This key is usually located on the back of your installation disc or on a sticker on your computer.
- Choose Installation Type: Select the installation type according to your preference. You can choose to upgrade an existing installation or perform a clean installation by formatting the drive.
- Follow the On-Screen Prompts: Continue following the on-screen prompts to complete the installation process. This includes selecting the partition or drive to install Windows Vista, creating a username and password, and choosing your computer’s name.
- Install Device Drivers and Software: After the installation is complete, install the necessary device drivers for your computer’s hardware components. You can obtain these drivers from the manufacturer’s website.
- Restore Your Backed-Up Data: Once Windows Vista is installed and your computer is up and running, restore your backed-up data from your external backup storage or other backup methods.
Reinstalling Windows Vista is a last resort when all other troubleshooting methods fail to fix the startup problems. It provides a fresh start and can resolve issues that are deeply rooted in the operating system or its configuration. Be sure to have your important data backed up before proceeding with the reinstallation process.