
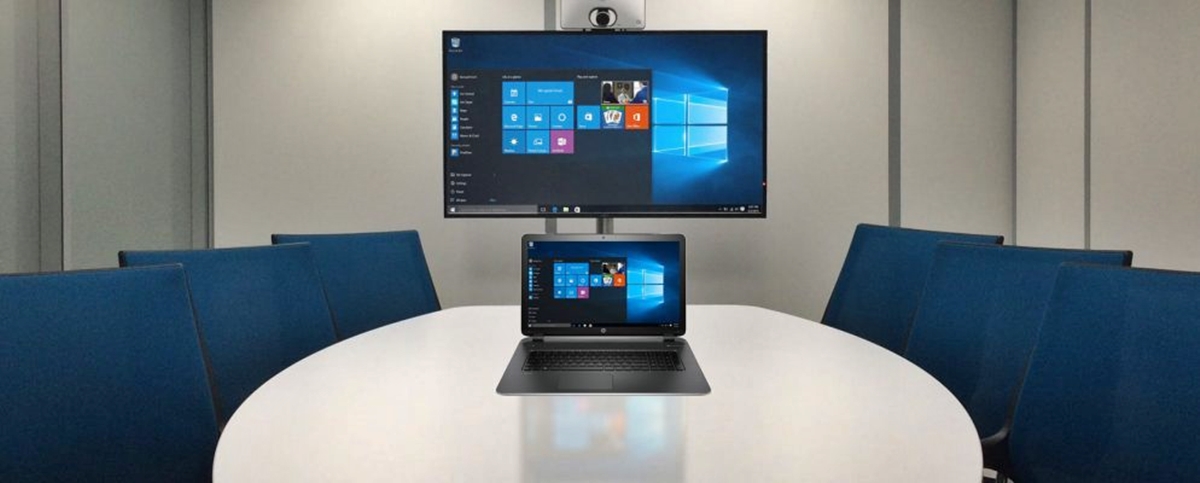
Requirements for Mirroring a Laptop to a TV
To successfully mirror your laptop screen to a TV, there are a few key requirements you need to meet. These requirements will ensure that you have the necessary hardware and software to establish a smooth and seamless connection between your devices.
- A laptop with an HDMI or VGA port: Most modern laptops come equipped with an HDMI (High-Definition Multimedia Interface) port, which is the easiest way to connect your laptop to a TV. However, if your laptop doesn’t have an HDMI port, you can still use a VGA (Video Graphics Array) port as an alternative.
- A TV with an HDMI or VGA input: Your TV needs to have either an HDMI or VGA input, depending on the type of cable connection you plan to use.
- An HDMI or VGA cable: To establish a physical connection between your laptop and TV, you’ll need either an HDMI cable or a VGA cable. Make sure to check the available ports on both your laptop and TV to determine the appropriate cable to use.
- A wireless display adapter (optional): If you prefer a wireless connection, you can use a wireless display adapter, such as Microsoft’s Wireless Display Adapter or Google’s Chromecast. These adapters allow you to mirror your laptop screen to the TV without the need for cables.
- Compatible operating systems: Your laptop should be running an operating system that supports screen mirroring. Most modern laptops running Windows, macOS, or Linux should be compatible. Ensure that your laptop’s operating system is up to date to avoid any compatibility issues.
By ensuring that you have these requirements met, you’ll be well-equipped to proceed with the various methods of mirroring your laptop to a TV. Whether you choose a wired or wireless connection, having the proper hardware and software in place is the foundation for a successful mirroring experience.
Option 1: Using an HDMI Cable to Mirror a Laptop to a TV
One of the most straightforward ways to mirror your laptop screen to a TV is by using an HDMI (High-Definition Multimedia Interface) cable. This method allows for a high-quality, reliable connection between your devices.
To get started, ensure that both your laptop and TV have an HDMI port. If your laptop doesn’t have an HDMI port, you may need an HDMI-to-VGA adapter to connect via VGA instead.
- Connect one end of the HDMI cable to your laptop: Locate the HDMI output port on your laptop, usually located on the side or back. Insert one end of the HDMI cable securely into this port.
- Connect the other end of the HDMI cable to your TV: Look for an HDMI input port on your TV. It is typically located on the back or side panel. Insert the other end of the HDMI cable into this port.
- Select the correct HDMI input on your TV: Use your TV’s remote control to navigate to the correct HDMI input channel. The HDMI inputs are usually labeled as “HDMI 1,” “HDMI 2,” and so on. Select the input that corresponds to the HDMI port you connected the cable to.
- Configure display settings on your laptop: Once the physical connection is established, your laptop screen should automatically mirror on the TV. However, if it doesn’t, you may need to adjust the display settings on your laptop. On Windows, right-click on the desktop and select “Display Settings,” then choose the “Duplicate” option. On macOS, go to System Preferences, click on “Displays,” and then select the “Arrangement” tab to enable mirroring.
With the HDMI cable connected and the display settings configured, your laptop screen should now be mirrored on your TV. You can enjoy watching videos, playing games, and doing presentations on a larger screen for a more immersive experience. Remember to keep the HDMI cable connected throughout your mirroring session to maintain the connection.
Using an HDMI cable provides a reliable and high-quality connection for mirroring your laptop to a TV. It is a popular choice due to its simplicity and compatibility with most devices. However, if your laptop doesn’t have an HDMI port, don’t worry. There are alternative methods to mirror your screen, such as using a VGA cable or wireless display adapters.
Option 2: Using a VGA Cable to Mirror a Laptop to a TV
If your laptop doesn’t have an HDMI port or you prefer a wired connection alternative, you can mirror your laptop screen to a TV using a VGA (Video Graphics Array) cable. Although VGA doesn’t support high-definition video and audio like HDMI, it can still provide a reliable connection for basic screen mirroring.
Here’s how you can use a VGA cable to mirror your laptop screen to a TV:
- Check the available ports: Ensure that your laptop has a VGA output port and your TV has a VGA input port. These ports are typically labeled as “VGA” or “PC” on both devices.
- Connect the VGA cable to your laptop: Take one end of the VGA cable and securely attach it to the VGA output port on your laptop. Ensure that the connection is firm and that the pins align properly.
- Connect the VGA cable to your TV: Take the other end of the VGA cable and connect it to the VGA input port on your TV. Make sure the connection is secure.
- Configure display settings on your laptop: Once the physical connection is established, you need to configure the display settings on your laptop to enable screen mirroring. On Windows, right-click on the desktop and select “Display Settings.” In the Display Settings menu, choose the option to duplicate or extend the display to the second screen (TV). On macOS, go to System Preferences, click on “Displays,” and then select the “Arrangement” tab to enable mirroring.
- Adjust the display settings on your TV: Use your TV’s remote control to navigate to the correct input source. Look for a button labeled “Input,” “Source,” or “AV” on your TV remote. Use the remote to select the VGA input source.
With the VGA cable connected and the display settings configured, your laptop screen should now be mirrored on your TV. Keep in mind that the audio won’t be transmitted through the VGA cable, so you’ll need a separate audio connection if you want to have sound coming from your TV.
Using a VGA cable is a simple and effective solution for mirroring your laptop screen to a TV, especially if your laptop doesn’t have an HDMI port. While it may not offer the same high-definition video and audio quality as HDMI, it is still a viable option for basic screen sharing and presentations.
Option 3: Using a Wireless Display Adapter to Mirror a Laptop to a TV
If you prefer a wireless connection to mirror your laptop screen to a TV, you can utilize a wireless display adapter. This option provides flexibility and convenience, allowing you to mirror your laptop screen without the need for any cables.
Here’s how you can use a wireless display adapter to mirror your laptop screen to a TV:
- Ensure compatibility: Check if your laptop and TV support wireless display technology, such as Miracast or Wi-Fi Direct. Most modern laptops and smart TVs are compatible, but it’s always good to double-check before making a purchase.
- Get a compatible wireless display adapter: Purchase a wireless display adapter that is compatible with your laptop’s operating system. Popular options include Microsoft’s Wireless Display Adapter and Google’s Chromecast.
- Plug in the wireless display adapter: Connect the wireless display adapter to an available HDMI port on your TV. Some adapters may require a separate power source, so make sure to follow the manufacturer’s instructions for setup.
- Enable Wi-Fi on your laptop: Make sure the Wi-Fi on your laptop is turned on and connected to the same network as the wireless display adapter.
- Open the display settings on your laptop: On Windows, right-click on the desktop and select “Display Settings.” In the Display Settings menu, click on “Connect to a wireless display” or “Connect using Miracast.” On macOS, go to System Preferences, click on “Displays,” and then select the “Arrangement” tab to enable screen mirroring via AirPlay.
- Select the wireless display adapter: Your laptop should detect the wireless display adapter. Select it from the list of available devices to establish a connection.
- Follow any on-screen prompts: Depending on your laptop and adapter, you may need to follow additional on-screen prompts to complete the connection process.
Once the connection is established, your laptop screen will be mirrored on the TV wirelessly. You can now enjoy streaming videos, giving presentations, or even playing games on the big screen without any physical cables.
Using a wireless display adapter offers convenience and flexibility, allowing you to mirror your laptop screen to a TV effortlessly. However, keep in mind that the quality of the wireless connection may vary depending on factors like distance, interference, and network stability.
Option 4: Using Chromecast to Mirror a Laptop to a TV
If you have a Chromecast device, you can easily mirror your laptop screen to a TV using the Google Chromecast technology. Chromecast provides a seamless and user-friendly way to cast your laptop display onto the big screen.
Here’s how you can use Chromecast to mirror your laptop screen to a TV:
- Set up Chromecast: Plug in your Chromecast device to an available HDMI port on your TV. Follow the on-screen instructions to complete the initial setup and connect the Chromecast to your Wi-Fi network. Make sure both your laptop and Chromecast are connected to the same Wi-Fi network.
- Install the Google Home app: Download and install the Google Home app on your laptop from the Google Play Store or Apple App Store. Sign in with your Google account.
- Open the Google Home app: Launch the Google Home app on your laptop and click on the “Set up or add” button. Follow the prompts to set up your Chromecast device and connect it to your Google account.
- Start casting: In the Google Home app, click on the “Cast” button located at the top right corner of the screen. Select your Chromecast device from the list of available devices.
- Select “Cast desktop”: After selecting your Chromecast device, click on the “Sources” button. From the drop-down menu, choose “Cast desktop” to mirror your entire laptop screen to the TV.
- Adjust display settings (optional): Once casting begins, your laptop screen will be mirrored on the TV. You can adjust the screen resolution and orientation by going to your laptop’s display settings.
With Chromecast, you can enjoy streaming videos, working on presentations, or even browsing the internet on your TV by mirroring your laptop screen. It offers a convenient way to share content wirelessly without the need for any cables.
Keep in mind that to achieve the best performance, make sure your laptop and Chromecast are connected to a stable Wi-Fi network. Also, ensure that the Google Home app and Chromecast firmware are up to date to take advantage of the latest features and improvements.
Option 5: Using Miracast to Mirror a Laptop to a TV
If you’re using a laptop and TV that both support Miracast technology, you can easily mirror your laptop screen to the TV wirelessly. Miracast allows for seamless screen sharing without the need for additional cables or devices.
Here’s how you can use Miracast to mirror your laptop screen to a TV:
- Check Miracast compatibility: Ensure that your laptop and TV both support Miracast. Most modern Windows devices and smart TVs are equipped with Miracast capabilities.
- Enable Miracast on your TV: Access the settings menu on your TV and search for the Miracast or Screen Mirroring option. Enable it to make your TV discoverable for Miracast connections.
- Enable Miracast on your laptop: On your Windows laptop, open the “Settings” app and navigate to the “System” category. Click on “Display” and select the “Connect to a wireless display” option. Your laptop will search for available Miracast devices.
- Select your TV: Once your TV appears in the list, click on it to establish the Miracast connection. Follow any additional prompts to complete the pairing process.
- Adjust display settings (if necessary): Once the Miracast connection is established, your laptop screen will be mirrored on the TV. You can adjust the resolution, orientation, and other display settings on your laptop to ensure optimal viewing experience on the TV.
With Miracast, you can enjoy streaming media, playing games, or giving presentations on a larger screen without the need for physical connections. It provides a convenient and wireless solution for mirroring your laptop screen to a TV.
It’s important to note that the availability and functionality of Miracast may vary depending on the laptop’s operating system and the TV’s brand and model. Make sure to check the manufacturer’s documentation and support resources for any specific instructions or troubleshooting tips related to Miracast.
How to Set Up the Display Settings on a Laptop for Mirroring
Setting up the display settings on the laptop is an essential step when it comes to mirroring your screen to a TV. By adjusting the display settings, you can ensure that your laptop screen is properly mirrored on the TV, allowing for a seamless and enjoyable viewing experience. Here’s how you can set up the display settings for mirroring:
- On Windows laptops:
- Right-click on the desktop and select “Display Settings” from the context menu.
- In the Display Settings menu, you will see options for your laptop screen and the connected external display (TV).
- Select the external display (TV) from the display options if it is not already selected.
- Choose the desired display mode, such as “Duplicate” or “Extend,” depending on how you want to use the TV (mirroring or extending the display).
- Make sure the screen resolution for the external display (TV) is set to a suitable value for optimal viewing. You can adjust this by clicking on the “Resolution” dropdown menu.
- On macOS laptops:
- Go to the Apple menu and select “System Preferences.”
- In the System Preferences menu, click on “Displays.”
- Click on the “Arrangement” tab.
- Check the “Mirror Displays” option to enable screen mirroring on the connected TV.
- Ensure that the resolution and refresh rate for the external display (TV) are set to optimal values for the best viewing experience.
By following these steps and configuring the display settings on your laptop correctly, you can ensure that your screen is mirrored accurately onto the TV. This allows you to enjoy videos, presentations, and other content on a larger screen while retaining the same visual quality as your laptop.
Keep in mind that the exact steps and options may vary depending on your laptop model and operating system version. It’s always a good idea to refer to the manufacturer’s documentation or support resources for more specific instructions tailored to your device.
Troubleshooting Common Issues with Mirroring a Laptop to a TV
While mirroring a laptop to a TV can be a straightforward process, there are instances where you may encounter some common issues along the way. Here are some troubleshooting steps to help address these problems and ensure a successful mirroring experience:
- No display on the TV:
- Double-check that both your laptop and TV are powered on and properly connected through the appropriate cable or wireless method.
- Confirm that the correct input/source is selected on the TV. Use the remote control to cycle through the available inputs until the laptop screen is displayed.
- Verify that the display settings on your laptop are properly configured to enable mirroring or extending the display to the TV.
- Audio is not coming through the TV:
- If using an HDMI or VGA cable, ensure that the audio cable is also connected from your laptop’s audio output to the audio input on the TV.
- If using a wireless connection, check that the audio settings on your laptop are set to output sound through the TV instead of the laptop’s speakers.
- Confirm that the volume is not muted on both the laptop and TV, and increase the volume on the TV if necessary.
- Poor video quality or audio sync issues:
- Ensure that your laptop and TV have sufficient processing power and network connectivity to handle the screen mirroring process smoothly.
- Consider using a higher-quality HDMI cable or switching to a wired connection if using a wireless display adapter results in inconsistent performance.
- Adjust the display and video settings on your laptop to optimize video quality and ensure smooth playback.
- If there is a delay in audio syncing with the video, try adjusting the audio delay or synchronization settings on your laptop or TV.
- Interference or connection drops:
- Make sure that there are no physical obstructions or sources of interference between your laptop and TV that could affect the wireless signal, such as walls, appliances, or other electronic devices.
- Keep your laptop and TV within a reasonable range of each other to maintain a strong and stable wireless connection.
- Avoid using other bandwidth-intensive activities, such as downloading large files or streaming videos on other devices, while attempting to mirror your laptop screen to avoid potential disruptions.
- Ensure that your laptop’s operating system and drivers, as well as the firmware on your TV and wireless display adapter, are up to date to take advantage of any bug fixes or performance improvements.
If you continue to experience issues despite troubleshooting, consult the user manuals or contact the manufacturer’s support for further assistance. They can provide more specific guidance based on your laptop and TV models.
By following these troubleshooting steps, you can overcome common problems and enjoy a smooth and seamless mirroring experience between your laptop and TV.