
Cable Options
When it comes to connecting your MacBook Air to a TV, you have several cable options to choose from. The right cable for you will depend on the ports available on your MacBook Air and the inputs on your TV. Let’s explore some popular cable options:
- HDMI cable: This is one of the most common and versatile options available. If your MacBook Air has an HDMI port, simply connect one end of the HDMI cable to your laptop and the other end to an available HDMI input on your TV. Make sure to select the corresponding HDMI input on your TV to see the display from your MacBook Air.
- Mini DisplayPort to HDMI cable: If your MacBook Air has a Mini DisplayPort, which is a smaller version of the standard DisplayPort, you can use a Mini DisplayPort to HDMI cable. This cable allows you to connect your MacBook Air to the HDMI input on your TV, providing both video and audio signals.
- Thunderbolt to HDMI cable: If your MacBook Air has a Thunderbolt port, which is a faster version of the Mini DisplayPort, you can use a Thunderbolt to HDMI cable. This cable works similarly to the Mini DisplayPort to HDMI cable and allows you to connect your MacBook Air to the HDMI input on your TV.
- VGA cable: If your MacBook Air has a VGA port, you can use a VGA cable to connect it to the VGA input on your TV. However, it’s worth noting that VGA only transmits video signals, so you’ll need an additional cable to transmit audio signals from your laptop to the TV.
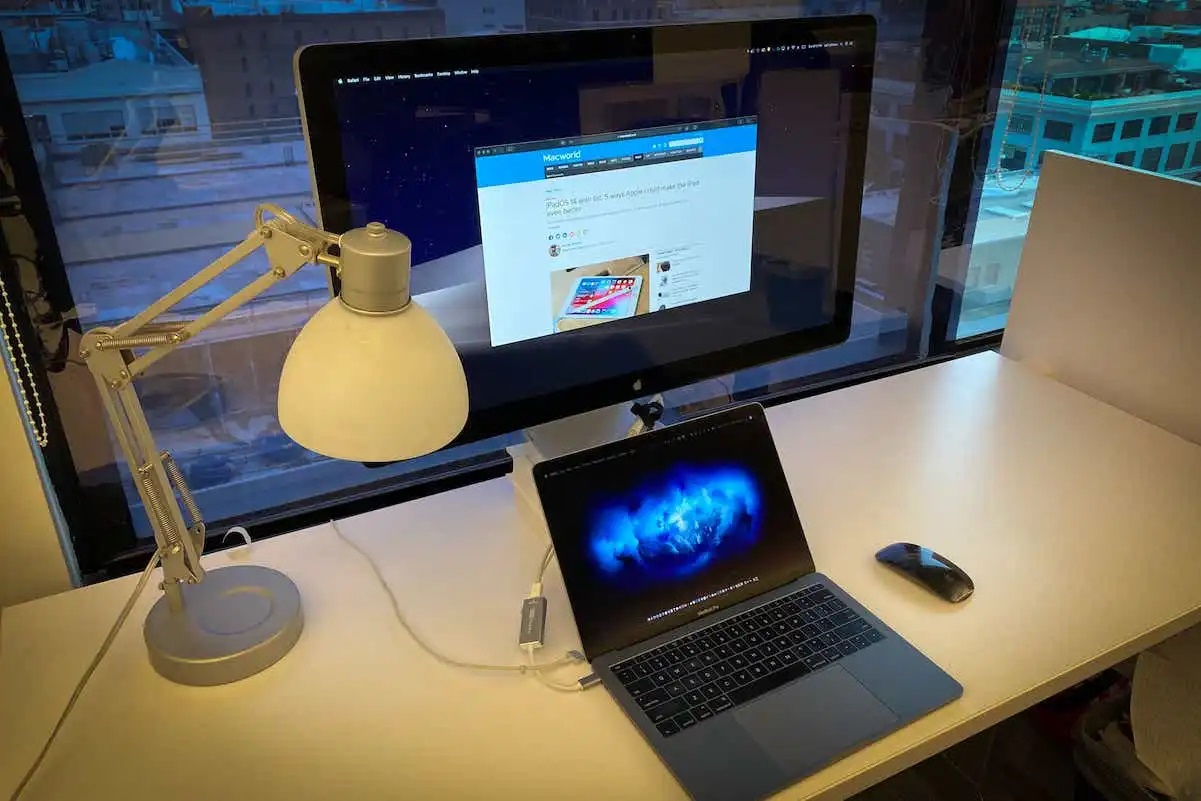
- USB-C to HDMI adapter: If your MacBook Air only has a USB-C port, you’ll need to use a USB-C to HDMI adapter. This adapter allows you to connect an HDMI cable from the adapter to the HDMI input on your TV. Make sure to select the correct HDMI input on your TV to see the display from your MacBook Air.
These are just a few cable options for connecting your MacBook Air to a TV. Remember to choose the cable that is compatible with your laptop’s ports and your TV’s inputs. Now that you know your cable options, it’s time to proceed with the connection process and enjoy your MacBook Air’s display on a larger screen.
HDMI Connection
The HDMI (High-Definition Multimedia Interface) connection is one of the most popular and reliable options for connecting your MacBook Air to a TV. With an HDMI cable, you can transmit both high-quality video and audio signals from your laptop to the TV.
To establish an HDMI connection between your MacBook Air and the TV, follow these simple steps:
- Check your MacBook Air’s ports: Determine if your MacBook Air has an HDMI port or if you need to use an adapter. If your laptop has an HDMI port, you can directly connect one end of the HDMI cable to your MacBook Air and the other end to an available HDMI input on your TV.
- Choose the correct HDMI input: On your TV, select the HDMI input that you connected your MacBook Air to. You may need to use the TV’s remote control or on-screen menu to navigate to the HDMI source.
- Adjust display settings: Once the HDMI connection is established, your MacBook Air’s screen should appear on the TV. However, you may need to adjust the display settings on your laptop to optimize the viewing experience. Go to “System Preferences” on your MacBook Air, select “Displays,” and make any necessary adjustments for screen resolution or mirroring options.
Remember that HDMI cables are capable of transmitting both video and audio signals. Therefore, when you connect your MacBook Air to the TV using an HDMI cable, the audio will also be transmitted to the TV. To ensure the audio is routed to the TV, make sure your MacBook Air’s sound output settings are configured correctly.
Overall, the HDMI connection provides a seamless and high-quality way to connect your MacBook Air to a TV. It’s a versatile option that is widely supported by most TVs and laptops. So, whether you want to stream videos, watch movies, or give presentations, utilizing an HDMI connection between your MacBook Air and TV will enhance your viewing experience.
Mini DisplayPort Connection
If your MacBook Air has a Mini DisplayPort, you can utilize this port to connect your laptop to a TV using a Mini DisplayPort to HDMI adapter or cable. The Mini DisplayPort connection allows you to transmit both high-quality video and audio signals from your MacBook Air to the TV.
Here’s a step-by-step guide on how to establish a Mini DisplayPort connection:
- Check your MacBook Air’s ports: Confirm that your MacBook Air is equipped with a Mini DisplayPort. If so, you’ll need a Mini DisplayPort to HDMI adapter or cable to connect your laptop to the TV.
- Connect the Mini DisplayPort adapter or cable: Plug one end of the Mini DisplayPort adapter or cable into your laptop’s Mini DisplayPort. If you’re using an adapter, connect the other end of the adapter to an HDMI cable. Then, insert the HDMI connector into an available HDMI input on your TV.
- Select the correct HDMI input: On your TV, select the HDMI input that corresponds to the port you connected your MacBook Air to. Use your TV’s remote control or on-screen menu to navigate to the desired HDMI source.
- Adjust display settings: Once the Mini DisplayPort connection is established, your MacBook Air’s display should appear on the TV. However, you may need to adjust the display settings on your laptop to ensure optimal viewing. Open “System Preferences” on your MacBook Air, go to “Displays,” and make any necessary adjustments for screen resolution or mirroring options.
It’s important to note that the Mini DisplayPort to HDMI adapter or cable will carry both video and audio signals, allowing you to enjoy a complete multimedia experience on your TV. As a result, ensure that your MacBook Air’s sound output settings are configured correctly to route the audio to the TV.
The Mini DisplayPort connection is a versatile option for MacBook Air users, providing a seamless way to share your laptop’s screen with a larger display. Whether you’re streaming videos, editing photos, or giving presentations, the Mini DisplayPort connection enables you to enjoy crisp visuals and immersive audio on your TV.
Thunderbolt Connection
If your MacBook Air is equipped with a Thunderbolt port, you can take advantage of this high-speed connection to connect your laptop to a TV. Thunderbolt is a versatile port that supports various types of connections, including video and audio signals.
To establish a Thunderbolt connection between your MacBook Air and a TV, follow these simple steps:
- Check your MacBook Air’s ports: Make sure your MacBook Air has a Thunderbolt port. This port looks similar to a Mini DisplayPort, but it offers faster data transfer speeds. If your laptop has a Thunderbolt port, you can utilize it for video and audio output.
- Connect the Thunderbolt to HDMI adapter or cable: To connect your MacBook Air to a TV, you’ll need a Thunderbolt to HDMI adapter or cable. Plug one end of the adapter or cable into your laptop’s Thunderbolt port. If you’re using an adapter, connect the other end to an HDMI cable. Then, insert the HDMI connector into an available HDMI input on your TV.
- Select the correct HDMI input: On your TV, choose the HDMI input that corresponds to the port where you connected your MacBook Air. Use your TV’s remote control or on-screen menu to navigate to the desired HDMI source.
- Adjust display settings: Once the Thunderbolt connection is established, your MacBook Air’s display should appear on the TV. However, you may need to adjust the display settings on your laptop for optimal viewing. Open “System Preferences” on your MacBook Air, go to “Displays,” and make any necessary adjustments for screen resolution or mirroring options.
Similar to other connections, the Thunderbolt to HDMI adapter or cable will carry both video and audio signals, allowing you to enjoy a complete multimedia experience on your TV. Ensure that your MacBook Air’s sound output settings are configured correctly to route the audio to the TV.
With Thunderbolt’s fast data transfer speeds, this connection option provides a reliable and efficient way to connect your MacBook Air to a TV. Whether you’re streaming movies, playing games, or working on visual content, the Thunderbolt connection ensures a seamless and high-quality viewing experience on your TV screen.
Connecting via Apple TV
If you own an Apple TV, you can easily connect your MacBook Air to your TV wirelessly using AirPlay. Apple TV acts as a bridge between your laptop and the TV, allowing you to mirror your MacBook Air’s screen or stream media effortlessly.
To connect your MacBook Air to a TV via Apple TV using AirPlay, follow these steps:
- Make sure your MacBook Air and Apple TV are on the same Wi-Fi network. This is essential for the devices to communicate with each other.
- On your MacBook Air, click on the “AirPlay” icon located on the menu bar. If you don’t see the AirPlay icon, go to “System Preferences” > “Displays” > “Display” tab, and check the box next to “Show mirroring options in the menu bar when available.”
- From the AirPlay menu, select your Apple TV device. If prompted, enter the AirPlay passcode displayed on your TV screen.
- Your MacBook Air’s screen will now be mirrored on the TV. You can navigate your laptop, open applications, play videos, or view photos, and they will appear on the TV in real-time.
- To stop mirroring, click on the AirPlay icon again and select “Turn Off AirPlay Mirroring” or simply close the AirPlay menu.
Connecting via Apple TV offers a convenient and seamless way to share your MacBook Air’s screen with a larger display. It enables you to enjoy your favorite movies, videos, and media content on the big screen without the need for cables or adapters.
In addition to screen mirroring, Apple TV also provides access to various streaming services and apps, offering a wide range of entertainment options. You can stream movies, TV shows, music, and even play games directly from your MacBook Air to the TV through the Apple TV interface.
Overall, connecting your MacBook Air to a TV via Apple TV using AirPlay is a user-friendly and versatile option that enhances your viewing experience and provides access to a multitude of entertainment choices.
Wireless Screen Mirroring
If you prefer a wireless connection option to connect your MacBook Air to a TV without the need for cables, wireless screen mirroring is an excellent solution. By leveraging built-in technologies like AirPlay and Miracast, you can easily mirror your laptop’s screen to a compatible TV wirelessly.
Here’s a step-by-step guide on how to wirelessly mirror your MacBook Air’s screen to a TV:
- Ensure that your MacBook Air and the TV support the same wireless mirroring technology. For Apple devices, AirPlay is the standard option. If you have an Android device or a Windows laptop, Miracast is commonly used. Check your laptop and TV specifications to ensure compatibility.
- Make sure both your MacBook Air and the TV are connected to the same Wi-Fi network. This is necessary for the wireless mirroring process.
- On your MacBook Air, go to “System Preferences” > “Displays” > “Display” tab. Look for the “AirPlay” or “Wireless Display” option and enable it.
- On your TV, navigate to the input/source selection and choose the appropriate input that corresponds to the wireless mirroring technology (e.g., AirPlay or Miracast).
- On your MacBook Air, follow the on-screen instructions to connect to the TV wirelessly. This process usually involves selecting the TV from a list of available devices or entering a code displayed on the TV screen.
- Once connected, your MacBook Air’s screen will be mirrored on the TV. You can now navigate, open applications, play videos, or view photos, and they will be displayed on the TV in real-time.
With wireless screen mirroring, you can enjoy the convenience of sharing your MacBook Air’s screen without the hassle of cables or adapters. This method allows you to showcase presentations, watch videos, or engage in collaborative work on a larger display, making it ideal for both personal and professional use.
It’s important to note that the availability and compatibility of wireless screen mirroring may vary depending on your MacBook Air model, operating system version, and the TV’s capabilities. Ensure your devices are up to date to have access to the latest features and improvements.
Overall, wireless screen mirroring provides an efficient and flexible way to connect your MacBook Air to a TV, allowing you to experience your laptop’s content on a larger screen without the limitations of physical connections.
Adjusting Display Settings
After connecting your MacBook Air to a TV, it’s important to adjust the display settings to ensure the best viewing experience. By making a few adjustments, you can optimize the screen resolution, aspect ratio, and color settings to match your preferences and the capabilities of the TV.
Here are some display settings you can adjust on your MacBook Air:
- Resolution: Go to “System Preferences” > “Displays” and select the “Display” tab. From here, you can adjust the screen resolution to match the TV’s native resolution for optimal clarity and sharpness.
- Mirroring Options: In the “Displays” settings, select the “Arrangement” tab. Check the box that says “Mirror Displays” to have the TV display the same content as your MacBook Air’s screen. If you prefer to extend the displays (using the TV as a second monitor), leave this box unchecked.
- Aspect Ratio: Some TVs may have a different aspect ratio than your MacBook Air’s screen. To adjust the aspect ratio, go to the TV’s picture settings or aspect ratio settings and choose the option that maintains the proper proportions without distorting the image.
- Brightness and Contrast: Use the TV’s built-in settings to adjust the brightness and contrast according to your lighting conditions and personal preference. This will ensure a balanced and visually pleasing image on the TV screen.
- Color Calibration: If you notice any color discrepancies or inaccuracies, use color calibration tools available on your MacBook Air or the TV settings to fine-tune the color reproduction and achieve more accurate color representation.
Additionally, it’s worth mentioning that some TVs have specific picture modes, such as “Cinema” or “Game,” that are designed for different types of content. You can explore these modes to find the one that best suits the content you’ll be viewing on your MacBook Air.
By adjusting the display settings, you can ensure that the visuals on your TV appear as intended and offer an optimal viewing experience. Take some time to experiment with different settings and find the combination that suits your preferences and makes the content on your MacBook Air truly shine on the TV screen.
Troubleshooting Common Issues
When connecting your MacBook Air to a TV, you may encounter some common issues. Don’t worry, as these can often be resolved with a few troubleshooting steps. Here are some of the most common issues and their solutions:
- No signal: If your TV displays a “No signal” message when you connect your MacBook Air, ensure that all cables are securely connected. Check if the correct input source is selected on the TV. If using an adapter or dongle, try disconnecting and reconnecting it.
- No audio: If there is no audio coming from the TV after connecting your MacBook Air, check the sound settings on your laptop. Go to “System Preferences” > “Sound” and make sure the output is set to the TV or HDMI. Adjust the volume on both the TV and the laptop to ensure they are not muted or set too low.
- Unsupported resolution: If your MacBook Air’s screen resolution is not supported by the TV, the display may appear distorted or not fill the entire screen. To address this, go to “System Preferences” > “Displays” and manually select a lower resolution that is supported by both the MacBook Air and the TV.
- Interference or lag: If you experience lag or an unstable connection, ensure that there are no physical obstacles blocking the signal between your MacBook Air and the TV. Move closer to the TV and avoid interference from other devices or Wi-Fi networks. Restarting both the MacBook Air and the TV can also help resolve connectivity issues.
- Incompatible adapters or cables: If you’re using adapters or cables to connect your MacBook Air to the TV, make sure they are compatible with both your laptop and the TV. Using faulty or incompatible adapters can result in connectivity issues or poor quality display.
If you continue to experience issues after troubleshooting, consult the user manual or contact the manufacturer’s support for further assistance. They can provide specific guidance tailored to your MacBook Air model and TV brand.
Remember, patience is key when troubleshooting. By following these troubleshooting steps and staying calm, you can resolve common issues and enjoy the seamless connection between your MacBook Air and the TV.