
What You’ll Need
If you want to make your Philips Hue lights cycle through colors, there are a few things you’ll need to get started. Here’s a list of what you’ll need:
- A Philips Hue lighting system: This includes the Hue Bridge, which acts as the central hub for your lights, as well as the individual Hue light bulbs or light strips that you want to control.
- A smartphone or tablet: You’ll need a device with the Philips Hue app installed to set up and control your lights. The app is available for both iOS and Android devices.
- A stable Wi-Fi connection: Since the Philips Hue lighting system relies on wireless communication, you’ll need a reliable internet connection to connect and control your lights.
Once you have these items ready, you’ll be on your way to creating a vibrant, colorful lighting experience in your home!
Note: Some newer Philips Hue products, such as the Philips Hue Bluetooth lights, do not require the Hue Bridge for basic functionality. However, for advanced features like color cycling, you will still need the Hue Bridge.
Step 1: Set Up Your Philips Hue Lights
Before you can start making your Philips Hue lights cycle through colors, you’ll need to set them up and connect them to the Philips Hue app. Follow these steps to get started:
- Unbox your Philips Hue lights: Start by unboxing your Philips Hue light bulbs or light strips. Ensure that all the necessary components are included.
- Insert the bulbs or attach the light strips: If you have Philips Hue light bulbs, simply screw them into the desired light fixtures just like you would with regular light bulbs. If you have Philips Hue light strips, attach them to the desired surfaces using the adhesive backing.
- Connect the Hue Bridge: Plug in the Hue Bridge to a power source and connect it to your home Wi-Fi router using the included Ethernet cable. Make sure the Hue Bridge is placed in a location where it can easily communicate with your lights.
- Power on your lights: Turn on the power to the light fixtures where you’ve installed the Philips Hue light bulbs or light strips. Allow the lights to turn on and verify that they are functioning properly.
- Download and install the Philips Hue app: Open the app store on your smartphone or tablet and search for “Philips Hue.” Download and install the app that matches your device’s operating system (iOS or Android).
- Open the Philips Hue app: Once the app is installed, open it on your device. You will be prompted to create a Philips Hue account if you don’t already have one. Follow the on-screen instructions to complete the account setup process.
- Follow the in-app instructions: The Philips Hue app will guide you through the process of discovering and connecting your lights to the Hue Bridge. Make sure your smartphone or tablet is connected to the same Wi-Fi network as the Hue Bridge for a seamless setup.
- Finish the setup process: Once the app successfully discovers your lights, it will prompt you to assign them to specific rooms or create groups. Optionally, you can give each light a unique name for easier control later on.
By following these steps, you’ll have your Philips Hue lights set up and ready to go. You can now move on to the next step in making them cycle through colors!
Step 2: Install the Philips Hue App
In order to control and customize your Philips Hue lights, you will need to install the Philips Hue app on your smartphone or tablet. The app serves as the central control hub for your lights and allows you to access a wide range of features and settings. Follow these steps to install the Philips Hue app:
- Open the app store: On your smartphone or tablet, open the app store that corresponds to your device’s operating system (iOS or Android).
- Search for “Philips Hue”: Use the search function within the app store to look for the official Philips Hue app. Make sure to select the app that is developed by “Signify Netherlands B.V.”
- Install the app: Once you have located the official Philips Hue app, click on the “Install” or “Get” button to begin the installation process. The app will be downloaded and automatically installed on your device.
- Open the app: After the installation is complete, locate the Philips Hue app on your device’s home screen or app drawer and tap on its icon to open it.
- Create a Philips Hue account: When you open the app for the first time, you will be prompted to create a Philips Hue account. Follow the on-screen instructions to set up your account. If you already have an account, you can simply log in using your existing credentials.
- Grant necessary permissions: The Philips Hue app may require certain permissions to access features like location services and device connectivity. Make sure to grant the necessary permissions as requested by the app to ensure full functionality.
- Complete the setup process: Once you have signed in to your Philips Hue account and granted the required permissions, the app will guide you through the setup process. This typically involves discovering and connecting your Philips Hue lights to the app.
With the Philips Hue app successfully installed on your device, you are now ready to connect and control your lights. The app provides an intuitive interface for managing various light settings, scenes, and schedules, allowing you to fully customize your lighting experience.
Step 3: Connect Your Lights to the App
Now that you have installed the Philips Hue app, it’s time to connect your Philips Hue lights to the app. This process will allow you to control and manage your lights directly from your smartphone or tablet. Follow these steps to connect your lights to the app:
- Open the Philips Hue app: Locate the Philips Hue app on your device and tap on its icon to open it. Ensure that your smartphone or tablet is connected to the same Wi-Fi network as the Philips Hue Bridge.
- Tap on the “Settings” tab: Once the app is open, navigate to the “Settings” tab, usually located at the bottom right corner of the screen.
- Select “Light setup”: Within the “Settings” tab, you will find various options. Look for and tap on the “Light setup” or similar option.
- Choose “Add light”: In the “Light setup” menu, you will see an option to “Add light” or “Search for lights.” Tap on this option to begin searching for your Philips Hue lights.
- Follow the in-app instructions: The app will start searching for available Philips Hue lights. Follow the on-screen instructions to put your lights into pairing mode. This usually involves turning the lights on and off or using a specific sequence of actions.
- Wait for the lights to be found: The app will automatically detect the lights that are in pairing mode and display them on the screen. This may take a few moments, so be patient and ensure that the lights are within range of the Philips Hue Bridge.
- Assign lights to rooms or groups: Once the app has discovered your lights, it will prompt you to assign them to specific rooms or create groups. This step will help you organize and control your lights more efficiently.
- Repeat the process if necessary: If you have multiple groups of Philips Hue lights, repeat the connecting process for each group. This will allow you to control them individually or collectively, depending on your preferences.
By following these steps, you will successfully connect your Philips Hue lights to the app. Once connected, you can start exploring the various features and settings available to create stunning lighting effects and color cycles.
Step 4: Select the Room/Group
After connecting your Philips Hue lights to the app, the next step is to select the specific room or group that you want to control. This allows you to customize the lighting settings for a specific area of your home, whether it’s a single room or a collection of lights grouped together. Follow these steps to select the room or group:
- Open the Philips Hue app: Launch the Philips Hue app on your smartphone or tablet. Ensure that you are logged into your Philips Hue account and that your lights are connected to the app.
- Navigate to the “Rooms” or “Groups” tab: Depending on the app version and layout, you will find a tab or menu option labeled as “Rooms” or “Groups”. Tap on this tab to access the list of available rooms or groups.
- Select the desired room or group: From the list of rooms or groups, choose the one that corresponds to the lights you want to control. This will display the controls and settings specific to that room or group.
- Explore the available options: Once you have selected the room or group, you can now explore the various options for customizing your lights. This may include adjusting brightness, color temperature, and specific lighting scenes.
- Adjust lighting settings: To customize the lighting settings, tap on the appropriate controls within the app. For example, you can use sliders to adjust the brightness or color temperature of the lights. You may also have the option to select pre-configured lighting scenes.
- Save your changes: After making any adjustments, ensure to save your changes by tapping on the “Save” or “Apply” button within the app. This will update the settings for the selected room or group.
By selecting the correct room or group within the Philips Hue app, you can easily control and customize the lighting settings for specific areas of your home. This allows for a more personalized and tailored lighting experience to suit your preferences.
Step 5: Choose a Color Scene
Now that your Philips Hue lights are set up and connected, it’s time to dive into the fun part – choosing a color scene! With the Philips Hue app, you have access to a wide range of pre-configured color scenes that can instantly transform the ambiance of your space. Follow these steps to choose a color scene:
- Open the Philips Hue app: Launch the Philips Hue app on your smartphone or tablet. Make sure you are logged into your Philips Hue account and have selected the desired room or group.
- Navigate to the “Scenes” tab: Look for the “Scenes” tab in the app’s navigation menu. Tap on it to access a variety of pre-set color scenes.
- Browse through the available scenes: The “Scenes” tab will display a grid of different color scenes. Scroll or swipe through the options to explore the different options available. Each scene is represented by a thumbnail image and a name.
- Select a scene: Once you find a scene that catches your eye, tap on its thumbnail to select it. The selected scene will be applied to your lights, instantly transforming the colors and ambiance in the room.
- Adjust scene settings (optional): If desired, you can further customize the selected scene by adjusting its settings. This may include modifying the brightness, saturation, or intensity of the colors. These options can usually be found within the scene details or settings menu.
- Save the scene (optional): If you have made any modifications to the scene settings, make sure to save your changes by tapping on the “Save” or “Apply” button within the app.
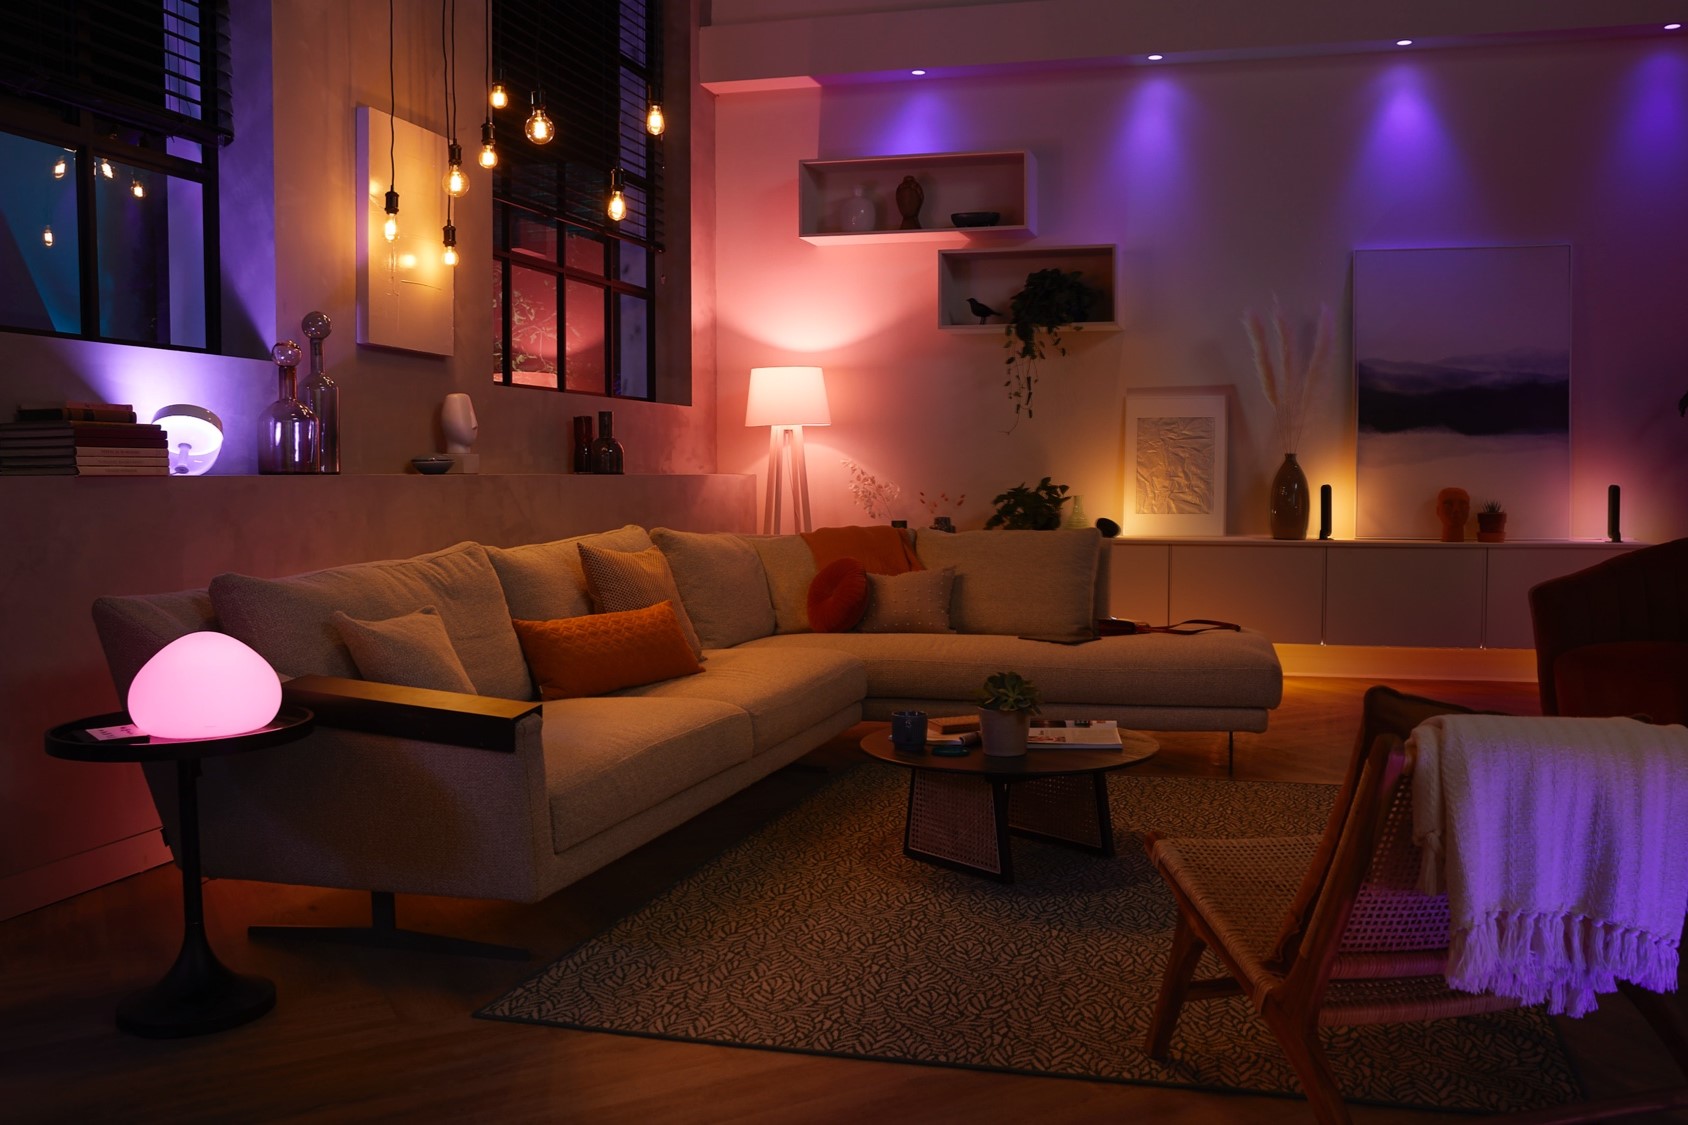
With just a few taps, you can easily choose a color scene to set the mood and atmosphere in your space. Whether you prefer a calming and soothing ambiance or a vibrant and energetic vibe, the Philips Hue app offers a wide range of color scenes to suit any occasion or preference.
Step 6: Adjust the Transition Time
One of the great features of Philips Hue lights is the ability to control the transition time between colors. This allows you to create smooth and gradual color changes for a more dynamic and immersive lighting experience. Follow these steps to adjust the transition time:
- Open the Philips Hue app: Launch the Philips Hue app on your smartphone or tablet. Ensure that you are logged into your Philips Hue account and have selected the desired room or group.
- Navigate to the “Color” or “Effects” tab: Look for the tab or menu option labeled as “Color” or “Effects” within the app’s interface. Tap on it to access the controls for adjusting the transition time.
- Select the desired transition time: Within the “Color” or “Effects” tab, you will find an option to adjust the transition time. This is typically represented by a slider or numerical input field.
- Drag the slider or enter a value: Use your finger to drag the slider to the left or right to decrease or increase the transition time respectively. Alternatively, you can enter a specific value in the numerical input field for more precise control.
- Preview the transition effect: As you adjust the transition time, pay attention to the preview of the color changes displayed on the screen. This will give you an idea of how the lights will transition between colors.
- Save the changes: Once you are satisfied with the adjusted transition time, save the changes by tapping on the “Save” or “Apply” button within the app. This will update the transition time settings for the selected room or group.
By adjusting the transition time, you have the power to control the pace of color changes in your Philips Hue lights. Whether you prefer a slow and gradual fade or a quick and dynamic transition, the ability to customize the transition time adds another layer of personalization to your lighting setup.
Step 7: Enable Color Loop
If you want your Philips Hue lights to continuously cycle through colors, you can enable the Color Loop feature. This allows you to create a mesmerizing and ever-changing light show in your space. Follow these steps to enable Color Loop:
- Open the Philips Hue app: Launch the Philips Hue app on your smartphone or tablet. Make sure you are logged into your Philips Hue account and have selected the desired room or group.
- Navigate to the “Color” or “Effects” tab: Look for the tab or menu option labeled as “Color” or “Effects” within the app’s interface. Tap on it to access the controls for enabling Color Loop.
- Find the Color Loop option: Within the “Color” or “Effects” tab, you will find an option to enable Color Loop. This is typically represented by a toggle switch or checkbox.
- Toggle the Color Loop switch: Tap on the toggle switch or checkbox to enable Color Loop. You may also have the option to customize the speed or intensity of the Color Loop effect.
- Preview the Color Loop effect: As you enable Color Loop, the app will preview the effect by continuously cycling through colors. Take a moment to appreciate the captivating display of changing hues and shades.
- Save the changes: Once you are satisfied with the Color Loop effect, save the changes by tapping on the “Save” or “Apply” button within the app. This will activate Color Loop for the selected room or group.
By enabling Color Loop, you can transform your space into a vibrant and dynamic environment. Whether you’re hosting a party, setting the mood for a cozy night in, or simply want to enjoy a visual spectacle, the Color Loop feature adds an extra level of excitement to your Philips Hue lights.
Step 8: Customize Cycling Preferences
To further enhance your color-cycling experience with Philips Hue lights, you have the option to customize the cycling preferences according to your preferences. This allows you to have more control over the color patterns, speed, and other aspects of the cycling effect. Follow these steps to customize your cycling preferences:
- Open the Philips Hue app: Launch the Philips Hue app on your smartphone or tablet. Ensure that you are logged into your Philips Hue account and have selected the desired room or group.
- Navigate to the “Color” or “Effects” tab: Look for the tab or menu option labeled as “Color” or “Effects” within the app’s interface. Tap on it to access the controls for customizing the cycling preferences.
- Select the cycling preferences option: Within the “Color” or “Effects” tab, you will find options to customize the cycling preferences. This may be labeled as “Cycling Preferences,” “Cycling Options,” or similar.
- Explore the available customization options: Once you have accessed the cycling preferences menu, you can explore the various options available for customization. This may include selecting specific colors, adjusting the speed or duration of the cycling effect, or choosing a specific pattern for the color changes.
- Make your desired changes: To customize the cycling preferences, tap on the corresponding controls within the app. For example, you can select a specific color palette or set the speed of cycling to your desired setting. Experiment with different combinations until you achieve the desired effect.
- Preview the customized effect: As you make changes to the cycling preferences, the app will preview the effect based on your customizations. Take a moment to see how the customized cycling preferences transform the colors of your Philips Hue lights.
- Save the changes: Once you are satisfied with the customized cycling preferences, save the changes by tapping on the “Save” or “Apply” button within the app. This will update the cycling preferences for the selected room or group.
By customizing the cycling preferences, you can create a unique and personalized color-cycling experience with your Philips Hue lights. Whether you want a slow and smooth transition or a fast-paced and dynamic effect, the ability to customize the cycling preferences allows you to tailor the lighting experience to your liking.
Step 9: Enjoy Your Color-Cycling Philips Hue Lights!
Congratulations! You have successfully set up and customized your Philips Hue lights to cycle through colors. Now it’s time to sit back, relax, and enjoy the captivating display of vibrant hues and dynamic lighting effects. Here are a few tips to enhance your experience:
- Create the perfect ambiance: Adjust the brightness and color intensity of your Philips Hue lights to create the ideal ambiance for any occasion. Whether you want a cozy and warm atmosphere or a lively and energetic mood, your color-cycling lights can set the tone.
- Experiment with different scenes and effects: Explore the wide range of pre-configured color scenes and effects available in the Philips Hue app. From gentle pastel shades to bold and dramatic color combinations, there’s a scene to suit every mood and preference.
- Set up schedules and automation: Take full advantage of the smart features of the Philips Hue system by setting up schedules and automation. Program your lights to cycle through colors at specific times of the day or use sensors to trigger color changes based on motion or daylight levels.
- Share the experience with others: Whether you’re hosting a gathering or simply want to impress your friends and family, your color-cycling Philips Hue lights are sure to be a conversation starter. Share the mesmerizing light show with others and let them experience the magic.
Remember, the beauty of Philips Hue lights is their versatility and adaptability. You can change the colors and cycling preferences whenever you like, allowing you to constantly refresh your lighting setup and set the desired mood for any occasion.
So go ahead and enjoy the captivating colors, immerse yourself in the ambiance, and make your living space truly come alive with your color-cycling Philips Hue lights!