
What You’ll Need
Before you can start enjoying the mesmerizing color cycles of your Philips Hue lights, there are a few essential items you’ll need to gather:
- Philips Hue lights: Make sure you have at least one Philips Hue light bulb or light strip. You can start with a single bulb and expand your collection over time.
- Philips Hue Bridge: The Philips Hue Bridge is the central hub that connects your lights to the Philips Hue app. It’s an essential component for controlling and customizing your lighting.
- Smartphone or Tablet: You’ll need a smartphone or tablet to install and use the Philips Hue app. The app is available for both iOS and Android devices.
- Wireless Internet Connection: To control your Philips Hue lights, you’ll need a stable wireless internet connection. This enables communication between the app, your smartphone or tablet, and the Hue Bridge.
- Power Source: Ensure that you have a power source ready to plug in your Philips Hue lights. Whether it’s a standard wall outlet or a compatible power adapter, make sure you have a way to provide electricity to your lights.
Once you have gathered these items, you’ll be well-prepared to embark on the colorful journey of Philips Hue color cycling.
Setting Up Your Philips Hue Lights
Setting up your Philips Hue lights is a straightforward process that can be done in a few simple steps:
- Unbox and Install: Start by unboxing your Philips Hue lights and finding the ideal spots to place them. Whether you’re using light bulbs or light strips, follow the manufacturer’s instructions to safely install them in the desired locations.
- Connect the Philips Hue Bridge: The next step is to connect the Philips Hue Bridge to your wireless internet router. Use the included ethernet cable to connect the Bridge to an available port on your router. Then, connect the power adapter to the Bridge and plug it into a power source.
- Download and Install the Philips Hue App: On your smartphone or tablet, go to the App Store or Google Play Store, search for the Philips Hue app, and download it. Once the app is installed, open it and sign in or create a new account.
- Connect the Philips Hue Bridge to the App: Open the Philips Hue app and tap the “Get Started” button. Follow the on-screen instructions to search for and connect to the Philips Hue Bridge. Ensure that your smartphone or tablet is connected to the same wireless network as the Bridge.
- Add Your Philips Hue Lights to the App: Once connected, the app will prompt you to add your Philips Hue lights. Follow the instructions to find and add each light individually. Ensure that the lights are powered on and within range of the Bridge.
- Verify and Test Your Lights: After adding the lights to the app, it’s crucial to verify that they are functioning correctly. You can do this by turning them on and testing their basic functionality through the app. If any lights are not working as expected, double-check their installation and connection to the Bridge.
Congratulations! You have successfully set up your Philips Hue lights and connected them to the Philips Hue app. Now, it’s time to dive into the exciting world of customizable lighting experiences.
Installing the Philips Hue App
The Philips Hue app is essential for controlling and customizing your Philips Hue lights. Follow these steps to install the app on your smartphone or tablet:
- Access the App Store or Google Play Store: On your smartphone or tablet, open the App Store (on iOS devices) or the Google Play Store (on Android devices).
- Search for the Philips Hue App: Use the search function in the App Store or Google Play Store to look for the official Philips Hue app. It is free to download and developed by Signify.
- Select and Install the App: Once you find the Philips Hue app, tap on it to view the app details, ratings, and reviews. Check if it is compatible with your device, then tap the “Install” or “Get” button to begin the installation process.
- Wait for the Installation: Depending on your internet connection speed, it may take a few moments for the Philips Hue app to download and install on your device. Ensure that you have enough free space on your device for the app to be installed.
- Open the Philips Hue App: Once the app is installed, locate its icon on your home screen or app drawer and tap on it to open the Philips Hue app.
- Sign In or Create a New Account: Upon launching the app, you will be prompted to sign in or create a new account. If you already have a Philips Hue account, enter your credentials to log in. Otherwise, follow the on-screen instructions to create a new account.
After completing these steps, you will have successfully installed the Philips Hue app on your device. Now, you can start exploring the features and functionalities that the app offers for controlling your Philips Hue lights.
Connecting the Philips Hue Bridge
The Philips Hue Bridge acts as the central hub that connects your Philips Hue lights to the Philips Hue app. Follow these steps to connect the Bridge to your wireless internet router:
- Unpack the Philips Hue Bridge: Start by removing the Philips Hue Bridge from its packaging. Find a suitable location near your wireless internet router to place the Bridge.
- Connect the Bridge to Power: Plug one end of the included power adapter into the back of the Philips Hue Bridge and the other end into a power outlet. Ensure that the Bridge is receiving power.
- Connect an Ethernet Cable: Take one end of the provided Ethernet cable and connect it to the LAN port on your wireless internet router.
- Connect the Other End of the Ethernet Cable: Take the other end of the Ethernet cable and connect it to the Ethernet port on the back of the Philips Hue Bridge. The connection should be secure.
- Check the Bridge Status: Once the Bridge is connected to both power and the router, check the status indicator lights on the Bridge. They should display a steady, solid light, indicating that the Bridge is powered on and connected to the network.
Once you have completed these steps, the Philips Hue Bridge will be successfully connected to your wireless internet router. This enables communication between the Bridge, your Philips Hue lights, and the Philips Hue app on your smartphone or tablet.
Adding Your Philips Hue Lights to the App
After connecting the Philips Hue Bridge to your wireless internet router, it’s time to add your Philips Hue lights to the Philips Hue app. Follow these steps to complete the process:
- Launch the Philips Hue App: Open the Philips Hue app on your smartphone or tablet. If you haven’t already signed in, enter your credentials to log in to your account.
- Tap on the “Settings” Tab: At the bottom of the app screen, you’ll see a navigation bar. Tap on the “Settings” tab, usually represented by a gear or gearwheel icon.
- Select “Light Setup” or “Add Light”: In the settings menu, look for an option labeled “Light Setup” or “Add Light.” This feature allows you to search for and connect new Philips Hue lights.
- Follow the On-Screen Prompts: The app will guide you through the process of adding your lights. Typically, it involves putting your lights into pairing mode and allowing the app to detect and connect to them.
- Verify the Connection: Once the app successfully detects your lights, it will display a confirmation message. Take a moment to review the list of connected lights and ensure that they match the physical lights you have.
- Assign Names and Rooms: To make managing your lights easier, assign individual names and assign them to specific rooms in your home. This allows you to control and customize each light separately or as a group.
By following these steps, you will have successfully added your Philips Hue lights to the Philips Hue app. Now, you can start exploring the various features and functionalities the app offers to control and personalize your lighting experience.
Creating a New Scene
A scene in the Philips Hue app allows you to set a specific combination of colors and brightness levels for your lights. Follow these steps to create a new scene:
- Open the Philips Hue App: Launch the Philips Hue app on your smartphone or tablet and sign in to your account if you haven’t already done so.
- Go to the “Scenes” Tab: At the bottom of the app screen, navigate to the “Scenes” tab. This tab is usually represented by a paintbrush or picture icon.
- Tap on the “+” or “Create New” Button: Look for an option to create a new scene, typically presented as a “+” or “Create New” button. Tap on it to start the scene creation process.
- Select Lighting Devices: Choose the lights that you want to include in the scene. You can select individual lights or entire rooms to be part of the scene.
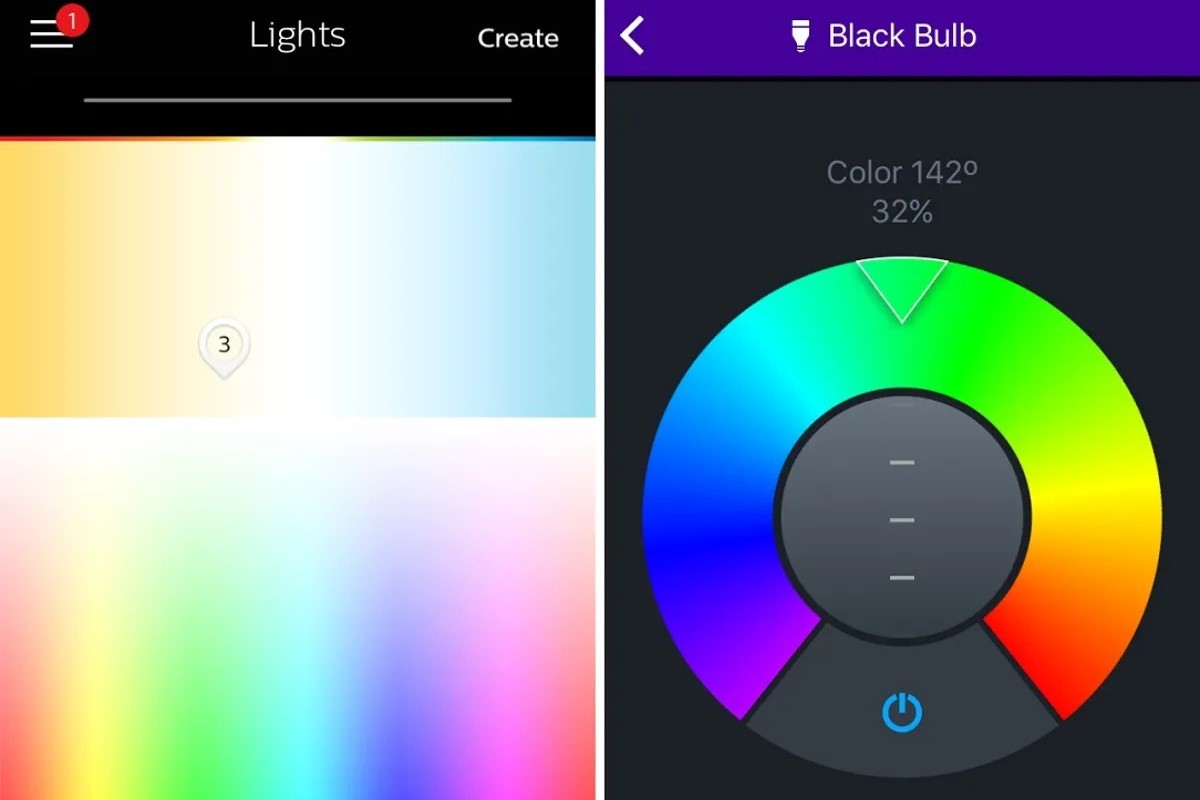
- Adjust Colors and Brightness: Once you have selected the lights, you can customize the colors and brightness levels for each light. Use the color wheel or pre-set color options to select the desired hues, and drag the brightness slider to set the intensity.
- Save the Scene: Give your scene a memorable name and tap the “Save” or “Done” button to save the scene to your collection.
Creating a new scene allows you to easily access and activate a specific lighting ambiance whenever you desire. You can create scenes for different moods, occasions, or even specific activities like reading or movie nights.
With the ability to create multiple scenes, you can effortlessly transform the atmosphere of your space with just a few taps on the Philips Hue app.
Choosing Colors for Your Scene
When creating a scene in the Philips Hue app, one of the most exciting aspects is selecting the colors for your lights. Here are some tips to help you choose the perfect colors for your scene:
- Consider the Mood: Think about the mood or ambiance you want to create with your scene. For a tranquil and relaxing setting, choose soothing colors like blues and greens. For a vibrant and energetic atmosphere, opt for bold and vibrant colors like reds and yellows.
- Coordinate with the Room’s Décor: Take into account the existing color scheme and décor of the room where your Philips Hue lights are installed. Choose colors that complement or enhance the overall aesthetic of the space.
- Experiment with Color Combinations: Don’t be afraid to mix and match different colors for a dynamic and visually captivating scene. You can create a harmonious blend of colors or choose contrasting colors for a dramatic effect.
- Use Color Psychology: Keep in mind that colors can evoke different emotions and feelings. Research color psychology to understand the psychological impact of various colors and use this knowledge to create scenes that align with your desired mood or ambiance.
- Utilize Pre-Set Color Schemes: The Philips Hue app offers pre-set color schemes to make it easier for you to choose colors for your scenes. These schemes are carefully curated combinations of colors that work well together. Feel free to explore these options and see if any resonate with your vision.
- Personalize and Experiment: Remember that creating a scene is a highly personal experience. Take the time to experiment with different color combinations and find what speaks to you. Don’t be afraid to let your creativity soar and create unique scenes that reflect your individual style and preferences.
By considering these tips and exploring the vast spectrum of colors available, you can create captivating and immersive scenes that transform your space and elevate your lighting experience.
Setting up a Color Cycle Routine
One of the exciting features of Philips Hue lights is the ability to set up color cycle routines. This allows your lights to smoothly transition through a range of colors over a specified period of time. Follow these steps to set up a color cycle routine:
- Open the Philips Hue App: Launch the Philips Hue app on your smartphone or tablet. Make sure you are signed in to your account.
- Go to the “Routines” or “Automation” Tab: Navigate to the “Routines” or “Automation” tab in the app. This tab is usually represented by a clock or schedule icon.
- Select “Create New Routine” or “Add New Automation”: Look for an option to create a new routine or automation. Tap on it to start the process.
- Choose the Lights: Select the lights that you want to include in the color cycle routine. You can choose individual lights or entire rooms.
- Set the Color Cycle Option: Look for an option to set the color cycle. Depending on your app version, this option may be labeled as “Color Loop” or “Cycle Colors.” Enable this option to activate the color cycling for the selected lights.
- Configure the Cycle Duration: Determine how long you want each color to be displayed before transitioning to the next. You can adjust the duration according to your preference.
- Set the Start Time: Choose the time when you want the color cycle routine to start. This allows you to enjoy the color cycling at a specific time of day or during certain activities.
- Save the Routine: Give your color cycle routine a name and tap the “Save” or “Done” button to save it to your collection.
Once you have completed these steps, your Philips Hue lights will begin cycling through the selected colors at the designated time and duration. This adds a dynamic and ever-changing element to your lighting setup, creating a captivating visual experience.
Feel free to experiment with different color combinations, cycle durations, and start times to find the perfect color cycle routine that fits your preferences and enhances the ambiance of your space.
Adjusting the Color Cycle Speed
With Philips Hue lights, you have the flexibility to adjust the speed of the color cycle, allowing you to customize the pace at which your lights transition between colors. Follow these steps to adjust the color cycle speed:
- Launch the Philips Hue App: Open the Philips Hue app on your smartphone or tablet and sign in to your account if needed.
- Go to the Color Cycle Routine: Navigate to the color cycle routine you have created previously. This can usually be found in the “Routines” or “Automation” tab in the app.
- Edit the Routine: Look for an option to edit the routine. Tap on it to access the settings for the color cycle routine.
- Adjust the Speed Setting: Within the settings, locate the option to adjust the speed of the color cycle. This setting may be labeled as “Cycle Speed” or “Transition Speed.”
- Choose the Desired Speed: Move the speed slider or select a speed option that best suits your preference. You may have the option to choose from slow, medium, or fast speeds, or have a slider that allows you to set a specific value.
- Preview the Changes: Take a moment to preview the adjusted speed and observe how the color transitions look with the new setting. Make additional adjustments if needed.
- Save the Changes: Once you are satisfied with the speed adjustment, tap the “Save” or “Done” button to save the changes to the color cycle routine.
By adjusting the color cycle speed, you can create different visual effects and moods. Slower speeds may create a more subtle and relaxing transition, while faster speeds can provide a vibrant and energetic atmosphere.
Feel free to experiment with different speed settings to find the perfect balance that enhances the ambiance of your space and matches your desired lighting experience.
Using Third-Party Apps for Advanced Color Cycling
While the Philips Hue app offers a range of features for controlling and customizing your lights, you can also explore third-party apps to unlock more advanced color cycling options and functionalities. These apps provide additional flexibility and creative possibilities for your Philips Hue lights. Here’s how you can utilize third-party apps for advanced color cycling:
- Research and Identify Compatible Apps: Start by exploring the various third-party apps available for your device’s operating system. Look for apps that are specifically designed for Philips Hue lights and have positive user reviews.
- Install the App: Once you have identified an app of interest, download and install it on your smartphone or tablet. Follow the app’s installation instructions, and ensure it is from a trusted source.
- Explore Color Cycling Features: Open the third-party app and navigate to the color cycling section or feature. Depending on the app, you may find a wide range of options such as customizing color sequences, selecting transition effects, and adjusting the speed and intensity of the color changes.
- Experiment and Personalize: Take the time to experiment with the different color cycling options available in the app. Discover new color combinations, try out unique transition effects, and customize the settings to match your desired lighting experience.
- Save and Activate Your Color Cycling Settings: Once you have fine-tuned your color cycling preferences, save the settings within the third-party app. Activate the color cycling routine whenever you want to enjoy the dynamic and captivating lighting effects.
- Stay Updated: Keep an eye out for app updates from the developers. These updates may introduce new features, additional color cycling options, and enhanced functionalities that further enhance your lighting experience.
Using third-party apps for advanced color cycling can provide a wide array of options and customization capabilities that go beyond the default features of the Philips Hue app. By exploring different apps and their unique offerings, you can transform your lighting setup into a truly immersive and personalized visual experience.
Note that while third-party apps are designed to work with Philips Hue lights, it’s essential to download apps from reputable sources and ensure they are compatible with your specific device and operating system version.
Troubleshooting Tips
While setting up and using Philips Hue lights is typically a smooth and enjoyable experience, you may encounter some issues along the way. Here are some troubleshooting tips to help you resolve common problems:
- Check Power and Connections: Ensure that all your Philips Hue lights are properly connected to a power source and that the power is turned on. Additionally, double-check the connections between the Philips Hue Bridge, lights, and your wireless internet router.
- Verify Wireless Connection: Make sure that your smartphone or tablet is connected to the same wireless network as the Philips Hue Bridge. If not, switch to the appropriate network to ensure proper communication between the app and your lights.
- Restart Devices: Try restarting your Philips Hue Bridge, lights, and your smartphone or tablet. Sometimes, a simple device reboot can resolve connectivity or functionality issues.
- Check Firmware Updates: Ensure that your Philips Hue Bridge and lights are running the latest firmware versions. Use the Philips Hue app to check for any available updates and install them accordingly.
- Reset Devices if Necessary: If you’re experiencing persistent issues, consider resetting your Philips Hue Bridge and lights to their factory settings. Refer to the manufacturer’s instructions for the proper reset procedure.
- Ensure Proper Distance and Range: Make sure that your Philips Hue lights are within range of the Bridge and not too far apart from each other. Adjust their placement if needed to improve connectivity.
- Troubleshoot Network Issues: If you’re encountering connectivity problems, check your wireless internet router for any network issues. Restart the router if necessary or contact your internet service provider for assistance.
- Consult Philips Hue Support: If you have followed the troubleshooting steps above and are still experiencing problems, don’t hesitate to reach out to Philips Hue customer support. They can provide further guidance and solutions for any technical issues you may be facing.
By following these troubleshooting tips, you can overcome common challenges and ensure smooth operation of your Philips Hue lights. Remember, don’t hesitate to seek assistance from the manufacturer or professional support if needed. With a little patience and troubleshooting, you’ll be able to enjoy the full potential of your Philips Hue lighting system.