
Set up the Philips Hue Bridge
Setting up the Philips Hue Bridge is the first step towards controlling your Philips Hue lights remotely. The Bridge is a vital component as it acts as a central hub that connects and communicates with all your Philips Hue lights. Here’s a step-by-step guide on how to set up the Philips Hue Bridge:
- Unpack the Philips Hue Bridge: Start by unpacking the Bridge from its packaging. You will find the Bridge itself, a power adapter, and an Ethernet cable.
- Find a suitable location: Choose a convenient location for your Bridge. It should be placed near your Wi-Fi router and connected to a power source using the power adapter.
- Connect the Bridge: Use the provided Ethernet cable to connect the Bridge to your Wi-Fi router. Ensure that the cable is securely plugged into both the Bridge and the router.
- Power up the Bridge: Plug the power adapter into a wall socket and connect it to the Bridge. The Bridge will turn on and the LED light on the front will start blinking.
- Download the Philips Hue app: On your smartphone or tablet, go to the App Store or Google Play Store and search for the Philips Hue app. Download and install the app on your device.
- Open the app and create an account: Launch the Philips Hue app and follow the on-screen instructions to set up an account. You will need to provide your email address and create a password.
- Add the Bridge to your account: Once you have created an account, the app will prompt you to add a Bridge. Tap on the “Add Bridge” option and follow the instructions to connect the app to your Bridge.
- Press the button on the Bridge: To establish a connection, press the button on the Bridge within 30 seconds of adding it in the app. The LED light on the Bridge will turn solid, indicating a successful connection.
- Set up your lights: With the Bridge successfully connected, you can now start adding your Philips Hue lights to the system. Follow the instructions provided with each light to connect them to the Bridge.
Once you have completed these steps, you have successfully set up the Philips Hue Bridge. It is now ready for you to control your lights remotely using the Philips Hue app or other compatible devices.
Connect your Philips Hue lights to the Bridge
After successfully setting up the Philips Hue Bridge, the next step is to connect your Philips Hue lights to the Bridge. This will allow you to control and manage your lights remotely. Let’s explore how to connect your lights:
- Ensure the Bridge is powered on: Make sure that the Philips Hue Bridge is turned on and connected to your Wi-Fi network.
- Choose a location for your lights: Decide where you want to place your Philips Hue lights. Whether it’s ceiling lights, table lamps, or wall fixtures, consider the best positions to create the desired lighting ambiance.
- Screw in the Philips Hue bulbs: If you are using Philips Hue bulbs, screw them into the light sockets of your chosen fixtures. Ensure they are securely fitted, but be careful not to overtighten.
- Turn on the lights: Once the bulbs are securely in place, switch on the power to each individual light fixture to activate the bulbs.
- Launch the Philips Hue app: Open the Philips Hue app on your smartphone or tablet.
- Add lights in the app: In the app, navigate to the settings or control panel and choose “Add Lights” or a similar option.
- Follow the app instructions: The app will guide you through the process of connecting your lights to the Bridge. This may involve searching for available lights and confirming their connection.
- Assign lights to rooms or zones: Once the lights are connected, you can organize them into different rooms or zones within the Philips Hue app. This will allow you to control specific groups of lights together, such as all the lights in your living room or bedroom.
- Test the connection: After adding the lights and assigning them to rooms, test the connection by turning them on and off using the app. If they respond accordingly, it means the connection is successful.
By following these steps, you can easily connect your Philips Hue lights to the Bridge and begin enjoying remote control and customization of your lighting. Each light will now be accessible through the Philips Hue app, allowing you to adjust their brightness, color, and create dynamic lighting scenes to suit your preferences.
Download and install the Philips Hue app
The Philips Hue app is a crucial tool for controlling your Philips Hue lights remotely. It provides a user-friendly interface that allows you to adjust the brightness, color, and other settings of your lights, as well as create customized lighting scenes. Here’s a step-by-step guide on how to download and install the Philips Hue app:
- Unlock your smartphone or tablet: Ensure that your device is unlocked and ready for use.
- Visit the app store: Depending on your device’s operating system, open the App Store (for iOS users) or the Google Play Store (for Android users).
- Search for the Philips Hue app: Using the search function within the app store, type “Philips Hue” in the search bar.
- Select the Philips Hue app: From the search results, locate the official Philips Hue app and tap on it to open the app’s page.
- Read the app description and reviews: Take a moment to read the app description and user reviews to get an idea of its features and functionality.
- Tap on the “Download” or “Install” button: Once you are satisfied with the app’s information, tap on the appropriate button to initiate the download and installation process.
- Wait for the app to download and install: The app may take a few moments to download, depending on your internet connection speed. Once downloaded, it will automatically install on your device.
- Open the Philips Hue app: After the installation is complete, locate the Philips Hue app on your device’s home screen or app drawer, and tap on it to launch the app.
- Create an account (if necessary): If this is your first time using the Philips Hue app, you may be prompted to create an account. Follow the on-screen instructions to set up your account using your email address and password.
- Log in to your account: If you already have an existing account, simply log in using your credentials.
Once you have downloaded and installed the Philips Hue app, you will have access to a range of features and settings to control your Philips Hue lights. The app provides an intuitive interface that allows you to effortlessly adjust your lights, create customized scenes, set schedules, and even integrate voice control through compatible voice assistants.
Connect the Philips Hue app to the Bridge
Once you have downloaded and installed the Philips Hue app on your smartphone or tablet, the next step is to connect the app to the Philips Hue Bridge. This will enable you to control and manage your Philips Hue lights remotely. Here’s a step-by-step guide on how to connect the Philips Hue app to the Bridge:
- Open the Philips Hue app: Locate the app on your device’s home screen or app drawer, and tap on it to launch the app.
- Ensure your device is connected to the same Wi-Fi network as the Bridge: Make sure that your smartphone or tablet is connected to the Wi-Fi network that the Philips Hue Bridge is connected to.
- Tap on the “Get Started” or “Set Up” button: When you launch the app for the first time, you will be prompted to set up the connection to the Bridge. Tap on the appropriate button to proceed.
- Select “Bridge” as the device to connect: From the available options, choose “Bridge” as the type of device you want to connect to the app.
- Press the button on the Bridge: To establish a connection between the app and the Bridge, you will need to press the button located on the Bridge. It may be a physical button or a touch-sensitive area. Press it once and wait for the app to detect the Bridge.
- Wait for the app to find the Bridge: The app will start searching for the Bridge on the same Wi-Fi network. This process may take a few seconds.
- Confirm the connection: Once the app detects the Bridge, a confirmation screen will appear. Verify that the Bridge is correctly identified, and tap on the “Confirm” or “Connect” button to establish the connection.
After completing these steps, the Philips Hue app will be successfully connected to the Bridge. You will now have full control over your Philips Hue lights, allowing you to adjust the brightness, color, and other settings, create customized lighting scenes, and even set schedules. The app provides a seamless and intuitive interface that makes it easy to manage and personalize your lighting experience.
Set up your remote access with Philips Hue
Setting up remote access with Philips Hue enables you to control your lights from anywhere, even when you’re not at home. This feature allows you to manage and customize your lighting settings whether you’re on vacation, at the office, or simply away from your Philips Hue Bridge. Follow these steps to set up remote access:
- Ensure your Philips Hue Bridge is connected to the internet: Before setting up remote access, make sure that your Bridge is connected to your Wi-Fi network and has a stable internet connection.
- Open the Philips Hue app: Launch the app on your smartphone or tablet.
- Go to settings: Tap on the settings icon, usually represented by a gear or three dots, in the top corner of the app.
- Select “Hue Bridges” or “Bridge Settings”: Depending on the version of the app, you may find these options under the settings menu.
- Choose “Remote Access”: Look for the “Remote Access” or “Access Control” option in the menu and select it.
- Enable remote access: Toggle the switch or tap the option to enable remote access. This will allow you to control your lights from outside your home network.
- Create a Philips Hue account (if needed): If you haven’t already created a Philips Hue account, the app may prompt you to create one. Follow the instructions to set up an account using your email address and a password.
- Link your Bridge to your Philips Hue account: If the Bridge is not already linked to your account, follow the on-screen instructions to link it. This step may involve pressing the button on the Bridge once.
- Verify your account and Bridge connection: The app will verify the connection between your account and Bridge. This process may take a few moments.
- Complete the setup: Once the verification is successful, you have completed the setup of remote access with Philips Hue.
With remote access set up, you can now control your Philips Hue lights from anywhere using the Philips Hue app or other compatible devices. This allows you to adjust the lighting brightness, colors, and scenes, giving you the flexibility to create the desired ambiance, even when you’re not physically present in your home.
Control your Philips Hue lights remotely
One of the great advantages of setting up Philips Hue is the ability to control your lights remotely. Whether you’re at work, on vacation, or simply away from your Philips Hue Bridge, you can still have full command over your lights using various methods. Here’s how to control your Philips Hue lights remotely:
- Use the Philips Hue app: The most straightforward way to control your lights remotely is through the official Philips Hue app. Simply launch the app on your smartphone or tablet, ensure you’re connected to the internet, and you’ll have access to all your connected lights. From the app, you can adjust the brightness, change the colors, and create customized lighting scenes.
- Utilize voice control: If you have a voice assistant device such as Amazon Echo or Google Home, you can control your Philips Hue lights remotely using voice commands. Make sure your voice assistant and Philips Hue Bridge are connected and set up properly. Then, simply speak the commands such as “Hey, [voice assistant], turn on/off the living room lights” or “Set the bedroom lights to blue.”
- Smart home integration: If you have a smart home system or hub like Apple HomeKit, Samsung SmartThings, or Amazon Alexa, you can integrate your Philips Hue lights into the system. This allows you to control your lights remotely through the respective smart home app or using voice commands through the connected voice assistant.
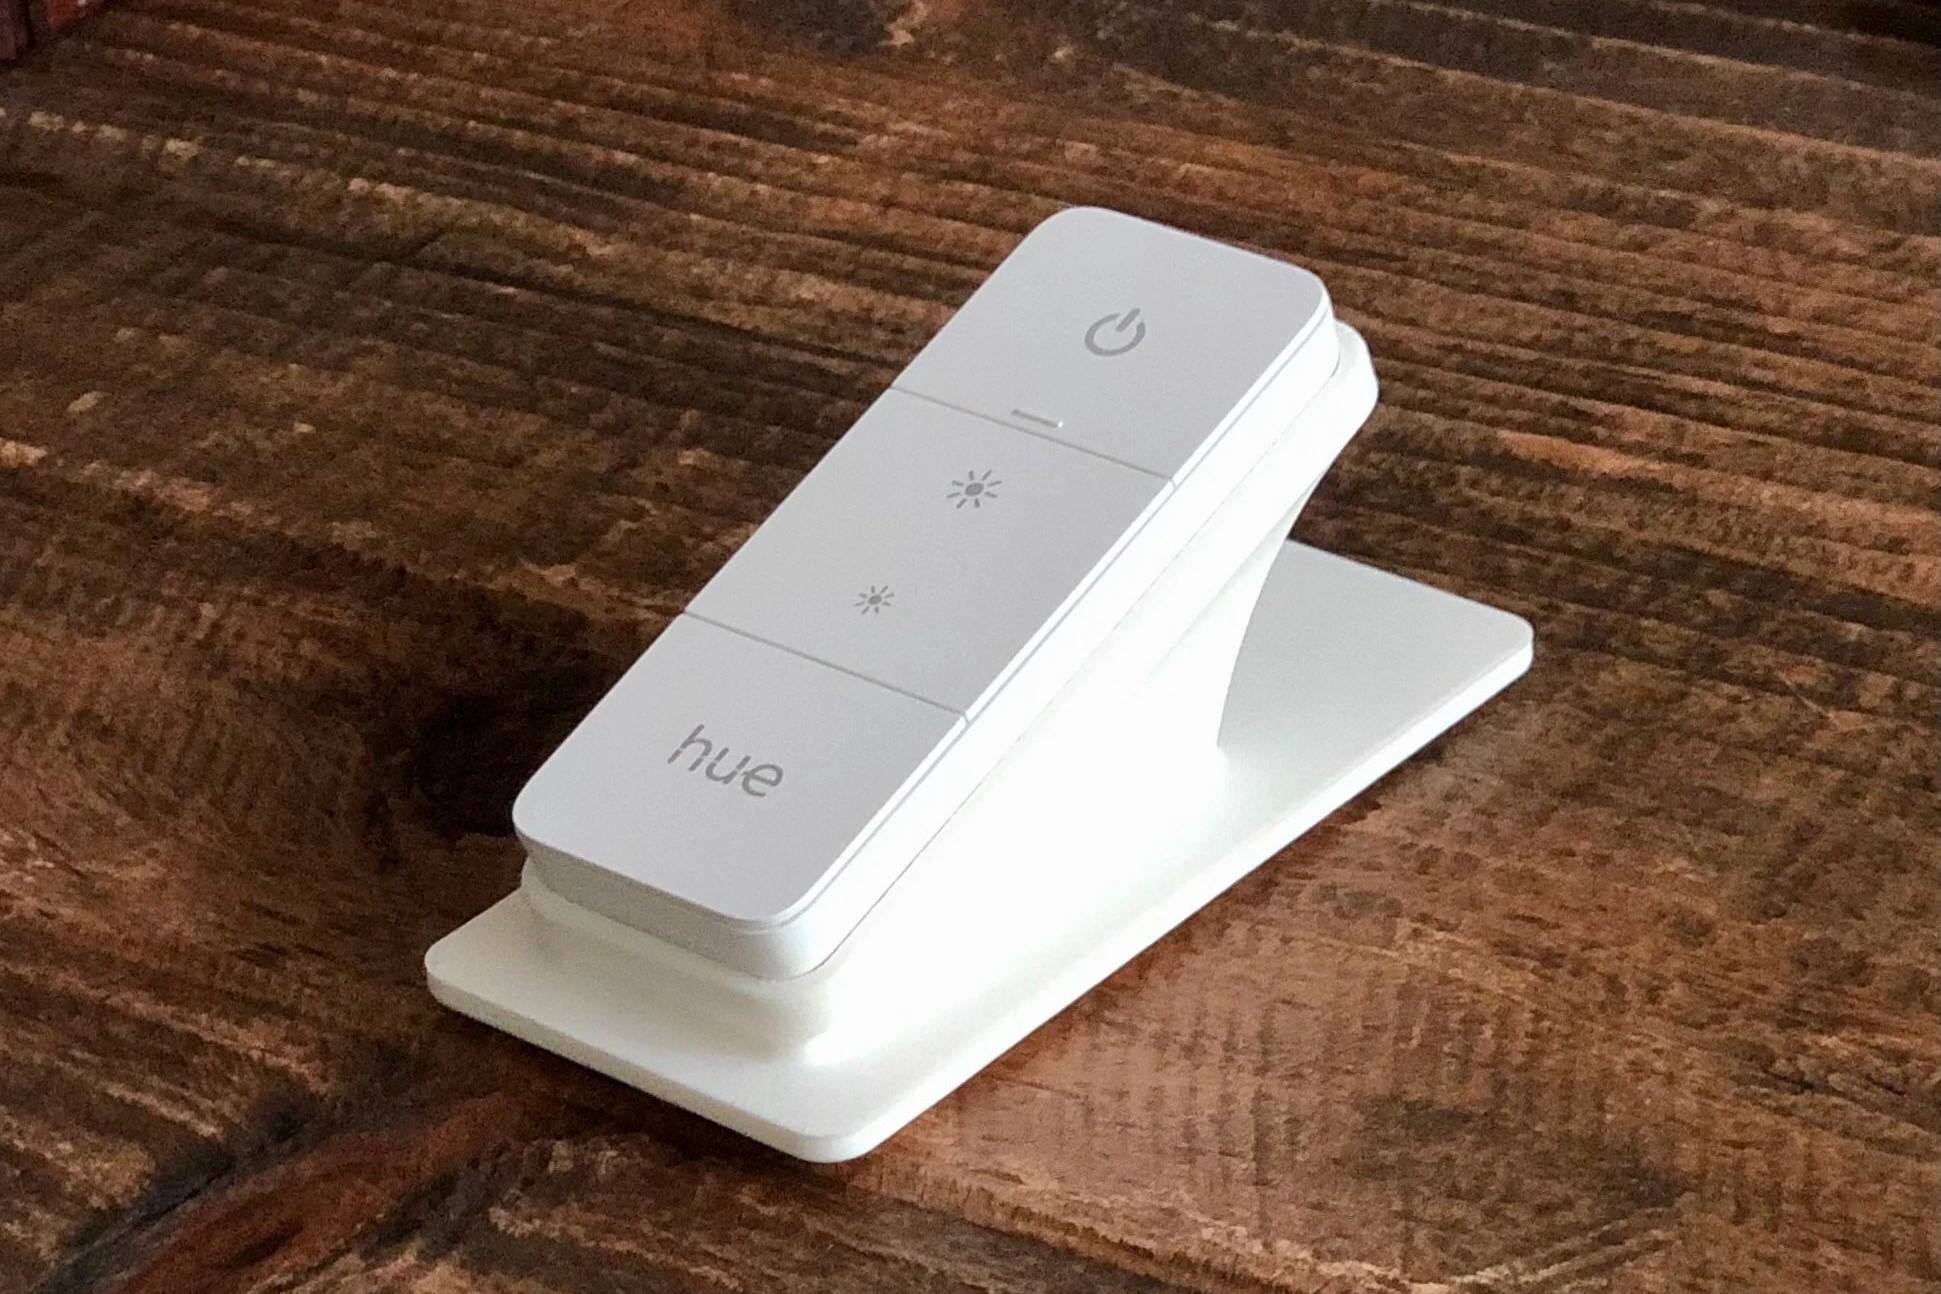
- Remote control accessories: Philips Hue offers various remote control accessories that allow you to manage your lights remotely. These accessories, such as the Philips Hue Dimmer Switch or Philips Hue Tap, are battery-powered and can be placed anywhere in your home. With these accessories, you can turn your lights on or off, adjust brightness, and cycle through preset scenes without needing your smartphone or app.
- Schedule lighting routines: With the Philips Hue app, you can set up schedules or routines to automate your lighting. Create a schedule to turn on specific lights at a certain time every day or program them to simulate your presence while you’re away. This way, your lights will turn on and off at pre-determined times, giving the illusion that someone is home.
By utilizing these methods, you can easily control your Philips Hue lights remotely, adding convenience, security, and personalization to your lighting experience. Whether it’s adjusting the lights to provide a warm welcome upon arrival or ensuring your home looks occupied when you’re away, remote control of your Philips Hue lights gives you complete flexibility and control over your lighting system.
Customize your lighting settings
One of the key benefits of the Philips Hue lighting system is the ability to customize your lighting settings to suit your preferences and create the perfect ambiance in your space. Here are some ways you can customize your lighting settings with Philips Hue:
- Adjust brightness: Whether you want bright, vibrant lighting or a soft, cozy glow, you can easily adjust the brightness of your Philips Hue lights. Using the Philips Hue app or compatible accessories, you can dim or brighten the lights to create the desired atmosphere.
- Choose colors: Philips Hue offers a range of color options, allowing you to personalize your lighting setup. Select from millions of colors and create dynamic lighting effects to match your mood or theme. Experiment with different color combinations to find your favorites.
- Create lighting scenes: With the Philips Hue app, you can capture and save your preferred lighting settings as scenes. Create scenes for different occasions, such as “Movie Night,” “Romantic Dinner,” or “Energize,” and easily switch between them to set the desired ambiance with just a tap.
- Sync lights with music and movies: Turn your living room into a mini theater by syncing your Philips Hue lights with your music or movies. With apps like Philips Hue Sync or third-party integrations, the lights can dynamically change colors and brightness based on the audio or video playing, enhancing your entertainment experience.
- Set timers and schedules: Take advantage of the timer and scheduling features to automate your lighting. Whether it’s setting your lights to gradually brighten in the morning to simulate a natural sunrise or automatically turning on certain lights at sunset, you can customize schedules to match your daily routine.
- Location-based control: Philips Hue can also utilize your smartphone’s location to control your lights. With geofencing, you can set up automatic lighting changes when you enter or leave a designated area. For example, your lights can turn on when you arrive home and turn off when you leave.
- Explore third-party apps and integrations: Philips Hue has a vast ecosystem of third-party apps and integrations that expand the possibilities of customization. From apps that offer pre-programmed dynamic lighting effects to integrations with smart home systems, there are endless options to personalize your lighting experience.
By customizing your lighting settings with Philips Hue, you can transform any space into a personalized oasis. Whether you want a calming environment for relaxation or vibrant colors to energize your space, the flexibility and versatility of Philips Hue allow you to create the perfect lighting ambiance to enhance your mood and activities.
Utilize the different lighting scenes
Philips Hue provides a variety of pre-designed lighting scenes that can easily transform the ambiance of your space with just a few taps. These scenes are carefully crafted combinations of colors and brightness levels that can set the mood for different activities or match specific occasions. Here’s how you can make the most of the different lighting scenes offered by Philips Hue:
- Explore the default scenes: The Philips Hue app comes with a selection of default scenes to get you started. These scenes include options like “Savanna Sunset,” “Arctic Aurora,” and “Spring Blossoms.” Take a moment to browse through these scenes and see which ones resonate with your preferences.
- Create your own scenes: In addition to the default scenes, you can also create your own customized scenes. Use the Philips Hue app to experiment with different combinations of colors and brightness levels to craft scenes that match your unique style and desired atmosphere.
- Set scenes for different activities: Consider the activities that take place in each room of your home and choose scenes accordingly. For instance, you might prefer a calming scene with cool blue tones for reading in the bedroom, while a vibrant and energizing scene can be suitable for a home workout space.
- Select scenes for special occasions: Philips Hue offers special scene collections for holidays and occasions like Halloween, Christmas, and birthdays. Take advantage of these seasonal scene collections to enhance the festive spirit and create a memorable lighting experience.
- Sync scenes with daily routines: Create scenes that complement your daily routines. For instance, a “Morning Boost” scene with bright white light can help you wake up and feel more energized, while a “Goodnight” scene with warm dimmed light can signal relaxation and prepare you for sleep.
- Explore third-party scene creators: Philips Hue has an active community of developers who create third-party apps and platforms that offer additional scene options. These apps allow you to discover a wide range of user-generated scenes or even sync your lights with games, movies, or music.
- Adjust scenes based on the time of day: To enhance the natural lighting rhythm of your day, consider setting scenes that change automatically based on the time of day. Utilize the scheduling feature in the Philips Hue app to gradually shift the colors and brightness levels as the day progresses.
By utilizing the different lighting scenes offered by Philips Hue, you can effortlessly transform your space to match your mood, activities, and special occasions. Whether you want to create a relaxing sanctuary, host a lively gathering, or simply enhance your daily routines, the versatility of lighting scenes allows you to customize the perfect ambiance with simplicity and style.
Use voice control with Philips Hue
Philips Hue lights can be seamlessly integrated with popular voice assistants, such as Amazon Alexa, Google Assistant, and Apple Siri, allowing you to control your lights using simple voice commands. Voice control adds a new level of convenience and hands-free operation to your lighting setup. Here’s how you can utilize voice control with Philips Hue:
- Set up your voice assistant: Make sure your voice assistant device, such as an Amazon Echo or Google Home, is properly set up and connected to your Philips Hue Bridge. Follow the manufacturer’s instructions to link the devices together.
- Enable the Philips Hue skill or action: For Alexa users, enable the “Philips Hue skill” in the Alexa app. For Google Assistant users, link the Philips Hue “action” in the Google Home app. This allows your voice assistant to communicate with your Philips Hue lights.
- Sync devices: Once the skill or action is enabled, sync your devices by following the on-screen instructions. This will establish the connection between your voice assistant and Philips Hue lights.
- Invoke voice commands: Use simple voice commands to control your lights. For example, say “Turn on the living room lights,” “Dim the bedroom lights to 50%,” or “Change the kitchen lights to blue.”
- Group lights for simultaneous control: Create groups or rooms within your voice assistant app to control multiple lights with a single command. This allows you to control specific areas in your home, such as saying “Turn off all the lights in the living room.”
- Adjust brightness and colors: Voice commands can also be used to adjust the brightness or change the colors of your lights. Simply say “Dim the lights to 30%” or “Set the lights to red.”
- Activate pre-set scenes: If you have pre-set scenes in the Philips Hue app, you can activate them using voice commands. For example, say “Activate the Relax scene” to create a soothing ambiance instantly.
- Combine voice commands with other actions: Take advantage of the flexibility of voice control by combining it with other smart home actions. For example, you can say “Goodnight” to your voice assistant, which can trigger a series of actions, including turning off all the lights in your home.
By using voice control with Philips Hue, you can easily manage and personalize your lighting without the need for a physical remote or smartphone app. Whether you’re relaxing on the couch, cooking in the kitchen, or getting ready for bed, voice control allows you to effortlessly command your lights and create the desired ambiance with just the sound of your voice.
Create schedules for your Philips Hue lights
One of the key features of Philips Hue is the ability to create schedules for your lights. With schedules, you can automate when your lights turn on, off, or even change colors throughout the day. Creating schedules not only adds convenience but also enhances security and energy efficiency. Here’s how you can create schedules for your Philips Hue lights:
- Open the Philips Hue app: Launch the Philips Hue app on your smartphone or tablet.
- Select the “Routines” or “Schedules” tab: Navigate to the “Routines” or “Schedules” section within the app, which is typically located in the bottom navigation menu.
- Create a new schedule: Tap on the “+” or “Add” button to create a new schedule.
- Choose the lights: Select the specific lights or rooms that you want to include in the schedule.
- Select the days and times: Set the days and times when you want the schedule to activate. You can choose specific days of the week or set it to repeat daily.
- Set the actions: Select the actions you want to occur at the scheduled time. This can include turning the lights on or off, adjusting brightness, or even changing colors.
- Configure additional settings: Depending on the app, you may have the option to further customize the schedule. This may include gradual fade-in or fade-out durations, randomize settings for a natural appearance, or syncing with sunrise and sunset times.
- Save the schedule: Once you’ve set all the desired parameters, save the schedule.
- Review and manage schedules: In the app, you can review and manage previously created schedules. You can edit, delete, or disable schedules as needed.
By creating schedules for your Philips Hue lights, you can effortlessly automate your lighting to match your daily routine. For example, you can set the lights to turn on gradually in the morning, simulating a natural sunrise. In the evening, you can have them automatically dim and turn off at a specific time, helping you wind down for bedtime. This not only adds convenience but also helps in energy conservation by ensuring the lights are only on when needed.
Schedules are also useful for enhancing home security when you’re away. You can set the lights to turn on and off at different times to mimic occupancy, giving the impression that someone is home even when you’re not. This can be a valuable deterrent to potential burglars.
With the ability to create personalized schedules, Philips Hue enables you to have seamless control over your lighting, allowing you to effortlessly enhance your daily routines, improve energy efficiency, and add security to your home.
Set up geofencing for automatic lighting control
Geofencing is a powerful feature offered by Philips Hue that allows you to automate lighting controls based on your location. By utilizing the GPS capabilities of your smartphone, geofencing can detect when you enter or leave a designated area, triggering automatic lighting changes. Setting up geofencing for your Philips Hue lights adds convenience, energy efficiency, and a touch of magic to your home automation. Here’s how you can set up geofencing:
- Open the Philips Hue app: Launch the Philips Hue app on your smartphone or tablet.
- Navigate to settings: Tap on the settings icon, usually represented by a gear or three dots, located in the top corner of the app.
- Choose “Home & Away” or “Geofencing” settings: Look for the “Home & Away” or “Geofencing” option within the settings menu and select it.
- Enable geofencing: Toggle the switch or select the option to enable geofencing for your lights.
- Define your home location: Use the app’s interface to set your home location. You can do this by dropping a pin on the map or by selecting your home address. Make sure the location is accurate.
- Set up the geofence radius: Adjust the geofence radius to determine the range for the automatic lighting controls. This radius should cover the area where you want the lights to adjust based on your presence.
- Choose the desired actions: Configure the lighting actions that should occur when you enter or leave the geofence area. For example, you can set the lights to turn on when you arrive or turn off when you leave.
- Review and save the settings: Double-check your settings, making sure the parameters are correct. Save the geofencing settings to activate the feature.
Once geofencing is set up, Philips Hue will use the location data from your smartphone to automatically trigger lighting changes based on your presence. When you enter the geofence area (usually your home), the lights can turn on or adjust to your preferred settings. Conversely, when you leave the geofence area, the lights can turn off or switch to a power-saving mode. This automation eliminates the need to manually control your lights and ensures energy efficiency by only using lighting when you’re present.
Geofencing can also be combined with other home automation features. For example, you can synchronize your geofencing with your smart thermostat or security system, ensuring the lights adjust alongside temperature changes or security modes.
With geofencing set up for your Philips Hue lights, you can enjoy effortless control and automation that aligns perfectly with your comings and goings, enhancing both convenience and energy efficiency in your smart home.
Sync your Philips Hue lights with your entertainment system
Syncing your Philips Hue lights with your entertainment system enhances your overall sensory experience by extending the immersive effects of movies, music, and games beyond the screen or speakers. By synchronizing your lights with your entertainment system, you can create dynamic lighting effects that match the mood and action of the content you’re enjoying. Here’s how to sync your Philips Hue lights with your entertainment system:
- Ensure your Philips Hue Bridge is connected and set up: Make sure your Philips Hue Bridge is properly connected to your Wi-Fi network and linked to the Philips Hue app or compatible control platform.
- Install the Philips Hue Sync app: Download and install the Philips Hue Sync app on your computer or gaming console. This app allows you to sync the lighting effects with your entertainment system.
- Launch the Philips Hue Sync app: Open the app on your device and follow the on-screen instructions to set it up for syncing with your lights.
- Choose your entertainment source: Select the source of your entertainment, such as your computer, gaming console, or television, within the Philips Hue Sync app.
- Configure the lighting mode: Set the lighting mode based on your preference. The app typically offers options like “Video,” “Music,” and “Game” to match the content you’re enjoying.
- Customize the lighting intensity and color palette: Adjust the intensity and color palette of the synced lighting effects to your liking. Experiment with different settings to find the best combination.
- Start your entertainment: Begin playing your desired movie, music, or game on your entertainment system.
- Enjoy synchronized lighting effects: As the content plays, your Philips Hue lights will sync with the visuals or sound, creating dynamic lighting effects that match the mood, colors, and intensity of what you’re experiencing.
Syncing your Philips Hue lights with your entertainment system adds an extra layer of immersion to your entertainment experience. Whether you’re watching a thrilling movie, listening to energizing music, or engaging in intense gaming, the synchronized lighting effects enhance the overall atmosphere and make the experience more captivating.
Aside from the Philips Hue Sync app, there are also third-party apps and integrations available that offer additional capabilities for syncing your lights with your entertainment system. These apps often provide more customization options and even the ability to sync with specific games, music visualizers, or media players.
By syncing your Philips Hue lights with your entertainment system, you can elevate your entertainment experience to new heights, turning ordinary moments into extraordinary sensory journeys.
Troubleshoot common issues with remote control of Philips Hue
While remote control of Philips Hue lights is generally a seamless and convenient experience, there can be occasional issues that arise. Here are some common problems you may encounter and troubleshooting tips to help resolve them:
- Ensure proper internet connectivity: Remote control of Philips Hue lights requires a stable internet connection. Make sure your Philips Hue Bridge is connected to your Wi-Fi network and that your smartphone or tablet has a reliable internet connection.
- Check Bridge connectivity: Confirm that your Philips Hue Bridge is connected and functioning properly. Ensure that the Bridge’s LED indicator is solid, indicating a successful connection. If it’s not, try power cycling the Bridge by unplugging it for a few seconds and then plugging it back in.
- Reconnect the Philips Hue app: If you’re experiencing issues with remote control through the Philips Hue app, try closing the app and reopening it. If that doesn’t solve the problem, try force quitting the app and relaunching it. If issues persist, consider uninstalling and reinstalling the app.
- Check Bridge firmware: Ensure that your Philips Hue Bridge is running the latest firmware version. Open the Philips Hue app, go to settings, and check for any available firmware updates. Install any pending updates and test remote control again.
- Power cycle your lights: If your Philips Hue lights are unresponsive to remote control, try power cycling them by turning them off and on again at the switch or unplugging and plugging them back in. This can help refresh the connection and resolve any temporary issues.
- Reconnect lights to the Bridge: If certain lights are not being recognized by the Bridge, try resetting them and adding them back to the system. Follow the instructions provided with the lights to perform a reset, and then use the Philips Hue app to search for and add them again.
- Check device compatibility: Ensure that your smartphone or tablet is compatible with the Philips Hue system and meets the necessary requirements. Check for updates to your device’s operating system and ensure that you have the latest version installed.
- Verify account and Bridge connection: Double-check that your account is properly linked to your Philips Hue Bridge. Open the Philips Hue app and verify the connection status. If necessary, go through the account linking process again.
- Reset and reconfigure geofencing: If you’re experiencing issues with geofencing and automatic lighting control based on your location, try resetting the geofencing settings in the Philips Hue app. Remove the existing geofence and set it up again, making sure the location and radius are configured correctly.
- Contact Philips Hue support: If you’ve tried the above troubleshooting steps and are still encountering issues with remote control of your Philips Hue lights, it’s recommended to contact the Philips Hue customer support team for further assistance. They will be able to provide specific guidance based on your situation.
By following these troubleshooting tips, you can address common issues and ensure smooth remote control of your Philips Hue lights. Remember to stay patient and thorough in your troubleshooting, as often a simple solution can get things back on track.