
Exploring the Philips Hue System
The Philips Hue system is a smart lighting solution that allows you to control the ambiance and color of your lights through a mobile app or voice commands. This innovative system uses LED bulbs and a bridge which acts as a central hub to connect your lights to your home network and the internet. With Philips Hue, you can create personalized lighting scenes, automate your lights, and even control them remotely when you’re away from home.
One of the main features of the Philips Hue system is the ability to adjust the color of your lights. Whether you want to create a warm, cozy atmosphere or a vibrant, colorful setting, the Philips Hue bulbs can transform your space to match your mood or occasion. The system offers a wide range of colors and shades to choose from, allowing for endless possibilities in lighting customization.
Another advantage of the Philips Hue system is its compatibility with smart assistants such as Amazon Alexa, Google Assistant, and Apple HomeKit. This means you can control your lights with simple voice commands, making it even easier to change the lighting in your home. You can ask your smart assistant to dim the lights, change the color, or even turn them on and off with just your voice.
With the Philips Hue app, you have complete control over your lights. The app allows you to create customized lighting scenes, where you can save specific brightness levels and colors for different occasions. For example, you can set a relaxing scene for movie nights or a vibrant scene for parties. The app also offers scheduling options, so you can automate your lights to turn on and off at specific times, simulating your presence even when you’re not at home.
One of the standout features of the Philips Hue system is its remote access capability. With the Philips Hue Bridge connected to the internet, you can control your lights from anywhere in the world using the Philips Hue app. This means that even if you’re on vacation or away for work, you can easily turn your lights on and off to give the appearance that someone is home. It provides peace of mind and adds an extra layer of security to your home.
The Philips Hue system is designed to be easy to set up and use, making it accessible to users of all technical levels. With its wide range of features and compatibility with smart assistants, it offers a seamless and convenient lighting solution for any modern home. Whether you want to create a cozy atmosphere, set the mood for a party, or enhance your home security, the Philips Hue system provides a versatile and customizable lighting experience.
Setting Up the Philips Hue Bridge
The Philips Hue Bridge is a crucial component of the Philips Hue system that acts as a central hub to connect your smart lights to your home network and the internet. Setting up the bridge is the first step in getting started with Philips Hue, and it’s a straightforward process.
To set up the Philips Hue Bridge, follow these steps:
- Unbox the Philips Hue Bridge and plug it into a power outlet near your Wi-Fi router.
- Use the included Ethernet cable to connect the bridge to your router. Ensure that the connection is secure.
- Download the Philips Hue app from the App Store or Google Play Store on your smartphone or tablet.
- Open the app and follow the on-screen instructions to set up an account.
- Once your account is created, the app will guide you through the process of adding the bridge to your network.
- Make sure your smartphone or tablet is connected to the same Wi-Fi network that your bridge will be connected to.
- In the app, select ‘Add Bridge’ and follow the instructions to find and connect to the bridge.
- The app will search for the bridge and establish a connection. Once connected, you will see the bridge listed in the app.
- Navigate through the app’s setup wizard, which will ask you to assign a location to the bridge and create a username.
- Once the setup wizard is complete, you are ready to start adding and controlling your Philips Hue lights.
It’s important to note that the bridge must remain connected to the power outlet and router at all times to ensure proper functionality. If you disconnect the bridge or lose power, you may need to repeat the setup process.
Setting up the Philips Hue Bridge is a quick and straightforward process that allows you to unlock the full potential of the Philips Hue system. Once the bridge is set up and connected to your network, you can start adding and controlling your lights through the Philips Hue app or by voice commands with compatible smart assistants. With the bridge in place, you can fully personalize your lighting experience and enjoy the convenience and versatility that Philips Hue has to offer.
Configuring the Philips Hue App
The Philips Hue app is the control center for your Philips Hue system. It allows you to easily configure and customize your lights, create personalized scenes, schedule lighting changes, and more. Configuring the Philips Hue app is essential to fully utilize the features of your smart lights.
Here are the steps to configure the Philips Hue app:
- Download and install the Philips Hue app from the App Store or Google Play Store, depending on your device.
- Open the app and sign in to your Philips Hue account. If you don’t have an account yet, you can create one during the setup process.
- Once signed in, the app will automatically search and connect to your Philips Hue Bridge if it’s on the same Wi-Fi network.
- Follow the on-screen instructions to complete the setup process. This includes naming your bridge, creating custom rooms or areas, and assigning lights to specific locations within your home.
- After the initial setup, you can start exploring the various features of the app.
The Philips Hue app offers a user-friendly interface that allows you to control individual lights, groups of lights, or entire rooms at the touch of a button. You can easily adjust the brightness, color, and intensity of each light, creating the perfect ambiance for any occasion.
One of the highlights of the Philips Hue app is the ability to create personalized lighting scenes. Scenes are pre-set combinations of light colors and brightness levels that you can save and easily activate with a single tap. You can create scenes for different activities, such as reading, watching movies, or hosting a dinner party.
The app also provides the option to schedule lighting changes. You can set your lights to turn on and off at specific times, mimicking your daily routines or creating the illusion of occupancy when you’re away from home. This feature adds both convenience and an extra layer of security to your home.
Furthermore, the Philips Hue app integrates with various smart assistants, such as Amazon Alexa, Google Assistant, and Apple HomeKit. This means you can control your lights with simple voice commands. Just ask your assistant to turn on the lights, change their color, or adjust the brightness, and your lights will respond accordingly.
Configuring the Philips Hue app is crucial to unlock the full potential of your Philips Hue system. By personalizing your lighting settings, creating scenes, and utilizing scheduling features, you can create the perfect lighting environment for every moment in your home.
Creating a Philips Hue Account
Creating a Philips Hue account allows you to have full control over your Philips Hue smart lighting system. The account serves as a central hub that connects your lights, bridge, and app together, enabling seamless control and customization. Setting up a Philips Hue account is a simple process that can be done within the Philips Hue app.
Follow these steps to create a Philips Hue account:
- Download and install the Philips Hue app from the App Store or Google Play Store on your smartphone or tablet.
- Open the app and tap on the “Sign Up” or “Create Account” option.
- You will be prompted to provide your email address and a secure password. Fill in the required information and tap “Next”.
- Agree to the terms of service and privacy policy by checking the corresponding box.
- Complete the verification process by following the instructions sent to your email address.
- Once your account is verified, return to the app and sign in using your newly created credentials.
- During the initial setup, you may be prompted to connect to your Philips Hue Bridge.
- Follow the on-screen instructions to connect your bridge to your account, which will allow for seamless control and management of your lights.
A Philips Hue account provides a range of benefits and features. Firstly, it allows you to sync your lights with multiple devices. This means that you can control your Philips Hue lights using different smartphones or tablets, as long as they are signed in to the same Philips Hue account.
Furthermore, having a Philips Hue account enables cloud-based synchronization. This feature allows you to access and control your lights even when you are away from home, giving you the flexibility to manage your lighting from anywhere in the world.
Creating a Philips Hue account also unlocks additional features and app functionalities. For example, it enables the use of third-party apps or integrations, which can enhance the overall experience and provide more advanced control options for your lights. Additionally, having an account allows you to receive firmware updates that improve the performance and compatibility of your Philips Hue system.
A Philips Hue account is essential for maximizing the functionality and customization of your Philips Hue smart lighting system. By following the simple steps outlined above, you can create an account and gain access to the full range of features offered by the Philips Hue app.
Connecting Philips Hue to Your Home Network
Connecting your Philips Hue system to your home network is a crucial step in ensuring that your smart lights can communicate with your smartphone, tablet, or other connected devices. By establishing this connection, you can have full control over your lights and access a wide range of features and functionalities. Here’s how you can connect Philips Hue to your home network:
- Connect the Philips Hue Bridge to a power outlet using the provided power adapter.
- Connect the bridge to your Wi-Fi router using an Ethernet cable. Ensure that the connection is secure.
- Open the Philips Hue app on your smartphone or tablet, and make sure your device is connected to the same Wi-Fi network you want to connect your Philips Hue system to.
- Follow the on-screen instructions in the app to set up an account or log in with your existing account information.
- Tap on the “Add Bridge” option in the app to initiate the process of connecting the bridge to your network.
- The app will search for any available bridges on your network. Once it finds the bridge, select it to continue.
- Confirm the connection by following the prompts and allowing the app to pair with the bridge.
- Once the connection is established, the app will notify you that the Philips Hue system is connected to your home network.
It’s worth noting that your Philips Hue Bridge needs to be connected to your home network at all times to ensure proper functionality. If the bridge gets disconnected or loses power, you may need to repeat the connection process.
Once Philips Hue is connected to your home network, you gain access to a plethora of features. You can control your lights using the Philips Hue app, create personalized lighting scenes, schedule lighting changes, and even integrate your smart lights with other smart home devices and platforms.
By connecting Philips Hue to your home network, you open the door to endless possibilities in creating the perfect lighting atmosphere in your home. Whether you want to set the mood for a cozy movie night or brighten up a space for a social gathering, having your Philips Hue lights connected to your network ensures that you have complete control and flexibility in managing your lighting experience.
Connecting Philips Hue to the Internet
In order to fully unlock the capabilities of your Philips Hue smart lighting system, it is essential to connect it to the internet. Connecting Philips Hue to the internet expands the functionality of your lights, allowing you to control them remotely and unlock additional features. Here’s how you can connect Philips Hue to the internet:
- Ensure that your Philips Hue Bridge is connected to your home network and powered on.
- Open the Philips Hue app on your smartphone or tablet.
- If you have already set up an account, sign in. Otherwise, create a new account following the prompts provided by the app.
- In the app, navigate to the settings or bridge setup section.
- Look for the option to connect your Philips Hue system to the internet.
- Follow the instructions provided in the app to complete the connection process.
- If necessary, press the button on the top of your Philips Hue Bridge to initiate the connection.
- Wait for the app to confirm that your Philips Hue system is successfully connected to the internet.
Once Philips Hue is connected to the internet, you gain several advantages. Firstly, it allows you to control your lights when you are away from home. With the Philips Hue app, you can remotely turn your lights on or off, adjust their brightness and color, and even set up schedules, providing you with convenience and added security.
Connecting Philips Hue to the internet also enables integration with other smart home platforms and devices. By connecting your smart lighting system to platforms such as Amazon Alexa, Google Assistant, or Apple HomeKit, you can control your lights with voice commands and create personalized lighting experiences that seamlessly integrate with other smart devices in your home.
Furthermore, internet connectivity allows your Philips Hue system to receive firmware updates. These updates improve the performance and compatibility of your smart lights, ensuring that you always have access to the latest features and enhancements.
Connecting Philips Hue to the internet opens up a world of possibilities in terms of functionality and convenience. By enabling remote control, integration with smart home platforms, and firmware updates, you can make the most out of your smart lighting system and create a truly personalized and immersive lighting experience in your home.
Accessing Philips Hue Away from Home
One of the standout features of the Philips Hue smart lighting system is the ability to access and control your lights even when you are away from home. By connecting your Philips Hue system to the internet, you gain the convenience and flexibility of managing your lights remotely. Here’s how you can access Philips Hue away from home:
- Ensure that your Philips Hue system is connected to the internet and that your lights are connected to the Philips Hue Bridge.
- Download and install the Philips Hue app on your smartphone or tablet, if you haven’t already.
- Launch the app on your device and sign in to your Philips Hue account.
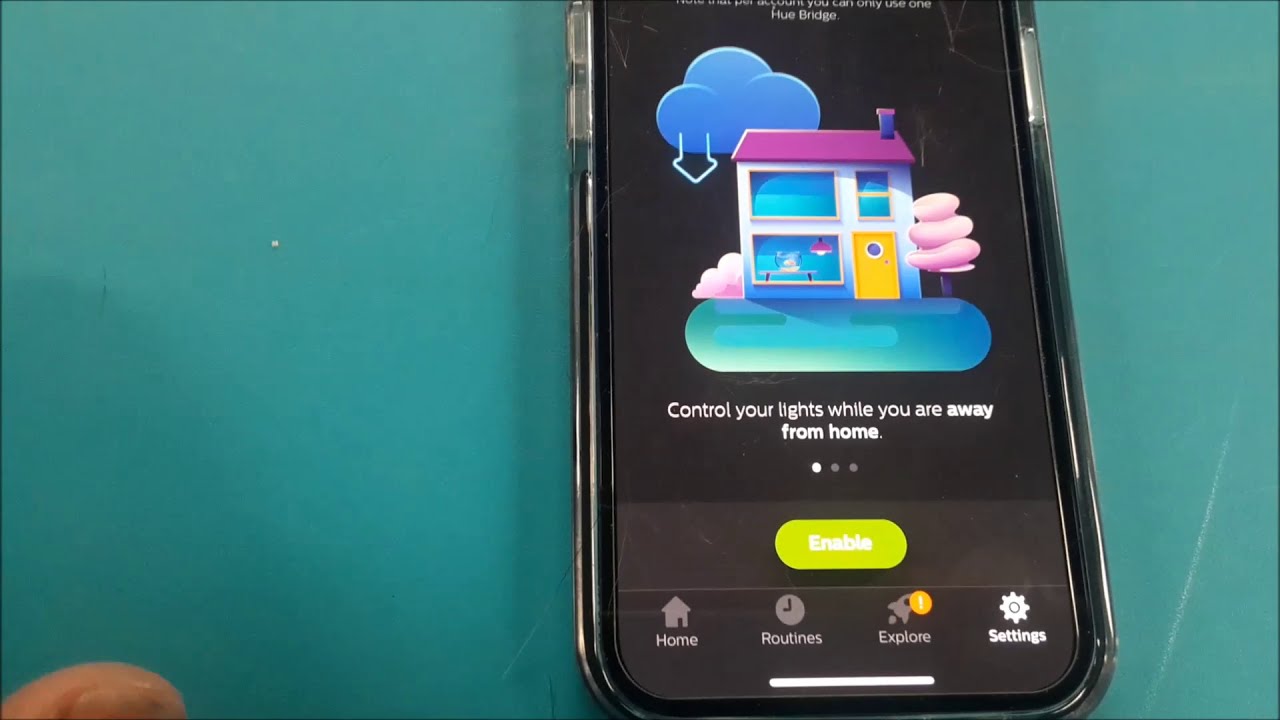
- If necessary, set up remote access in the app. This is typically done during the initial setup process.
- Once remote access is enabled, you can control your Philips Hue lights from anywhere in the world as long as you have an internet connection.
To access your Philips Hue lights while you are away, open the Philips Hue app on your smartphone or tablet and navigate to the control screen. From there, you can turn lights on or off, dim or brighten them, change colors, and even create or activate pre-set lighting scenes.
Remote access to your Philips Hue lights not only provides convenience but also offers enhanced security. By being able to control your lights while you are away from home, you can create the appearance that someone is present, deterring potential burglars and keeping your home secure.
Additionally, remote access allows you to manage your lights when unexpected situations arise. Whether you forgot to turn off the lights before leaving home or want to create a welcoming environment for your return, accessing Philips Hue away from home gives you the flexibility to adjust your lighting to suit your needs.
It’s important to note that remote access requires a stable internet connection for both your Philips Hue Bridge and your smartphone or tablet. Ensure that your devices are connected to a reliable Wi-Fi network or have a strong cellular data connection for proper functionality.
With the ability to access Philips Hue away from home, you can enjoy the convenience, flexibility, and added security that smart lighting provides. Whether you’re on vacation or simply away for the day, you have full control over your lighting environment at your fingertips.
Linking Philips Hue with a Smart Assistant
One of the great advantages of the Philips Hue smart lighting system is its compatibility with popular smart assistants, such as Amazon Alexa, Google Assistant, and Apple HomeKit. Linking your Philips Hue lights with a smart assistant allows you to control your lights using voice commands, adding a new level of convenience and hands-free control. Here’s how you can link Philips Hue with a smart assistant:
- Make sure you have a smart assistant device, such as an Amazon Echo, Google Home, or Apple HomePod, set up and connected to your Wi-Fi network.
- Open the respective smart assistant app on your smartphone or tablet and ensure it is connected to your smart assistant device.
- Open the Philips Hue app and navigate to the settings or bridge setup section.
- Select the option to add a new smart device or integration.
- Choose the type of smart assistant you want to link with Philips Hue (e.g., Amazon Alexa, Google Assistant, Apple HomeKit).
- Follow the on-screen instructions to complete the linking process.
- You may be prompted to sign in to your smart assistant account and authorize access to your Philips Hue lights.
- Once the linking process is complete, your Philips Hue lights should appear as devices within your smart assistant app.
After linking Philips Hue with a smart assistant, you can control your lights using simple voice commands. For example, you can say “Hey Google, turn on the living room lights,” or “Alexa, dim the bedroom lights to 50%.” Your smart assistant will communicate with the Philips Hue system and adjust your lights accordingly.
Linking Philips Hue with a smart assistant offers a seamless and convenient way to control your lights. It eliminates the need for manual control through the app or physical switches, allowing you to effortlessly adjust the lighting in your home with just your voice.
Furthermore, linking with a smart assistant opens up possibilities for automating your lighting. You can integrate your Philips Hue lights with other smart devices in your home, creating custom routines and triggers. For example, you can set up a routine that turns on your lights when you arrive home or have them automatically dim when you start watching a movie.
It’s important to note that the process of linking Philips Hue with a smart assistant may vary slightly depending on the brand and model of your smart assistant and the corresponding app. Refer to the specific instructions provided by your smart assistant and Philips Hue app for accurate linking guidance.
By linking Philips Hue with a smart assistant, you can enjoy a more intuitive and personalized smart lighting experience that seamlessly integrates with your home automation system. With voice control at your disposal, you can effortlessly create the perfect lighting ambiance in your home.
Enabling Philips Hue Remote Access
Enabling remote access for your Philips Hue smart lighting system allows you to control your lights from anywhere using the Philips Hue app, even when you are away from home. Remote access enhances the flexibility and convenience of managing your lights, providing you with seamless control no matter where you are. Here’s how you can enable remote access for Philips Hue:
- Ensure that your Philips Hue Bridge is connected to both your home network and the internet.
- Open the Philips Hue app on your smartphone or tablet.
- Sign in to your Philips Hue account, or create a new account if you haven’t already.
- In the app, navigate to the settings or bridge setup section.
- Look for the option to enable remote access.
- Follow the on-screen instructions to enable remote access for your Philips Hue system.
- Once enabled, you will be able to control your lights remotely using the Philips Hue app.
Enabling remote access for Philips Hue opens up a world of possibilities for managing your smart lights when you are away. With remote access, you can turn your lights on or off, adjust their brightness and color, and activate pre-set lighting scenes, all from the convenience of your smartphone or tablet.
Remote access is particularly useful for providing the illusion of occupancy when you’re not at home. By controlling your lights remotely, you can create the appearance that someone is present, enhancing your home security and providing peace of mind while you’re away.
It’s important to note that enabling remote access requires a stable internet connection for both your Philips Hue Bridge and your smartphone or tablet. Ensure that both devices are connected to a reliable Wi-Fi network or have a strong cellular data connection for proper functionality.
Additionally, it’s essential to protect your remote access by using a strong and unique password for your Philips Hue account. This helps ensure the security and privacy of your smart lighting system.
By enabling remote access for your Philips Hue smart lighting system, you can take full control of your lights no matter where you are. This feature adds convenience, customization, and security to your lighting experience, allowing you to enjoy the benefits of smart lighting from anywhere in the world.
Using a Virtual Private Network (VPN) with Philips Hue
Using a Virtual Private Network (VPN) with your Philips Hue smart lighting system adds an extra layer of security and privacy, especially when accessing your lights remotely. A VPN creates a secure, encrypted connection between your device and the internet, ensuring that your data remains private and protected. Here’s how you can use a VPN with Philips Hue:
- Research and choose a reputable VPN provider that suits your needs.
- Sign up for a subscription with the VPN provider and install the VPN app on your smartphone or tablet.
- Connect to a VPN server of your choice using the VPN app.
- Once connected, your device will have a secure connection to the internet via the VPN.
- Open the Philips Hue app on your device and access your lights as you normally would.
Using a VPN with your Philips Hue system offers several benefits. Firstly, it encrypts your internet traffic, safeguarding your data from potential hackers or unauthorized access. This is particularly important when accessing your lights remotely, as it ensures that your commands and settings remain secure.
A VPN also provides added privacy by masking your IP address, making it more difficult for anyone to track your online activities. This can be especially useful when using public Wi-Fi networks, as it prevents others from eavesdropping on your Philips Hue connection.
Another advantage of using a VPN with Philips Hue is the ability to bypass geo-restrictions. If you are traveling or living in a different country, a VPN can allow you to connect to a server in your home country, enabling you to access your Philips Hue lights as if you were back at home.
It’s important to note that not all VPNs are created equal, and it’s crucial to choose a reputable VPN provider that prioritizes security and privacy. Additionally, using a VPN may introduce some latency, which can affect the responsiveness of your Philips Hue app when accessing your lights remotely.
By using a Virtual Private Network (VPN) with your Philips Hue smart lighting system, you can enhance the security and privacy of your remote access. Whether you’re at home or on the go, a VPN ensures that your connection to your Philips Hue lights remains private and protected, allowing you to have peace of mind while enjoying the convenience and flexibility of smart lighting.
Troubleshooting Philips Hue Remote Access
While remote access for your Philips Hue smart lighting system offers convenience and flexibility, there may be situations where you encounter issues with accessing your lights when away from home. Here are some common troubleshooting steps to help resolve remote access issues with Philips Hue:
1. Check Internet Connectivity
Ensure that both your Philips Hue Bridge and the device you are using to access your lights have a stable and reliable internet connection. Make sure your Wi-Fi or mobile data is working properly and consider restarting your router if necessary.
2. Verify Bridge and Account Status
Open the Philips Hue app and confirm that your Bridge is connected and operational. Make sure that your Philips Hue account is active and that you are signed in properly. If there are any issues, try reconfiguring the Bridge or signing out and back into your account.
3. Ensure Remote Access Functionality
In the Philips Hue app settings, check if the remote access feature is enabled. If not, follow the on-screen instructions to enable it. This step is crucial to allow remote control of your lights when you’re away from home.
4. Check Firewall and Router Settings
Make sure your router and firewall settings are not blocking remote access. Check if any port forwarding or firewall rules are interfering with the connection. Consult your router’s user manual or contact your internet service provider for assistance in configuring these settings properly.
5. Restart Philips Hue Bridge
Try restarting your Philips Hue Bridge by unplugging it from the power source and plugging it back in after a few seconds. This simple step can help resolve any temporary issues or glitches with the bridge’s connectivity.
6. Update Philips Hue Firmware
Ensure that your Philips Hue Bridge and lights have the latest firmware updates installed. Outdated firmware can cause compatibility issues and may prevent remote access. Use the Philips Hue app to check for firmware updates and install them if necessary.
7. Reinstall the Philips Hue App
If all else fails, consider reinstalling the Philips Hue app on your smartphone or tablet. This can help resolve any software-related issues or bugs that may be affecting remote access functionality.
If you have tried all these troubleshooting steps and are still experiencing issues with remote access to your Philips Hue lights, it may be helpful to contact Philips Hue support or consult their online community for further assistance. They can provide specific guidance tailored to your situation and help resolve any persistent connectivity problems.
By following these troubleshooting steps and ensuring proper setup and configuration, you can ensure reliable and consistent remote access to your Philips Hue smart lighting system, allowing you to control your lights from anywhere, anytime.