
Why Label Outgoing Emails in Gmail
Gmail is a powerful email service that offers a variety of features to help users stay organized. One of the most useful features is the ability to label outgoing emails. Labeling outgoing emails not only helps you categorize and sort your messages but also streamlines your communication process. Here are some reasons why labeling outgoing emails in Gmail is beneficial:
- Efficient Organization: Labeling outgoing emails allows you to create a structured system for managing your messages. By assigning specific labels to different types of emails, you can easily locate and refer back to them later.
- Easy Sorting: Labels provide a quick way to sort your emails based on their content or purpose. This is particularly helpful when dealing with a high volume of outgoing emails, as you can quickly filter them by applying the relevant labels.
- Quick Identification: By labeling outgoing emails, you can easily identify their purpose or status at a glance. This can be especially useful when you need to review or follow up on specific types of messages.
- Streamlined Workflow: With labeled outgoing emails, you can streamline your workflow and prioritize your communication. You can create labels for different projects, clients, or departments, allowing you to focus on important messages and ensure timely responses.
- Enhanced Collaboration: By labeling outgoing emails, you can improve collaboration and team communication. For example, by using labels to indicate the status of a project, team members can easily track the progress of tasks and stay updated on the latest developments.
How to Set Up Labels in Gmail
Setting up labels in Gmail is a simple and effective way to organize your emails and streamline your inbox. Follow these steps to set up labels in Gmail:
- Access Gmail Settings: Open your Gmail account and click on the gear icon located in the top-right corner. From the dropdown menu, select “Settings.”
- Navigate to Labels: In the Settings menu, click on the “Labels” tab to access the label management options.
- Create a New Label: Scroll down to the Labels section and click on the “Create new label” link. A pop-up window will appear, prompting you to enter a name for your new label.
- Assign a Nesting Location: If you want to create a nested label, meaning a label within another label, click on the checkbox next to “Nest label under” and select the parent label from the dropdown menu.
- Save the Label: Once you have entered the label name and selected the nesting location (if applicable), click on the “Create” button to save the label.
- Apply a Color: To make your labels visually distinctive, you have the option to assign a color to each label. To do this, click on the small square next to the label name and choose a color from the palette.
- Manage Label Visibility: By default, new labels are automatically displayed on the sidebar. However, you can choose to hide specific labels from the sidebar by unchecking the box next to “Show” under the “Visible” column.
- Apply Filters to Labels: To automatically assign labels to incoming or outgoing emails based on specific criteria, navigate to the “Filters and Blocked Addresses” tab in Gmail settings. Create a new filter, specify the criteria, and select the desired label for the filtered emails.
With these steps, you can easily set up and customize labels in Gmail to better organize your inbox and improve your email management efficiency.
How to Create Labels for Outgoing Emails
Creating labels for outgoing emails in Gmail is a straightforward process that can help you easily organize and categorize your messages. Follow these steps to create labels for outgoing emails:
- Open Compose Window: Start by clicking on the “Compose” button in Gmail to open a new email composition window.
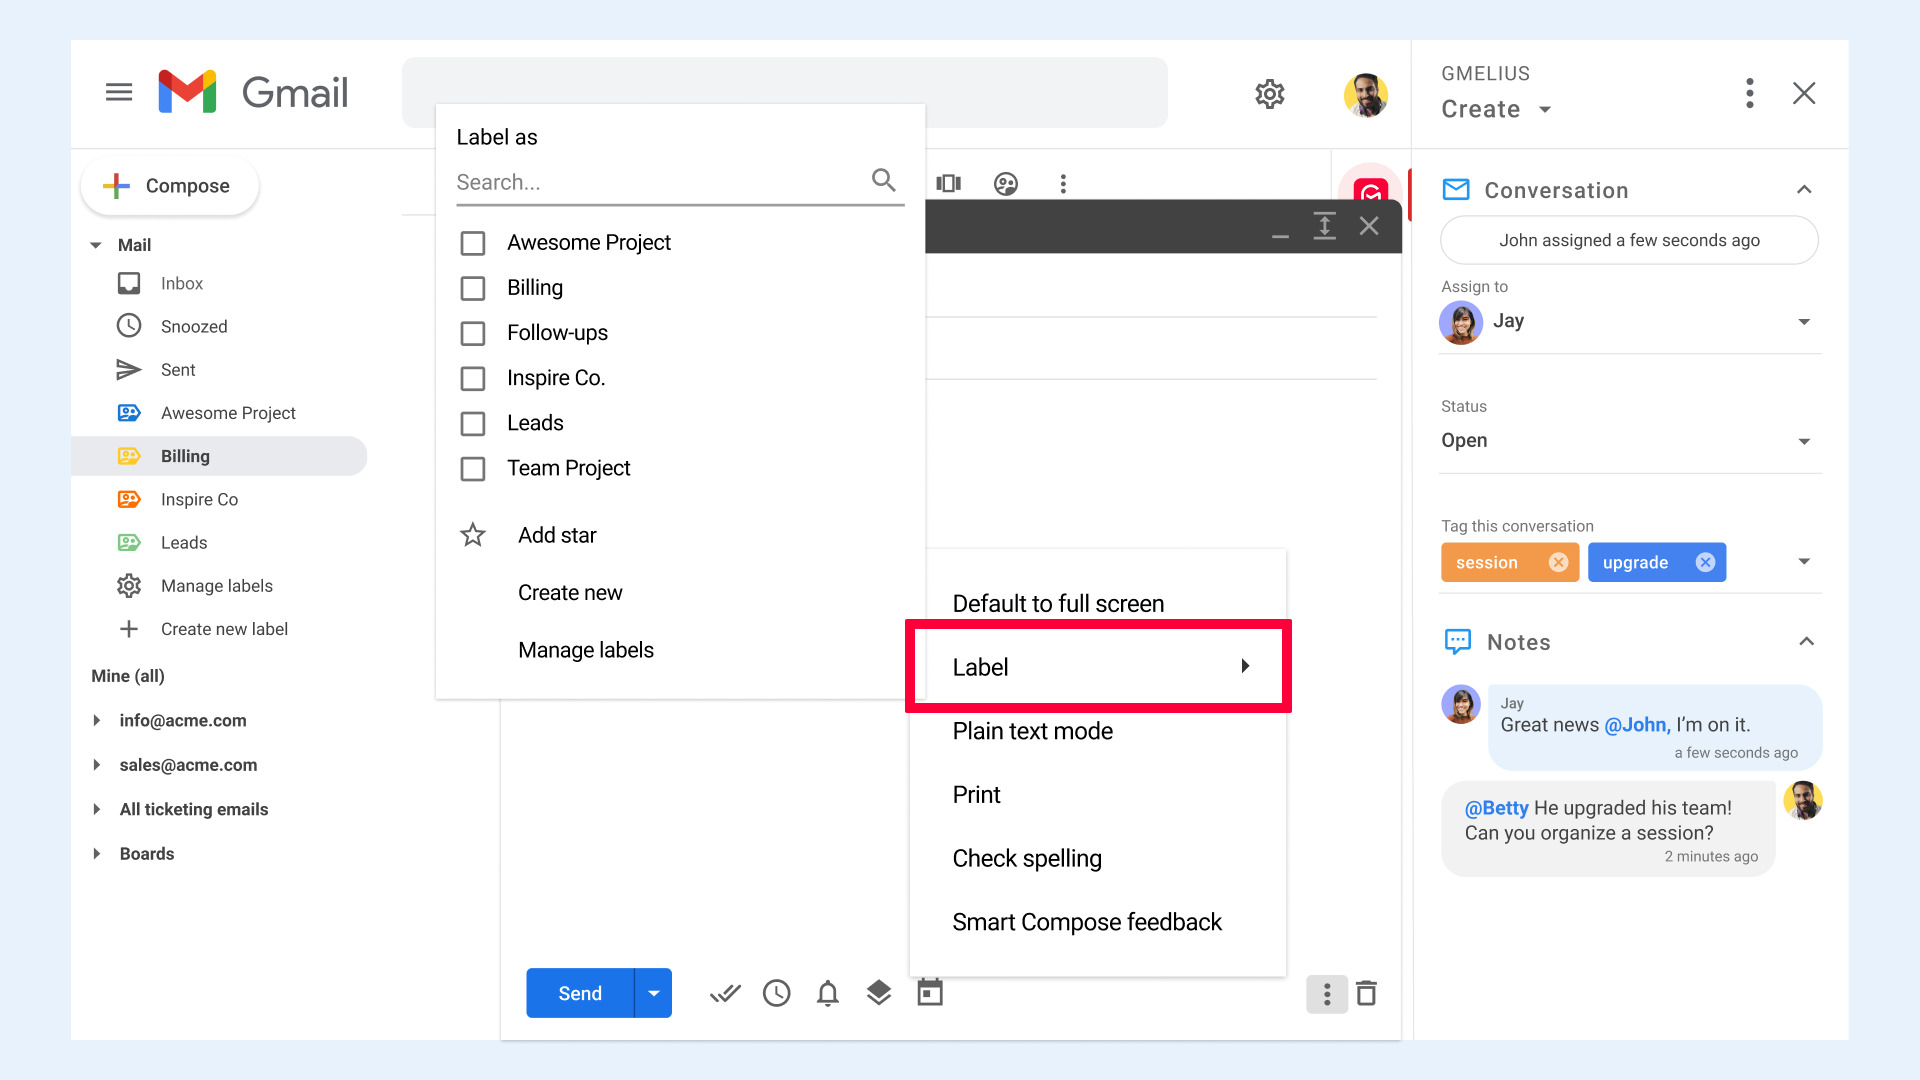
- Access Label Options: In the compose window, look for the “Label” icon, which resembles a small tag. Click on this icon to reveal the label options.
- Create a New Label: If you already have labels set up, you can select an existing label from the dropdown menu. However, if you want to create a new label, click on the “Create new” option at the bottom of the label menu.
- Enter Label Name: A pop-up window will appear, prompting you to enter a name for the new label. Type a descriptive name that represents the purpose or category of your outgoing email.
- Assign Label: Once you have entered the label name, click on the “Create” button to save the label. Your new label will now appear as an option in the label menu.
- Apply Label to Outgoing Email: To assign the label to your outgoing email, simply click on the label name in the label menu. The label will be applied to the email, indicating its category or purpose.
- Multiple Labels: You can assign multiple labels to an outgoing email by selecting additional labels from the label menu. This allows you to categorize your email under multiple categories or projects.
By following these steps, you can easily create labels for your outgoing emails in Gmail. This will help you stay organized and efficiently manage your email communication.
How to Apply Labels to Outgoing Emails
In Gmail, applying labels to outgoing emails is a simple process that allows you to categorize and organize your messages. Follow these steps to apply labels to outgoing emails:
- Open Compose Window: Start by clicking on the “Compose” button in Gmail to open a new email composition window.
- Access Label Options: In the compose window, look for the “Label” icon, which resembles a small tag. Click on this icon to reveal the label options.
- Select a Label: From the label options, choose the appropriate label that you want to apply to your outgoing email. You can select one label or multiple labels based on your needs and the categorization you want to achieve.
- Apply the Label: Once you have selected the label(s), they will be displayed as tags on the email composition window. You can verify the label(s) by their name and color.
- Continue Composing the Email: Proceed with composing your email as usual. The applied label(s) will remain associated with the email.
- Send the Email: After you have finished composing your email, click on the “Send” button to send the email with the applied label(s).
- Confirm Applied Label(s): Once the email is sent, you can verify the applied label(s) by checking the email in your Sent folder. The label(s) will be visible next to the email in the email list view.
By following these steps, you can easily apply labels to your outgoing emails in Gmail. This enables you to categorize and organize your emails, allowing for efficient email management and easier retrieval of specific messages.
How to Add Multiple Labels to Outgoing Emails
In Gmail, you have the flexibility to add multiple labels to your outgoing emails, allowing you to categorize and organize your messages in various ways. Here’s how you can add multiple labels to outgoing emails:
- Open Compose Window: Start by clicking on the “Compose” button in Gmail to open a new email composition window.
- Access Label Options: In the compose window, look for the “Label” icon, which resembles a small tag. Click on this icon to reveal the label options.
- Select the First Label: From the label options, choose the first label that you want to add to your outgoing email. Click on the label to apply it to the email.
- Add Additional Labels: To add more labels to the outgoing email, click on the “Label” icon again. This will bring up the label options menu once more.
- Select Another Label: From the label options, choose the next label that you want to add to the outgoing email. Click on the label to apply it. Repeat this step if you want to add more labels.
- Verify Applied Labels: As you add labels, they will be displayed as tags on the email composition window. Make sure to check the applied labels by their names and colors.
- Continue Composing the Email: Proceed with composing your email as usual. The added labels will remain associated with the email.
- Send the Email: After you have finished composing your email, click on the “Send” button to send the email with the added labels.
- Confirm Applied Labels: Once the email is sent, you can verify the applied labels by checking the email in your Sent folder. The labels will be visible next to the email in the email list view.
By following these steps, you can easily add multiple labels to your outgoing emails in Gmail. This allows for flexible categorization and organization, helping you effectively manage your emails and retrieve them based on different criteria.
How to Remove Labels from Outgoing Emails
In Gmail, removing labels from outgoing emails is a simple process that allows you to modify the categorization or organization of your messages. Here’s how you can remove labels from outgoing emails:
- Open Sent Folder: Start by navigating to your Sent folder in Gmail. This is where you can access the emails that you have sent.
- Open Email to Remove Labels: Locate the specific outgoing email from which you want to remove labels. Open the email by clicking on it.
- Access Labels: Inside the email, find the “Labels” option located near the top of the email window. It resembles a small tag icon.
- Remove Labels: Click on the “Labels” option to open the label menu. Here, you will see a list of all the labels that are currently applied to the email.
- Uncheck Labels to Remove: To remove a label, simply uncheck the box next to the label’s name in the label menu. This signifies that the label will no longer be associated with the email.
- Save Changes: After unchecking the labels that you want to remove, click on the “Save” or “Done” button to save the changes and update the email’s label configuration.
- Confirm Label Removal: Once the changes are saved, you can verify that the labels have been successfully removed by checking the email in your Sent folder. The removed labels will no longer be visible next to the email in the email list view.
By following these steps, you can easily remove labels from your outgoing emails in Gmail. This allows you to adjust the categorization and organization of your emails to better suit your needs, ensuring that your email management remains efficient and organized.
How to View Labels on Outgoing Emails
In Gmail, viewing labels on outgoing emails allows you to quickly identify their categorization or organization. Here’s how you can view labels on outgoing emails:
- Open Sent Folder: Start by navigating to your Sent folder in Gmail. This is where you can access the emails that you have sent.
- Locate Outgoing Email: Find the specific outgoing email that you want to view the labels for. Locate the email in the Sent folder and click on it to open it.
- Labels Displayed: Once you open the email, any labels that have been applied to it will be displayed near the top of the email window. These labels will be shown as tags, indicating the categories or organization of the email.
- Label Colors: If you have assigned specific colors to your labels, these colors will also be visible next to the labels. The colors help in visually identifying the labels and distinguishing them from one another.
- Label Information: By hovering your cursor over a label, additional information about the label may appear, such as the full label name or nesting information if it is nested under another label.
- Confirm Labels: Verify the labels that are displayed on the outgoing email. Ensure that the labels accurately represent the categorization or organization of the email.
- Email List View: If you view your Sent folder in the list view, the labels applied to each email will also be visible in the list. This allows you to quickly scan through your sent emails and identify the labeled ones.
By following these steps, you can easily view labels on your outgoing emails in Gmail. This helps you quickly identify the categorization or organization of your emails, making it easier for you to manage and retrieve specific messages as needed.
Tips for Effectively Labeling Outgoing Emails in Gmail
Labeling outgoing emails in Gmail is an excellent way to stay organized and streamline your communication. To make the most out of this feature, here are some helpful tips for effectively labeling outgoing emails:
- Create Descriptive Labels: When setting up labels, use clear and descriptive names that accurately reflect the content or purpose of the emails. This will make it easier to locate and filter emails based on specific labels.
- Use Color-Coding: Assign colors to your labels to make them visually distinguishable. Color-coding helps quickly identify labels and visually categorize your outgoing emails.
- Establish a Labeling System: Develop a consistent labeling system that aligns with your workflow and organizational needs. This could involve creating labels for specific projects, clients, or departments to ensure efficient categorization.
- Consider Nesting Labels: If you have a more complex organizational structure, take advantage of nested labels. Nesting labels allows you to create subcategories within broader categories, making it easier to manage and locate related emails.
- Apply Labels Purposefully: Before applying labels to outgoing emails, think about the purpose and categorization you want to achieve. Avoid excessive label usage, as it may lead to confusion or clutter.
- Review and Update Labels Regularly: Periodically review your labels to ensure they still align with your evolving needs. Remove or update labels that are no longer relevant, and create new labels as necessary.
- Combine Labels with Filters: Maximize efficiency by utilizing Gmail’s filtering feature with labels. Set up filters to automatically apply specific labels to outgoing emails based on predefined criteria, such as sender, subject, or keywords.
- Use Search and Filters Together: Search for emails using keywords or specific criteria in conjunction with labels. This can help narrow down your search results and locate specific emails more efficiently.
- Train Yourself and Your Team: If you work in a team, educate team members on the labeling system and encourage consistent usage. Provide guidelines and best practices to maximize the benefits of labeling outgoing emails.
By implementing these tips, you can effectively label your outgoing emails in Gmail, improving your organization, productivity, and overall email management.