
Check System Requirements
Before you proceed with the installation of Kaspersky Internet Security Cloud Protection, it is crucial to ensure that your system meets the necessary requirements. This will help guarantee a seamless installation process and optimal performance of the software. Here’s a comprehensive checklist to assess whether your system meets the prerequisites:
- Operating System: Verify that your computer runs on a supported operating system. Kaspersky Internet Security Cloud Protection is compatible with Windows 7, 8, 8.1, and 10, as well as macOS 10.12 or later versions.
- Processor: Check if your system has a processor that meets the minimum requirements, such as Intel Pentium 1 GHz or equivalent.
- RAM: Ensure that you have sufficient random access memory (RAM) available for the software to run smoothly. Typically, Kaspersky recommends a minimum of 1 GB of RAM for Windows systems and 2 GB for macOS.
- Free Disk Space: Make sure that your computer has enough free disk space to accommodate the installation and future updates. The exact disk space requirement will depend on the specific version of Kaspersky Internet Security Cloud Protection you are installing, but generally, a few hundred megabytes to several gigabytes should be available.
- Internet Connection: A stable internet connection is necessary for the initial installation, activation, and regular updates of the software. Ensure that you have a reliable internet connection before proceeding.
- Browser Compatibility: If you plan to use the Kaspersky Protection browser extension, verify that your preferred web browser is supported. Commonly supported browsers include Microsoft Edge, Google Chrome, Mozilla Firefox, and Safari.
By confirming these system requirements, you can avoid any compatibility issues and potential installation errors. After performing this check, you can confidently proceed to the next steps of installing Kaspersky Internet Security Cloud Protection.
Disable Other Security Software
Prior to installing Kaspersky Internet Security Cloud Protection, it is crucial to disable any existing security software on your computer. This step is necessary to prevent conflicts between different security applications and ensure the smooth functioning of Kaspersky’s comprehensive protection. Here’s how you can disable other security software:
- Locate Your Current Security Software: Identify the antivirus or internet security software that is currently installed on your system. Look for the program’s icon in your system tray or check the list of installed programs in the Control Panel (Windows) or Applications folder (Mac).
- Access Settings or Options: Open the settings or options menu of your currently installed security software. This is usually accessible by right-clicking the program’s icon in the system tray or through a dedicated control panel.
- Disable Real-Time Protection: Look for the option to disable or turn off real-time protection. This feature actively scans files and programs in the background, which may interfere with the installation and operation of Kaspersky Internet Security Cloud Protection.
- Disable Firewall or Intrusion Prevention: If your current security software includes a built-in firewall or intrusion prevention system, ensure that these features are temporarily deactivated. They may conflict with Kaspersky’s firewall and lead to connectivity issues.
- Stop Services or Processes: Some security software may have background services or processes running even when the main program is disabled. Locate these services or processes in the Task Manager (Windows) or Activity Monitor (Mac) and stop them to completely disable the software.
- Restart Your Computer: After disabling the other security software, it is recommended to restart your computer. This will ensure that any remaining background processes or services are terminated, allowing for a clean installation of Kaspersky Internet Security Cloud Protection.
By disabling other security software temporarily, you can avoid conflicts and ensure the optimal functioning of Kaspersky Internet Security Cloud Protection. Once the installation is complete, you can re-enable your previous security software or rely solely on Kaspersky for comprehensive protection against online threats.
Download and Run the Installer
Once you have checked the system requirements and disabled other security software, you are ready to download and run the installer for Kaspersky Internet Security Cloud Protection. Follow the steps below to ensure a successful installation:
- Visit the Kaspersky Website: Open your preferred web browser and navigate to the official Kaspersky website. Look for the download page or section where you can obtain the installer for Kaspersky Internet Security Cloud Protection.
- Select the Correct Version: Make sure you download the correct version of the software for your operating system. Choose either the Windows or macOS version, depending on the type of computer you have.
- Click on the Download Button: Once you have selected the appropriate version, click on the download button to initiate the download process. The installer file will be saved to your computer’s default download location or the location you specify.
- Locate the Installer File: Once the download is complete, navigate to the location where the installer file was saved. It is usually located in your computer’s “Downloads” folder or the folder you specified during the download.
- Run the Installer: Double-click on the installer file to execute it. Depending on your operating system, you may encounter a security prompt asking for permission to run the installation. Click “Yes” or “Run” to proceed.
- Follow the On-Screen Instructions: The installer will launch, and you will be guided through a series of on-screen instructions. Read each prompt carefully and follow the prompts to proceed with the installation.
- Wait for the Installation to Finish: The installation process may take a few minutes. Be patient and let the installer complete its tasks in the background. Avoid closing the installer or interrupting the process until it finishes.
- Proceed to the Activation: Once the installation is complete, you will be prompted to activate Kaspersky Internet Security Cloud Protection. Move on to the next section to learn how to activate your license.
By downloading and running the installer correctly, you are one step closer to enjoying the full protection and features of Kaspersky Internet Security Cloud Protection. Proceed to the next section to activate your license and start safeguarding your digital life.
Customize Installation Settings
When installing Kaspersky Internet Security Cloud Protection, you have the option to customize the installation settings according to your preferences. This allows you to tailor the software to meet your specific needs. Follow the steps below to customize the installation settings:
- Launch the Installer: Double-click on the installer file you downloaded to start the installation process of Kaspersky Internet Security Cloud Protection.
- Select Installation Language: In the first step of the installation wizard, you will be prompted to choose the language for the installation. Select your preferred language from the available options.
- Review the End User License Agreement (EULA): Read through the End User License Agreement and make sure you understand the terms and conditions. If you agree to them, click on the checkbox indicating your acceptance.
- Choose the Installation Type: There are typically two installation types available: Recommended and Custom. The Recommended installation installs the software with default settings, while the Custom installation allows you to modify specific settings. Choose the Custom installation option.
- Select Installation Location: By default, Kaspersky is installed in the Program Files (Windows) or Applications (Mac) folder. If you prefer to install it in a different location, click on the “Browse” button and navigate to the desired folder.
- Configure Additional Options: In the custom installation settings, you may find additional options to customize. These options might include selecting specific components or features to install, adjusting the scanning preferences, or setting up a proxy server.
- Review and Confirm Settings: Before proceeding with the installation, review the customized settings you have selected. Once you are satisfied with the settings, click on the “Install” or “Next” button to begin the installation process.
- Wait for the Installation to Complete: The installation process may take a few moments. Allow the installer to complete the installation of Kaspersky Internet Security Cloud Protection.
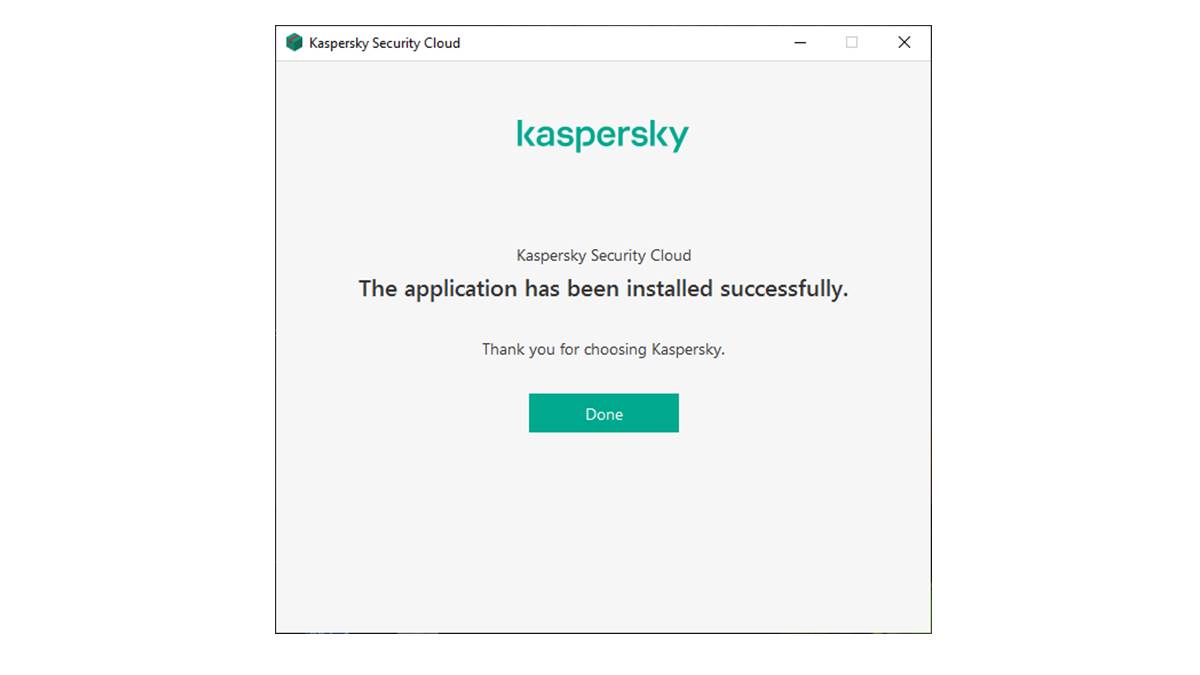
- Installation Successful: Once the installation is complete, you will receive a confirmation message stating that Kaspersky Internet Security Cloud Protection has been successfully installed. Click on the “Finish” button to close the installer.
By customizing the installation settings, you can ensure that Kaspersky Internet Security Cloud Protection is configured to suit your needs and preferences. After customizing the installation, move on to the next section to activate your license and start protecting your system from online threats.
Activate Your License
After successfully installing Kaspersky Internet Security Cloud Protection, the next step is to activate your license. Activation is necessary to unlock all the features and ensure that your software is up to date with the latest virus definitions. Follow the steps below to activate your license:
- Open Kaspersky Internet Security: Locate the Kaspersky Internet Security Cloud Protection application on your computer and open it. You can usually find it in your list of installed applications or by searching for “Kaspersky” in the Start menu (Windows) or Applications folder (Mac).
- Navigate to the Licensing Section: Once you have launched the application, look for the “Licensing” or “Activate” section within the program’s interface. It is typically located in the top or side navigation menu.
- Enter Your Activation Code: In the licensing or activation section, you will find a field to enter your activation code. The activation code is a unique alphanumeric code provided to you upon purchase or included in the confirmation email. Enter the code accurately into the designated field.
- Click on Activate: After entering the activation code, click on the “Activate” or “Submit” button to initiate the license activation process. Kaspersky Internet Security Cloud Protection will connect to the activation servers to verify and activate your license.
- Wait for Activation Confirmation: The activation process may take a few moments. Wait for Kaspersky to verify your license and activate all the features included in your specific license type.
- Activation Successful: Once the license activation is complete, you will receive a confirmation message indicating that your license is now active. At this point, you can access all the features and functionalities offered by Kaspersky Internet Security Cloud Protection.
By following these steps to activate your license, you can unlock the full potential of Kaspersky Internet Security Cloud Protection and start enjoying enhanced protection against online threats. Now that your license is activated, proceed to the next section to perform an initial scan and update to ensure your system is secure.
Perform Initial Scan and Update
Once you have activated your license for Kaspersky Internet Security Cloud Protection, it’s important to perform an initial scan and update to ensure that your system is protected from potential threats. Here’s how you can do it:
- Open Kaspersky Internet Security: Locate the Kaspersky Internet Security Cloud Protection application on your computer and open it. You can usually find it in your list of installed applications or by searching for “Kaspersky” in the Start menu (Windows) or Applications folder (Mac).
- Navigate to the Protection Section: Once you have launched the application, look for the “Protection” or “Scan” section within the program’s interface. It is typically located in the top or side navigation menu.
- Run a Full System Scan: In the “Protection” section, choose the option to run a full system scan. This method thoroughly scans all files and folders on your computer for any existing malware or suspicious activity.
- Initiate the Scan: Click on the “Scan” or “Start Scan” button to begin the scanning process. The scan duration will vary depending on the size and contents of your system, so it may take some time to complete.
- Review Scan Results: Once the scan is complete, Kaspersky Internet Security Cloud Protection will display the scan results. Take note of any identified threats or suspicious files and take appropriate action to quarantine or remove them.
- Update Virus Definitions and Software: After completing the initial scan, it is vital to update Kaspersky Internet Security Cloud Protection with the latest virus definitions and software patches. Look for the “Update” or “Check for Updates” option within the program and follow the on-screen instructions to download and install available updates.
- Perform Regular Scans and Updates: To maintain optimal protection, it’s essential to schedule and perform regular scans and updates. Set a schedule that suits your needs and preferences to ensure that your system remains secure against evolving threats.
By performing an initial scan and update, you can identify and eliminate any existing threats on your system, as well as keep Kaspersky Internet Security Cloud Protection up to date with the latest security features. This will help safeguard your computer from potential malware and ensure the continuous protection of your digital assets.
Set Up Real-Time Protection
Real-time protection is a crucial component of Kaspersky Internet Security Cloud Protection that actively monitors your system for potential threats in real-time. By configuring this feature properly, you can ensure that your computer is continuously protected against malware and other security risks. Here’s how to set up real-time protection:
- Open Kaspersky Internet Security: Locate the Kaspersky Internet Security Cloud Protection application on your computer and open it. You can usually find it in your list of installed applications or by searching for “Kaspersky” in the Start menu (Windows) or Applications folder (Mac).
- Navigate to the Real-Time Protection Section: Once you have launched the program, look for the “Real-Time Protection” or “Scan” section within the program’s interface. It is typically located in the top or side navigation menu.
- Enable Real-Time Scanning: In the real-time protection settings, ensure that the real-time scanning feature is enabled. This feature actively scans files and programs as they are accessed or executed on your computer, providing immediate protection against malware and other threats.
- Configure File and Web Anti-Virus Settings: Within the real-time protection settings, you can usually find options to configure file and web anti-virus settings. Customize these settings according to your preferences, such as choosing the level of scanning sensitivity or enabling additional security features.
- Activate Automatic Updates: Real-time protection relies on up-to-date virus definitions to identify and block the latest threats. Ensure that the automatic update feature is enabled within the program settings so that Kaspersky Internet Security Cloud Protection can download and install the latest virus definitions automatically.
- Review and Adjust Additional Real-Time Protection Settings: Depending on the specific version of Kaspersky Internet Security Cloud Protection you have, there may be additional settings related to real-time protection. Take the time to review these options and adjust them according to your preferences and requirements.
- Regularly Monitor Real-Time Protection: Once you have configured the real-time protection settings, make it a habit to periodically check the program’s status and notifications. This will allow you to ensure that the real-time protection feature is functioning properly and address any issues that may arise promptly.
By setting up real-time protection in Kaspersky Internet Security Cloud Protection, you can proactively defend your computer against threats in real-time. This feature adds an additional layer of security to your system, preventing malware and other harmful entities from causing damage or compromising your sensitive data.
Configure Behavioral Detection
Behavioral detection is an advanced feature of Kaspersky Internet Security Cloud Protection that helps identify and block suspicious or malicious activities on your computer. By configuring this feature, you can enhance your system’s protection and prevent potential threats. Here’s how to configure behavioral detection:
- Open Kaspersky Internet Security: Locate the Kaspersky Internet Security Cloud Protection application on your computer and open it. You can usually find it in your list of installed applications or by searching for “Kaspersky” in the Start menu (Windows) or Applications folder (Mac).
- Navigate to the Behavioral Detection Settings: In the program’s interface, look for the “Settings” or “Preferences” section. Different versions of Kaspersky may have different terminology for the settings section.
- Access the Behavioral Detection Options: Within the settings section, locate the “Behavioral Detection” or “Advanced Threat Protection” options. Click on it to access the behavioral detection configuration settings.
- Enable Behavioral Detection: In the behavioral detection settings, make sure that the feature is enabled. This allows Kaspersky Internet Security Cloud Protection to monitor and analyze the behavior of applications and processes running on your computer.
- Adjust Sensitivity: Depending on your preferences and requirements, you may have the option to adjust the sensitivity level of behavioral detection. Higher sensitivity may result in more alerts but can detect even subtle suspicious behaviors, while lower sensitivity minimizes false positive alerts but may miss some malicious activities. Choose a sensitivity level that balances both security and usability.
- Set Actions for Detected Behaviors: Kaspersky Internet Security Cloud Protection allows you to define actions for detected suspicious behaviors. These actions can include blocking the activity, quarantining the suspicious file, or requesting your permission to proceed. Configure the desired actions according to your preferences and tolerance for risk.
- Review and Adjust Additional Settings: Explore the behavioral detection settings thoroughly to uncover any additional configurations that may be available. Adjust these settings according to your needs and preferences, such as excluding certain processes or file types from monitoring.
- Regularly Monitor Behavioral Detection: Once you have configured the behavioral detection settings, it’s important to periodically review the program’s notifications and reports related to detected behaviors. This will allow you to stay informed about potential threats and take appropriate actions if necessary.
By configuring behavioral detection in Kaspersky Internet Security Cloud Protection, you can proactively identify and block suspicious behaviors on your computer. This adds an additional layer of protection against emerging and zero-day threats, ensuring a safer digital experience.
Enable Safe Browsing
Safe browsing is a critical feature offered by Kaspersky Internet Security Cloud Protection that helps protect you from malicious websites and online threats. By enabling this feature, you can browse the internet with confidence, knowing that Kaspersky is actively blocking harmful content. Here’s how to enable safe browsing:
- Open Kaspersky Internet Security: Locate the Kaspersky Internet Security Cloud Protection application on your computer and open it. You can usually find it in your list of installed applications or by searching for “Kaspersky” in the Start menu (Windows) or Applications folder (Mac).
- Navigate to the Safe Browsing Settings: In the program’s interface, look for the “Settings” or “Preferences” section. The exact location may vary depending on your version of Kaspersky Internet Security.
- Access the Safe Browsing Options: Within the settings section, locate the “Safe Browsing” or “Web Protection” options. Click on it to access the safe browsing configuration settings.
- Enable Safe Browsing: In the safe browsing settings, ensure that the feature is enabled. This allows Kaspersky Internet Security Cloud Protection to scan websites in real-time and block access to known malicious websites or sites that exhibit suspicious behavior.
- Customize Safe Browsing Settings: Depending on your preferences and requirements, you may have the option to customize certain aspects of safe browsing. This can include adjusting the strictness of the blocking criteria or setting exceptions for specific websites or categories.
- Enable Anti-Phishing: Kaspersky’s safe browsing feature often includes protection against phishing attacks. Enable this functionality to receive warnings when visiting websites that attempt to trick you into disclosing sensitive information, such as passwords or credit card details.
- Regularly Update Safe Browsing Database: To ensure the efficacy of safe browsing, it is essential to update the database regularly. Kaspersky Internet Security Cloud Protection automatically downloads updates to its database, but you can also manually initiate updates from the program’s interface.
- Practice Safe Internet Habits: While safe browsing provides an extra layer of protection, it is important to remember that no security measure is foolproof. Supplement your protection by adopting safe internet habits, such as avoiding suspicious links, only downloading files from trusted sources, and being cautious with sharing personal information online.
- Stay Informed: Keep an eye on notifications and reports from Kaspersky Internet Security Cloud Protection related to safe browsing. By staying informed about potential threats and risks, you can make informed decisions and take appropriate actions to protect your online experience.
By enabling safe browsing in Kaspersky Internet Security Cloud Protection, you can navigate the web safely, protecting yourself from malicious websites and potential online threats. This feature provides you with peace of mind, allowing you to enjoy the internet without compromising your security and privacy.
Set Up Firewall Protection
Configuring a firewall is an essential step in ensuring the security of your computer. Kaspersky Internet Security Cloud Protection comes with an advanced firewall feature that helps protect your system from unauthorized access and network threats. Follow these steps to set up firewall protection:
- Open Kaspersky Internet Security: Locate the Kaspersky Internet Security application on your computer and open it. You can typically find it in your list of installed applications or by searching for “Kaspersky” in the Start menu (Windows) or Applications folder (Mac).
- Navigate to the Firewall Settings: In the program’s interface, look for the “Settings” or “Preferences” section. The exact location may vary depending on the version of Kaspersky Internet Security you have installed.
- Access the Firewall Options: Within the settings section, locate the “Firewall” or “Network Protection” options. Click on it to access the firewall configuration settings.
- Enable Firewall Protection: In the firewall settings, ensure that the firewall protection feature is enabled. This activates the firewall and establishes rules to control inbound and outbound network traffic.
- Configure Network Rules: Customize the network rules according to your preferences. You can specify which applications are allowed or blocked from accessing the internet, as well as define specific rules for different types of network connections, such as Home, Public, or Work networks.
- Enable Network Attack Blocker: Many firewall settings include an option to enable network attack blocker functionality. Activating this feature adds an extra layer of protection by detecting and blocking suspicious network activities that may indicate an ongoing attack.
- Set Up Port Scanning Detection: Configure the firewall to detect and block port scanning attempts. Port scanning is a technique used by attackers to identify open ports in a system, making it vulnerable to potential intrusion. By enabling port scanning detection, you can fortify your system’s security.
- Review and Adjust Additional Firewall Settings: Explore the firewall settings to find additional options that you can configure based on your needs and preferences. This may include specifying exceptions for specific applications or adjusting the level of network traffic monitoring.
- Regularly Review Firewall Logs: Periodically review the firewall logs provided by Kaspersky Internet Security Cloud Protection. These logs can assist in identifying any suspicious network activity and help you refine your firewall rules and settings accordingly.
By setting up firewall protection in Kaspersky Internet Security Cloud Protection, you can effectively safeguard your computer from unauthorized access and network threats. Through careful configuration and monitoring, you can establish a strong defense mechanism that mitigates potential risks and maintains the security of your system.
Create a Backup and Restore Plan
Creating a backup and restore plan is crucial for protecting your valuable data in case of system failures, malware attacks, or accidental deletions. Kaspersky Internet Security Cloud Protection offers backup and restore functionality to ensure the safety and availability of your important files. Follow these steps to create a backup and restore plan:
- Assess Your Data: Determine which files and folders are critical for you to back up. This may include documents, photos, videos, and other irreplaceable content.
- Select a Backup Storage Option: Choose a suitable storage device or online service for your backups. External hard drives, network storage, or cloud storage providers are popular options. Ensure that your chosen storage solution is reliable and has enough capacity to accommodate your backup needs.
- Open Kaspersky Internet Security: Locate the Kaspersky Internet Security Cloud Protection application on your computer and open it. You can typically find it in your list of installed applications or by searching for “Kaspersky” in the Start menu (Windows) or Applications folder (Mac).
- Navigate to the Backup and Restore Section: In the program’s interface, look for the “Backup and Restore” or “Data Protection” options. Click on it to access the backup and restore configuration settings.
- Create a Backup Plan: Follow the prompts and create a backup plan tailored to your needs. Specify the files and folders to back up, the backup frequency (such as daily or weekly), and the destination storage location.
- Configure Backup Settings: Customize additional backup settings as needed. This may include encryption for added security, compression for optimizing storage space, or backup validation to ensure data integrity.
- Run the Initial Backup: Initiate the initial backup process. Depending on the size of your data and the backup settings, this may take some time. Ensure that your computer remains powered on and connected to the backup storage during the process.
- Monitor Backup Progress: Keep an eye on the backup progress and verify that the backups are successfully completed. Regularly check the backup logs provided by Kaspersky Internet Security Cloud Protection to identify any issues or errors that may arise.
- Create a Restore Plan: In addition to creating backups, it is essential to have a clear restore plan. Determine how you will restore your data in case of a system failure or data loss. This may involve accessing the backups directly or utilizing the restore functionality provided by Kaspersky Internet Security Cloud Protection.
- Regularly Test Restoration: Test the restore process periodically to ensure that your backups are functioning correctly. This will help you gain confidence in the backup and restore plan and identify any issues that may require attention.
By creating a backup and restore plan with Kaspersky Internet Security Cloud Protection, you can mitigate the risk of data loss and ensure the availability of your important files. Regular backups provide peace of mind, allowing you to recover quickly from any unfortunate events that may compromise your data.
Schedule Scans and Updates
Scheduling regular scans and updates is crucial to maintaining the optimal security and performance of your system with Kaspersky Internet Security Cloud Protection. By automating these tasks, you can ensure that your computer is regularly checked for threats, and the software remains up to date with the latest security enhancements. Follow these steps to schedule scans and updates:
- Open Kaspersky Internet Security: Locate the Kaspersky Internet Security Cloud Protection application on your computer and open it. You can typically find it in your list of installed applications or by searching for “Kaspersky” in the Start menu (Windows) or Applications folder (Mac).
- Navigate to the Scan and Update Settings: In the program’s interface, look for the “Settings” or “Preferences” section. The exact location may vary depending on the version of Kaspersky Internet Security you have installed.
- Access the Scheduled Scans: Within the settings section, locate the “Scans” or “Scan Schedule” options. Click on it to access the scheduled scan configuration settings.
- Schedule Full System Scans: Set up a scheduled full system scan to run at regular intervals. This comprehensive scan will check all files and folders on your computer for potential threats and provide a thorough security checkup.
- Schedule Quick Scans: Consider adding a scheduled quick scan that performs a faster but less extensive scan of critical areas on your system. This scan is ideal for regular checks to quickly identify any new threats.
- Set Scan Frequency and Timing: Configure the frequency and timing of the scheduled scans based on your preferences and usage patterns. Consider scheduling scans during periods when your computer is usually idle, such as overnight or during work breaks.
- Configure Automatic Updates: In the settings section, locate the “Updates” or “Update Schedule” options. Enable automatic updates to ensure that Kaspersky Internet Security Cloud Protection stays up to date with the latest virus definitions, software patches, and security enhancements.
- Set Update Frequency: Customize the update frequency according to your needs. Generally, it is recommended to have automatic updates scheduled daily or at least a few times a week to stay protected against new and emerging threats.
- Monitor Scan and Update Logs: Regularly check the scan and update logs provided by Kaspersky Internet Security Cloud Protection. Review the results to ensure the scans are executing as scheduled, and updates are being applied successfully.
- Make Adjustments as Needed: Periodically review and adjust the scheduled scan and update settings based on your changing needs and preferences. This flexibility allows you to adapt to any alterations in your usage patterns or security requirements.
By scheduling regular scans and updates with Kaspersky Internet Security Cloud Protection, you can ensure that your system is consistently protected against threats and vulnerabilities. Regular maintenance and staying up to date with the latest security patches contribute to a secure and stable computing environment.
Optimize Performance Settings
Optimizing performance settings in Kaspersky Internet Security Cloud Protection can help ensure that the software operates efficiently without negatively impacting the performance of your computer. By tweaking these settings, you can strike a balance between robust security and optimal system performance. Follow these steps to optimize the performance settings:
- Open Kaspersky Internet Security: Locate the Kaspersky Internet Security Cloud Protection application on your computer and open it. You can typically find it in your list of installed applications or by searching for “Kaspersky” in the Start menu (Windows) or Applications folder (Mac).
- Navigate to the Performance Settings: In the program’s interface, look for the “Settings” or “Preferences” section. The exact location may vary depending on the version of Kaspersky Internet Security you have installed.
- Access the Performance Options: Within the settings section, locate the “Performance” or “Optimization” options. Click on it to access the performance configuration settings.
- Enable Gaming Mode: If you frequently play games or engage in resource-intensive activities on your computer, consider enabling the gaming mode. This mode temporarily adjusts the program’s settings to minimize interruptions and maximize system resources during gameplay.
- Optimize Scan Frequency and Priority: Review the scan settings and adjust the scan frequency and priority based on your needs. Higher scan frequencies and priority levels offer enhanced security but may impact system performance during scans. Find a balance that works for you.
- Customize Exclusion List: Kaspersky Internet Security Cloud Protection allows you to exclude specific files, folders, or applications from scanning. Use the exclusion list to add any trusted files or applications that are known to be safe. This can help reduce scan times and resource usage.
- Limit Background Scanning: Adjust the background scanning settings to minimize the impact on system resources. You can set specific times during which background scans are performed or reduce the scanning intensity to reserve resources for other tasks.
- Monitor System Performance: Keep an eye on your computer’s performance while Kaspersky Internet Security Cloud Protection is running. Observe any significant slowdowns or performance issues that may be caused by the security software, and adjust settings accordingly.
- Update the Software: Ensure that you are using the latest version of Kaspersky Internet Security Cloud Protection. Software updates often include performance optimizations and bug fixes, so regularly check for and install available updates to maintain peak performance.
- Regularly Review Performance Logs: Check the performance logs provided by Kaspersky Internet Security Cloud Protection. These logs can provide insights into the impact of the security software on your system’s performance and help you identify areas for further optimization.
- Seek Professional Assistance if Needed: If you have concerns about performance or need assistance optimizing settings in Kaspersky Internet Security Cloud Protection, reach out to the support team or refer to the program’s documentation for guidance.
By optimizing performance settings in Kaspersky Internet Security Cloud Protection, you can strike a balance between robust security and efficient system performance. Finding the right configuration for your specific needs ensures that you can enjoy a secure computing experience without compromising the performance of your computer.
Use Additional Tools and Features
In addition to its core security functionalities, Kaspersky Internet Security Cloud Protection offers a range of additional tools and features that can enhance your digital protection and improve your overall security posture. By leveraging these tools effectively, you can further safeguard your system and data. Here are some notable tools and features you can utilize:
- Password Manager: Kaspersky’s built-in password manager helps you securely store and manage your passwords. It can generate strong, unique passwords and automatically fill them in when needed, saving you from the hassle of remembering multiple passwords.
- Secure Virtual Keyboard: The secure virtual keyboard is a useful tool for protecting your sensitive information from keyloggers and other types of malware. It allows you to enter your passwords and other confidential data by clicking on virtual keys displayed on your screen.
- Privacy Cleaner: The privacy cleaner feature helps you maintain your online privacy by deleting sensitive data such as browsing history, cookies, and temporary files. Regularly using this tool ensures that your online activities remain private.
- System Vulnerability Scan: Kaspersky Internet Security Cloud Protection offers a system vulnerability scan that checks for potential security weaknesses in your operating system and installed applications. It alerts you to any outdated software versions or missing security patches that may expose your system to known vulnerabilities.
- Network Monitor: The network monitor gives you visibility into the incoming and outgoing network connections on your computer. It allows you to identify any unauthorized network activities and helps to block potential threats attempting to exploit vulnerabilities.
- Application Control: Kaspersky Internet Security Cloud Protection includes an application control feature that allows you to manage the behavior and permissions of applications installed on your system. You can control which applications can access sensitive data or make changes to system settings.
- Parental Controls: If you have children using your computer, Kaspersky’s parental control feature is a valuable tool. It enables you to monitor and limit their online activities, block inappropriate websites, and set time limits for internet usage.
- Anti-Theft: Kaspersky offers an anti-theft feature that helps protect your devices from loss or theft. It allows you to remotely locate, lock, or wipe your device to prevent unauthorized access to your data if it falls into the wrong hands.
- Rescue Disk: In the unfortunate event that your computer becomes infected with stubborn malware, Kaspersky’s rescue disk feature can help you restore your system to a clean state. It allows you to create a bootable disk or USB drive to scan and disinfect your computer from outside of the operating system.
- Mobile Device Protection: Kaspersky Internet Security Cloud Protection extends its capabilities to mobile devices, offering comprehensive security features for smartphones and tablets. Features include anti-malware protection, call and text message filtering, anti-theft capabilities, and safe browsing.
By utilizing these additional tools and features provided by Kaspersky Internet Security Cloud Protection, you can enhance your digital security and protect yourself from a wide range of threats. Configuring and utilizing these tools effectively strengthens your overall security posture, providing you with greater peace of mind while using your computer and mobile devices.
Troubleshooting Common Issues
While Kaspersky Internet Security Cloud Protection is designed to provide robust and reliable protection, certain issues may arise from time to time. By familiarizing yourself with common issues and their solutions, you can effectively troubleshoot and resolve any challenges that may occur. Here are some common issues and their troubleshooting steps:
- Installation Issues: If you encounter problems during the installation process, ensure that your system meets the minimum requirements. Disable any conflicting security software, download the installer from a trusted source, and run it as an administrator. If the issue persists, contact Kaspersky support for further assistance.
- Performance Impact: If you notice a significant slowdown in system performance after installing Kaspersky, ensure that your computer meets the recommended hardware requirements. Adjust the program’s performance settings, schedule scans during idle periods, and consider excluding specific files or folders from scanning to optimize performance.
- Update Failures: If you encounter difficulties in updating Kaspersky Internet Security Cloud Protection, check your internet connection and ensure that there are no firewall or proxy settings blocking the update. Restart your computer and try updating again. If the issue persists, reinstall the program or contact Kaspersky support for assistance.
- False Positives: Occasionally, Kaspersky may flag a harmless file or application as malicious. If you believe a file has been wrongly identified, submit it to the Kaspersky Security Network for analysis or add it to the exclusions list. This will prevent Kaspersky from detecting it again in the future.
- Compatibility Issues: If you experience compatibility problems with other software or applications, ensure that you have the latest updates installed for both Kaspersky Internet Security Cloud Protection and the conflicting software. If the issue persists, consider reaching out to the software vendors or consult the Kaspersky support team for guidance.
- License Activation Issues: If you encounter problems activating your license, double-check the activation code for accuracy and ensure that you have an active internet connection. Restart the program and attempt activation again. If the issue persists, contact Kaspersky support for further assistance.
- Unwanted Pop-ups or Notifications: If you find the program’s pop-ups or notifications intrusive or excessive, review the settings and adjust the level of alerts and notifications. Customize the configurations to suit your preferences, ensuring that you receive important security alerts without unnecessary interruptions.
- Unresponsive Interface: If the program’s interface becomes unresponsive or freezes, try closing and reopening it. If the problem persists, restart your computer and launch Kaspersky Internet Security Cloud Protection again. If the issue continues, perform a clean reinstallation of the software or seek assistance from Kaspersky support.
- Scan or Update Delays: If scans or updates are taking longer than usual, check your internet connection for stability and ensure that your system resources are not heavily utilized by other programs. If the issue persists, try adjusting the scanning or updating settings to reduce their impact on system performance.
By troubleshooting common issues with Kaspersky Internet Security Cloud Protection, you can quickly resolve any challenges that may arise. Remember to keep the program and your operating system up to date, and stay vigilant in using safe internet practices to ensure the continued security and performance of your computer.
Frequently Asked Questions (FAQs)
Here are answers to some frequently asked questions about Kaspersky Internet Security Cloud Protection:
- Q: Can Kaspersky Internet Security Cloud Protection be used on multiple devices?
A: Yes, Kaspersky Internet Security Cloud Protection can be used on multiple devices, including computers and mobile devices, as long as the license permits. - Q: Will Kaspersky Internet Security Cloud Protection slow down my computer?
A: While Kaspersky Internet Security Cloud Protection is designed to be lightweight, it may have a slight impact on system resources. However, you can optimize its performance settings to minimize any potential slowdown and find the right balance between security and performance. - Q: How often should I update Kaspersky Internet Security Cloud Protection?
A: It is recommended to enable automatic updates for Kaspersky Internet Security Cloud Protection to ensure that you receive the latest virus definitions, software patches, and security enhancements. These updates help protect your system against new and emerging threats. - Q: Can I use Kaspersky Internet Security Cloud Protection alongside other security software?
A: It is generally not recommended to use multiple security software simultaneously, as they may conflict with each other and impact system performance. It’s best to disable or uninstall any other security software before installing Kaspersky Internet Security Cloud Protection. - Q: How often should I perform a system scan with Kaspersky Internet Security Cloud Protection?
A: Performing a full system scan on a regular basis is recommended to thoroughly check your computer for potential threats. The frequency of scans will depend on your usage pattern and the level of risk you are exposed to. Scheduling regular scans, such as once a week, is generally a good practice. - Q: Can Kaspersky Internet Security Cloud Protection protect me from phishing attacks?
A: Yes, Kaspersky Internet Security Cloud Protection includes anti-phishing features that help protect against phishing attacks. It can detect and block suspicious websites that attempt to trick you into disclosing personal information, such as passwords or banking details. - Q: How can I contact Kaspersky support for assistance?
A: You can reach Kaspersky support by visiting their official website and navigating to the support section. They provide various channels for assistance, including phone, live chat, and email support. You can also find helpful resources such as knowledge bases and user forums for troubleshooting. - Q: Can Kaspersky Internet Security Cloud Protection protect my mobile devices?
A: Yes, Kaspersky Internet Security Cloud Protection extends its protection to mobile devices, offering features such as anti-malware protection, call and text message filtering, anti-theft capabilities, and safe browsing for smartphones and tablets.
These are just a few commonly asked questions about Kaspersky Internet Security Cloud Protection. If you have any other inquiries or need further clarification, it is recommended to refer to the official documentation or contact Kaspersky support for personalized assistance.